Updated . Built against the tool’s current screens and checked step by step. How we check this lesson
Most mornings start with sorting: new inquiries, client questions, bills. In this free lesson you build an n8n workflow that sorts the inbox before you open it. An AI Text Classifier decides whether each new email is a lead, a client or an invoice, the matching Gmail label goes on, and client emails get a short reply waiting in Drafts. Nothing is ever sent on its own.
At a glance
| Question | Answer |
|---|---|
| What you build | Build an n8n workflow that reads each new email, sorts it as a lead, a client or an invoice with a Text Classifier, adds the matching Gmail label, and drafts a reply to clients for you to check. |
| Tools | n8n |
| Time | About 14 minutes, 40 steps in 5 parts |
| Level | Advanced, no coding needed |
| Cost | Free |
| Ways to learn it | Practice it step by step, watch the video, read the guide with screenshots |
The 5 parts, in short
- Sort every email: Add the next step, Search for classifier, Text Classifier, What to classify, and 9 more steps.
- Add the model: Add a chat model, OpenAI Chat Model, Close the node.
- Apply the labels: Connect Lead, Connect Client, Connect Invoice.
- Write the reply: Add the reply writer, Search for llm chain, Basic LLM Chain, Change the prompt source, and 6 more steps.
- Save it as a draft: Save the reply, Search for gmail, Gmail, Create a draft, and 7 more steps.
Start here first: AI Receipt Extractor: Receipts to Google Sheets with n8n (module 1 of Business Automations)
In the course: Part 9 · n8n Automation Toolkit (Module 42 of the full course)
Part of: Business Automations with n8n (step 5 of 7). Next up: A Support Agent That Answers from Your Own Docs
Gmail AI Triage: Auto-Label Every Email and Draft Replies: step-by-step guide with screenshots
About the screenshots. They come from Stepthrough’s simulated practice environment (a practice copy of n8n), not the live tool, so no real account appears. The buttons and labels match the real screens the lesson was built against. Practice it yourself free at learn.ynteractive.com.
- Tools: n8n
- Time: about 14 minutes, 40 steps in 5 parts
- Level: beginner, no coding needed
Part 1: Sort every email
Step 1: Add the next step
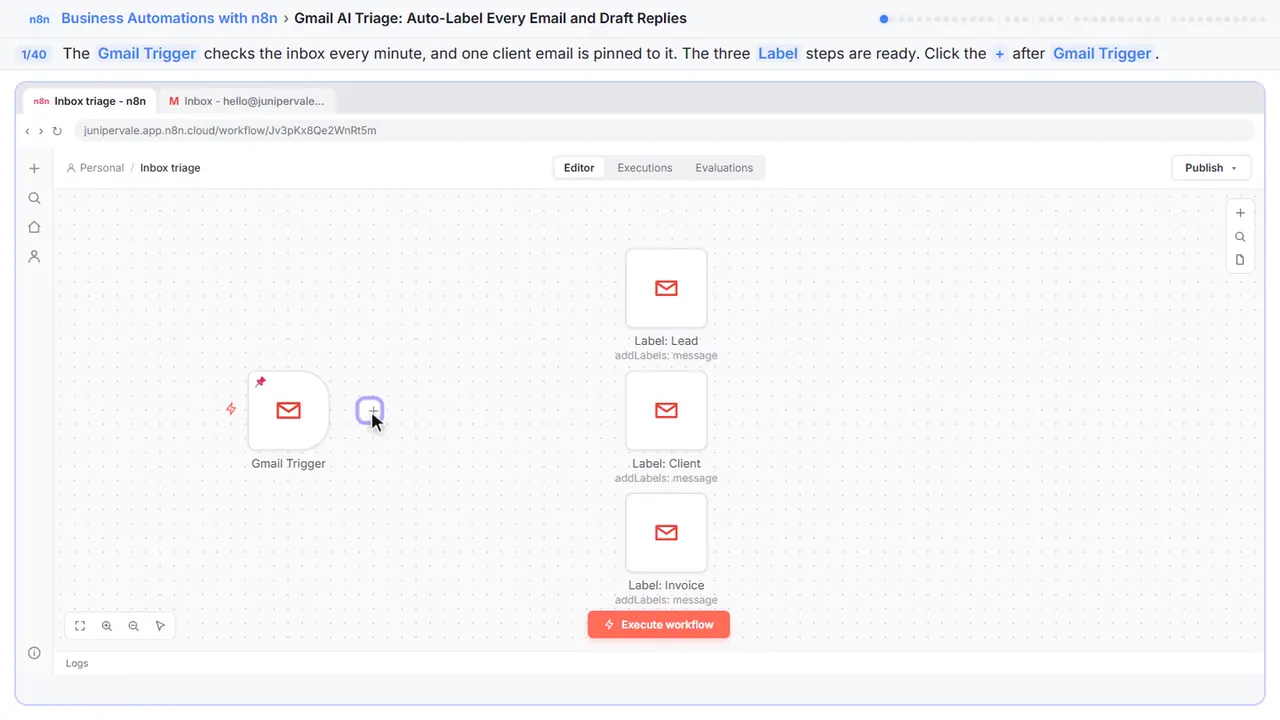
You're Sam at Juniper and Vale Marketing, and every morning starts with sorting the inbox. Let AI do it. This workflow already has a Gmail Trigger with a client email pinned, and three steps that each add one Gmail label. What's missing is the part that decides.
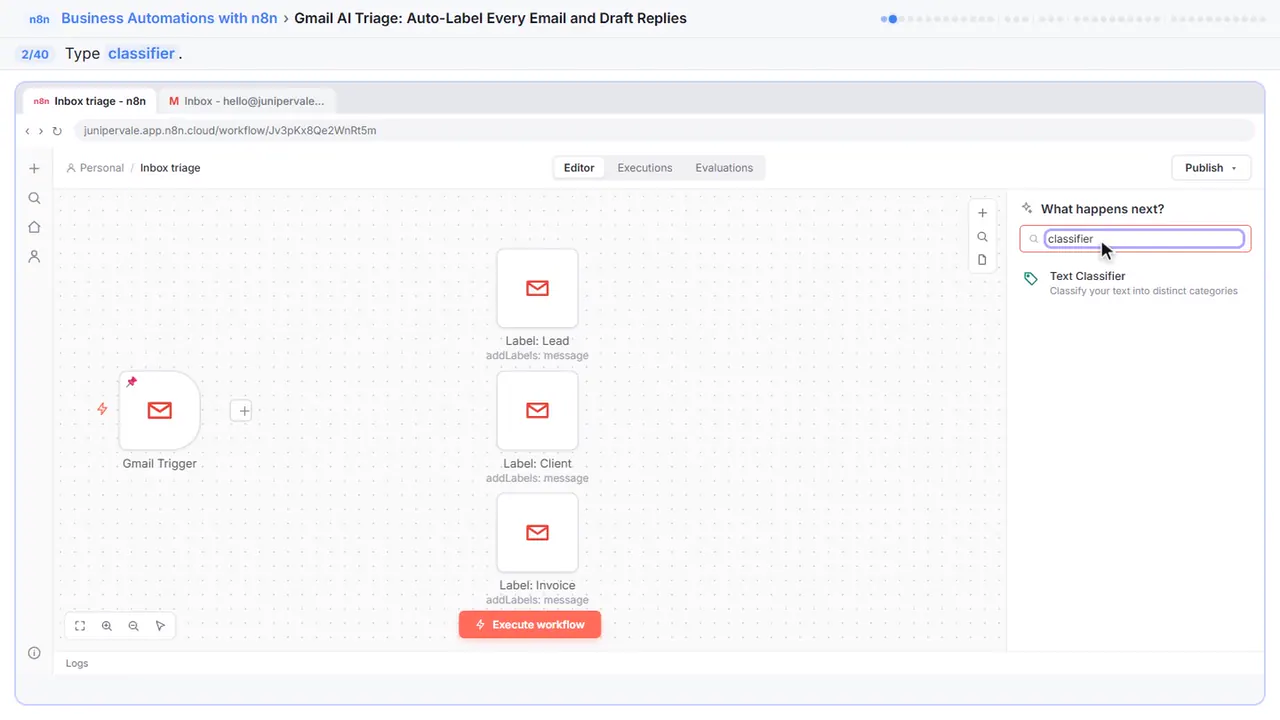
Step 2: Search for classifier
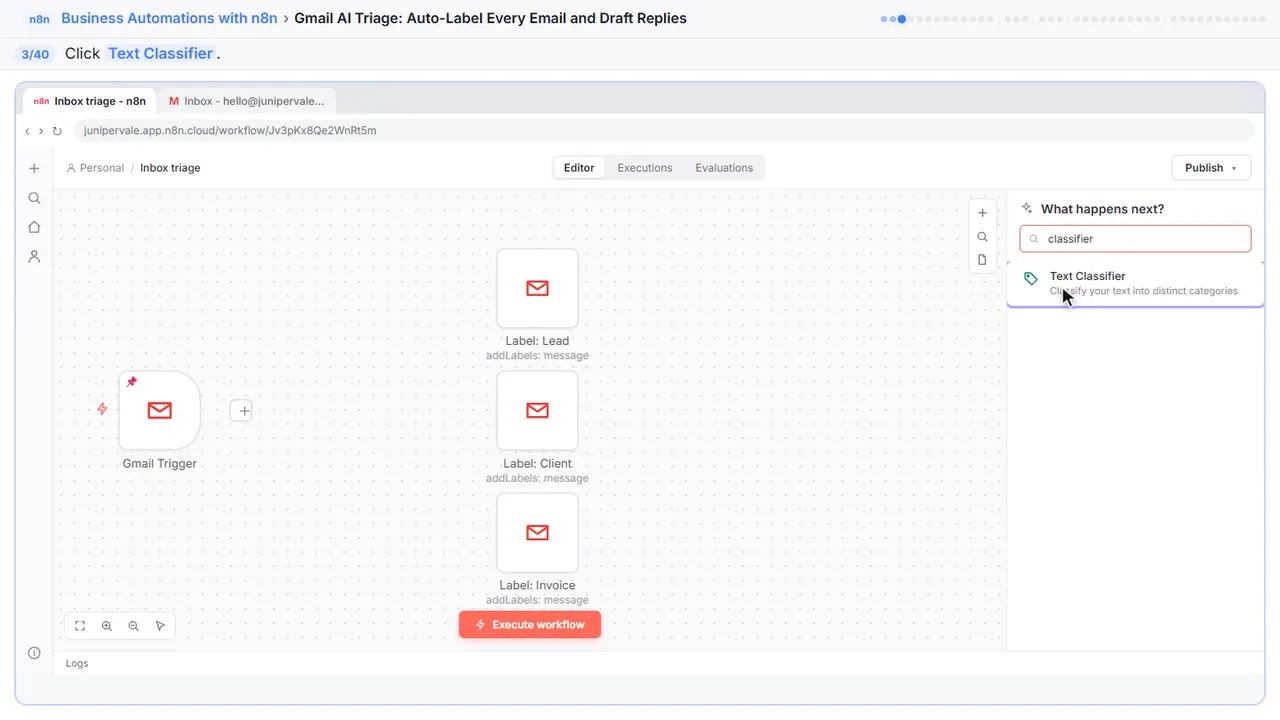
Step 3: Text Classifier
It reads some text and sends it down one output per category.
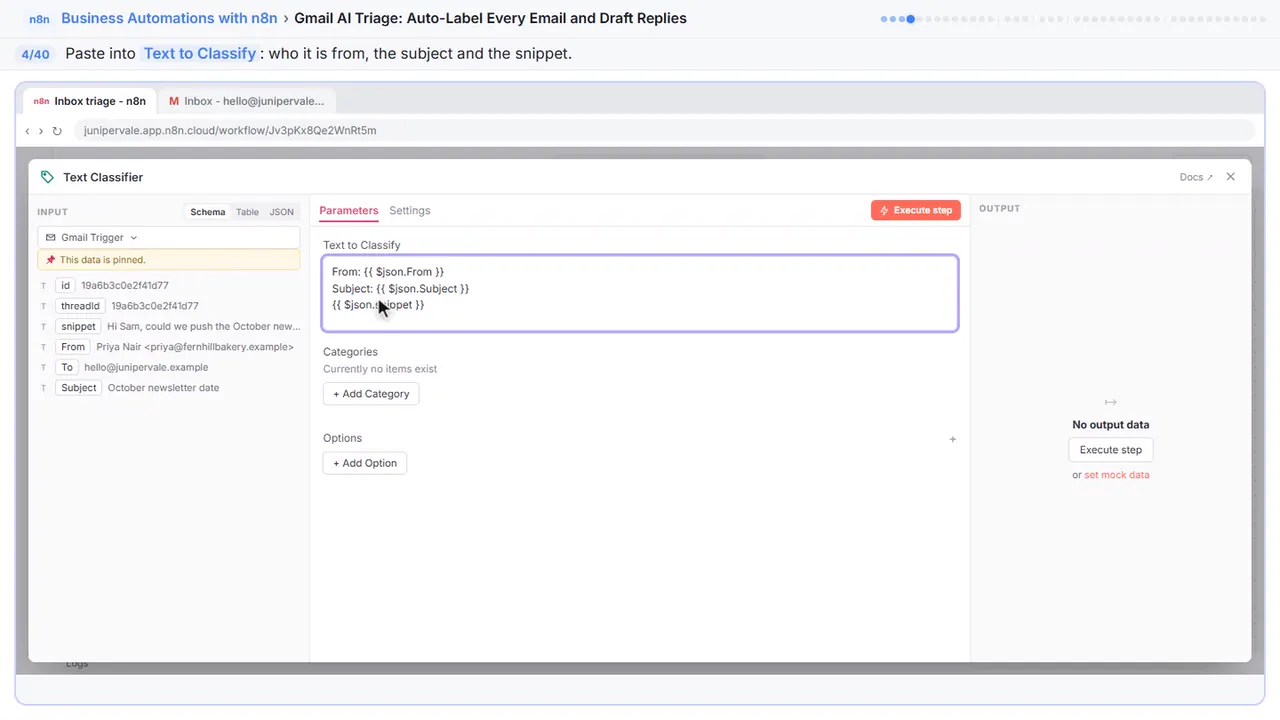
Step 4: What to classify
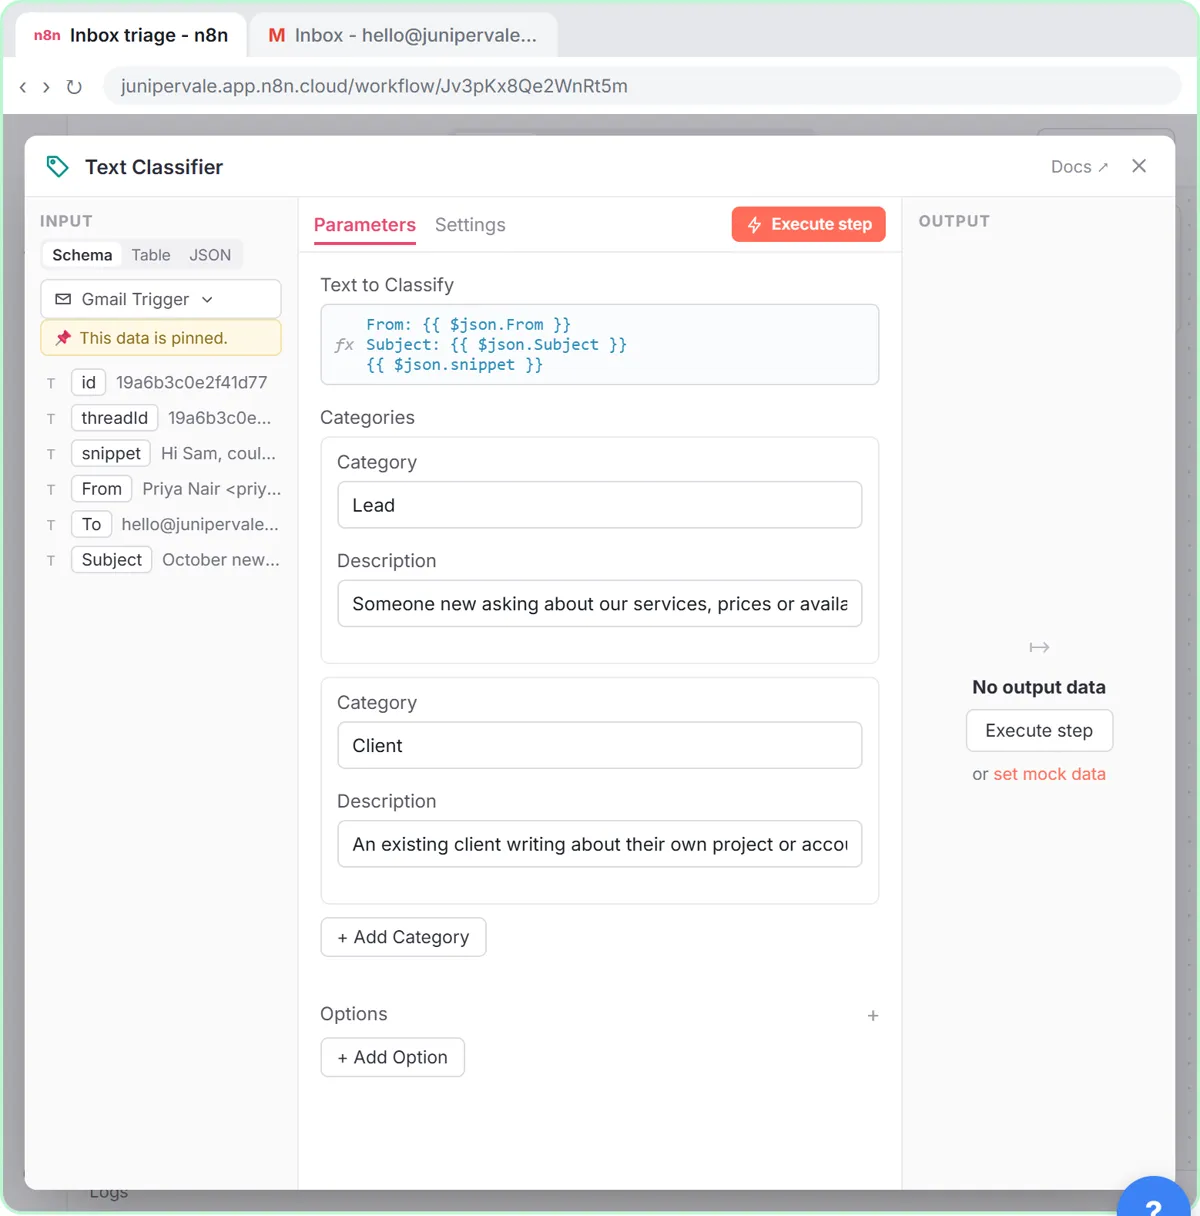
Point to Text to Classify and switch it to Expression, then paste this. The sender, the subject and the start of the message are usually enough to tell what an email is.
Step 5: Add a category
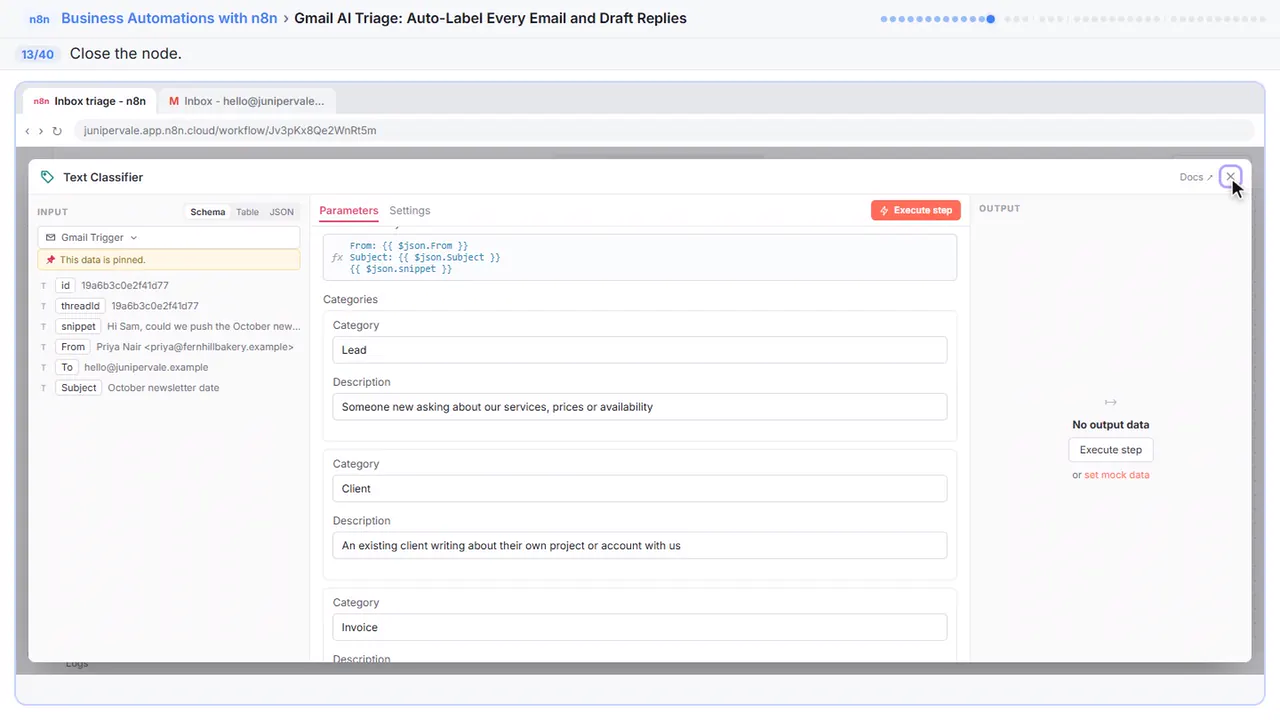
Now the categories.
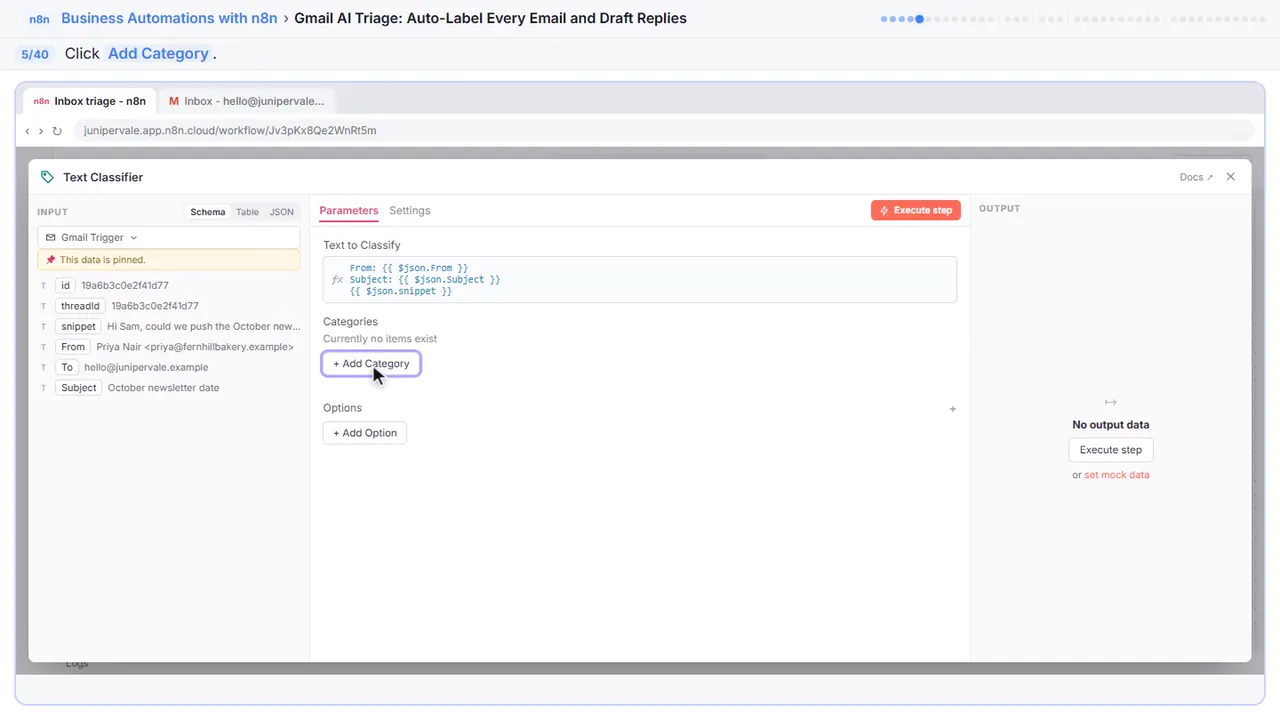
Step 6: Name it Lead
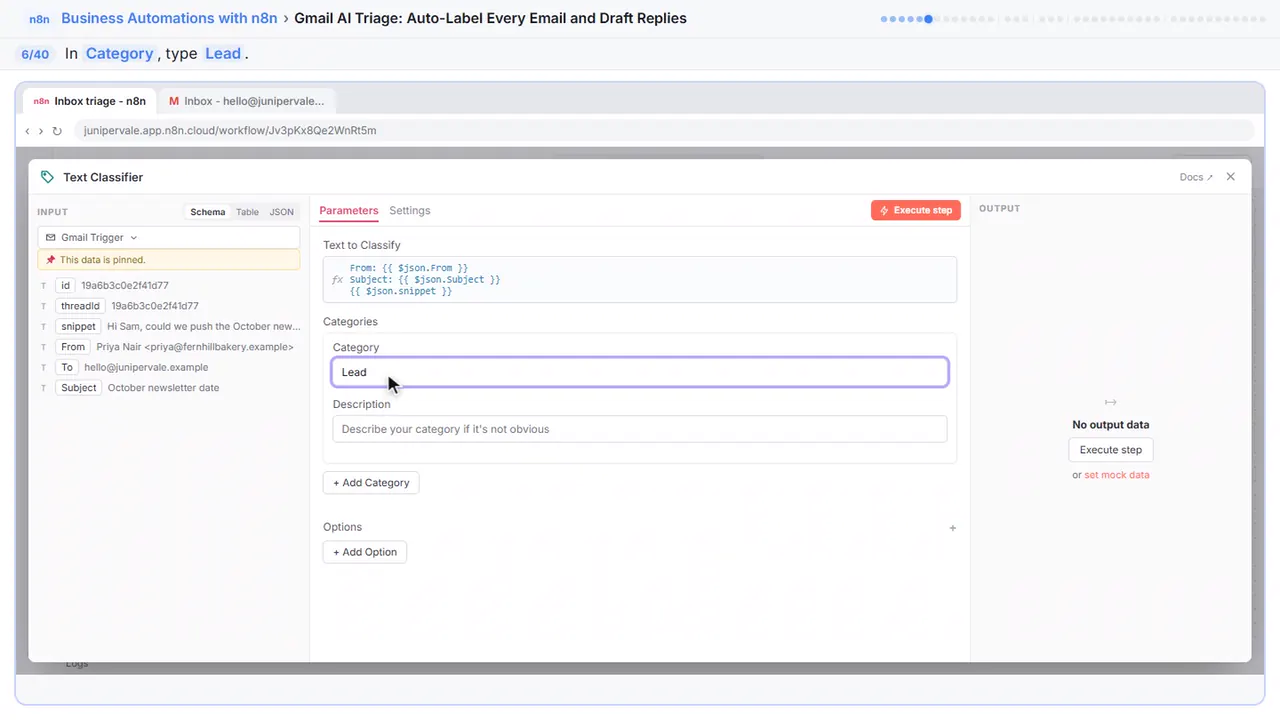
Step 7: Describe it
Add a description. Lead and Client both sound like customers, so spell out the difference. A lead is someone new.
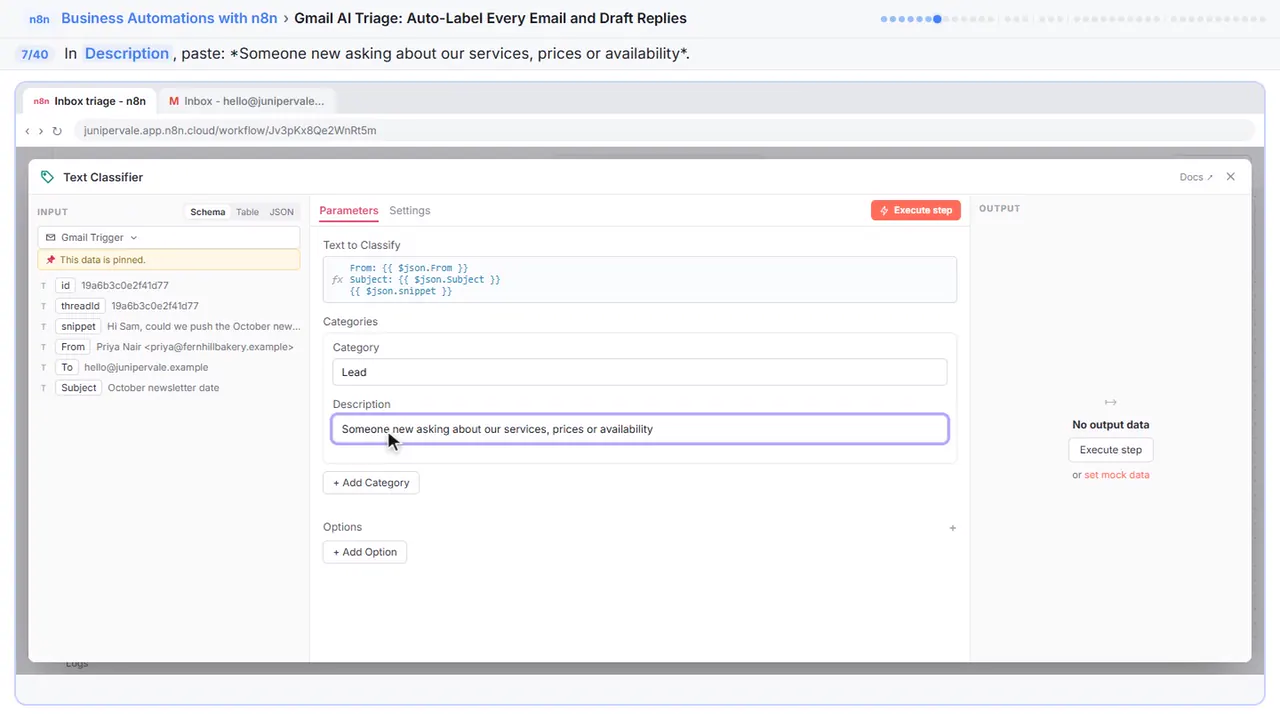
Step 8: Add a category
Add another category.
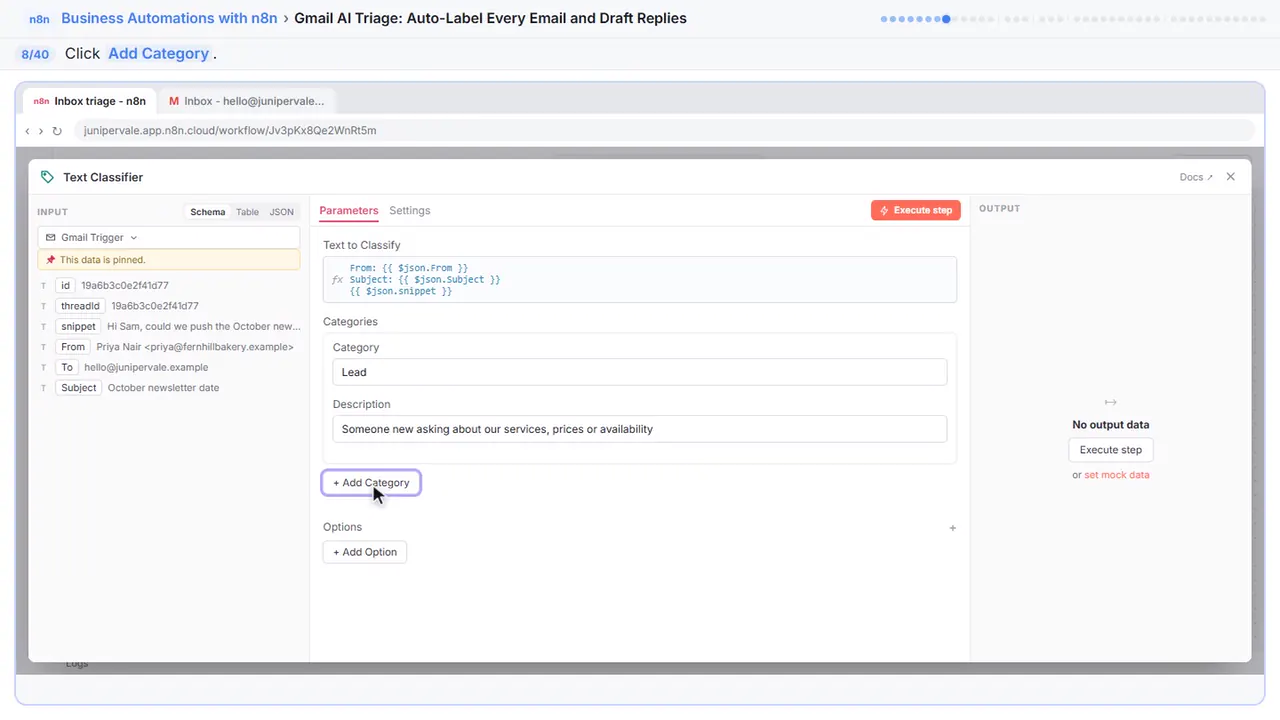
Step 9: Name it Client
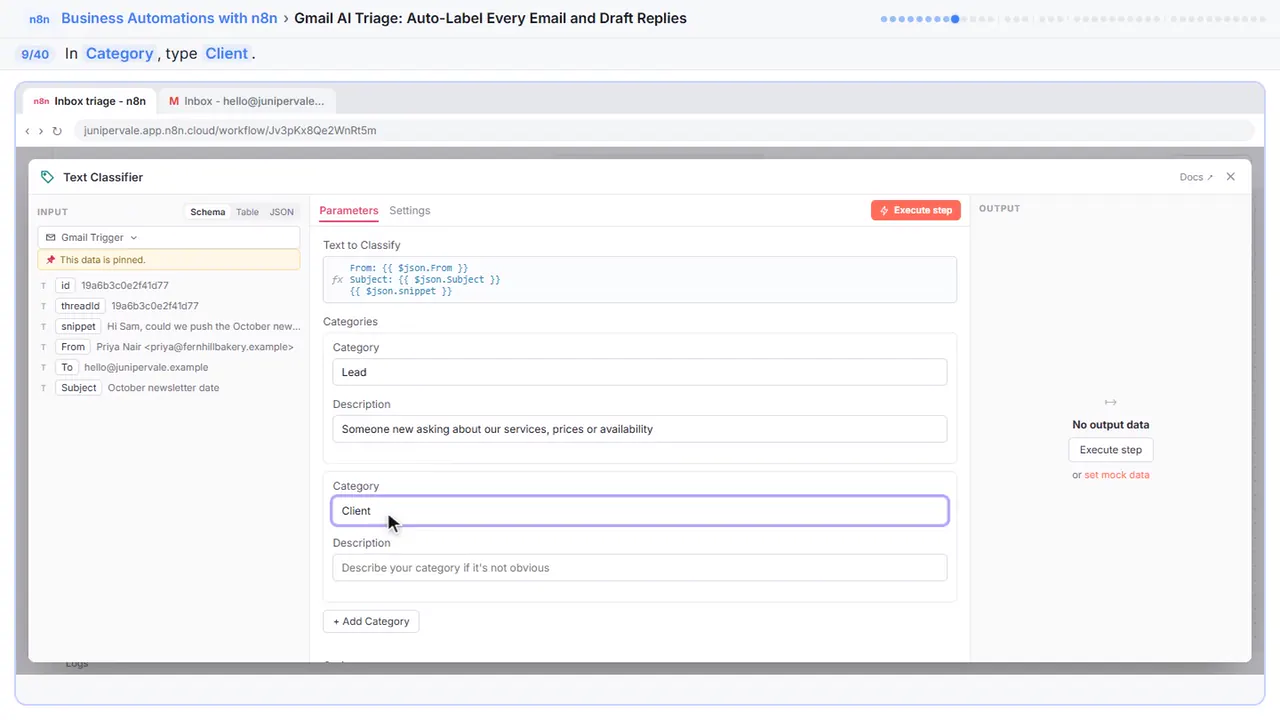
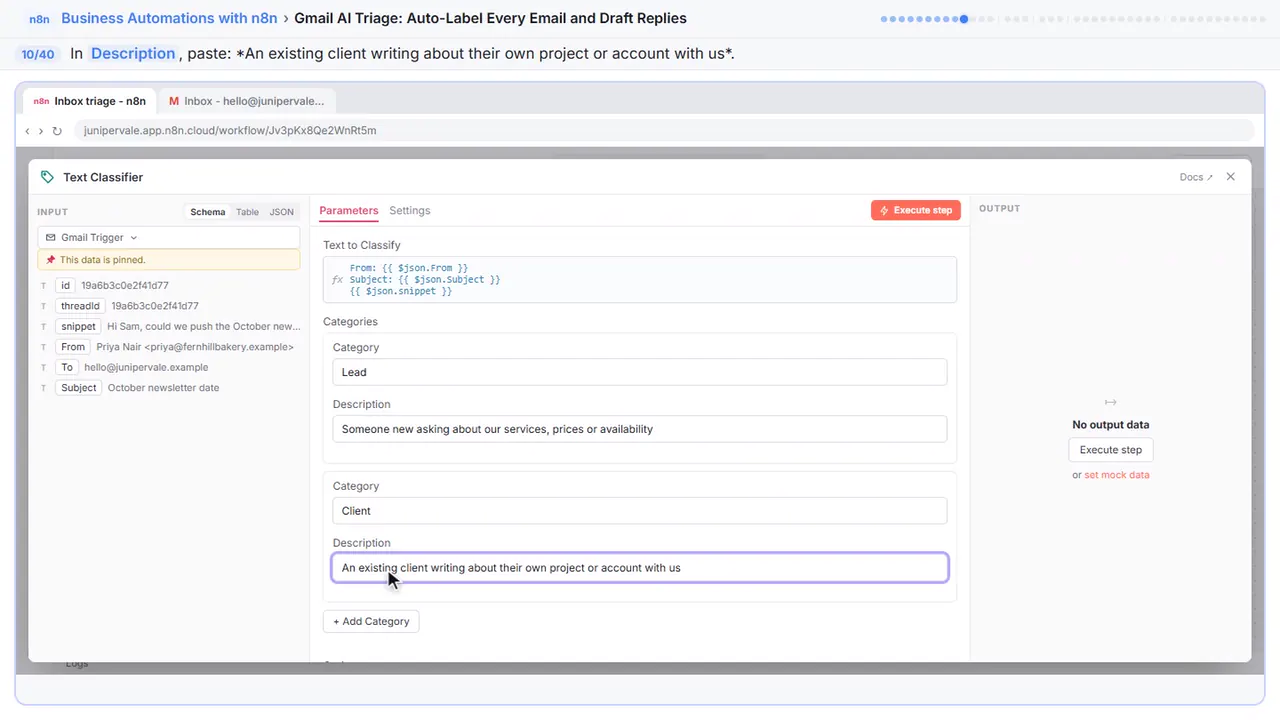
Step 10: Describe it
A client already works with you and writes about their own project.
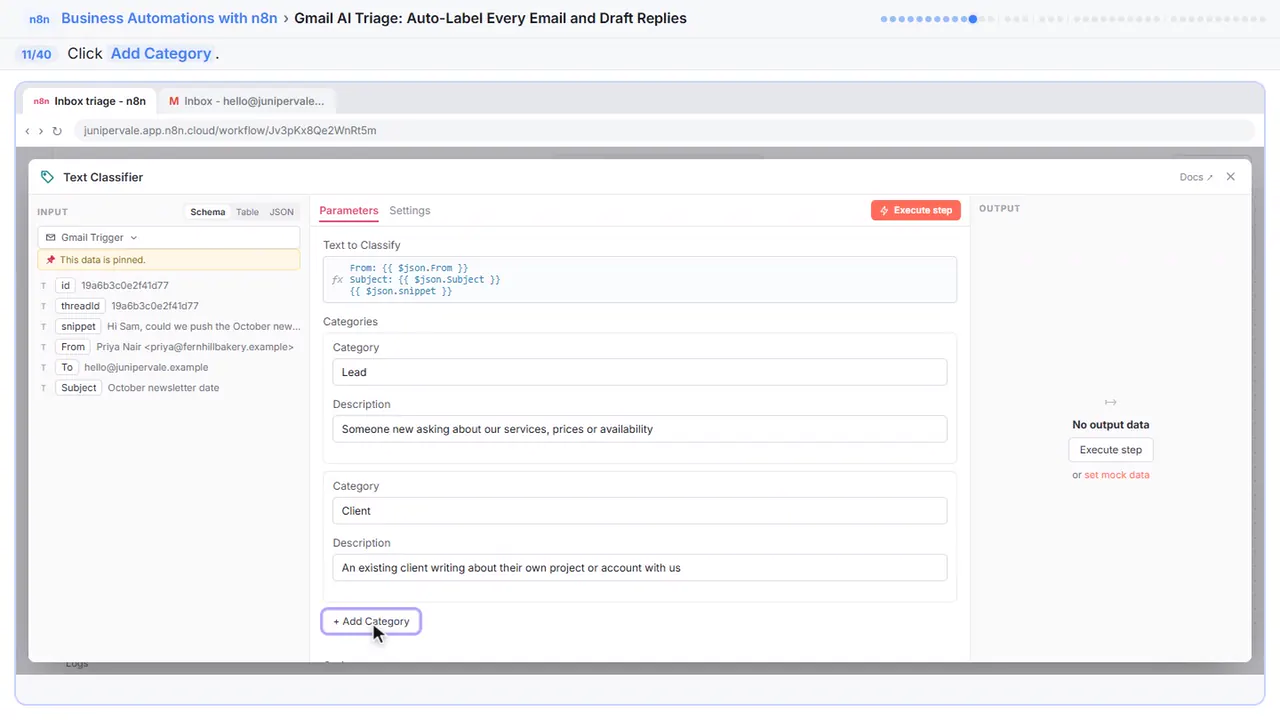
Step 11: Add a category
One more.
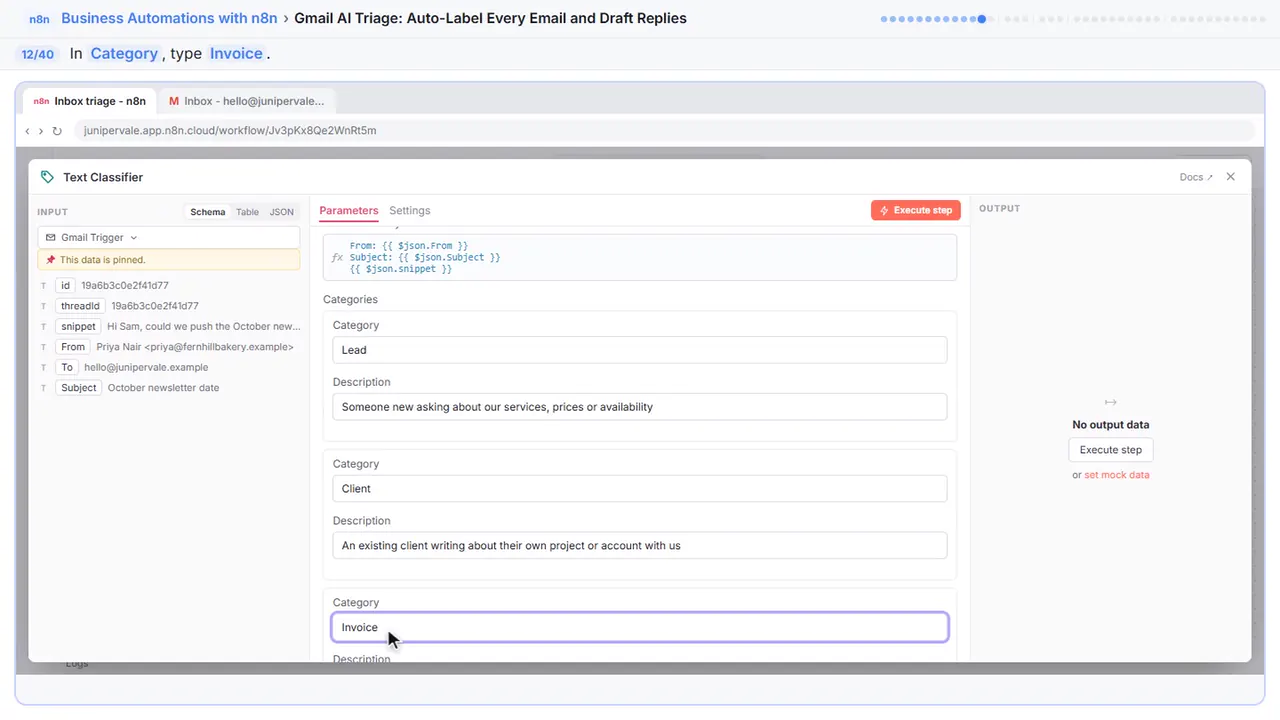
Step 12: Name it Invoice
That one is obvious, so it needs no description. Anything that fits none of the three is dropped and stays unlabeled.
Step 13: Close the node
Close it.
Part 2: Add the model
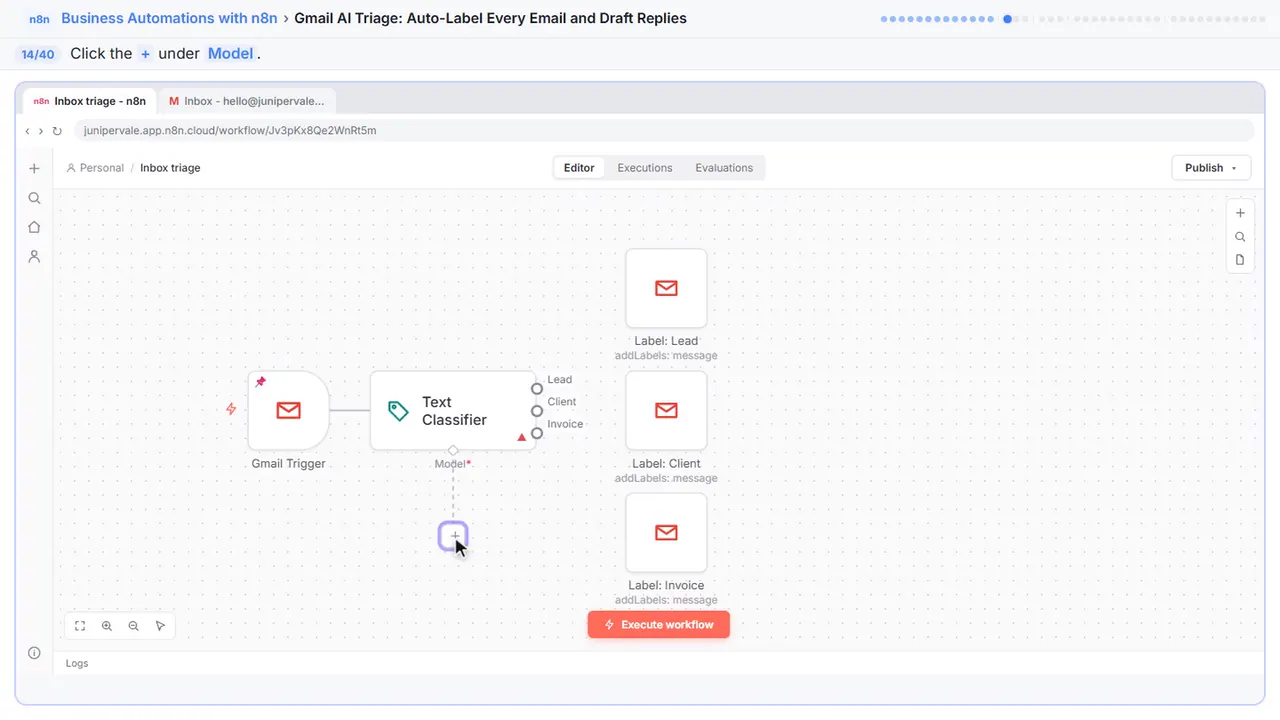
Step 14: Add a chat model
Give it a model.
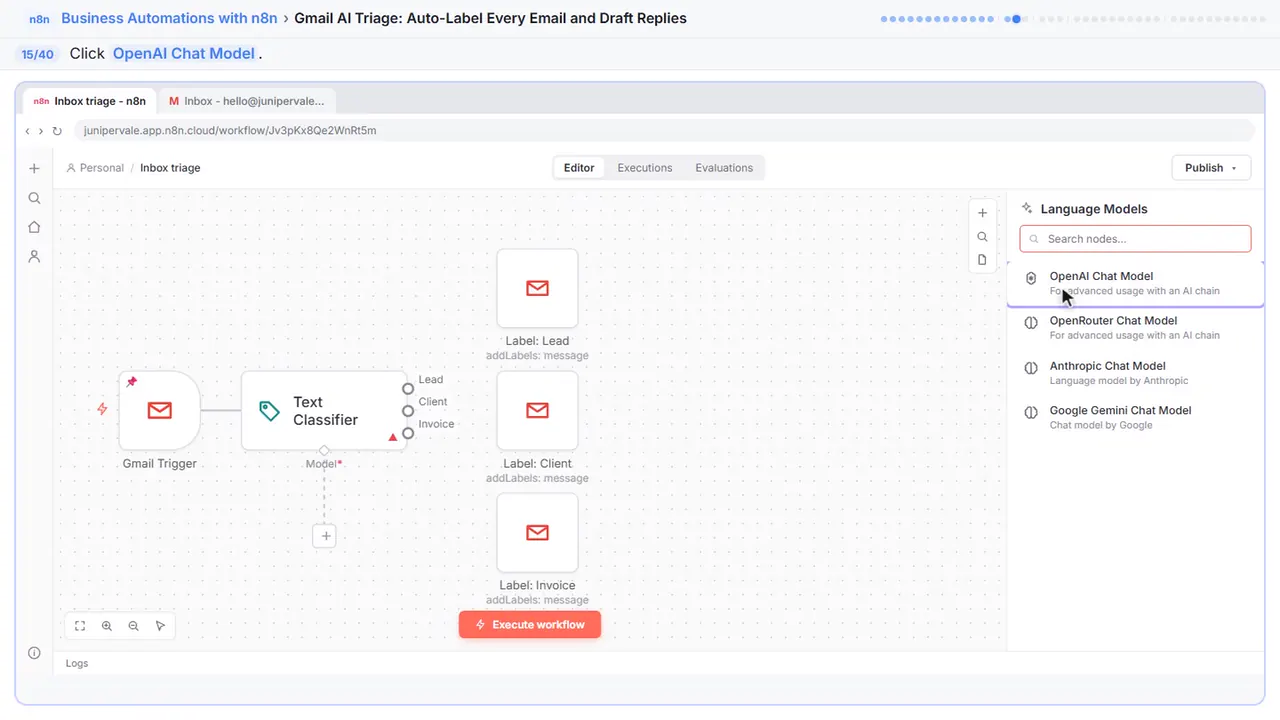
Step 15: OpenAI Chat Model
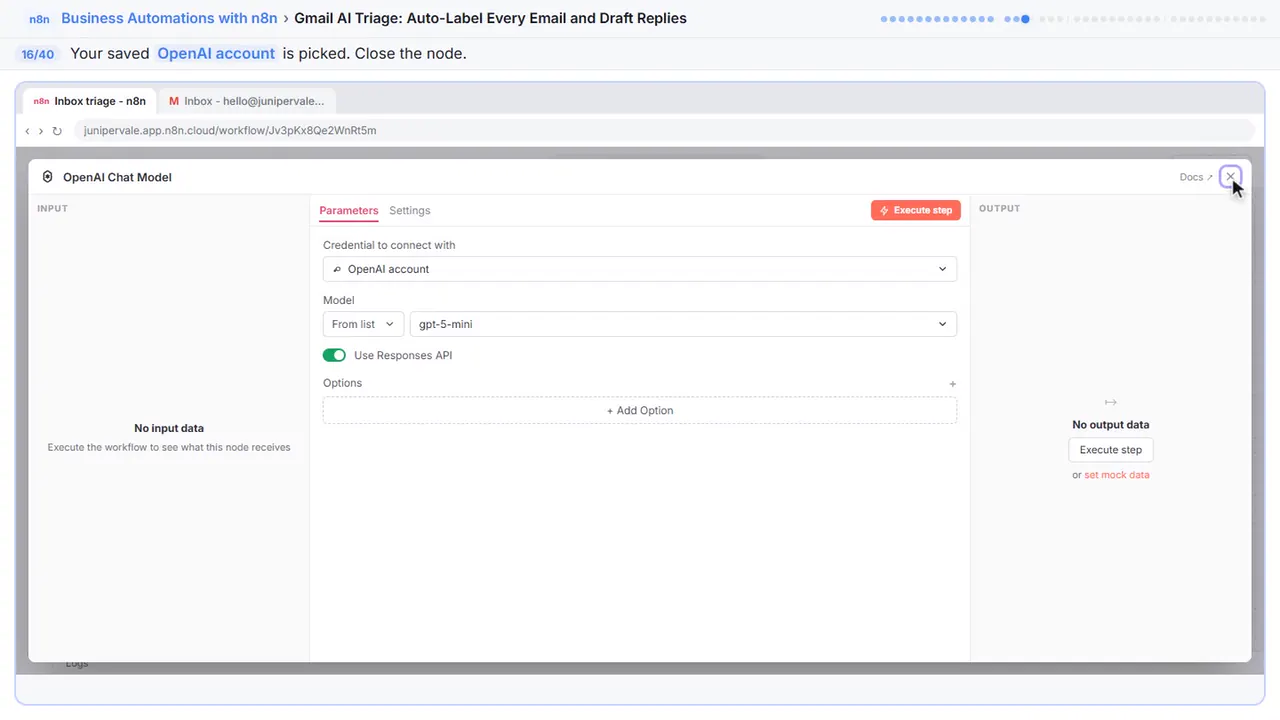
Step 16: Close the node
Your saved OpenAI key is already picked. Close it.
Part 3: Apply the labels
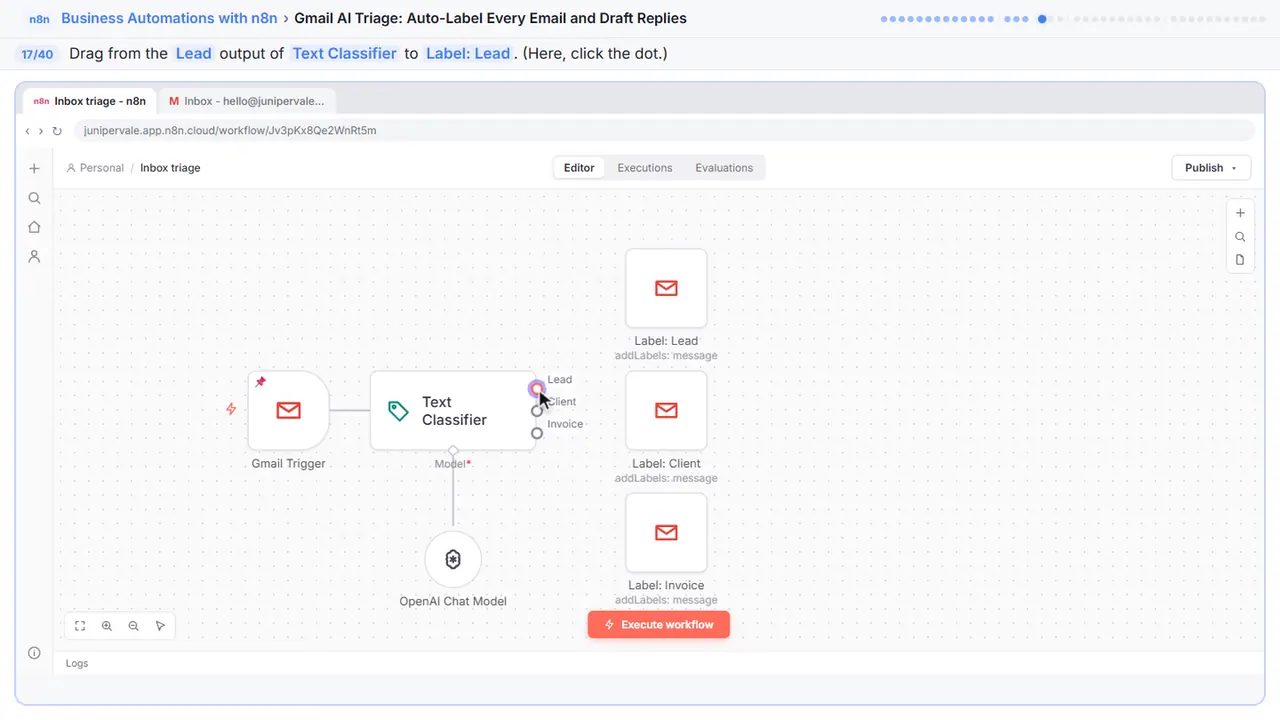
Step 17: Connect Lead
The classifier now has one output per category. Connect each one to its label step.
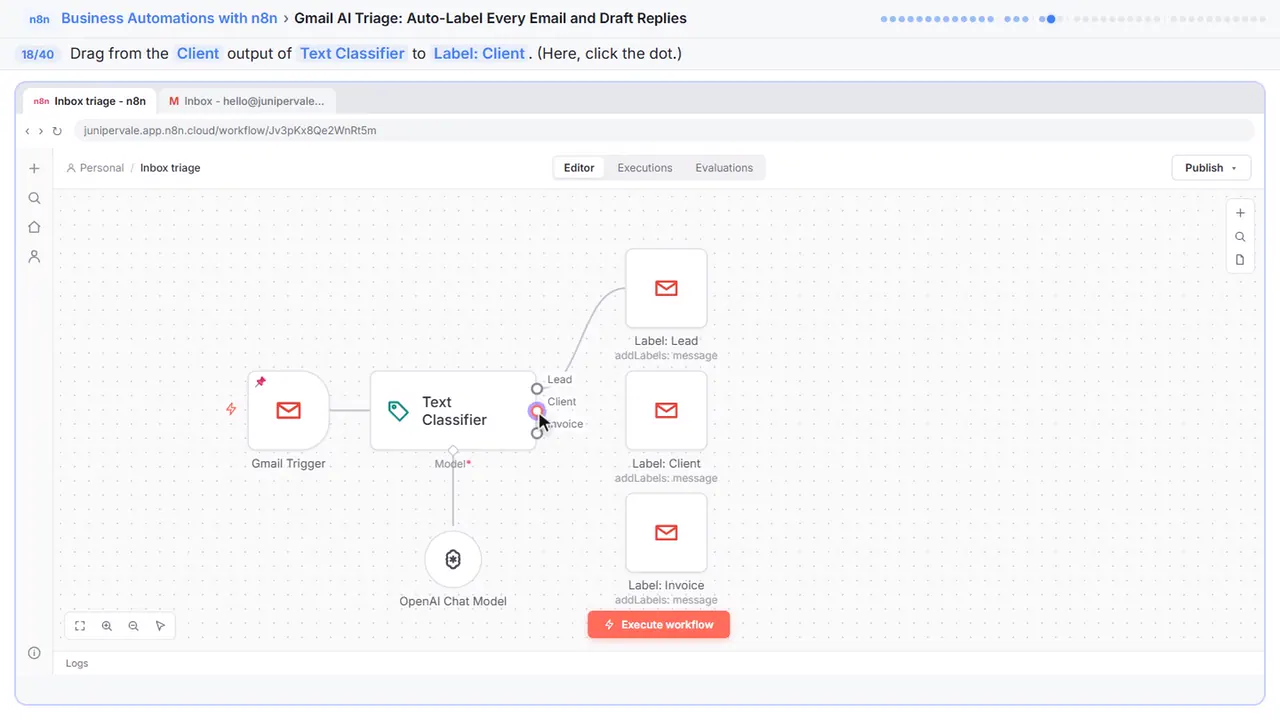
Step 18: Connect Client
Client to Label: Client.
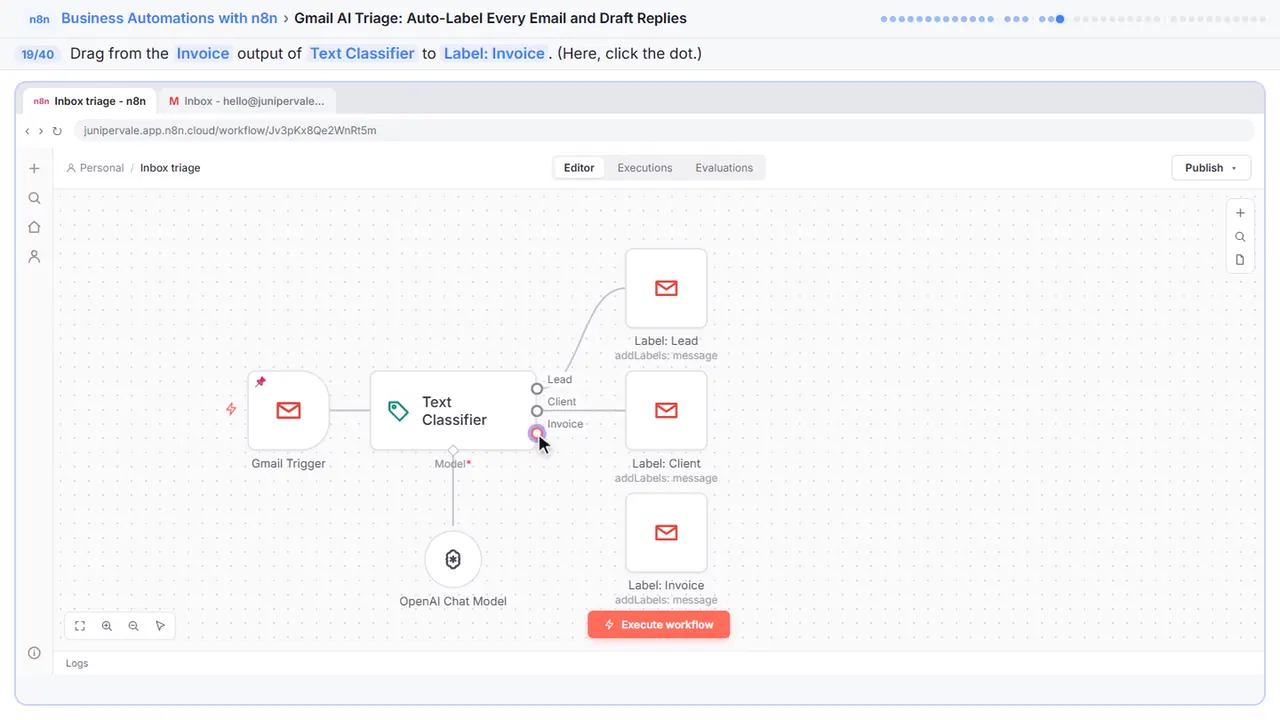
Step 19: Connect Invoice
And Invoice to Label: Invoice. Each label step adds its Gmail label to that email.
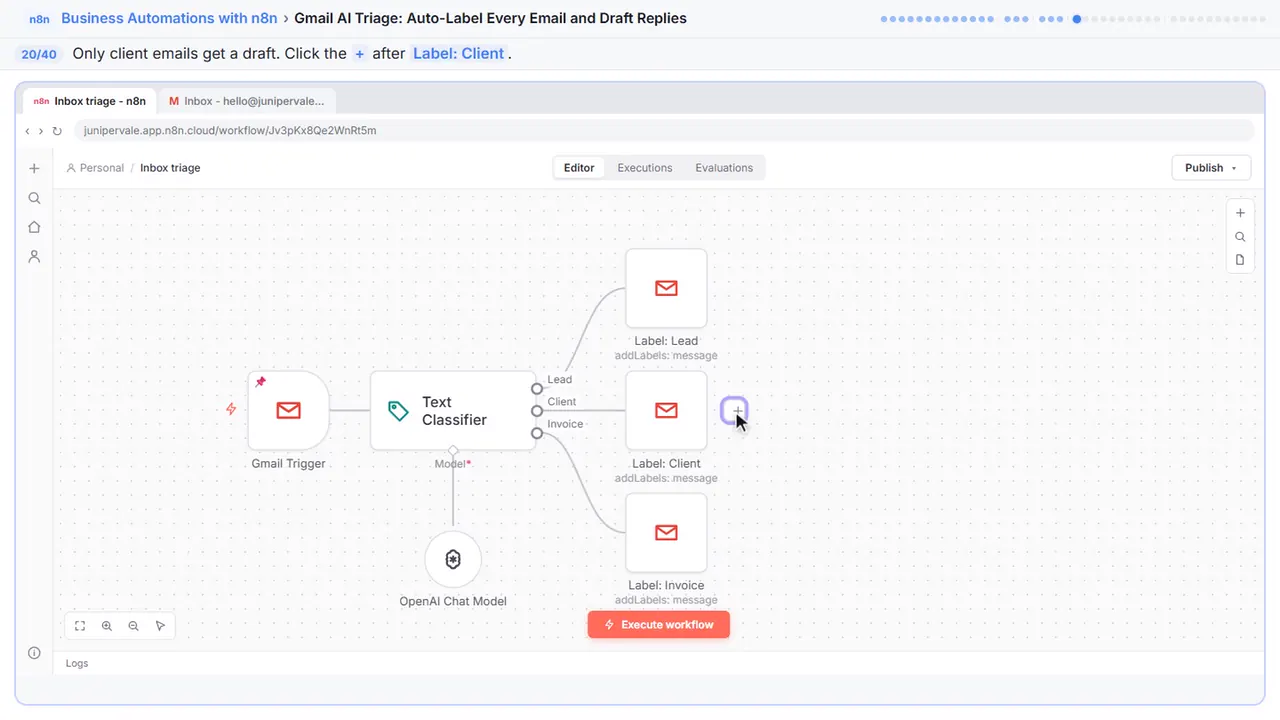
Part 4: Write the reply
Step 20: Add the reply writer
Client emails also get a reply ready for you.
Step 21: Search for llm chain
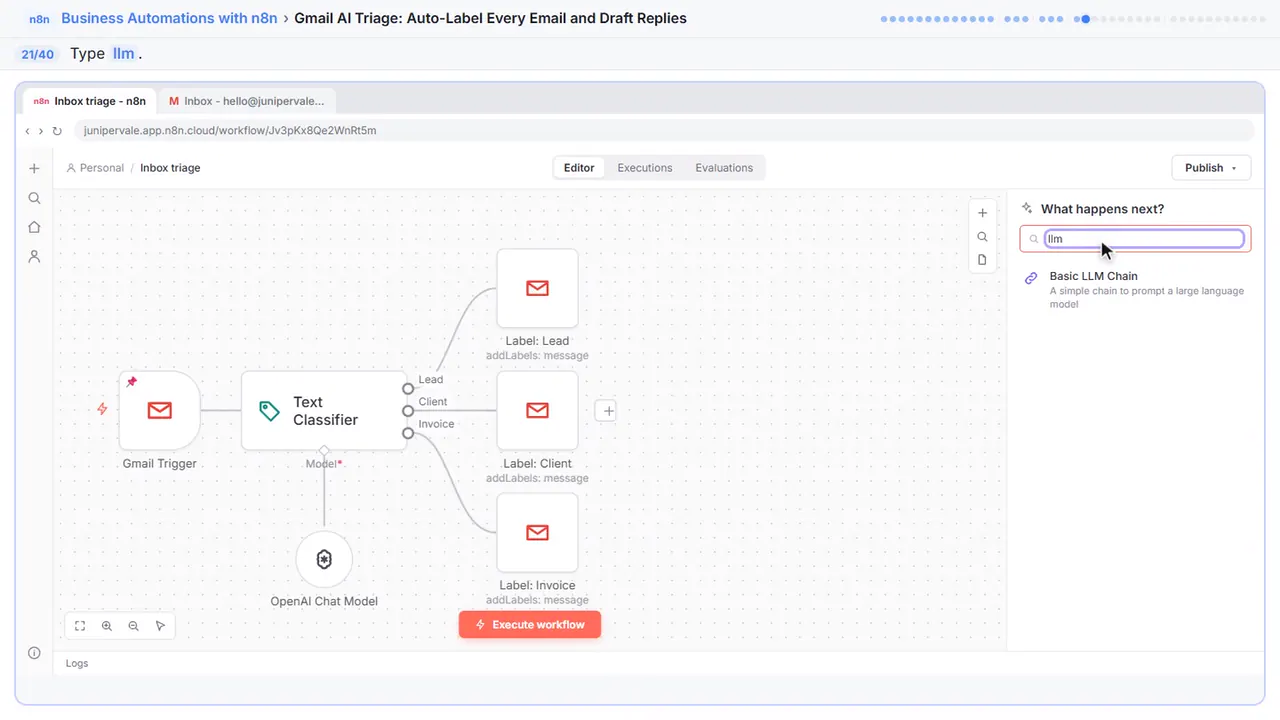
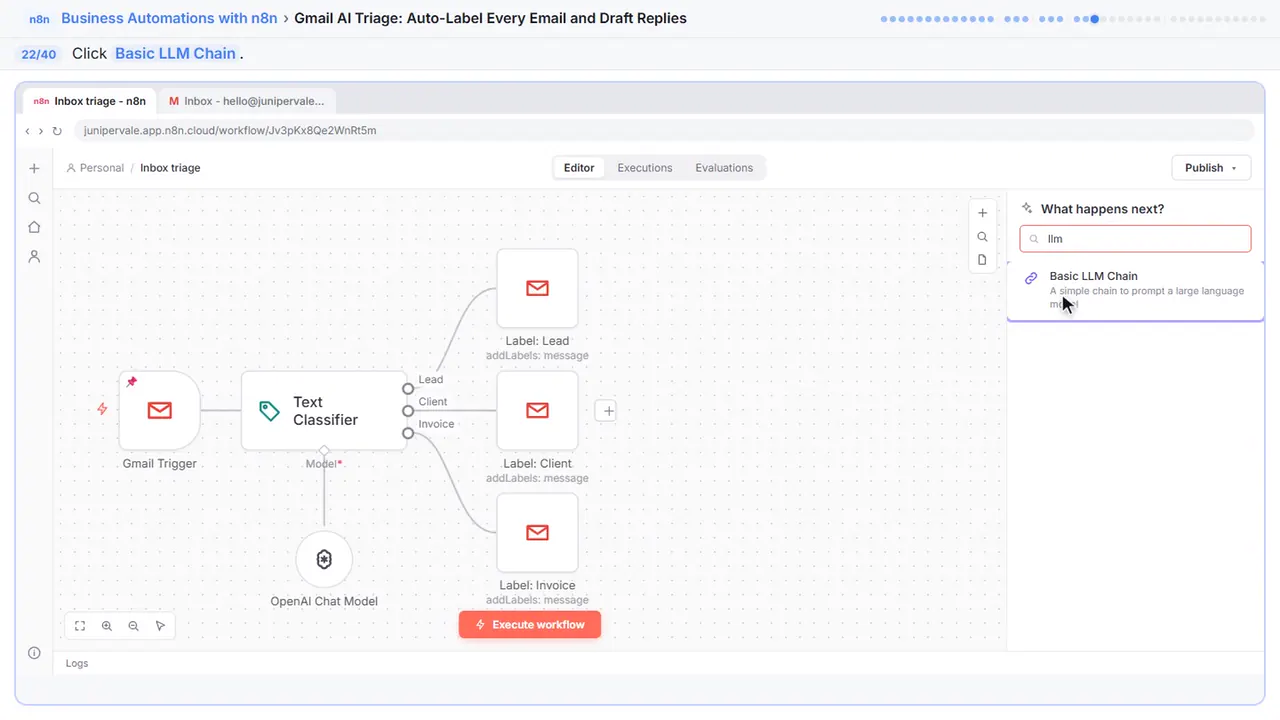
Step 22: Basic LLM Chain
It sends one prompt to a model and returns the text.
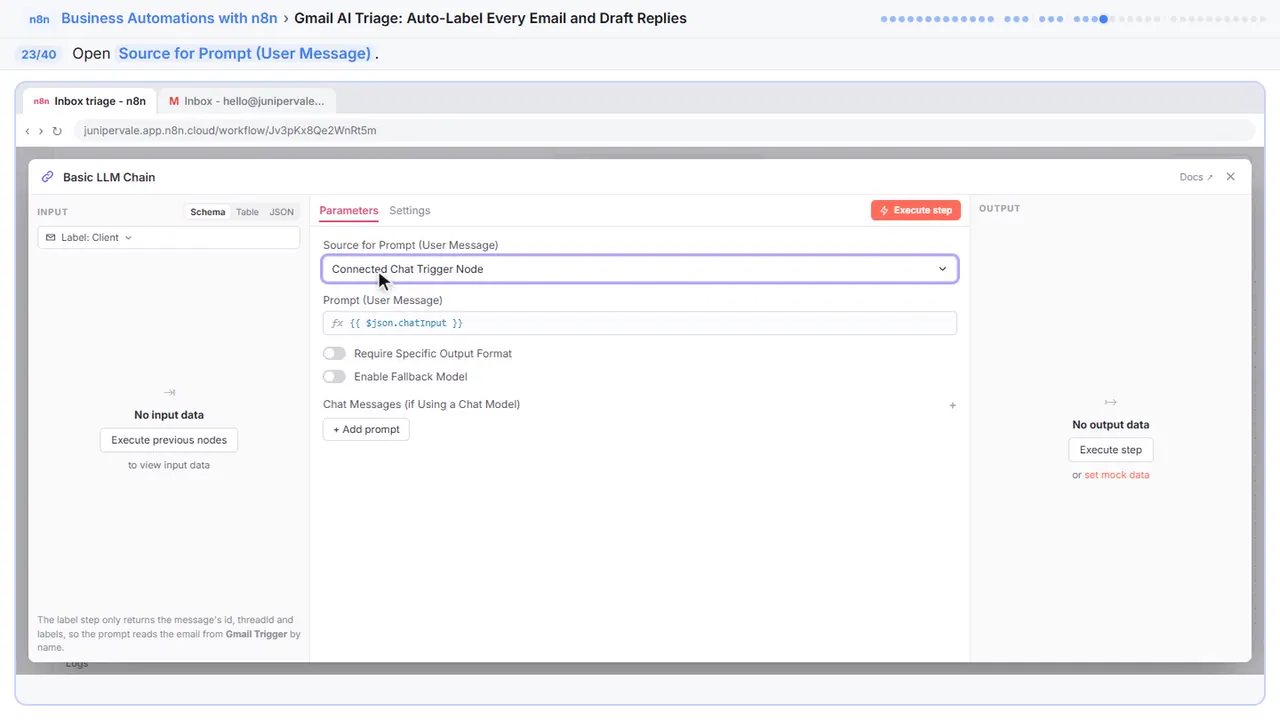
Step 23: Change the prompt source
It expects a chat message by default, and ours is an email.
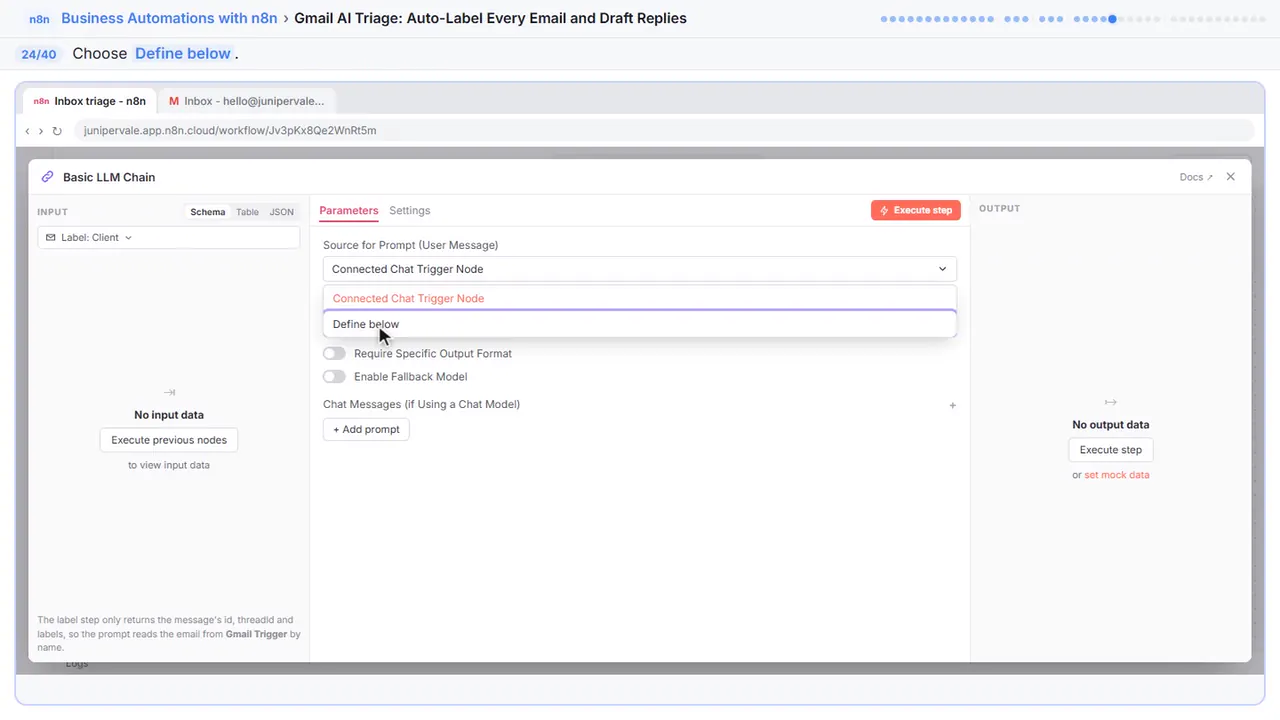
Step 24: Define below
Define below.
Step 25: Write the prompt
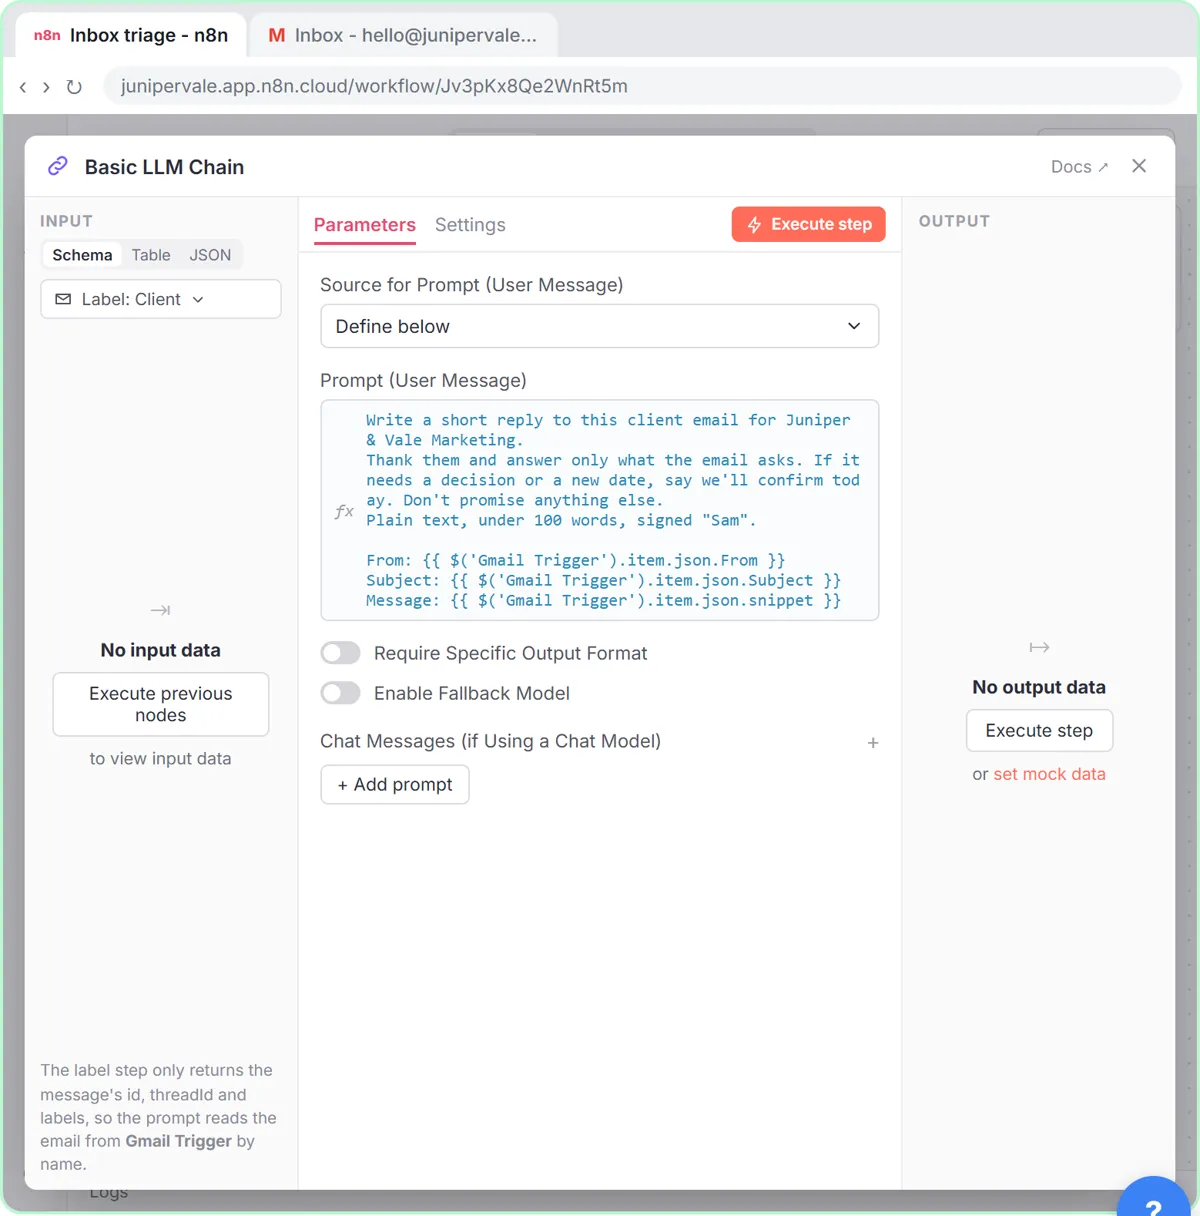
Switch Prompt to Expression, then paste the prompt. It says what to write and what not to promise, and it pulls the email from the Gmail Trigger by name, because the step right before this one only returns the label result.
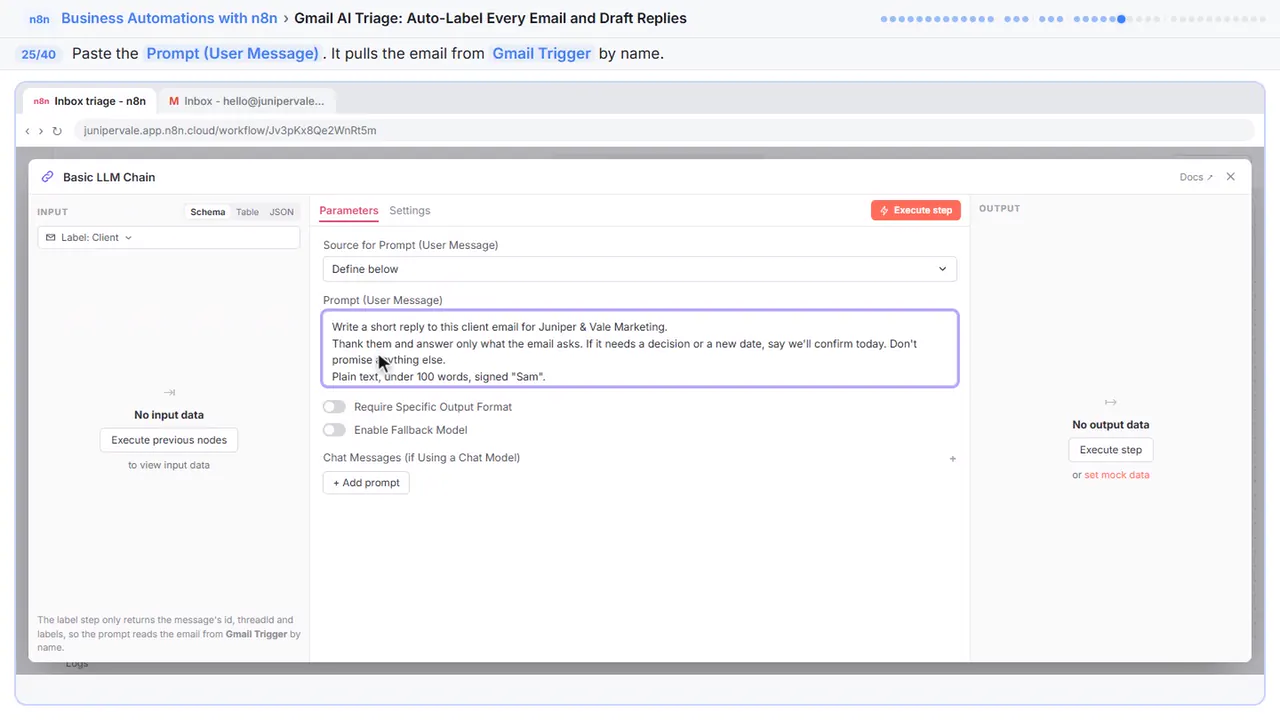
Write a short reply to this client email for Juniper & Vale Marketing.
Thank them and answer only what the email asks. If it needs a decision or a new date, say we'll confirm today. Don't promise anything else.
Plain text, under 100 words, signed "Sam".

From: {{ $('Gmail Trigger').item.json.From }}
Subject: {{ $('Gmail Trigger').item.json.Subject }}
Message: {{ $('Gmail Trigger').item.json.snippet }}
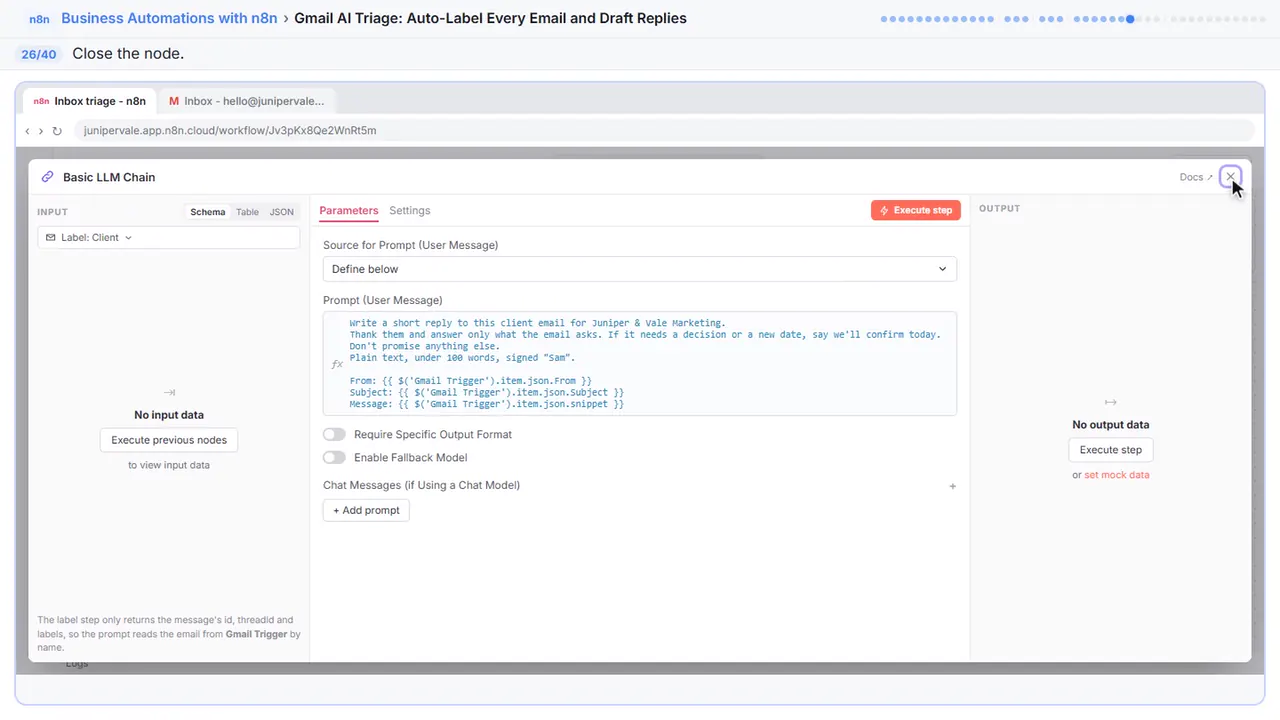
Step 26: Close the node
Close it.
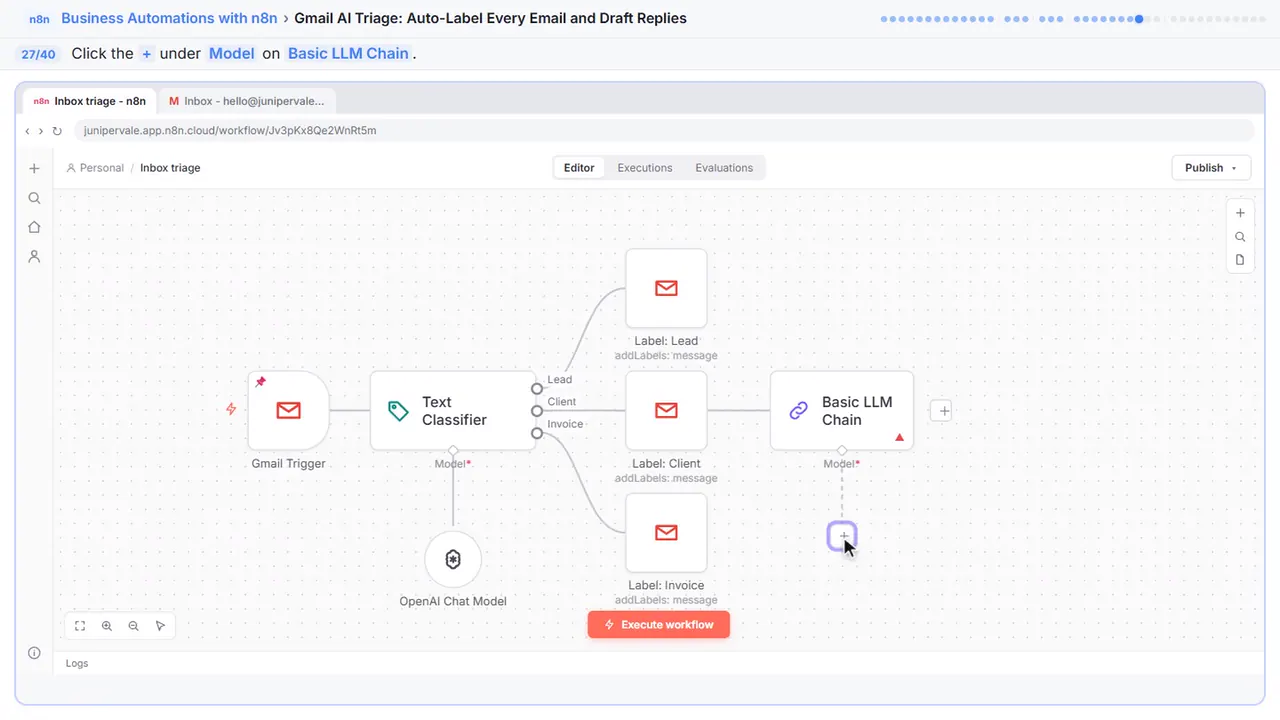
Step 27: Add its model
This one needs a model too.
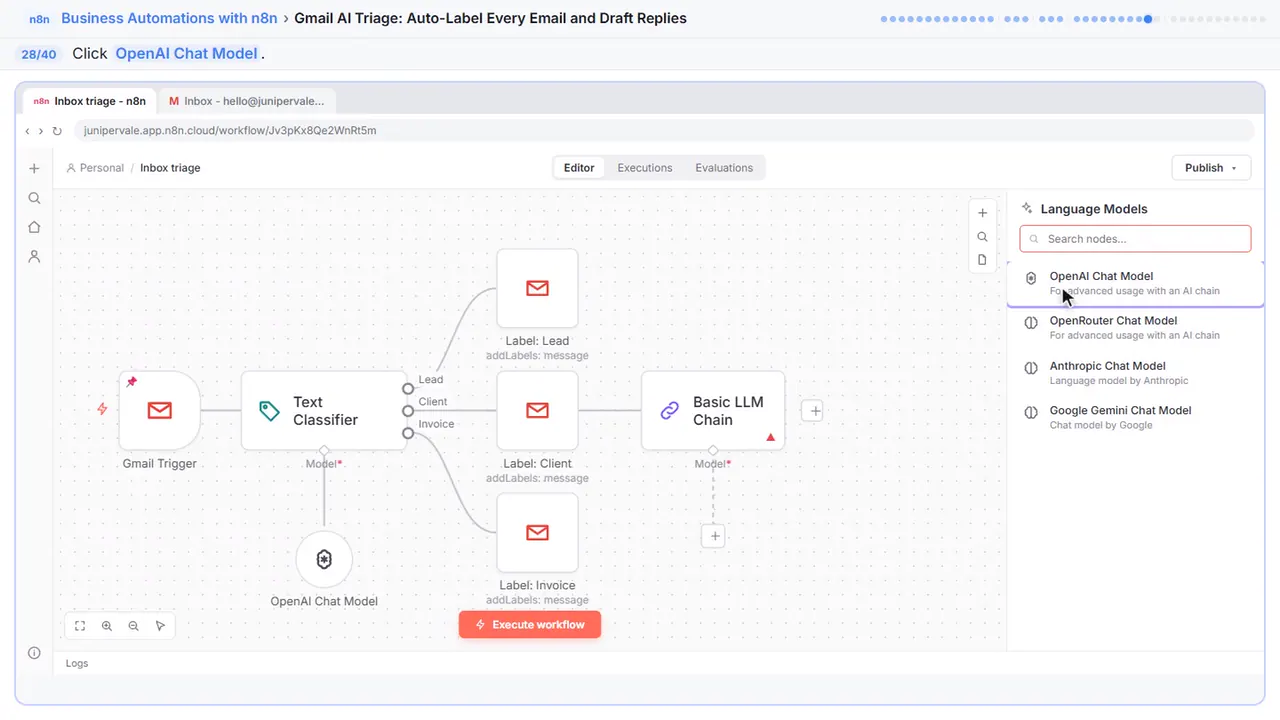
Step 28: OpenAI Chat Model
OpenAI Chat Model.
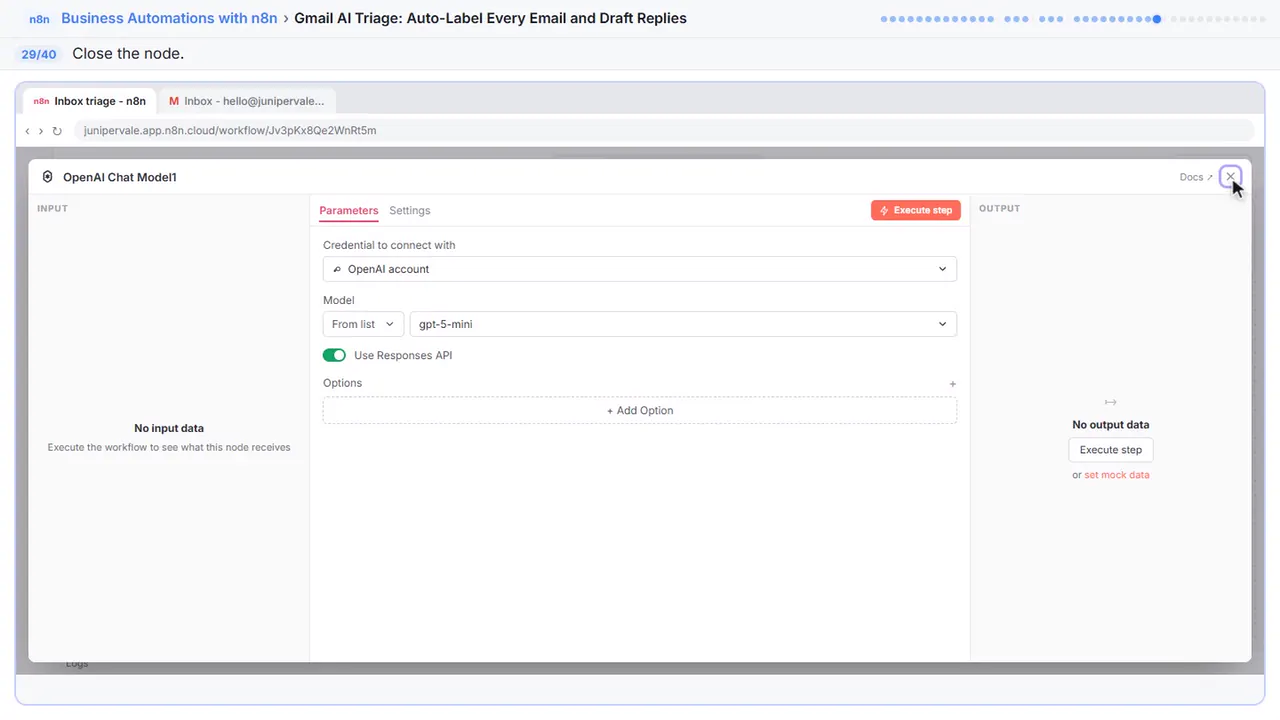
Step 29: Close the node
Close it.
Part 5: Save it as a draft
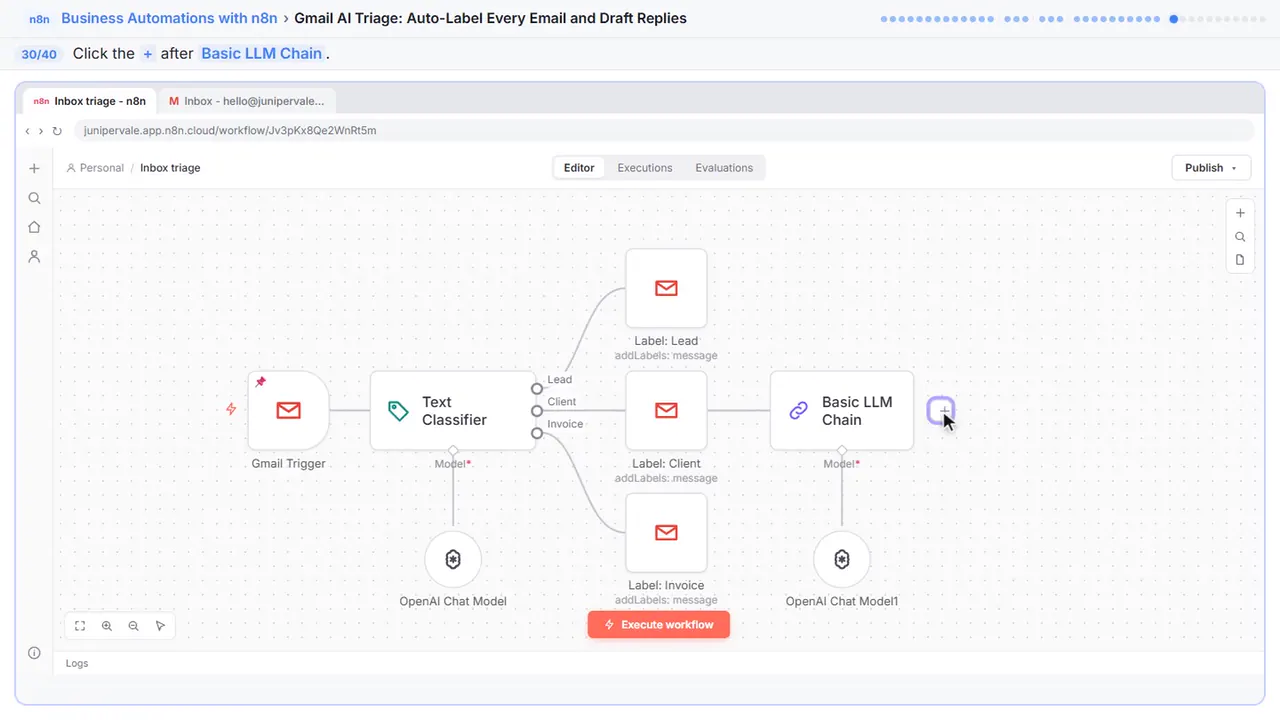
Step 30: Save the reply
Now save that reply as a draft.
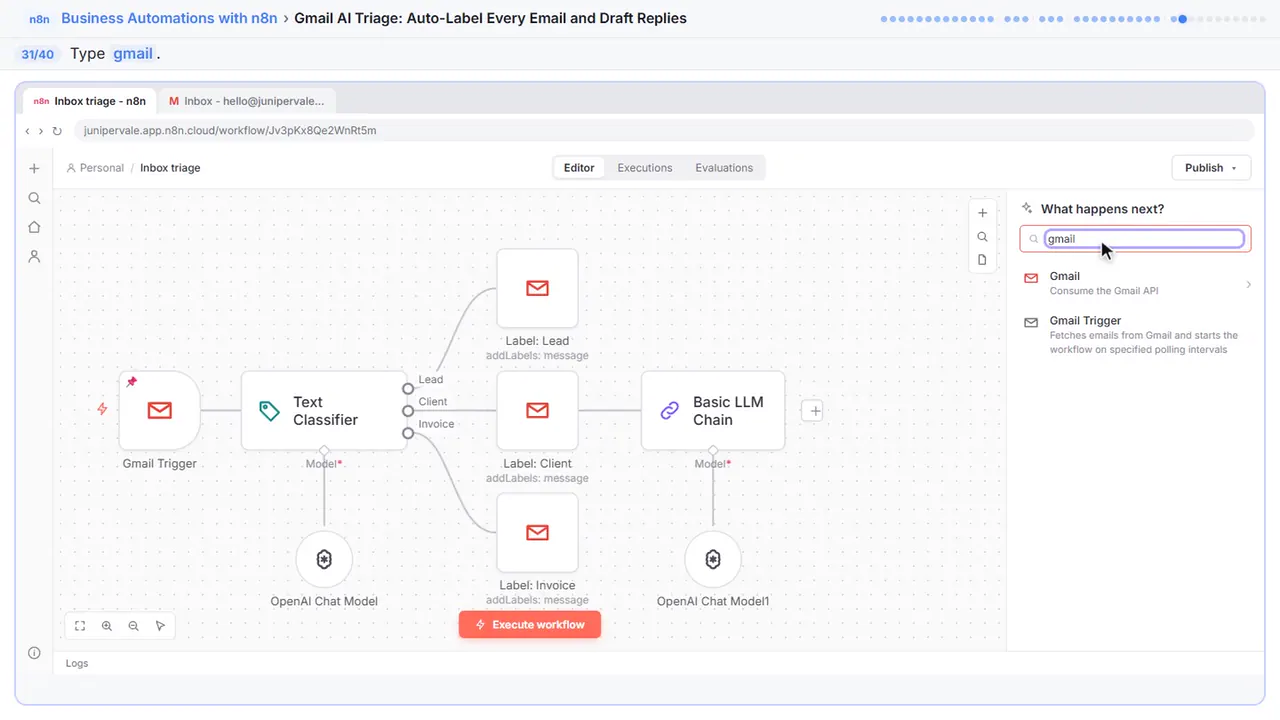
Step 31: Search for gmail
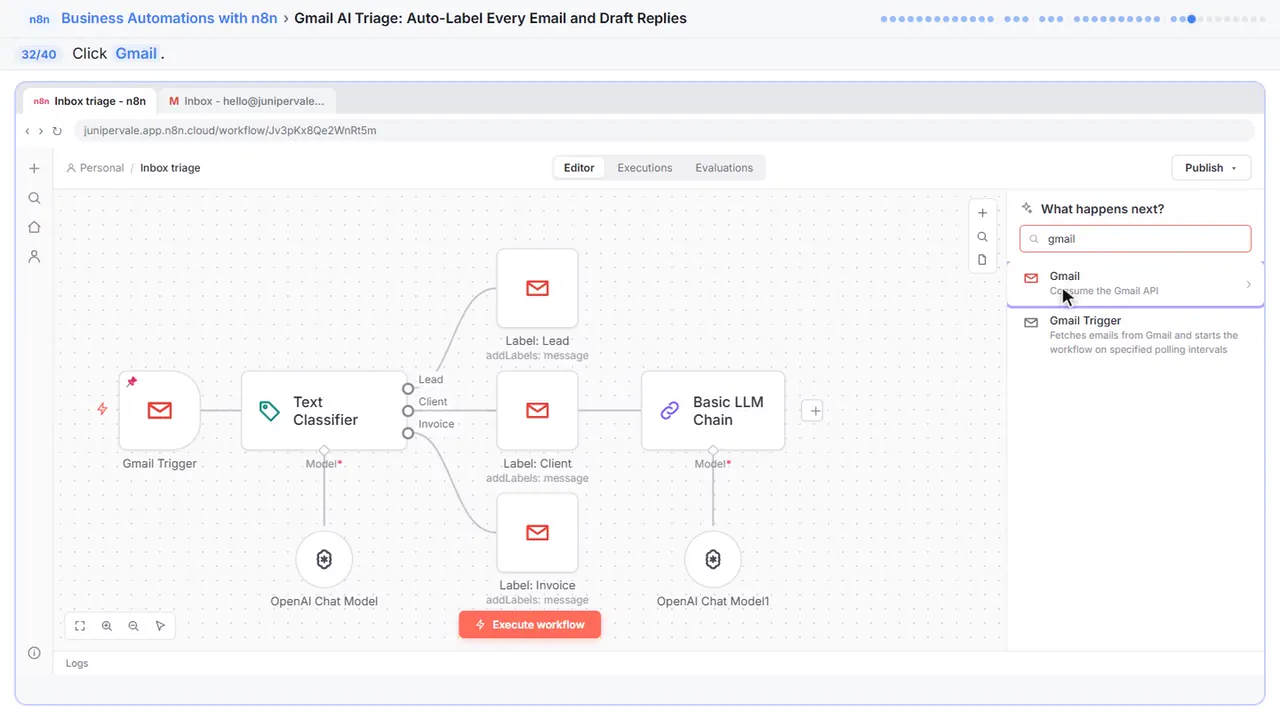
Step 32: Gmail
Gmail.
Step 33: Create a draft
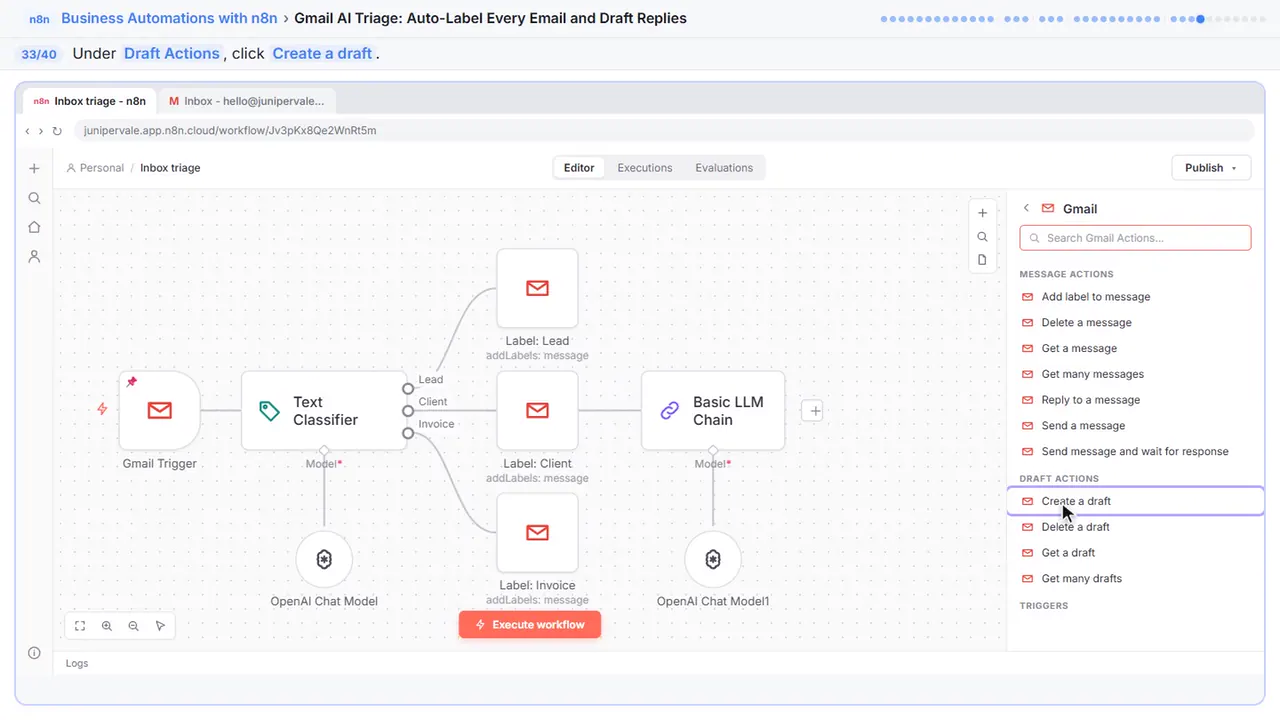
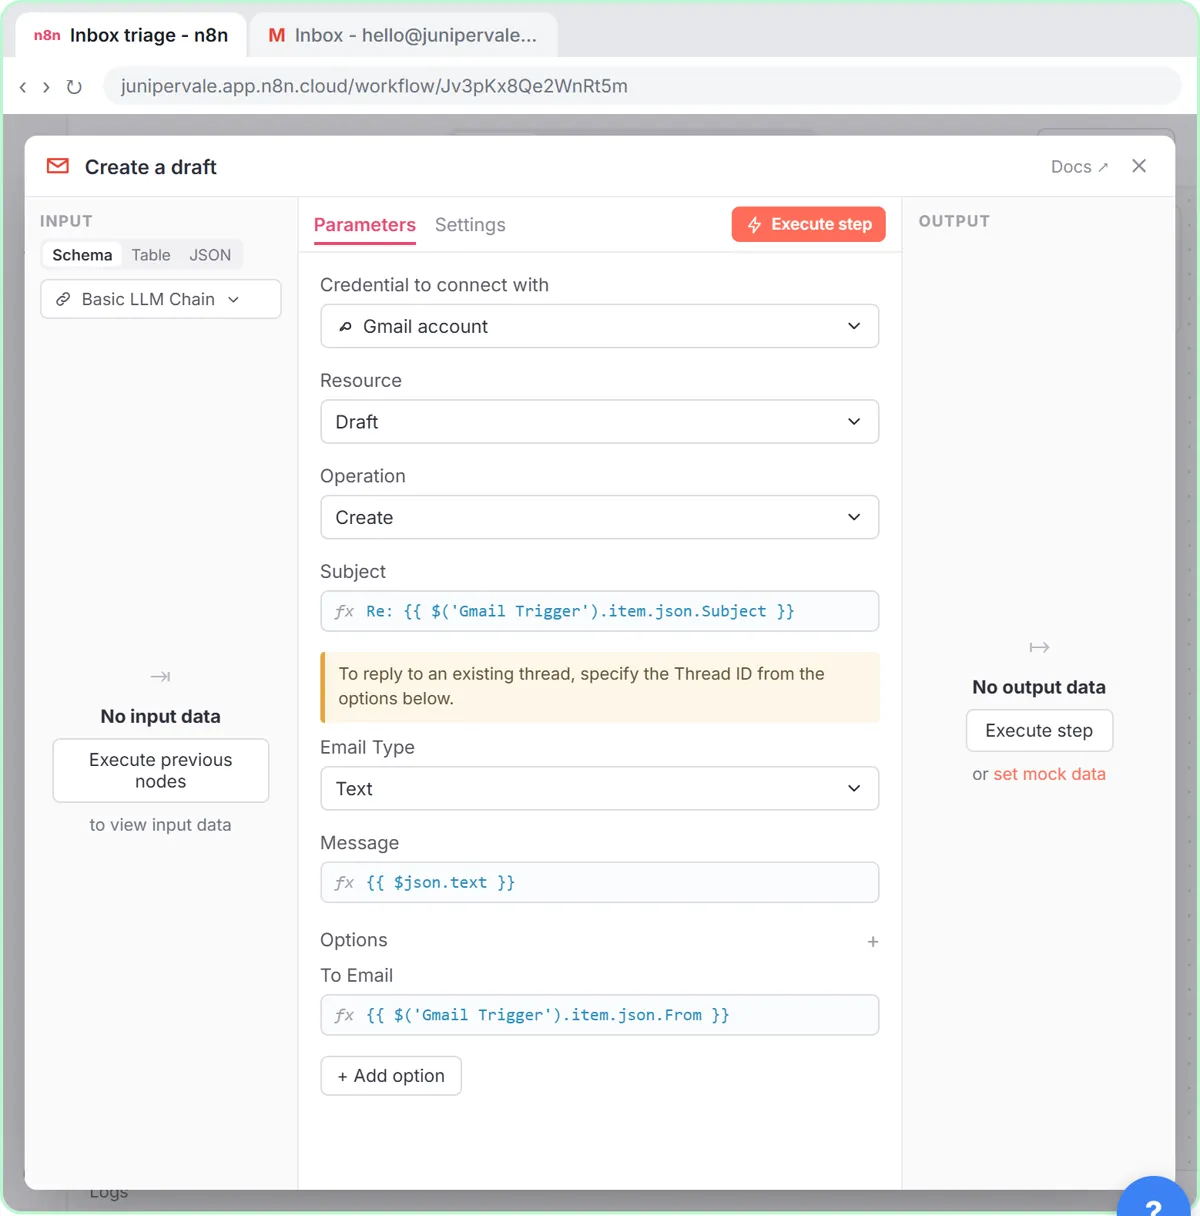
Under Draft Actions, click Create a draft. It saves a draft and never sends, so you read it first.
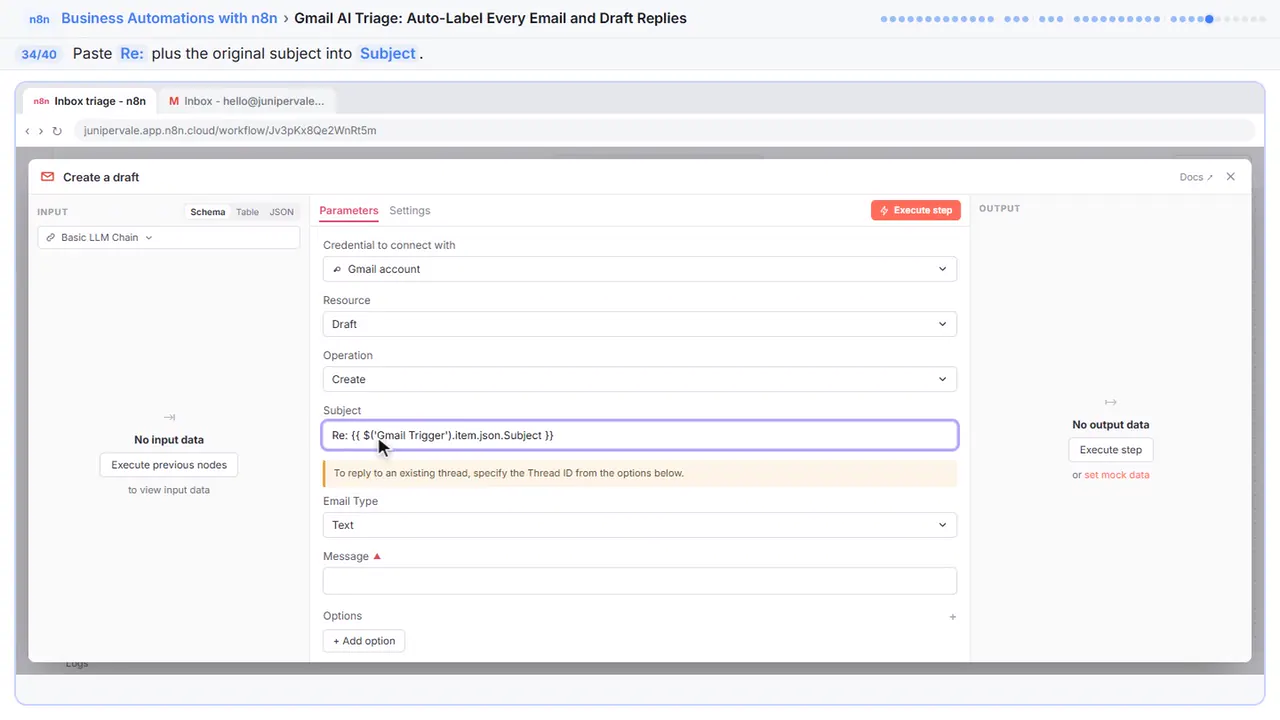
Step 34: Subject
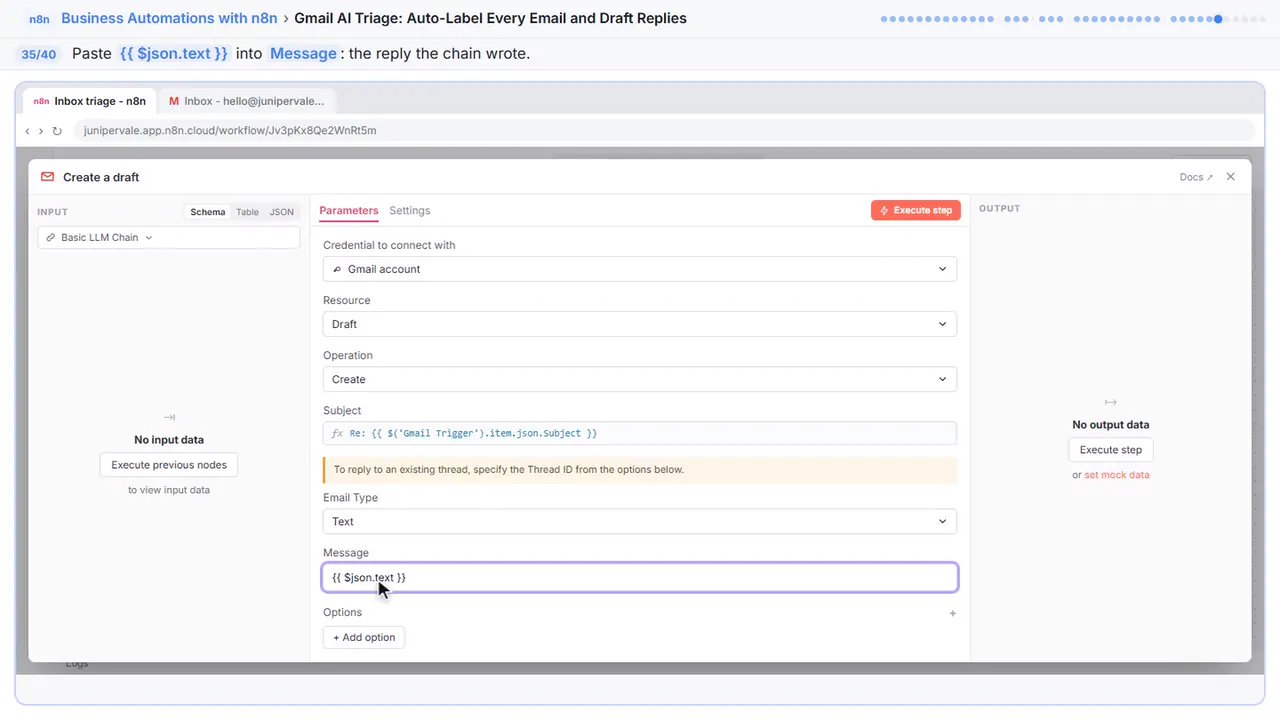
Step 35: Message
In Message, paste this. It is the text the chain wrote.
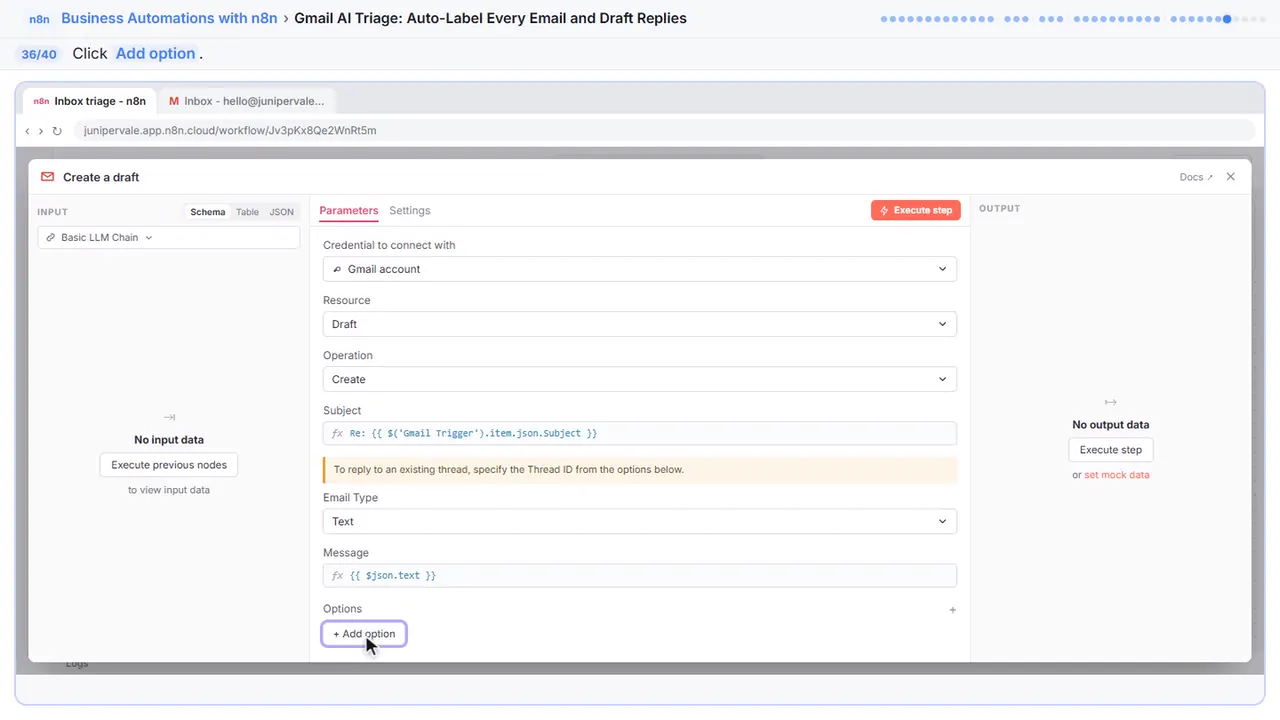
Step 36: Add option
Without a recipient, the draft has nobody to go to.
Step 37: To Email
To Email.
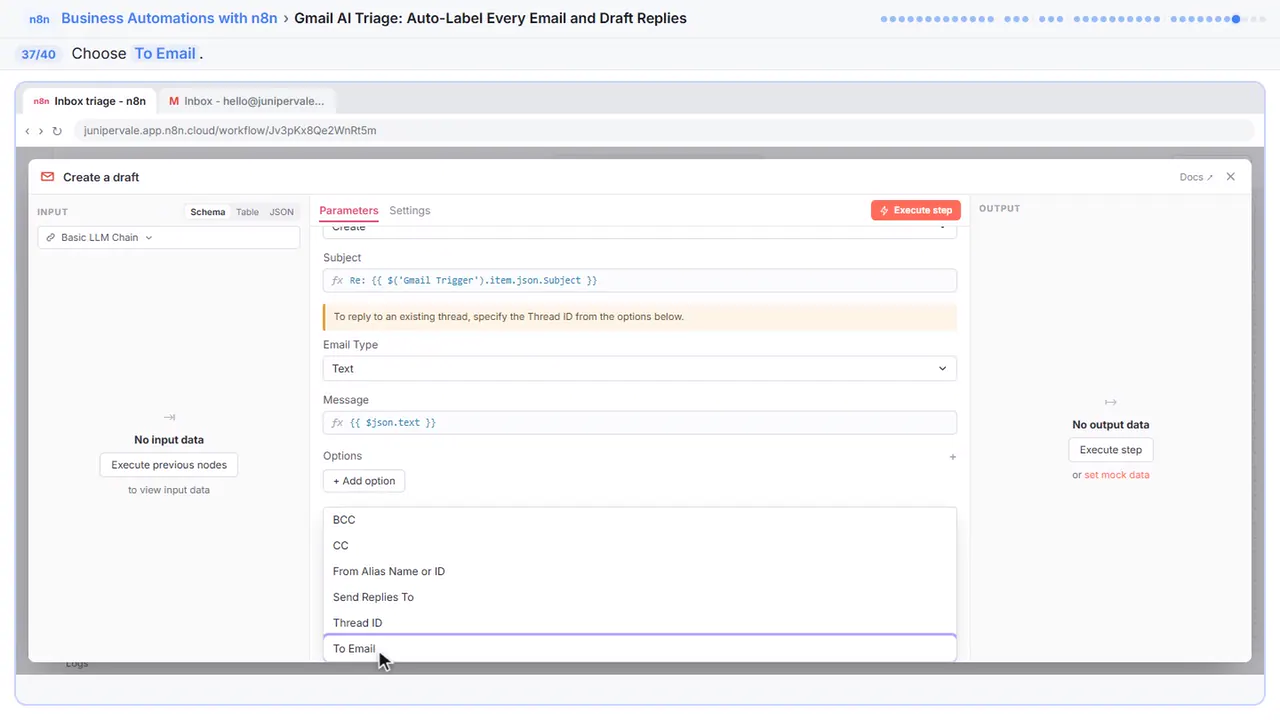
Step 38: Reply to the sender
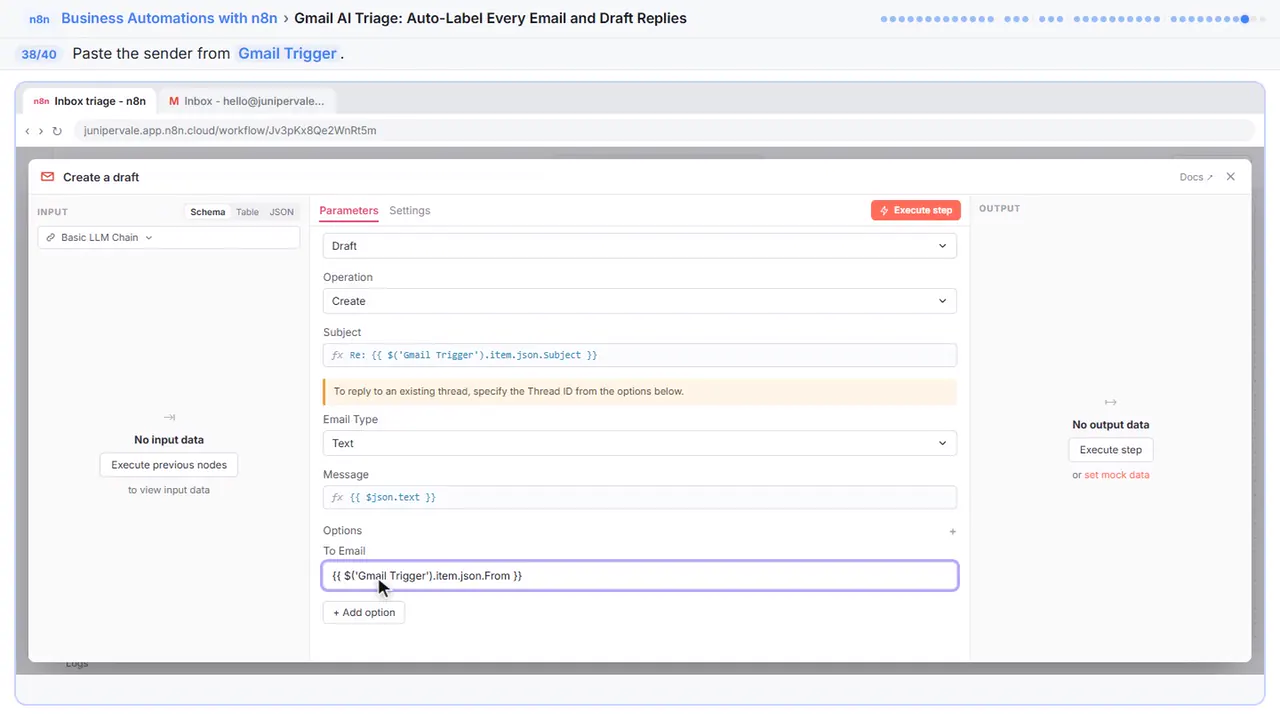
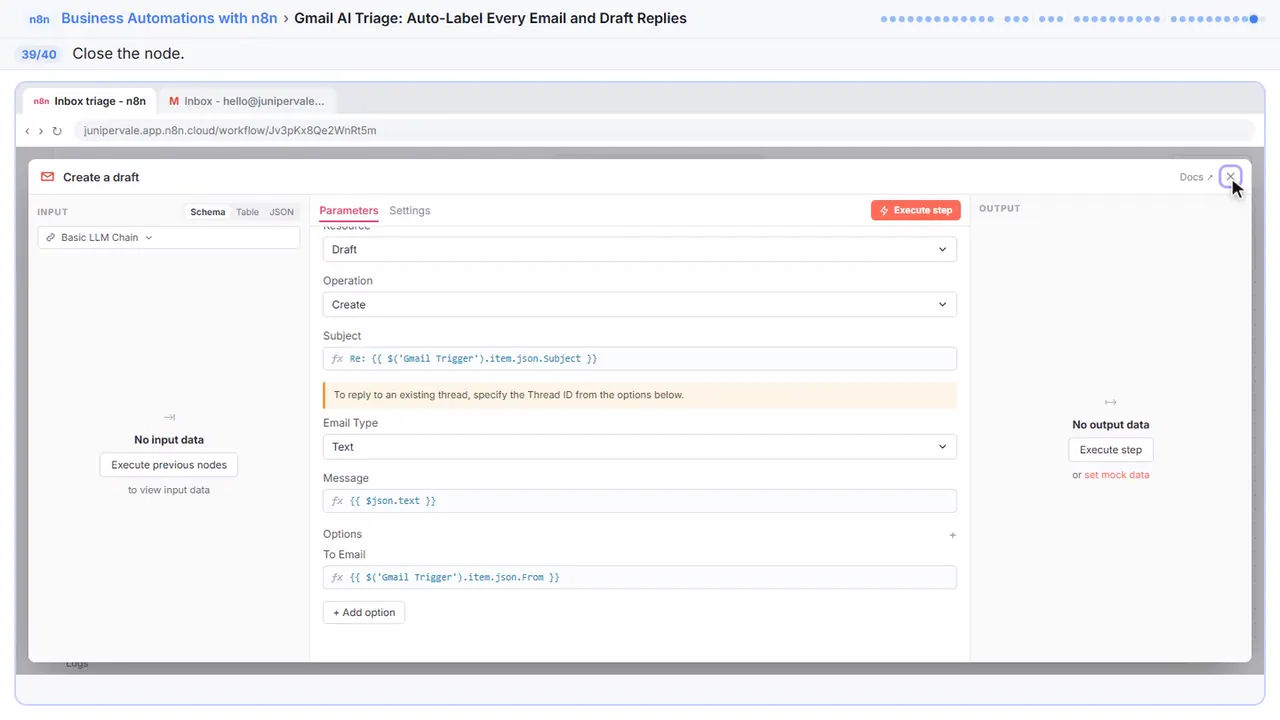
Step 39: Close the node
Close it.
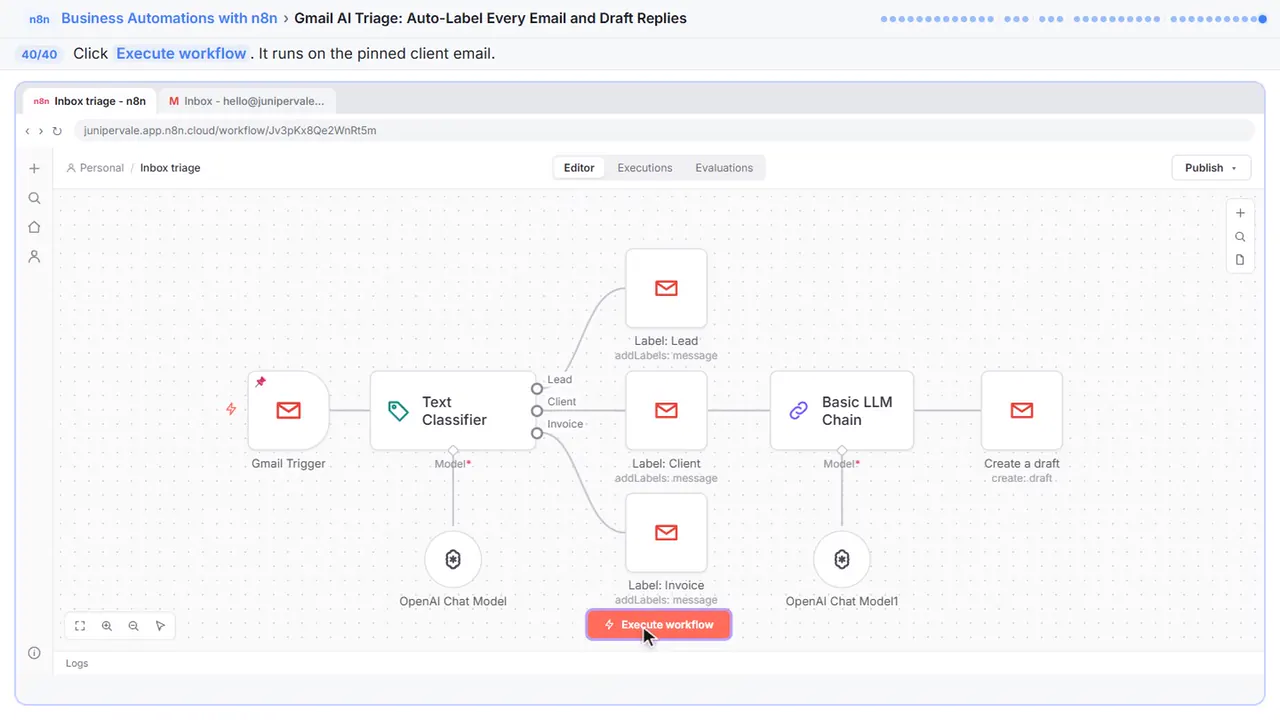
Step 40: Test it
Priya's email goes out the Client side, gets the Client label, and a short reply waits in Drafts. Check it in Gmail, then publish. Read every draft before you send it.
Now do it yourself, free
Reading the steps is a start. Doing them is how it sticks. The interactive lesson puts you in a practice copy of n8n: you do every step yourself, it checks your work, and “Do it for me” finishes any step you get stuck on. Nothing touches your real accounts.
Practice “Gmail AI Triage: Auto-Label Every Email and Draft Replies” step by stepGmail AI Triage: Auto-Label Every Email and Draft Replies: video walkthrough
The whole lesson in 2:31, narrated step by step.
Simulated practice environment. Recorded in Stepthrough’s simulated practice environment, not the live tool. Practice it yourself free at learn.ynteractive.com.
Chapters
Click a chapter to jump the video there.
Now do it yourself, free
Watching is the warm-up. The interactive lesson puts you in a practice copy of n8n: you do every step yourself, it checks your work, and “Do it for me” finishes any step you get stuck on. Nothing touches your real accounts.
Practice “Gmail AI Triage: Auto-Label Every Email and Draft Replies” step by stepFull transcript
Sort every email
0:00 You're Sam at Juniper and Vale Marketing, and every morning starts with sorting the inbox. Let AI do it. This workflow already has a Gmail Trigger with a client email pinned, and three steps that each add one Gmail label. What's missing is the part that decides. Click the plus after the Gmail Trigger.
0:15 Type classifier.
0:16 Click Text Classifier. It reads some text and sends it down one output per category.
0:22 Paste this into Text to Classify. The sender, the subject and the start of the message are usually enough to tell what an email is.
0:29 Now the categories. Click Add Category.
0:32 Type Lead.
0:33 Add a description. Lead and Client both sound like customers, so spell out the difference. A lead is someone new.
0:38 Add another category.
0:40 Type Client.
0:41 A client already works with you and writes about their own project.
0:45 One more.
0:46 Type Invoice. That one is obvious, so it needs no description. Anything that fits none of the three is dropped and stays unlabeled.
0:53 Close it.
Apply the labels
0:54 Give it a model. Click the plus under Model.
0:56 OpenAI Chat Model.
0:58 Your saved OpenAI key is already picked. Close it.
1:01 The classifier now has one output per category. Connect each one to its label step. Drag from Lead to Label: Lead.
1:08 Client to Label: Client.
1:10 And Invoice to Label: Invoice. Each label step adds its Gmail label to that email.
Write the reply
1:14 Client emails also get a reply ready for you. Click the plus after Label: Client.
1:19 Type llm.
1:20 Click Basic LLM Chain. It sends one prompt to a model and returns the text.
1:25 It expects a chat message by default, and ours is an email. Open Source for Prompt.
1:30 Define below.
1:31 Paste the prompt. It says what to write and what not to promise, and it pulls the email from the Gmail Trigger by name, because the step right before this one only returns the label result.
1:41 Close it.
1:42 This one needs a model too. Click the plus under its Model.
1:45 OpenAI Chat Model.
1:46 Close it.
Save it as a draft
1:47 Now save that reply as a draft. Click the plus after the chain.
1:51 Type gmail.
1:52 Gmail.
1:53 Under Draft Actions, click Create a draft. It saves a draft and never sends, so you read it first.
1:58 Paste the subject: R E, then the original subject.
2:02 In Message, paste this. It is the text the chain wrote.
2:05 Without a recipient, the draft has nobody to go to. Click Add option.
2:09 To Email.
2:10 Paste the sender from the Gmail Trigger.
2:13 Close it.
2:14 Click Execute workflow. Priya's email goes out the Client side, gets the Client label, and a short reply waits in Drafts. Check it in Gmail, then publish. Read every draft before you send it.
2:24 Simple as that. We show you and you do it. Sign up below to learn AI automation for free.
What you will build
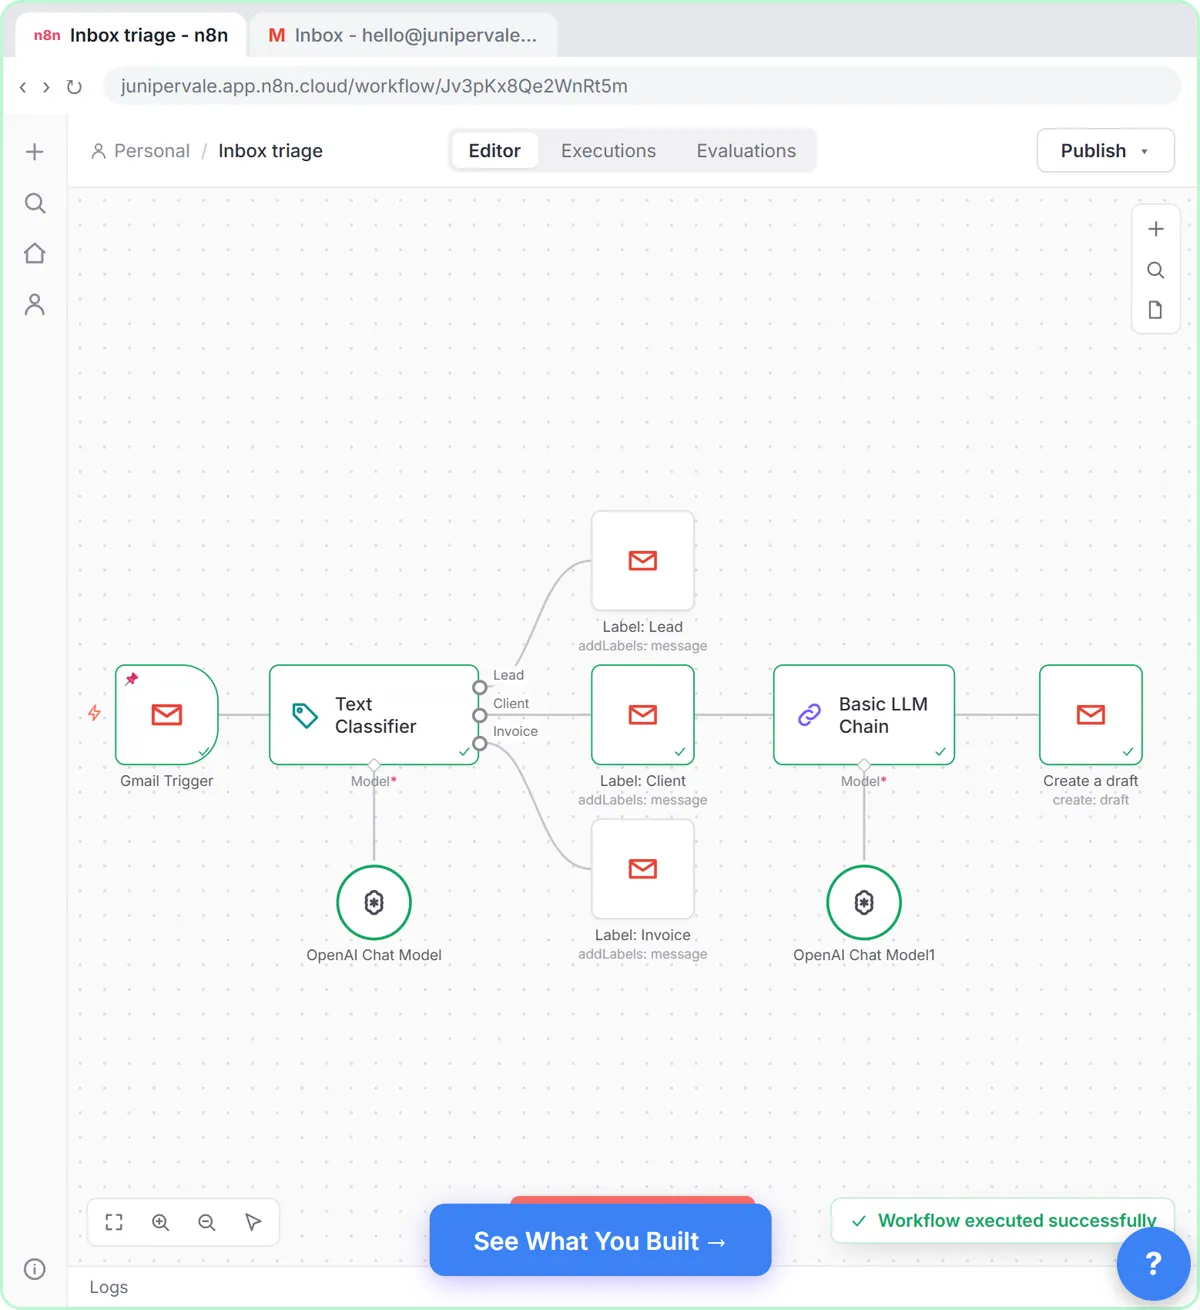
You are Sam at Juniper & Vale Marketing, a made-up agency. The workflow already has a Gmail Trigger with one email pinned to it, from Priya at Fernhill Bakery asking to move the October newsletter to Thursday, and three steps that each add a Gmail label: Label: Lead, Label: Client and Label: Invoice.
You add a Text Classifier with an OpenAI Chat Model and three categories. Lead and Client get a one-line description each, because both sound like customers. You connect each of the classifier's outputs to its label step. After Label: Client you add a Basic LLM Chain that writes a short reply, then Gmail's Create a draft saves it, addressed back to the sender. One test run sends Priya's email down the Client branch, labels it, and leaves a draft for Sam to read.
Why descriptions matter
A Text Classifier only knows your categories by their names and descriptions. "Invoice" is obvious. "Lead" and "Client" are not: both are people who might pay you. One plain sentence for each, new versus existing, is what keeps a client's question from being treated as a cold lead. If a type of email keeps landing in the wrong place, sharpen that description first. Anything that fits none of the categories is dropped by default and simply stays unlabeled. Choose Output on Extra, 'Other' Branch under When No Clear Match if you want to catch those too.
Gotchas worth knowing
- Create the Lead, Client and Invoice labels in Gmail first. Add label to message picks from labels that already exist.
- The label step only returns the message's id, threadId and labels, so the reply prompt and the draft read the email from the Gmail Trigger by name: $('Gmail Trigger').item.json.snippet.
- Basic LLM Chain expects a chat message by default. Switch Source for Prompt to Define below.
- A draft has no recipient unless you add the To Email option. Add Thread ID too if you want the draft to sit under the original email.
- Gmail's own filters and spam folder still run first. This sorts what reaches your inbox.
What you need
- An n8n account: n8n Cloud from about €20 a month with a free trial, or the free self-hosted Community Edition.
- An OpenAI API key with a little credit. Classifying one email and writing a short reply costs a fraction of a cent.
- Gmail connected in n8n, with the three labels created.
Keep it safe
The workflow only labels and drafts. It never sends, deletes or archives. Read every draft before you send it, and watch the labels for the first week. Emails pass through OpenAI to be classified, so check your company's rules on client data first.
Try it yourself, free
Reading the steps is a start. Doing them is how it sticks. The interactive module walks you through every click in a practice copy of n8n, checks each step, and never touches your real accounts.
Start “Gmail AI Triage: Auto-Label Every Email and Draft Replies”Screenshots
Frequently asked questions
- How does the interactive lesson work?
- Each step is shown to you first on the left (Watch). Then you do it yourself in a practice copy on the right (Your turn), and every click is checked. If you get stuck, press Do it for me. It is a practice copy, so no real accounts are touched.
- Is this free?
- Stepthrough is completely free. Running the workflow for real needs your own n8n account, an OpenAI API key with some credit, and Gmail.
- Will it send emails for me?
- No. Client emails get a reply saved as a draft. You read it, change it if needed, and send it yourself.
- Can I add more categories?
- Yes. Add another category in the Text Classifier, then a label step for its new output. Keep each description to one clear sentence.
- How is this different from Gmail filters?
- Filters match fixed words or senders. The classifier reads what the email is about, so a new client's question gets the right label even if it doesn't contain the words a filter looks for.
More in Business Automations
 AI Receipt Extractor: Receipts to Google Sheets with n8n
Drop a photo of a receipt into an n8n chat. An AI agent reads it, pulls out the date, vendor and amount, picks a category, and adds a row to Google Sheets.
Free · Live ~12 min
 AI Email Responder: Draft Gmail Replies Automatically with n8n
Build an n8n agent that watches your Gmail, reads each new customer email, and writes a reply as a draft in the same thread, ready for you to check and send.
Free · Live ~12 min
All 5 modules in Business Automations
More n8n tutorials
 n8n AI Agent Tutorial: Save Social Media Ideas to Google Sheets
Build an AI agent for BrightPath Marketing that generates social media post ideas and saves them to Google Sheets — chat trigger, AI Agent, system prompt, model…
Free · Live ~12 min
 Lovable + n8n: Build a Web App with an AI Backend
Build a contact form in Lovable and connect it to an n8n workflow — webhook trigger, AI Agent, Google Sheets, Gmail, and a Respond node that ties it all together.
Free · Live ~15 min
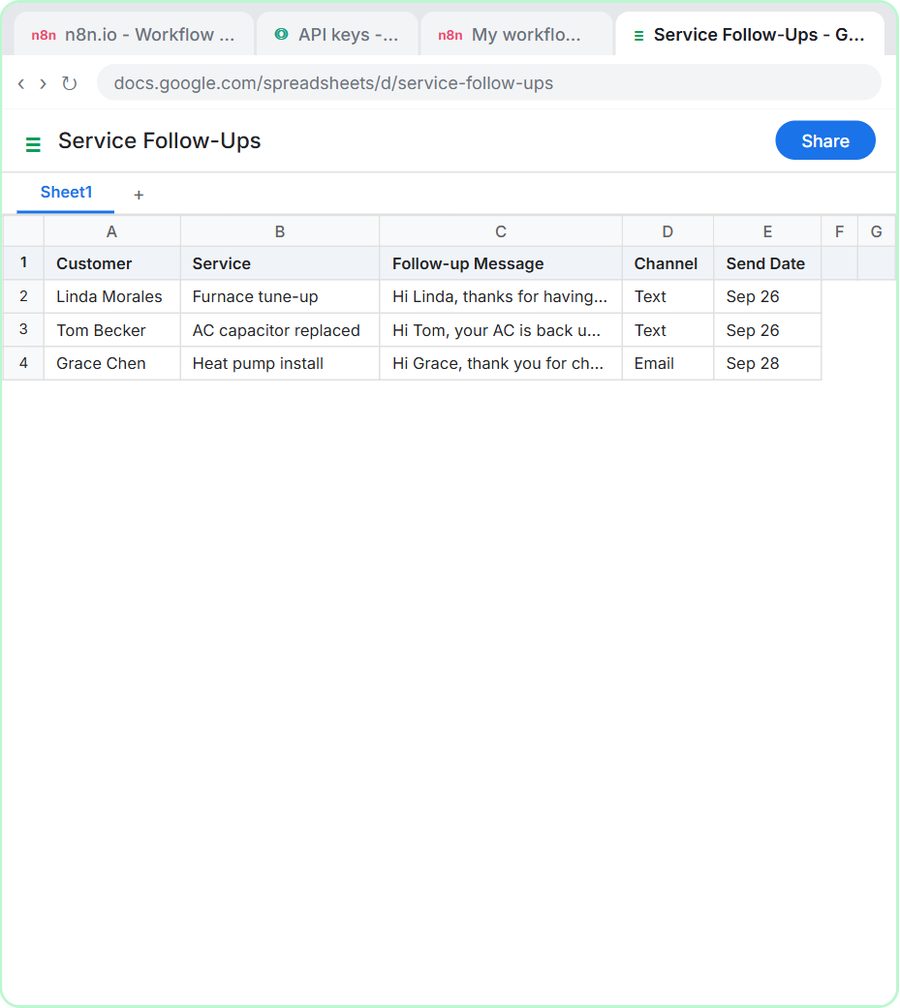 Build an AI Follow-Up Agent for HVAC Service Calls
Build an AI agent for Cedar Ridge Heating & Air that writes follow-up messages for completed service calls and saves them to Google Sheets — chat trigger, AI Agent…
Free · Live ~12 min
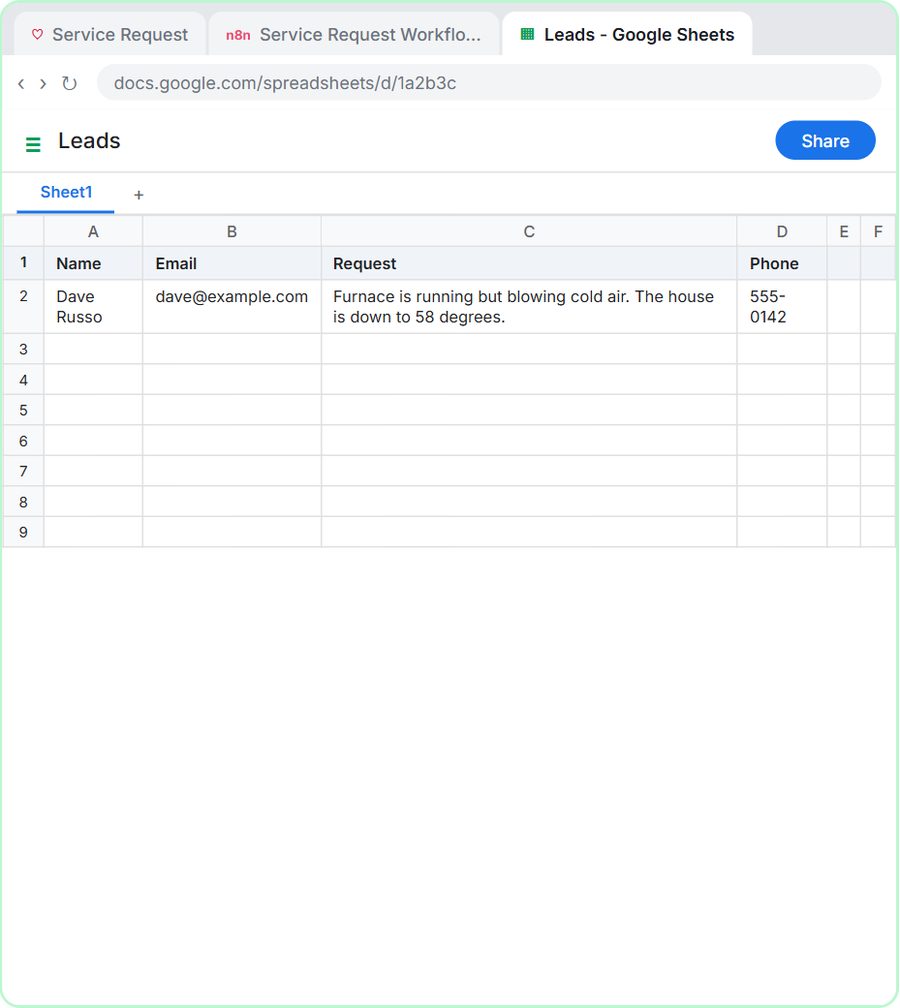 Build an AI Service Request Form for Your HVAC Company
Build a service request form in Lovable for Cedar Ridge Heating & Air and connect it to n8n — the AI agent sorts each job into repair, maintenance, install or…
Free · Live ~15 min
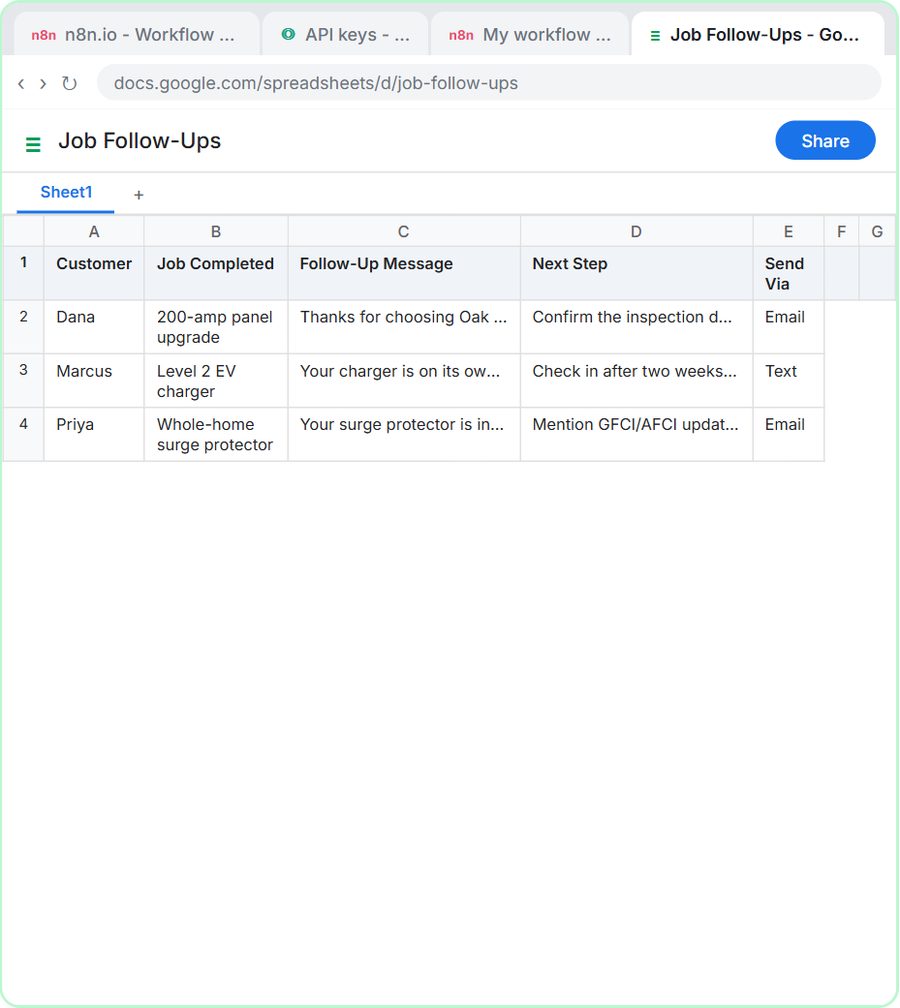 Build an AI Job Follow-Up Agent for Electricians
Build an AI agent for Oak & Wire Electric that writes follow-up messages after completed jobs and tracks them in Google Sheets — chat trigger, AI Agent, system prompt…
Free · Live ~12 min
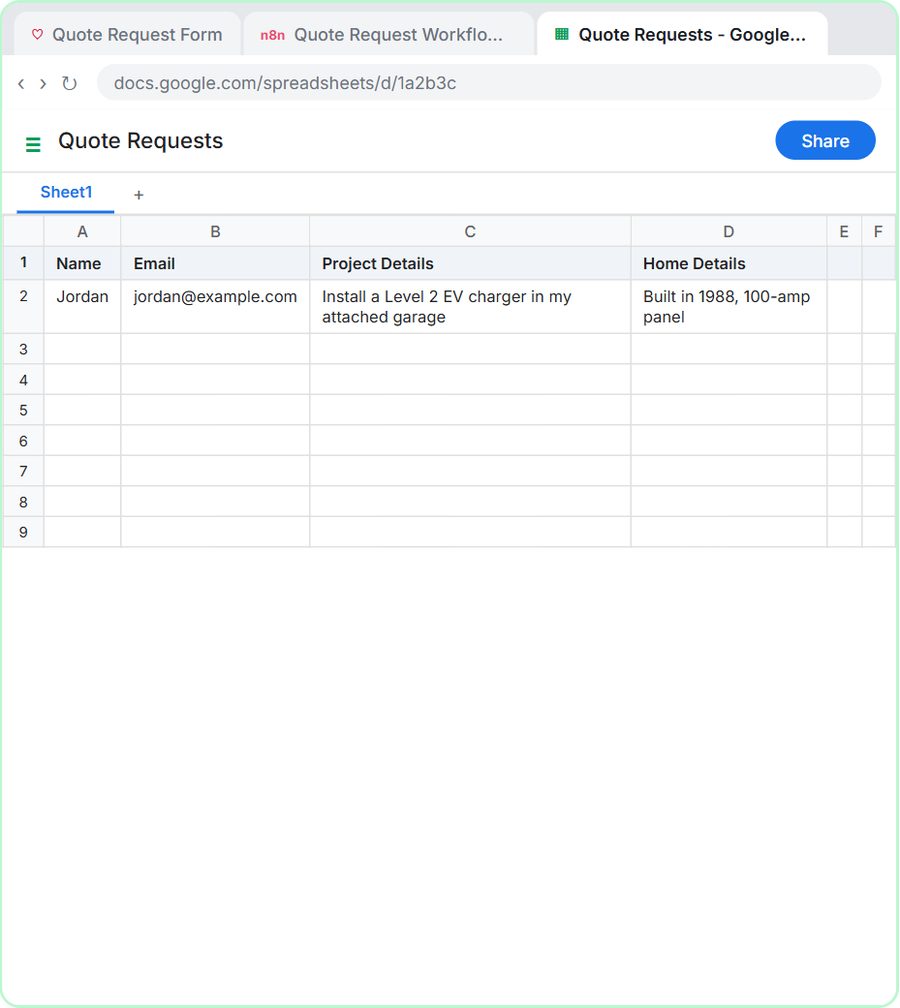 Build an AI Quote Request Form for Electrical Contractors
Build a quote request form in Lovable and connect it to an n8n workflow — webhook trigger, an AI Agent that drafts an initial estimate note, Google Sheets, Gmail, and a…
Free · Live ~15 min
Terms in this lesson
Plain-English definitions, each with an example from a free lesson.