Updated . Built against the tool’s current screens and checked step by step. How we check this lesson
Most small firms build a new service first and find out later whether anyone wants it. A one-page site with a sign-up box answers that question in a few weeks, for almost nothing. Mixo (mixo.io) is an AI website builder: you describe your idea in one sentence, it builds the page, and you edit and publish it. In this free business-case lesson you help a made-up bookkeeping firm test a monthly Cash-Flow Check-in service, then follow Mixo's own help center to generate the page, rewrite the headline, turn the button into a sign-up form, add your logo and color, publish it and download the list of people who signed up. The screenshots on this page and in the lesson come from Mixo's help center, credited and linked under each one, so they show Mixo's demo sites. This is my own lesson, not an official Mixo course.
At a glance
| Question | Answer |
|---|---|
| What you build | A business case for a firm testing a new service before building it: describe the idea in one sentence, let Mixo build the page, turn on a sign-up form, publish it free and download the list of people who want it. |
| Tools | Mixo |
| Time | About 12 minutes, 17 steps in 7 parts |
| Level | Beginner, no coding needed |
| Cost | Free |
| Ways to learn it | Practice it step by step, read the guide with screenshots |
The 7 parts, in short
- Test the idea before you build it: Price the risk, Meet Mixo.
- Describe the idea in one sentence: Type the idea, Generate the site, Try another style.
- Save it and open the editor: Click Save and customize, Click Edit Site.
- Make it ask for an email: Open the Hero section, Rewrite the headline, Turn on the sign-up form, Label the button.
- Save, then publish: Add your logo and color, Click Save, Click Publish.
- See who signed up: Read Recent Subscribers, Download the list.
- What to do next: Decide with real numbers.
Start here first: AI Receipt Extractor: Receipts to Google Sheets with n8n (module 1 of Business Automations)
In the course: Part 9 · n8n Automation Toolkit (Module 99 of the full course)
Part of: AI for Accounting & Bookkeeping Firms (step 32 of 41). Next up: AI Workflow Automation for Beginners: Sort Every Client Inquiry and Draft the Reply using n8n
Part of: AI for Marketing Teams (step 41 of 51). Next up: Buffer: Write One Post and Schedule It to Every Channel
Part of: AI Apps Worth Knowing (step 78 of 158). Next up: n8n + Signatoro: AI Drafts Every Reply, Signatoro Signs It
Mixo: Launch a Landing Page and Collect Early Sign-ups: step-by-step guide with screenshots
About the screenshots. They come from Stepthrough’s simulated practice environment (a practice copy of Mixo), not the live tool, so no real account appears. The buttons and labels match the real screens the lesson was built against. Practice it yourself free at learn.ynteractive.com.
- Tools: Mixo
- Time: about 12 minutes, 17 steps in 7 parts
- Level: beginner, no coding needed
Part 1: Test the idea before you build it
Step 1: Price the risk
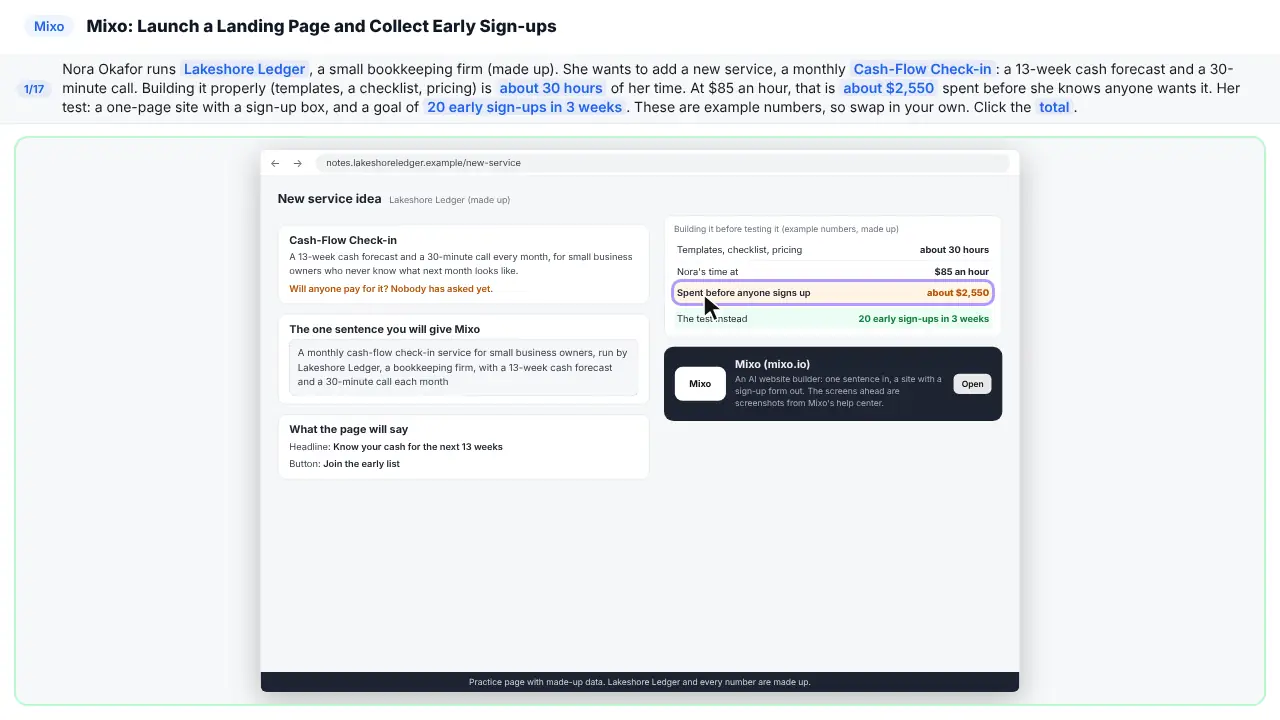
Meet Nora. She runs a small bookkeeping firm, and she wants to add a new service. Building it properly would take about thirty hours. That's real money, before she knows anyone wants it. So first, she'll test it. One page, one sign-up box, and a goal of twenty sign-ups.
Step 2: Meet Mixo
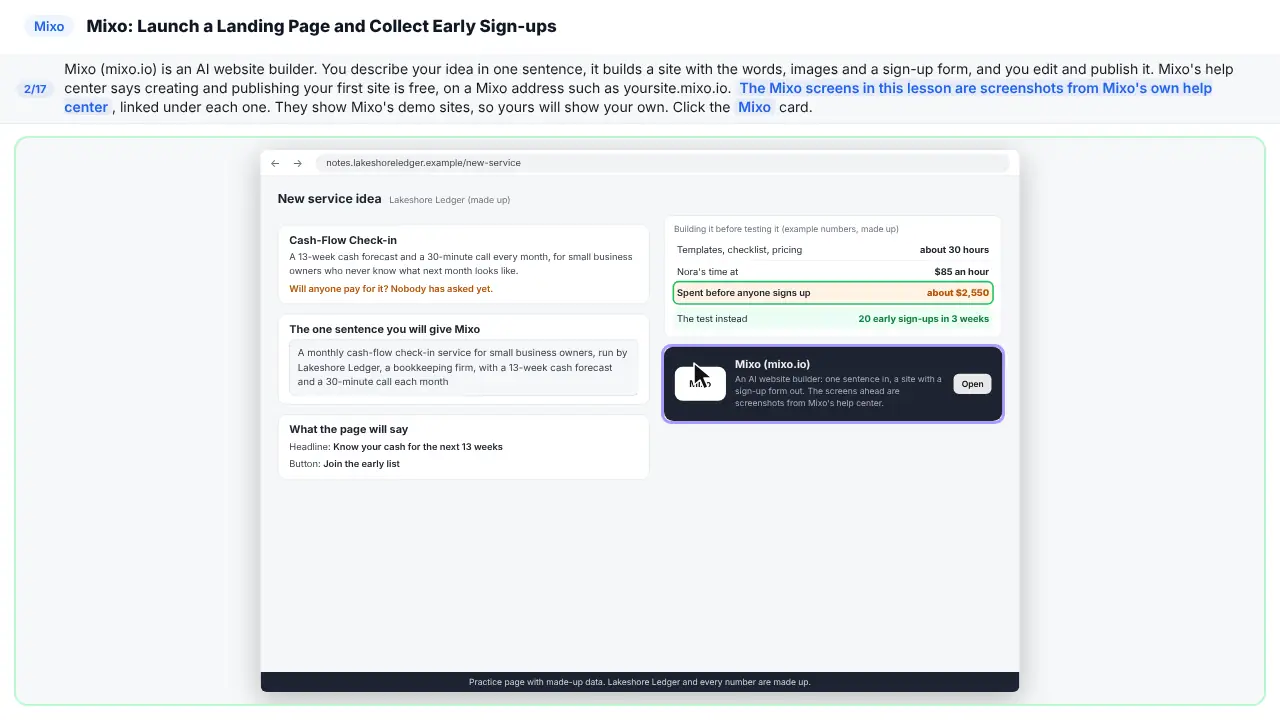
Mixo is an A I website builder. You describe your idea in one sentence, and it builds the site. The screens in this lesson are screenshots from Mixo's own help center. So the names on them are Mixo's demo sites, not Nora's.
Part 2: Describe the idea in one sentence
Step 3: Type the idea
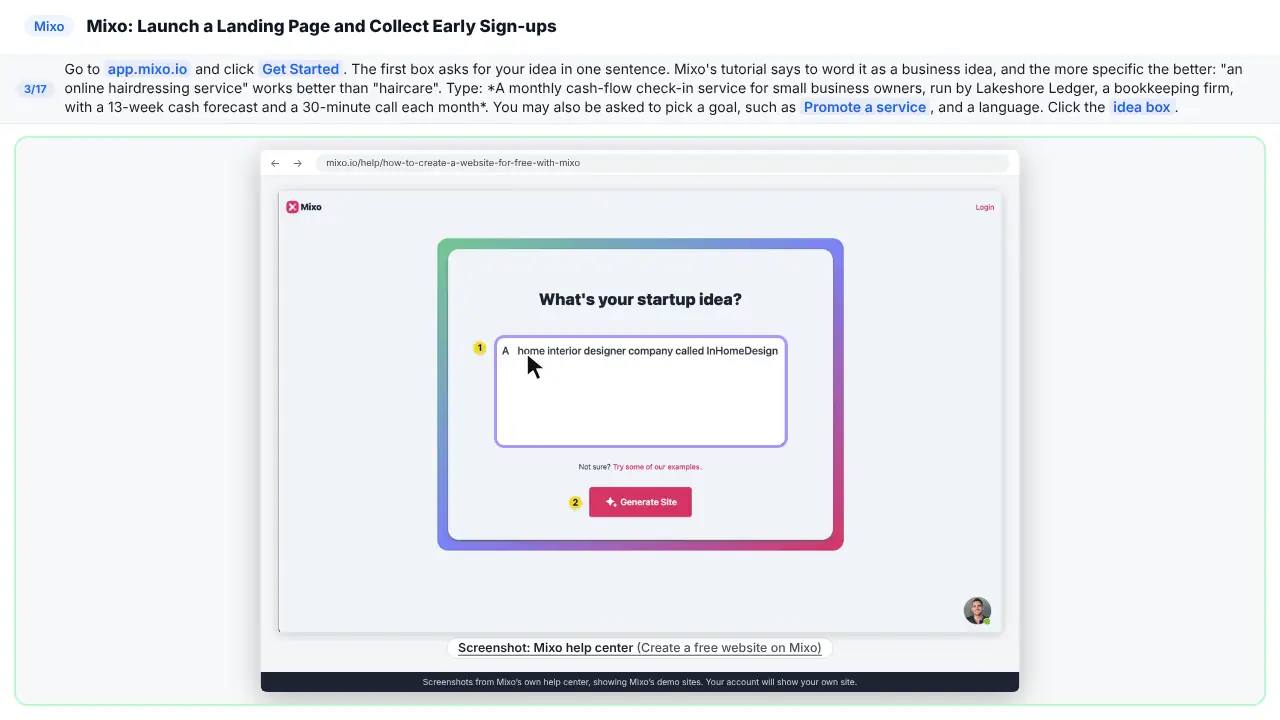
Go to app dot mixo dot io, and click Get Started. Be specific. Say what the service is, who it's for, and who runs it.
Step 4: Generate the site
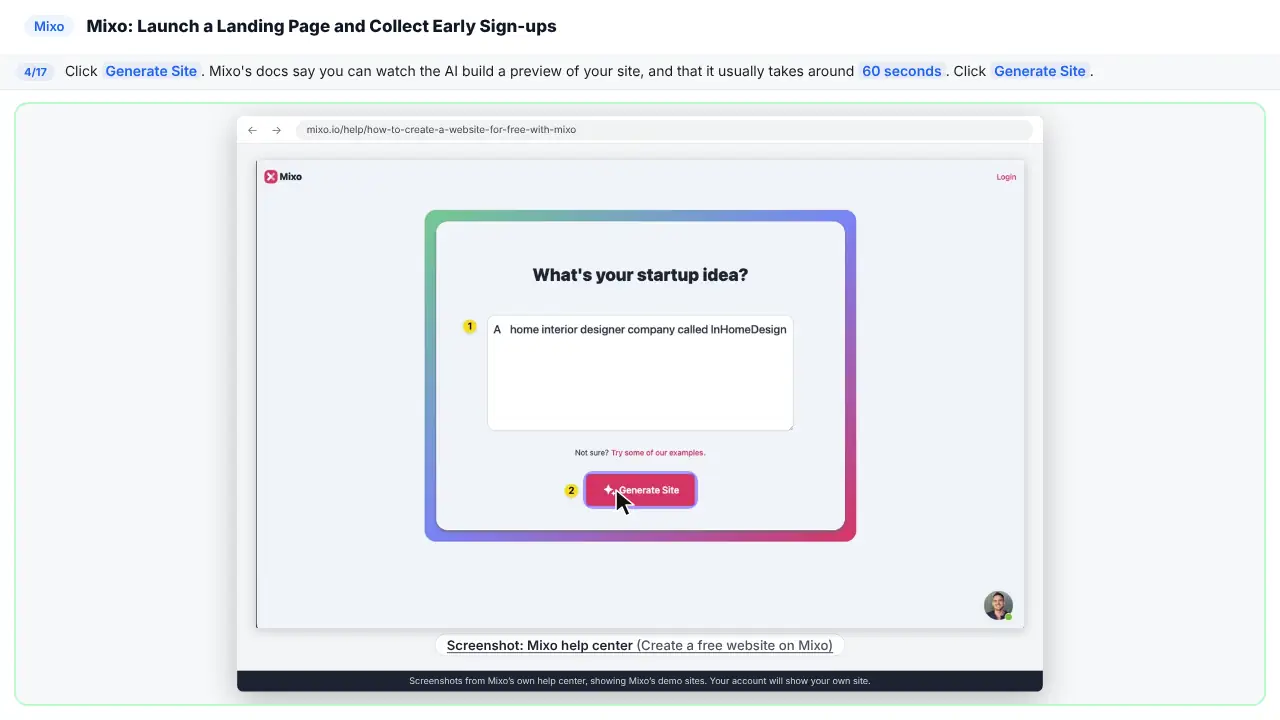
It takes about a minute, and you can watch it build.
Step 5: Try another style
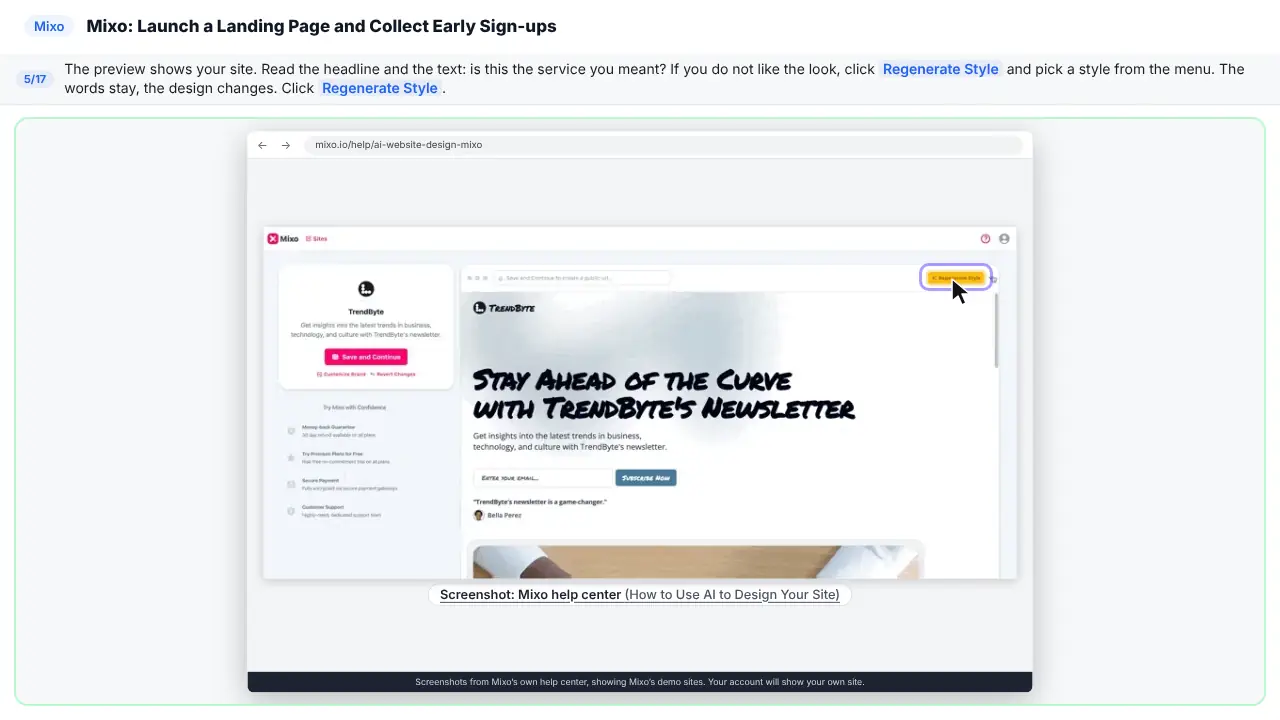
Here's your preview. Read it. Is this the service you meant? Don't like the look?
Part 3: Save it and open the editor
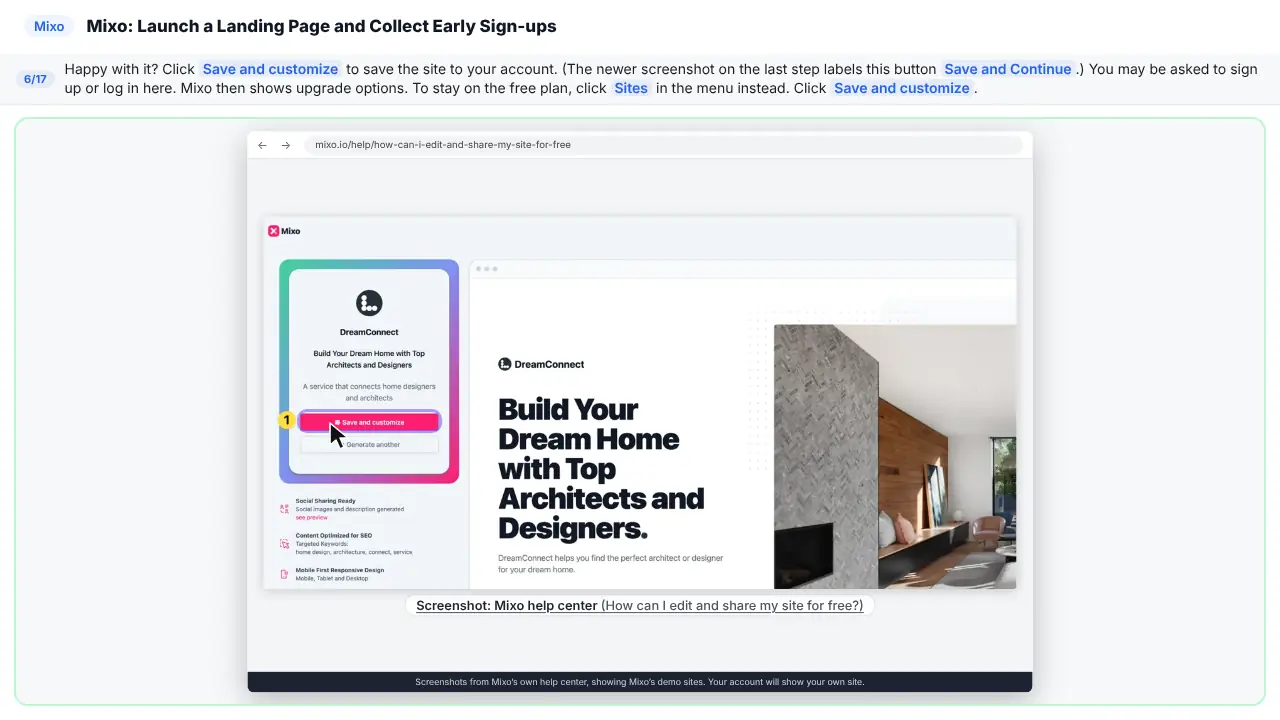
Step 6: Click Save and customize
Happy with it? You may need to sign up or log in. Then, to stay on the free plan, just go to Sites.
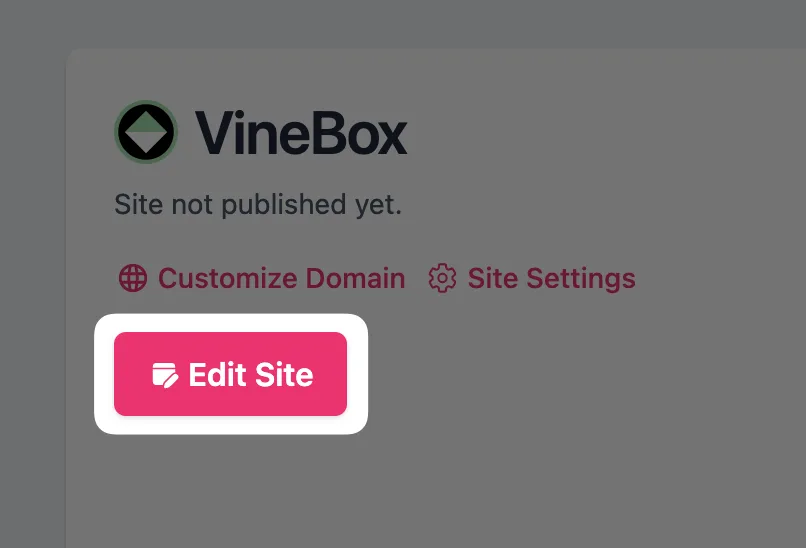
Step 7: Click Edit Site
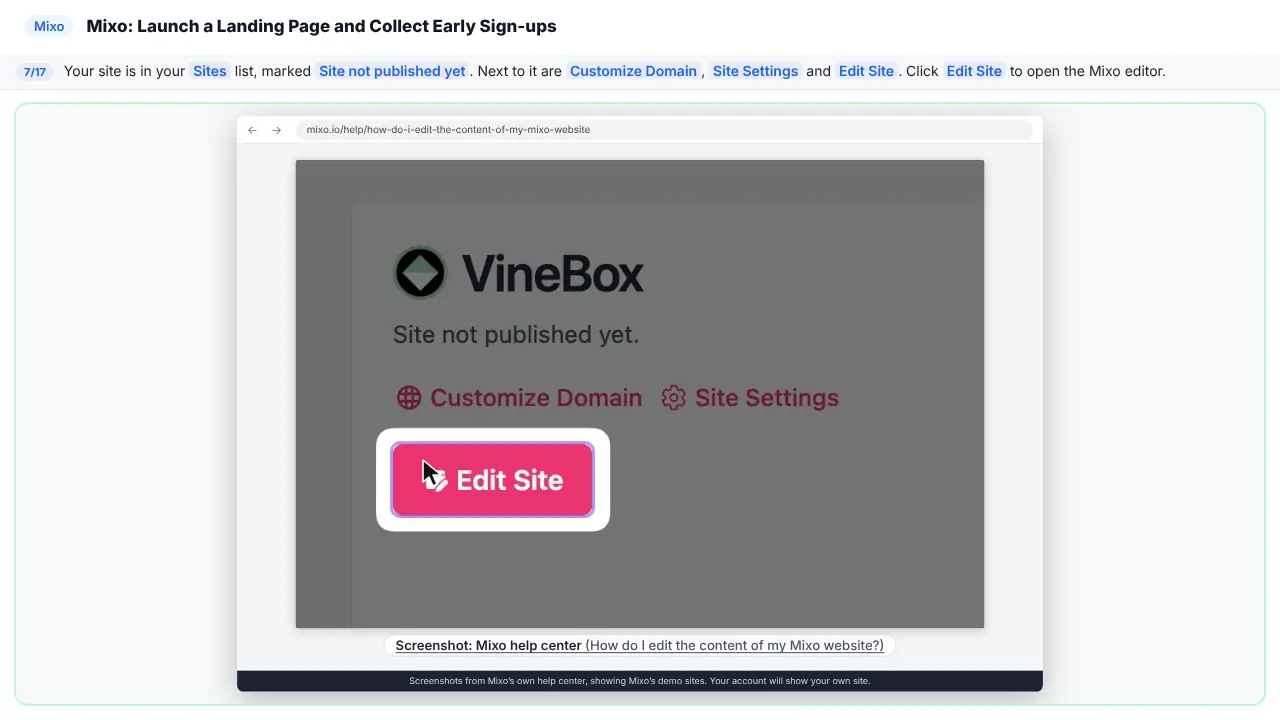
Your site is in the list, not published yet.
Part 4: Make it ask for an email
Step 8: Open the Hero section
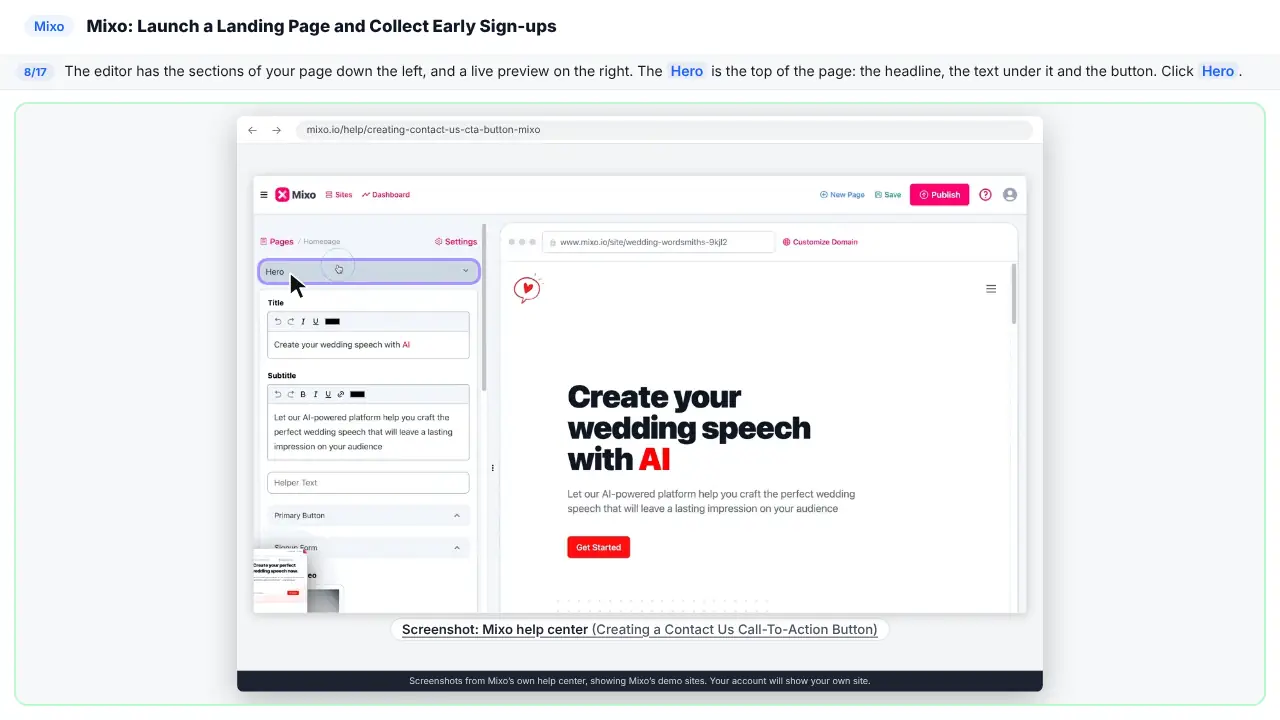
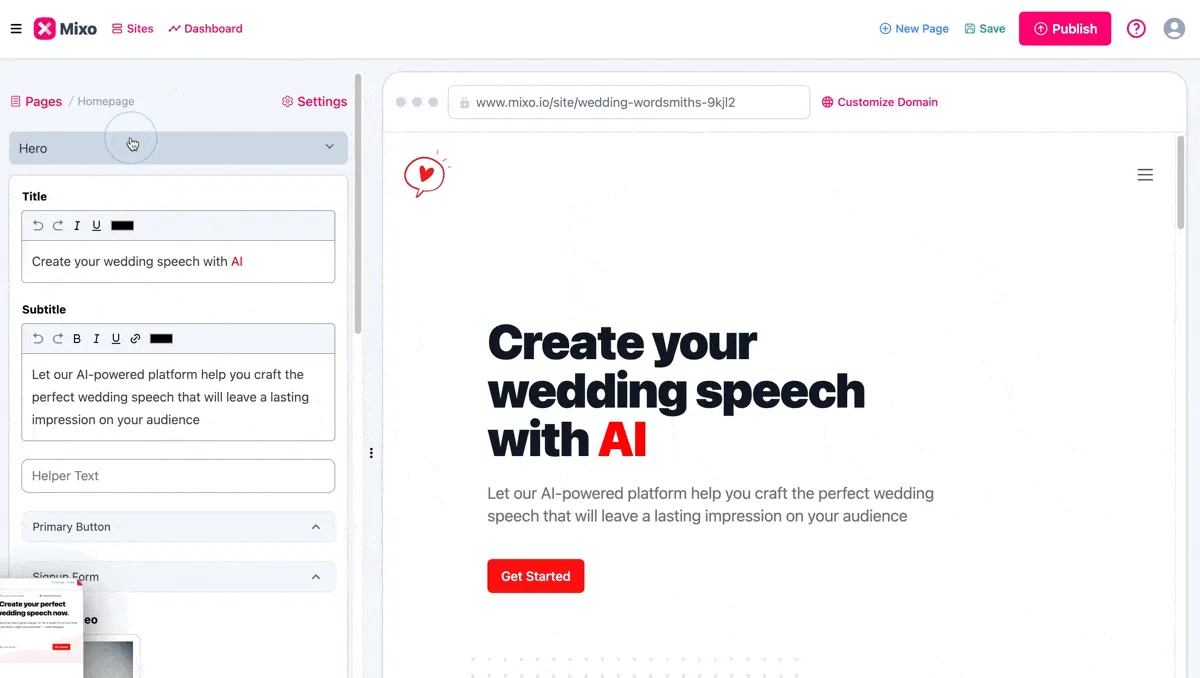
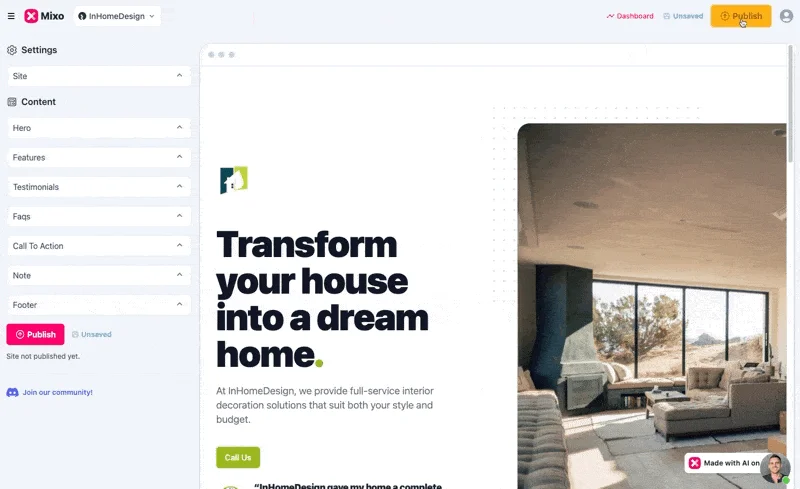
On the left are the sections of your page. On the right is a live preview. The hero is the top of the page.
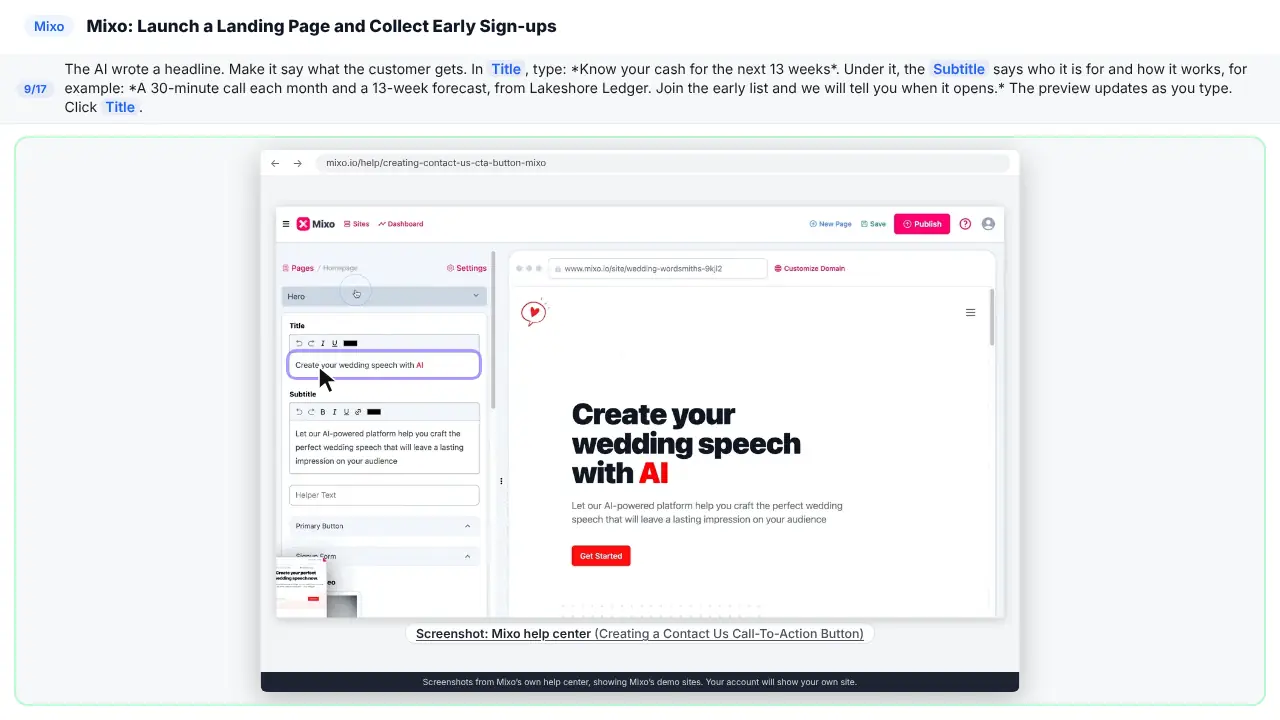
Step 9: Rewrite the headline
Make the headline say what the customer gets. Then say who it's for in the subtitle.
Step 10: Turn on the sign-up form
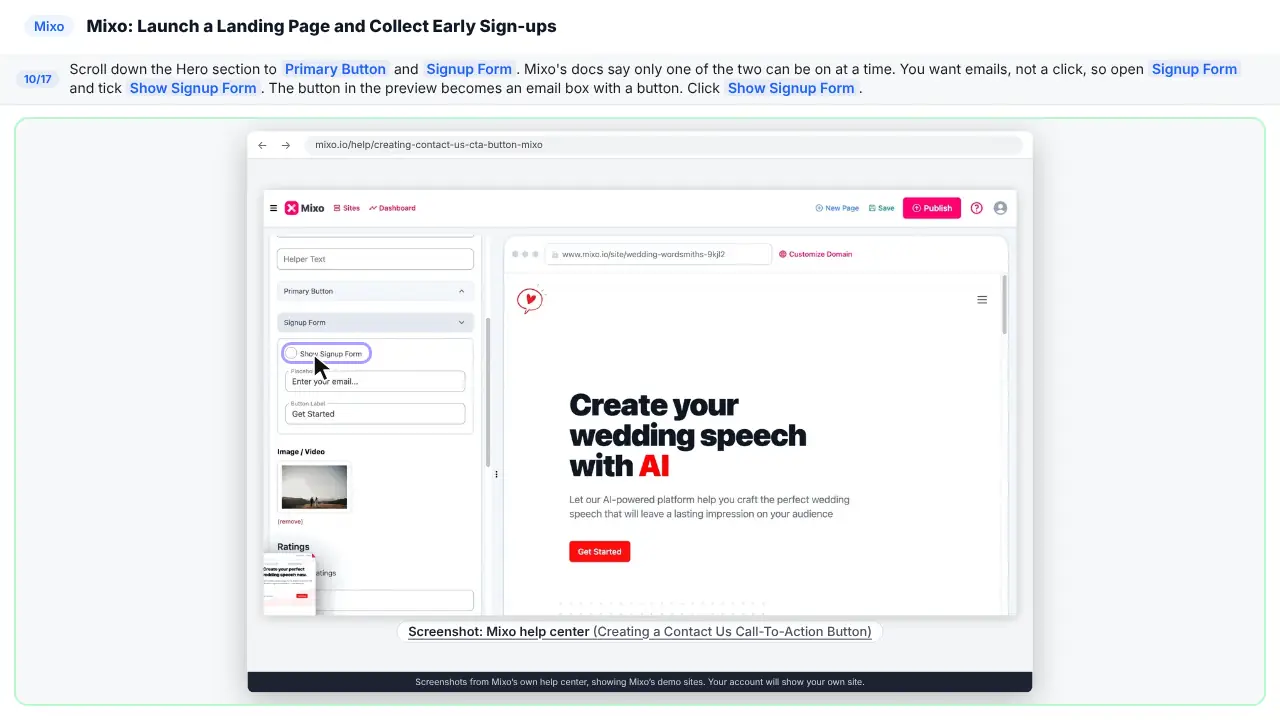
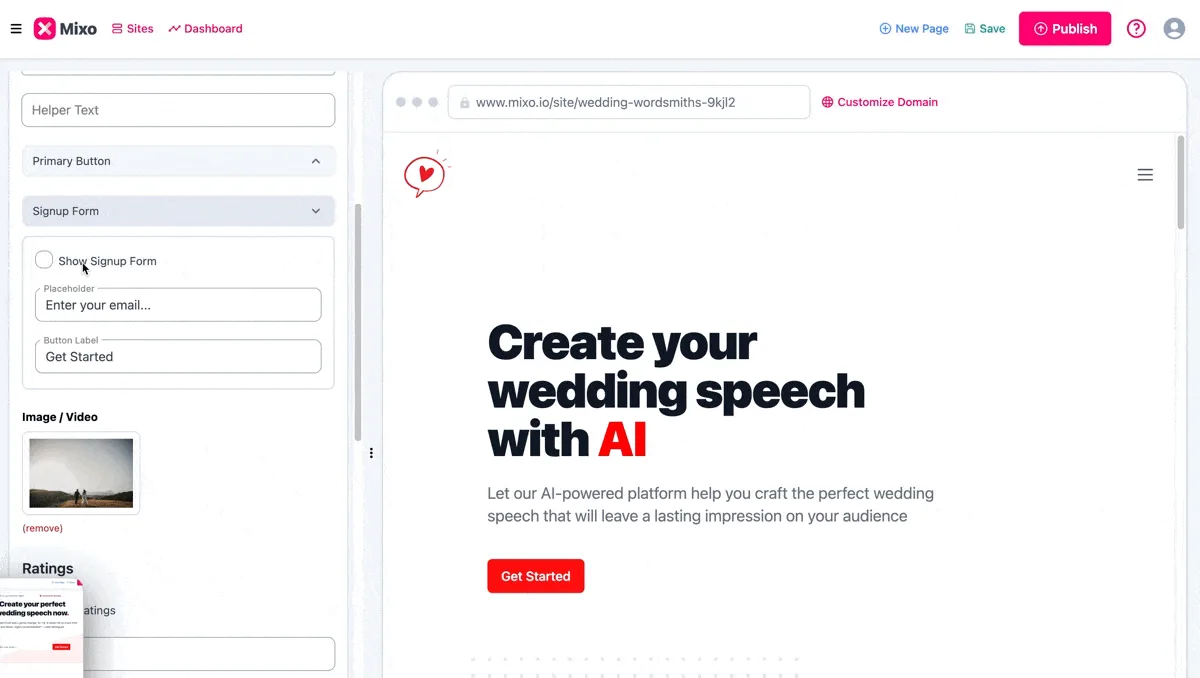
Only one can be on, the button or the form. You want emails, so tick Show Signup Form.
Step 11: Label the button
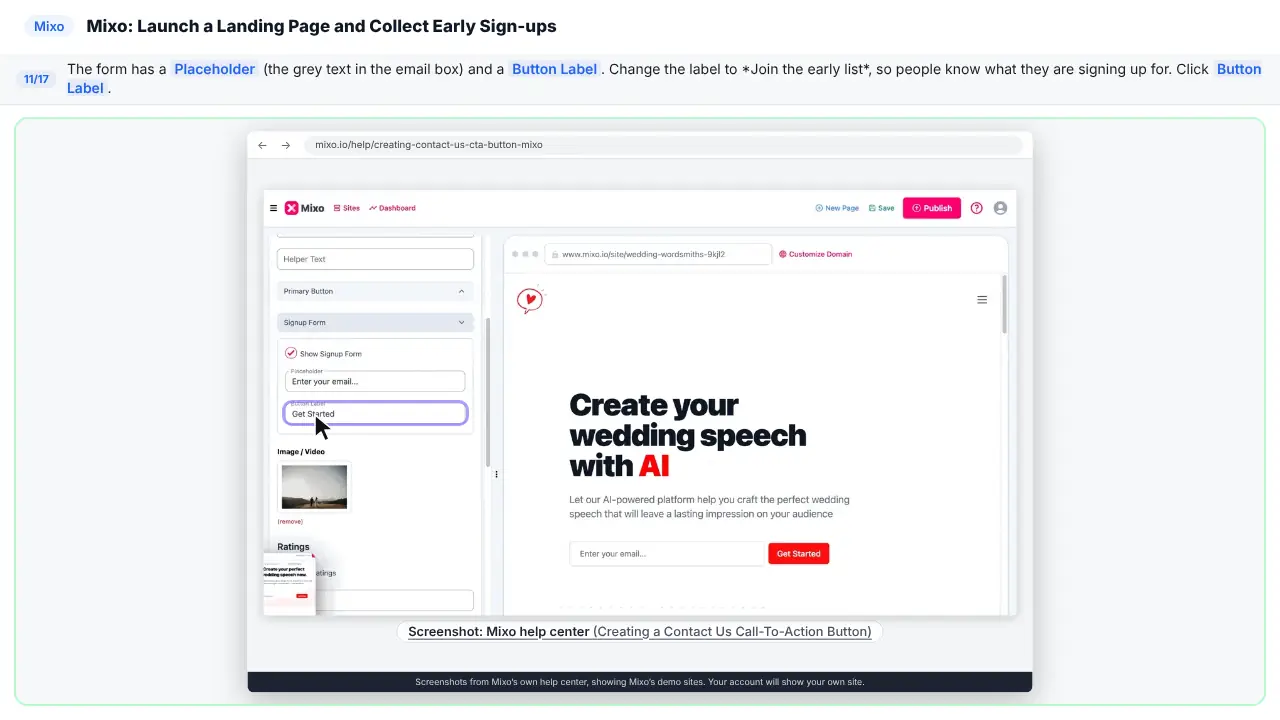
Now label the button, so people know what they're signing up for.
Part 5: Save, then publish
Step 12: Add your logo and color
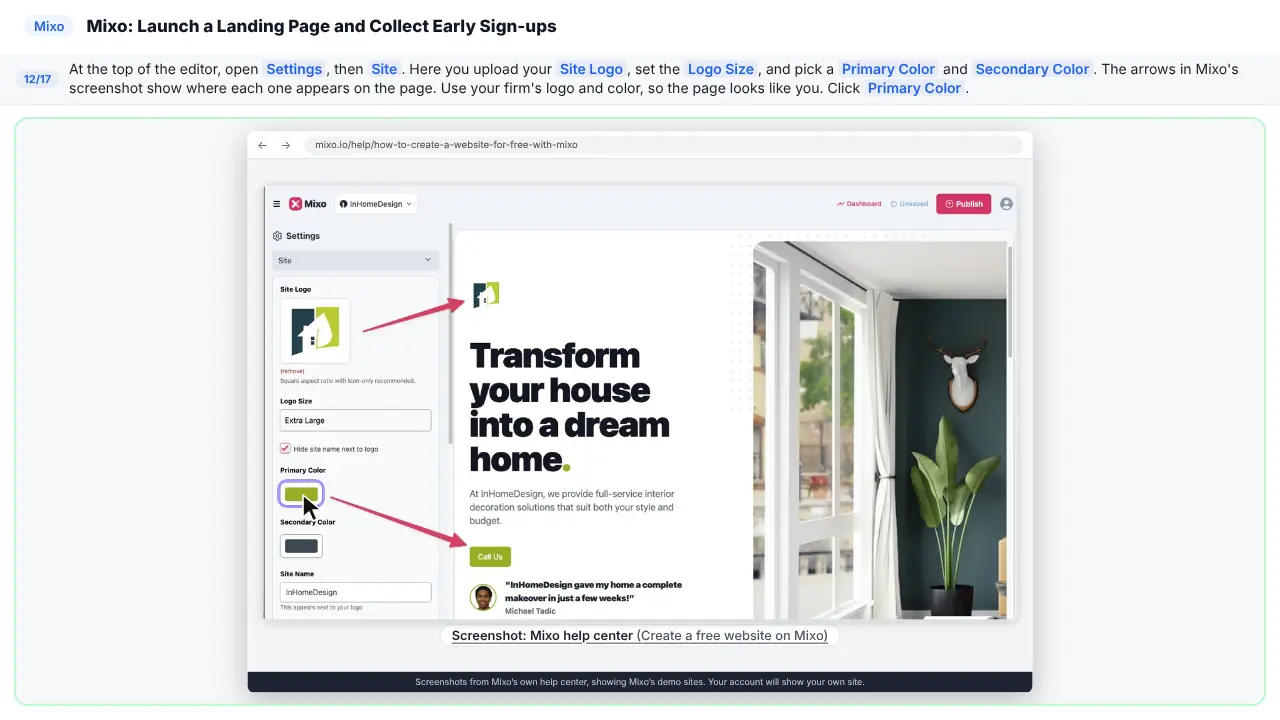
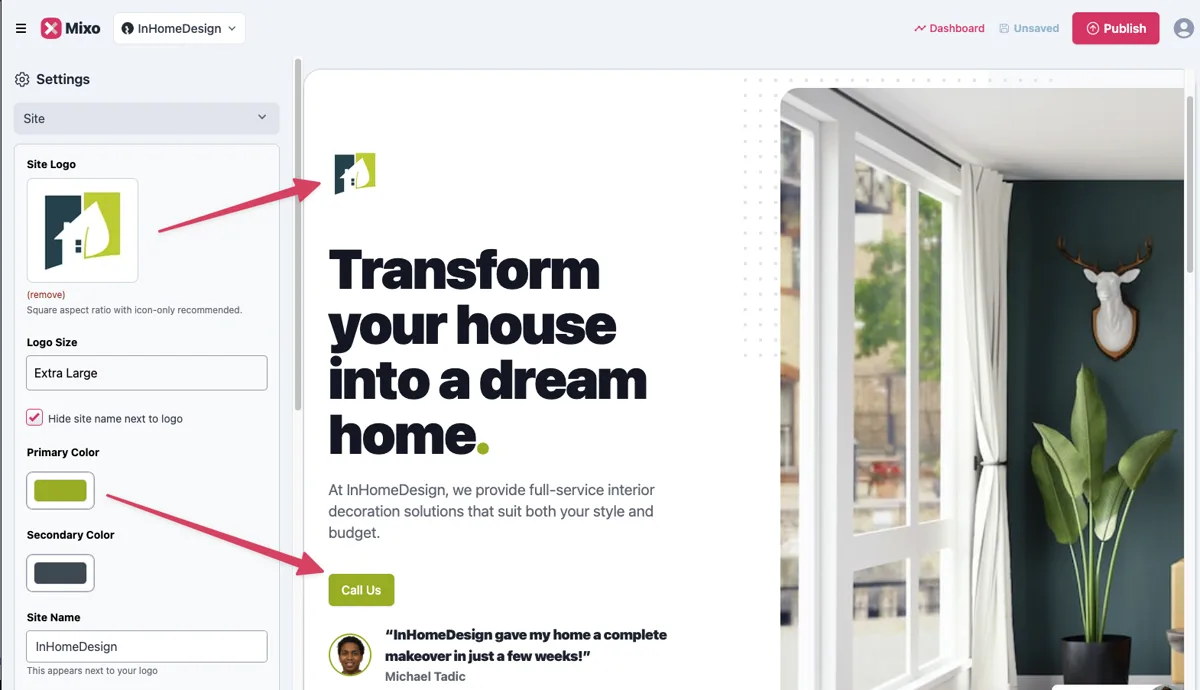
Upload your logo, and pick your brand color.
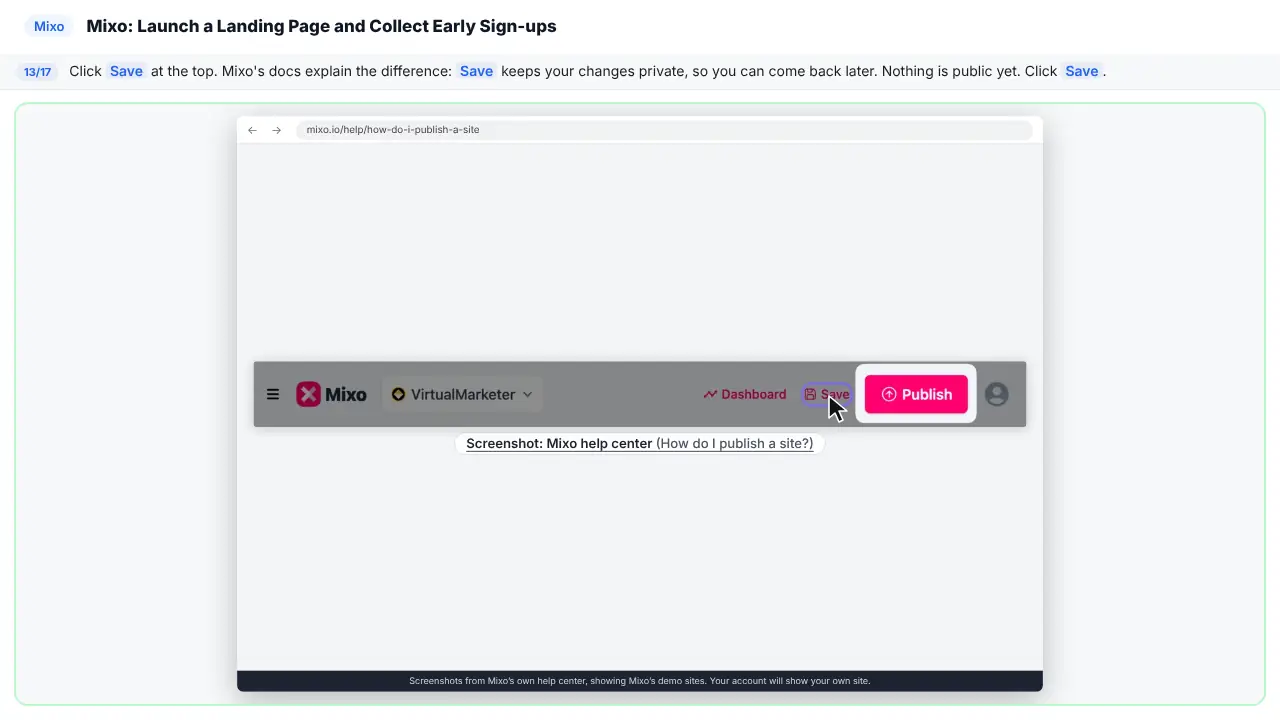
Step 13: Click Save
Saving keeps your work. It doesn't make anything public.
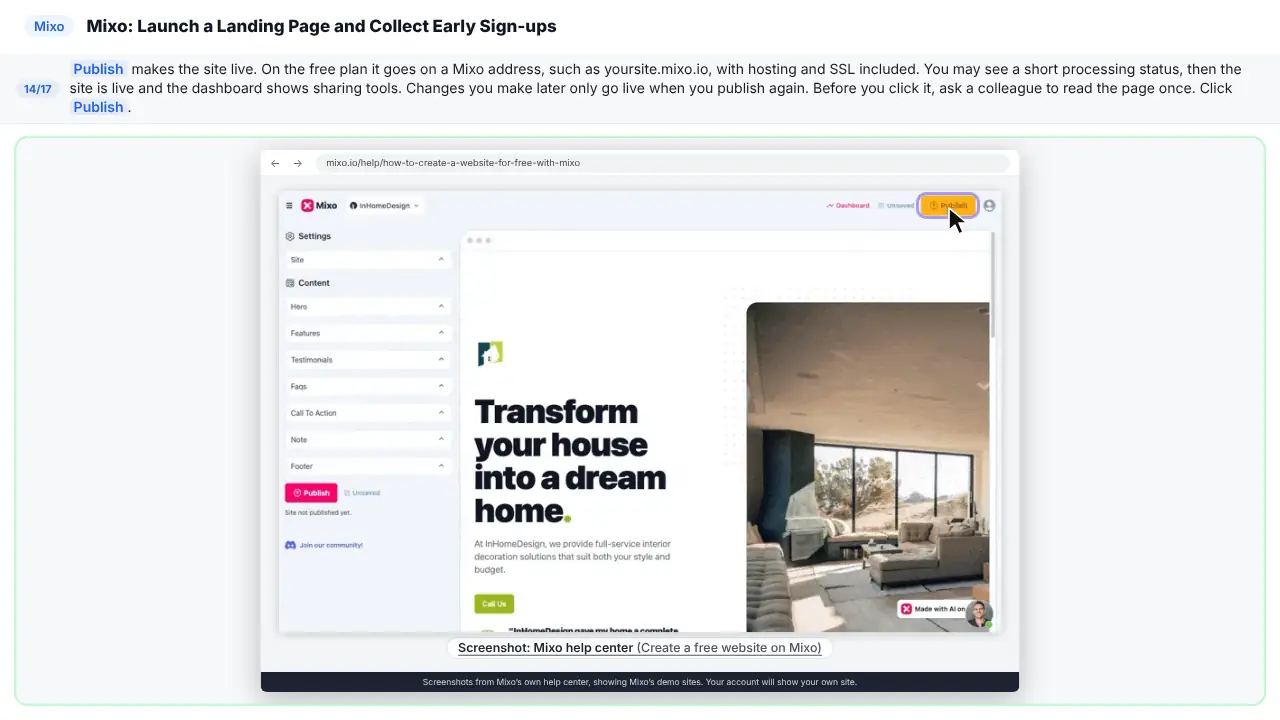
Step 14: Click Publish
Publish makes it live, on a free Mixo address. Later changes only go live when you publish again.
Part 6: See who signed up
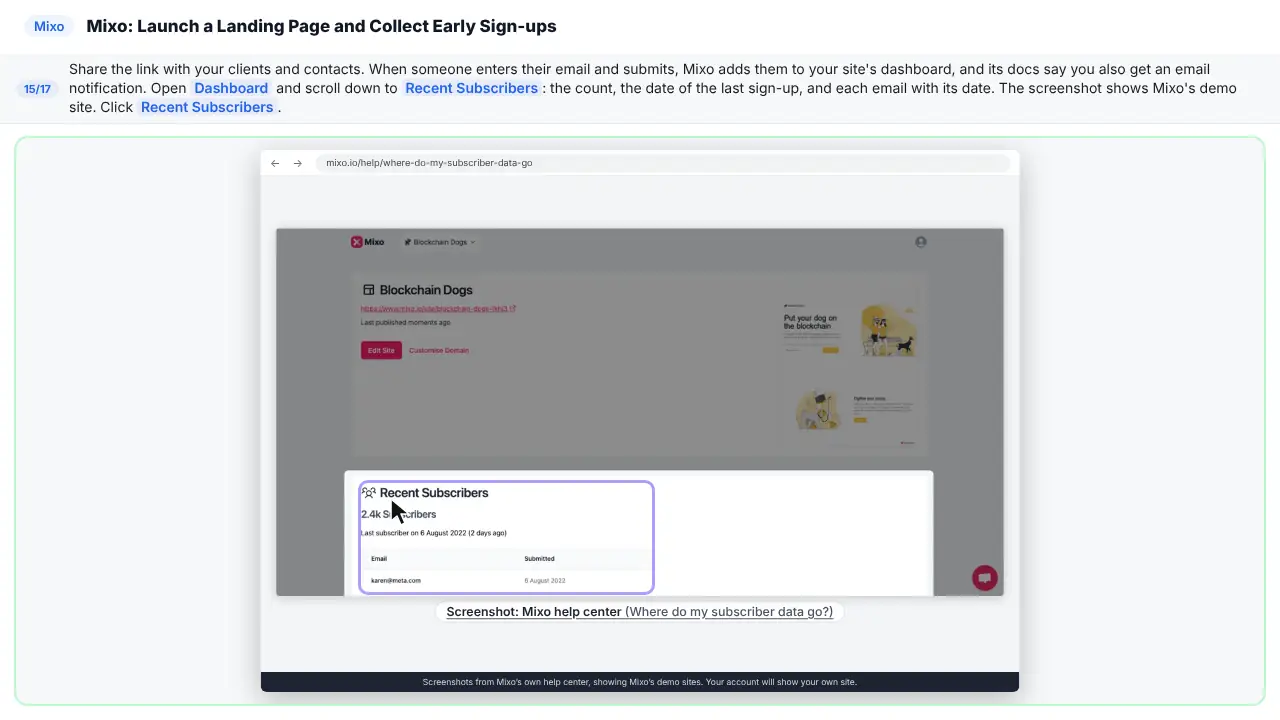
Step 15: Read Recent Subscribers
Share the link. Every time someone signs up, Mixo adds them to your dashboard, and emails you.
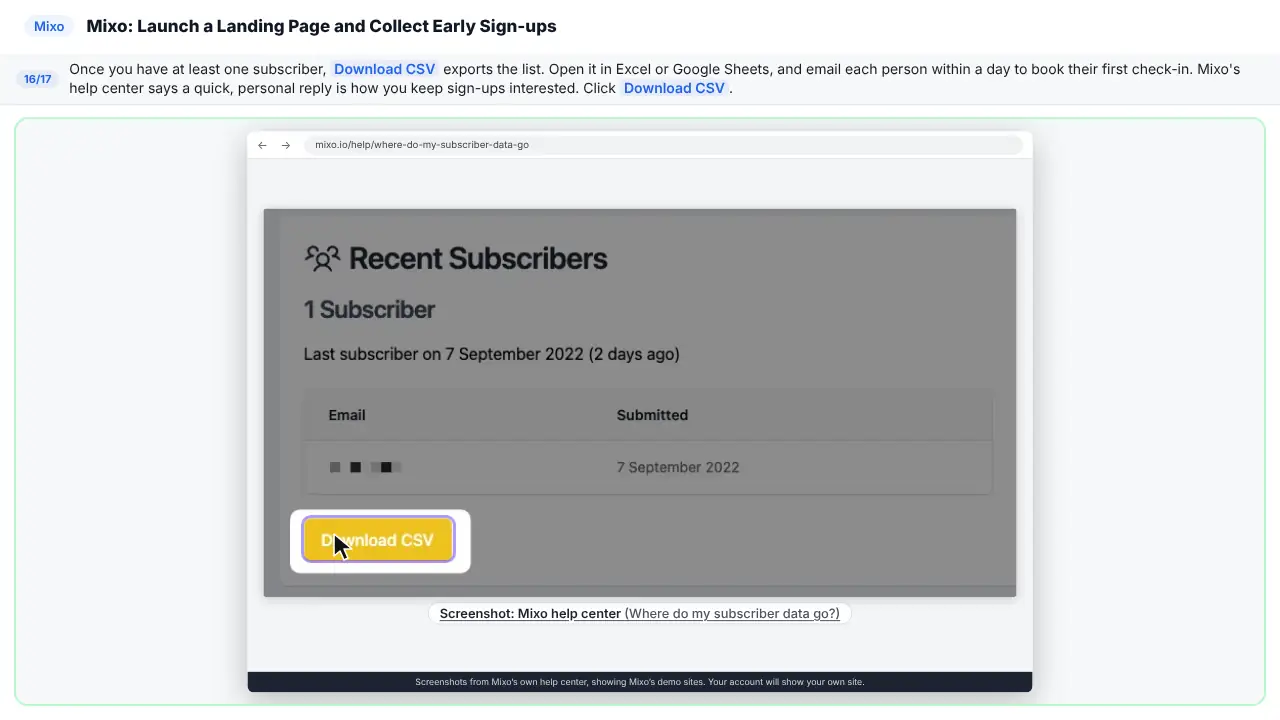
Step 16: Download the list
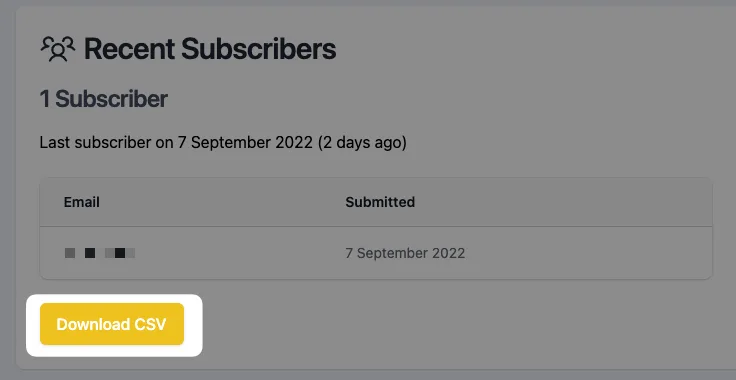
Once someone signs up, click Download C S V. Then email each person within a day.
Part 7: What to do next
Step 17: Decide with real numbers
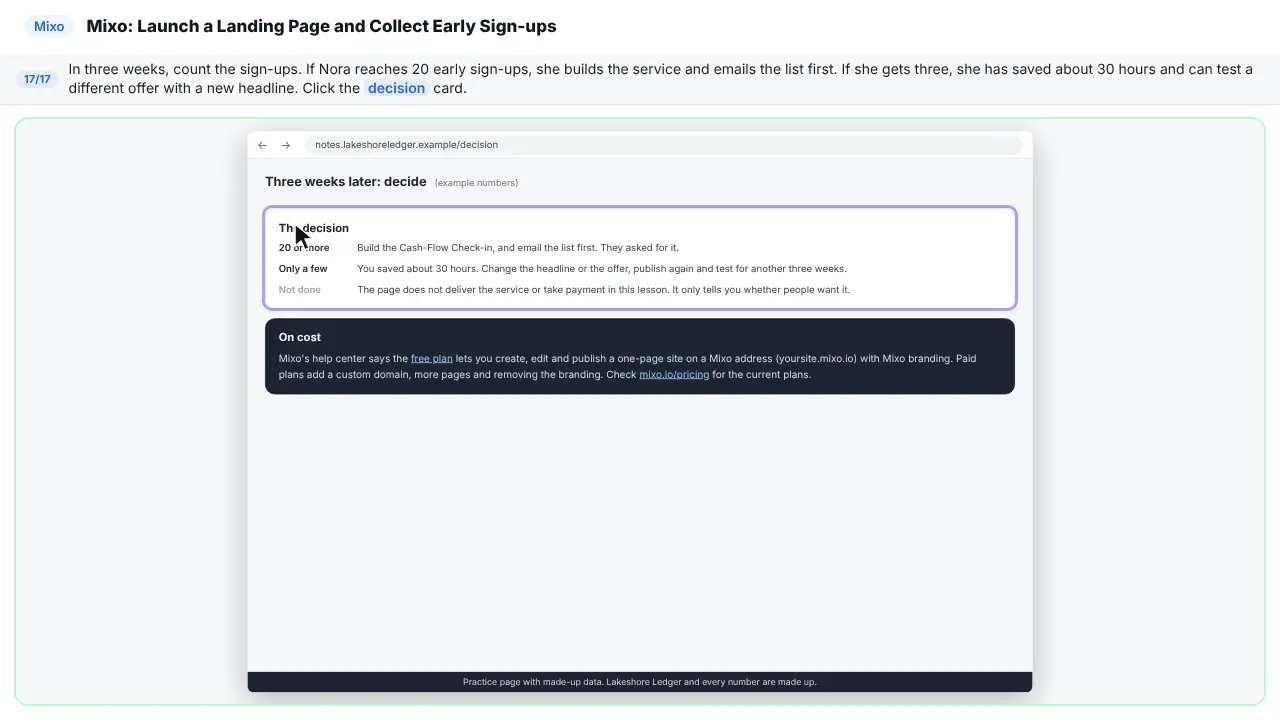
In three weeks, count the sign-ups. Twenty? Build the service, and email the list first. Three? You just saved thirty hours. Try a different headline.
Part of these free courses: AI Apps Worth Knowing, AI for Accounting & Bookkeeping Firms, AI for Marketing Teams
Now do it yourself, free
Reading the steps is a start. Doing them is how it sticks. The interactive lesson puts you in a practice copy of Mixo: you do every step yourself, it checks your work, and “Do it for me” finishes any step you get stuck on. Nothing touches your real accounts.
Practice “Mixo: Launch a Landing Page and Collect Early Sign-ups” step by step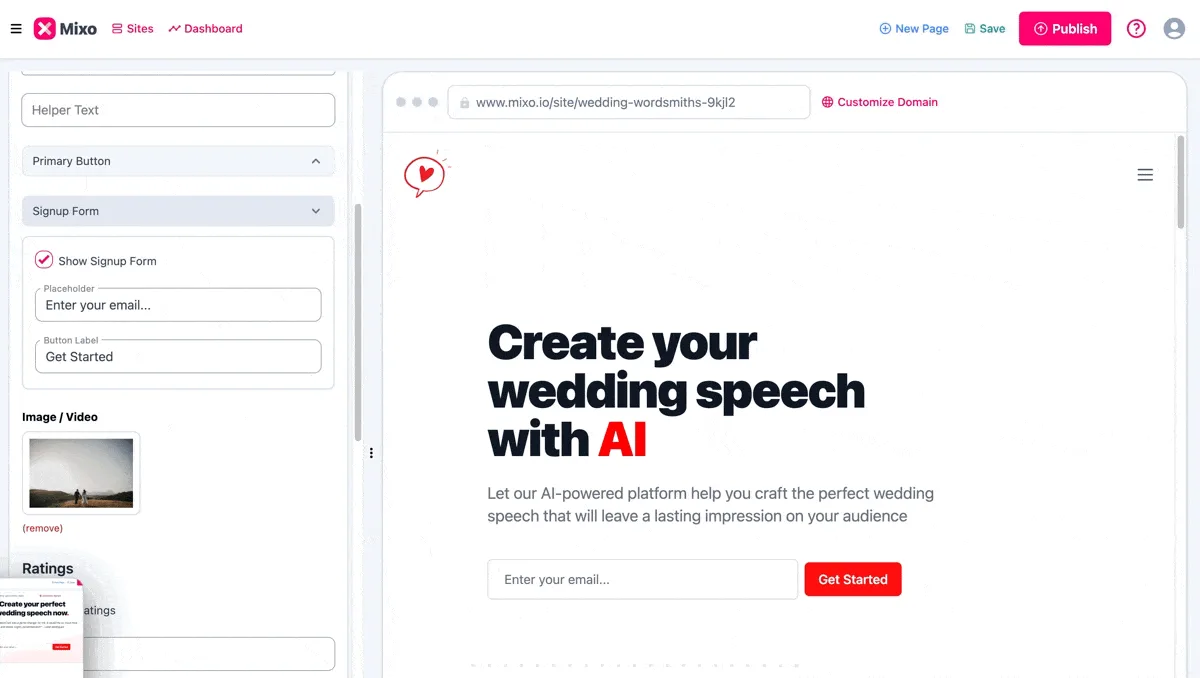
The business case: test it before you build it
Picture Nora Okafor, who runs Lakeshore Ledger, a made-up bookkeeping firm. Clients keep saying they never know what next month's cash looks like, so she wants to add a monthly Cash-Flow Check-in: a 13-week cash forecast and a 30-minute call. Nobody has actually asked to buy it yet.
Here is the arithmetic, using example numbers you should replace with your own. Building the service properly (templates, a client checklist, pricing) is about 30 hours of her time. At $85 an hour, that is about $2,550 spent before she knows anyone wants it. The cheaper test is a one-page site that describes the service and asks for an email, with a goal set in advance: 20 early sign-ups in 3 weeks.
Who this is for, and what you need
Owners and managers at bookkeeping, consulting, HR and other professional firms who want to test a new service, workshop or package. To follow the practice you need nothing. To do it for real you need a Mixo account. Mixo's help center says the free plan lets you create, edit and publish a one-page site on a Mixo address, such as yoursite.mixo.io, with Mixo branding. Paid plans add a custom domain, more pages and no branding, so check mixo.io/pricing before you start.
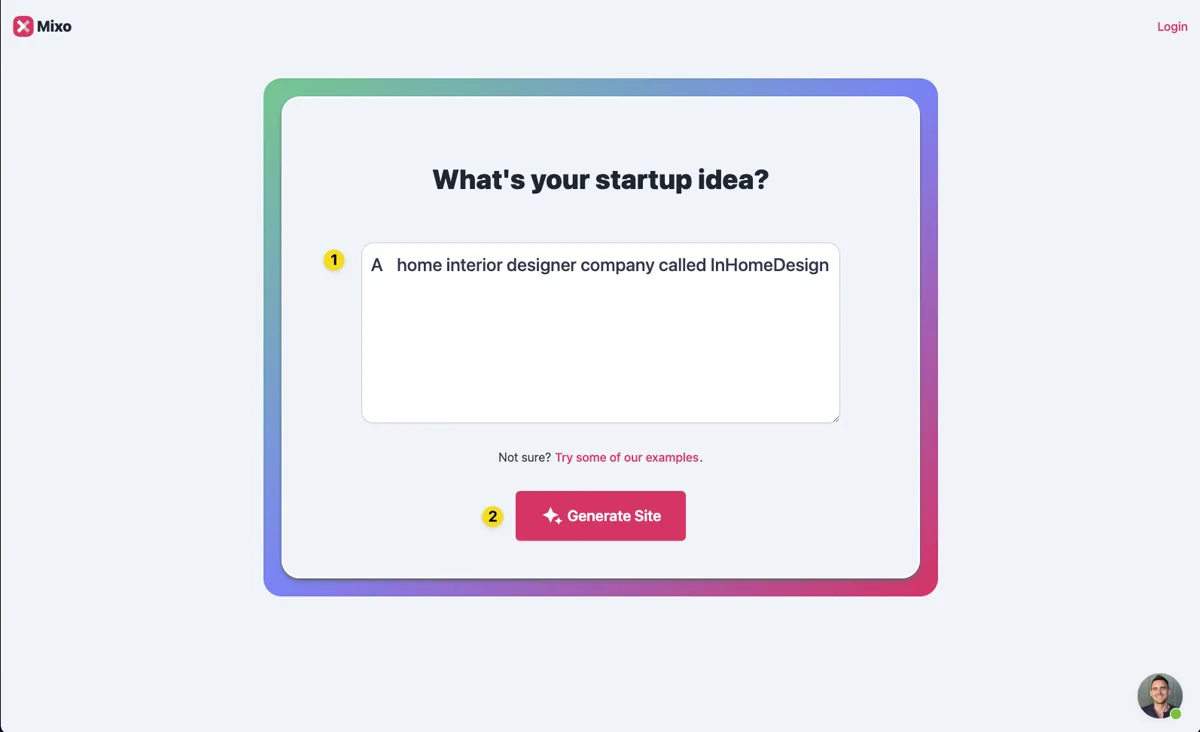
A note on the screens: this lesson uses the screenshots Mixo publishes in its own help center. They show Mixo's demo sites, such as InHomeDesign and Wedding Wordsmiths, and some were taken on an older version of the app, so a label can differ a little from what you see.
Step 1: describe the idea in one sentence
Go to app.mixo.io and click Get Started. The first box asks for your idea in one sentence. Mixo's tutorial says to word it as a business idea, and the more specific the better: "an online hairdressing service" works better than "haircare". Name the service, the customer and what they get. The lesson uses: A monthly cash-flow check-in service for small business owners, run by Lakeshore Ledger, a bookkeeping firm, with a 13-week cash forecast and a 30-minute call each month.
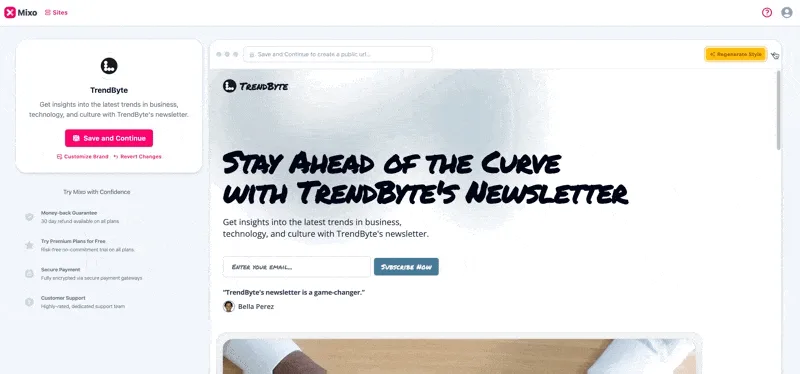
You may also be asked to pick a goal, such as Promote a service, and a language. Click Generate Site. Mixo's docs say it usually takes around 60 seconds, and you can watch it build. If you do not like the look, click Regenerate Style and pick a style from the menu.
Step 2: save it and open the editor
Click Save and customize (newer screens say Save and Continue) to save the site to your account. You may be asked to sign up or log in. Mixo then shows upgrade options. To stay on the free plan, click Sites in the menu, find your site and click Edit Site.
The editor lists your page's sections on the left and shows a live preview on the right. Open Hero, the top of the page, and rewrite the Title so it says what the customer gets, for example "Know your cash for the next 13 weeks". Use the Subtitle to say who it is for and that they can join an early list.
Step 3: turn the button into a sign-up form
Scroll down the Hero section to Primary Button and Signup Form. Mixo's help center says only one of the two can be active at a time. Open Signup Form and tick Show Signup Form. The button in the preview becomes an email box and a button. Change the Button Label to something specific, such as "Join the early list", and leave the Placeholder as "Enter your email..." or reword it.
In the site Settings, under the Config tab, Signup Form Settings lets you change the confirmation page people see after they sign up, add a GDPR message as a checkbox they must tick, and turn on Captcha to stop spam sign-ups. Mixo's help center describes these settings. The lesson does not show them, because the help article has no screenshot of them.
Step 4: add your logo and color, save, then publish
Open Settings, then Site. Upload your Site Logo, set the Logo Size, and pick a Primary Color and Secondary Color, so the page looks like your firm. Click Save. Mixo's docs explain that Save keeps your changes private, while Publish puts them on the internet.
When the page reads well, click Publish at the top right. On the free plan the site goes on a Mixo address with hosting and SSL included. You may see a short processing status, then the dashboard shows sharing tools: a WhatsApp message, a social post to copy and local groups to share in. Mixo also tells search engines about the new page each time you publish. Changes you make later go live only when you publish again.
Step 5: see who signed up and follow up
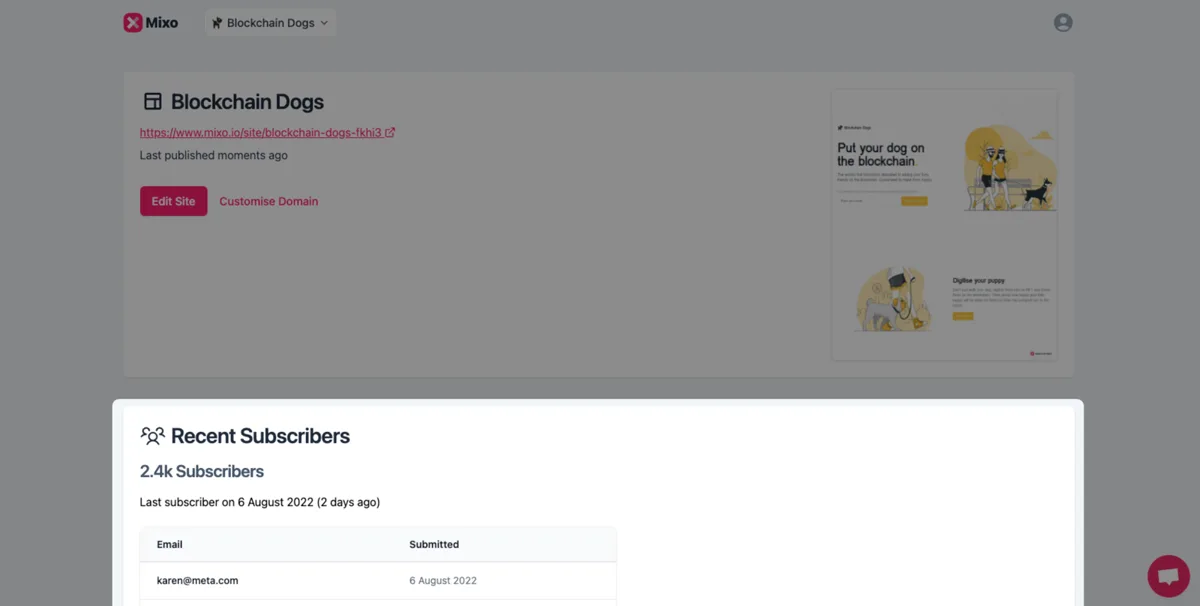
When someone enters their email and submits, Mixo adds them to your site's dashboard, and the help center says you also get an email notification. Open Dashboard and scroll down to Recent Subscribers: the count, the date of the last sign-up, and each email with its date. Once you have at least one subscriber, Download CSV exports the list for Excel or Google Sheets.
Email each person within a day. Mixo's own advice is to reply quickly and personally. When the deadline comes, count: if you reached your goal, build the service and offer it to the list first. If not, you saved the hours, and you can change the headline or the offer and test again.
Mistakes to avoid
- A vague idea sentence. "Bookkeeping" gets a generic page. Say the service, the customer and what they get.
- Leaving the AI's headline as it is. Read every line and make it say what the customer gets.
- Keeping the Primary Button on. You want emails, so switch to the Signup Form.
- Clicking Save and expecting the change to be live. Only Publish makes it public.
- Sharing the link without a goal and a deadline. Decide what number means yes before you start.
- Waiting a week to reply to sign-ups. They are most interested on the day they sign up.
Links
- Mixo: the AI website builder this lesson teaches.
- Tutorial: Create a free website on Mixo (Mixo help): Mixo's own walk-through: generate, save, edit, publish.
- Creating a Contact Us Call-To-Action Button (Mixo help): how to switch the hero button to a sign-up form.
- Where do my subscriber data go? (Mixo help): the subscriber list on your dashboard and its CSV export.
- Does Mixo have a free plan? (Mixo help): what the free plan includes. Check mixo.io/pricing for current paid plans.
Try it yourself, free
Reading the steps is a start. Doing them is how it sticks. The interactive module walks you through every click in a practice copy of Mixo, checks each step, and never touches your real accounts.
Start “Mixo: Launch a Landing Page and Collect Early Sign-ups”Screenshots


Frequently asked questions
- Is this an official Mixo course?
- No. This is my own lesson. Mixo is a separate, third-party product from mixo.io. The screenshots come from Mixo's own help center and are credited and linked under each one.
- Is Mixo free?
- Mixo's help center says the free plan lets you create, edit and publish a website on a Mixo subdomain, such as yoursite.mixo.io, with hosting, SSL and Mixo branding, and one page. Paid plans add a custom domain, more pages, removing the branding and features such as Google Analytics. Check mixo.io/pricing for current plans.
- Where do the sign-ups go?
- To your site's Mixo dashboard, under Recent Subscribers. You get an email notification for each one, and Download CSV exports the list once you have at least one.
- Can I use my own domain?
- Yes, on a paid plan. Mixo's help center explains how to buy a domain through Mixo or connect one you already own.
- How long does Mixo take to build a site?
- Mixo's docs say the AI usually generates the preview in around 60 seconds.
- Can Mixo make the site in another language?
- Yes. When you start, you can be asked to pick the language for the text on your site.
More in Business Automations
 AI Receipt Extractor: Receipts to Google Sheets with n8n
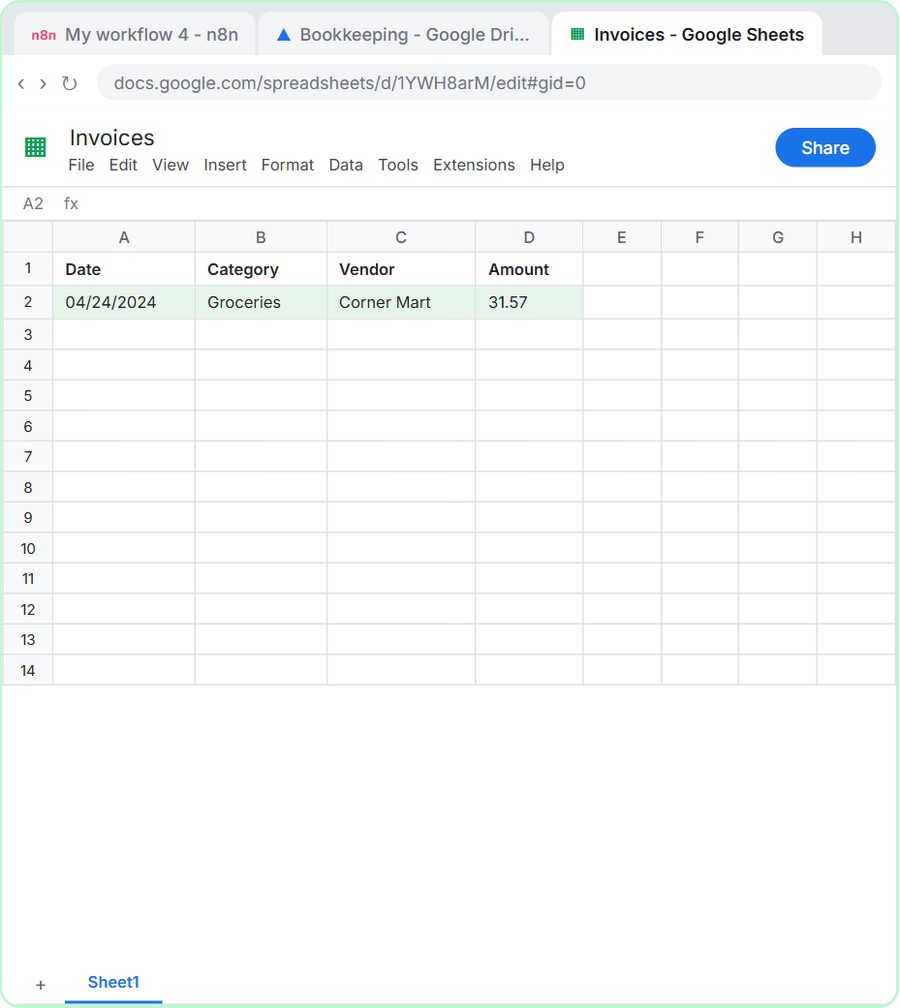
Drop a photo of a receipt into an n8n chat. An AI agent reads it, pulls out the date, vendor and amount, picks a category, and adds a row to Google Sheets.
Free · Live ~12 min Intermediate
 n8n AI Email Responder: Draft Gmail Replies Automatically
Build an n8n agent that watches your Gmail, reads each new customer email, and writes a reply as a draft in the same thread, ready for you to check and send.
Free · Live ~12 min Intermediate
 Daily Job Alerts: Email Each Tech Their Jobs from Google Sheets with n8n
Every morning at 7, n8n reads a plumbing company's jobs sheet, skips anything not assigned yet, and emails each job to the tech it's assigned to — customer, address…
Free · Live ~10 min Intermediate
 Gmail AI Triage: Auto-Label Every Email and Draft Replies
Build an n8n workflow that reads each new email, sorts it as a lead, a client or an invoice with a Text Classifier, adds the matching Gmail label, and drafts a reply to…
Free · Live ~18 min Advanced
 A Support Agent That Answers from Your Own Docs
Turn an n8n chat agent into a support agent that answers only from your policies in a Google Doc, refuses what it should, and hands off to a person by email.
Free · Live ~13 min Advanced
 Zoho CRM: Add a Lead, Qualify It and Convert It to a Deal
A business case for a firm with leads scattered across inboxes and a notebook: add a lead with its source and status, note the call, convert it to an account, contact…
Free · Live ~12 min Beginner
All 48 modules in Business Automations
From the blog
Mixo Landing Page FAQ: Sign-up Form, Publish, SubscribersHow do you test a new service with a Mixo landing page? Answers on the idea sentence, the sign-up form, Save vs Publish and the subscriber CSV.
Oct 20, 2026 5 min read
Mixo Landing Page: 8 Sign-up Test Mistakes to AvoidMixo landing page mistakes that spoil a sign-up test: a vague idea, the AI headline kept, no sign-up form, Save without Publish, no goal and slow replies.
Oct 20, 2026 5 min read
Terms in this lesson
Plain-English definitions, each with an example from a free lesson.