Updated . Built against the tool’s current screens and checked step by step. How we check this lesson
A lovable.app address is fine for testing, but customers remember a real domain. In this free, interactive Lovable tutorial you tidy up how a small salon's site looks when it is shared or found on Google, publish the update, and then connect a domain the owner already bought somewhere else. You add the two DNS records Lovable asks for at the domain provider, watch the status go from Verifying to Live, and open the site on its own address.
At a glance
| Question | Answer |
|---|---|
| What you build | Give your Lovable site a proper title, description and sharing image, publish the update, then connect a domain you already own: add the A and TXT records at your domain provider, wait for Verifying to turn Live, and open your site on its own address. |
| Tools | Lovable |
| Time | About 9 minutes, 35 steps in 5 parts |
| Level | Beginner, no coding needed |
| Cost | Free |
| Ways to learn it | Practice it step by step |
The 5 parts, in short
- How your site looks when shared: Open the page selector, Show the Social and Search cards, Ask Lovable to edit, Say what to change, and 3 more steps.
- Open Domains: Open More, Open Settings, Open Domains.
- Connect your domain: Connect an existing domain, Enter your domain, Continue, Connect the root domain, and 3 more steps.
- Add the DNS records: Copy the A record value, Go to your domain provider, Delete the old A record, Paste the A value, and 11 more steps.
- Wait for Live: Check status, Refresh a little later, Open your domain.
Start here first: Build a Landing Page with Lovable from One Prompt (module 1 of Build Apps with Lovable)
In the course: Part 10 · Build Apps with Lovable (Module 50 of the full course)
What you will build
You continue the Hazelbrook Hair Studio site from the first four modules of this course. Hazelbrook is a made-up salon on Orchard Lane, and its site has been live at hazelbrook-hair.lovable.app since module 1. The owner, Jess, already owns the domain hazelbrookhair.example at another company (the .example ending is reserved, so it can't be a real site).
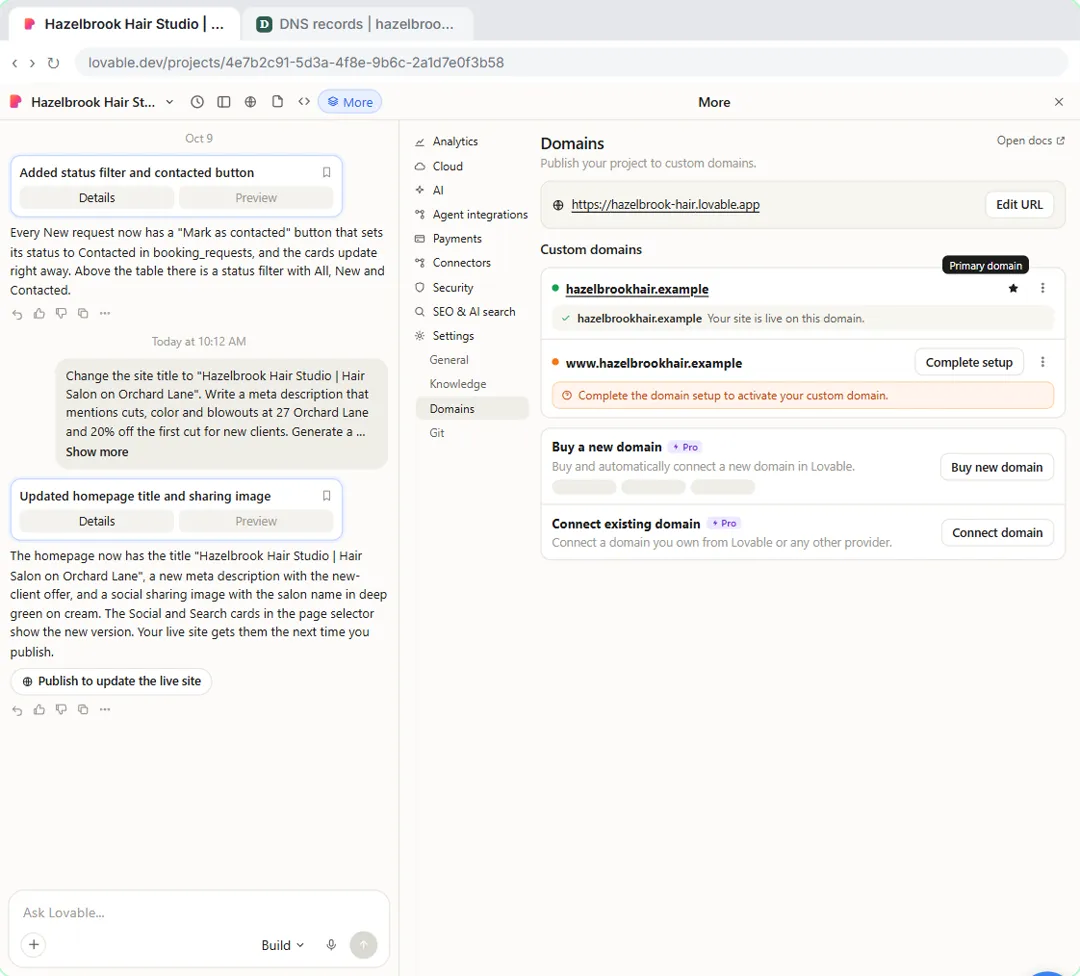
By the end of this module the homepage has a clearer title, a meta description with the new-client offer and a proper social sharing image, and the site is live on hazelbrookhair.example. Because it is the first custom domain on the project, it becomes the primary domain, and the lovable.app address redirects to it.
Connecting a custom domain needs a paid Lovable plan, such as Pro. Publishing itself works on every plan, and publishing from the Publish dialog doesn't use credits.
The steps, in order
The module has 35 steps across five short chapters. Each one mirrors a real screen in Lovable, plus a made-up domain provider's DNS page.
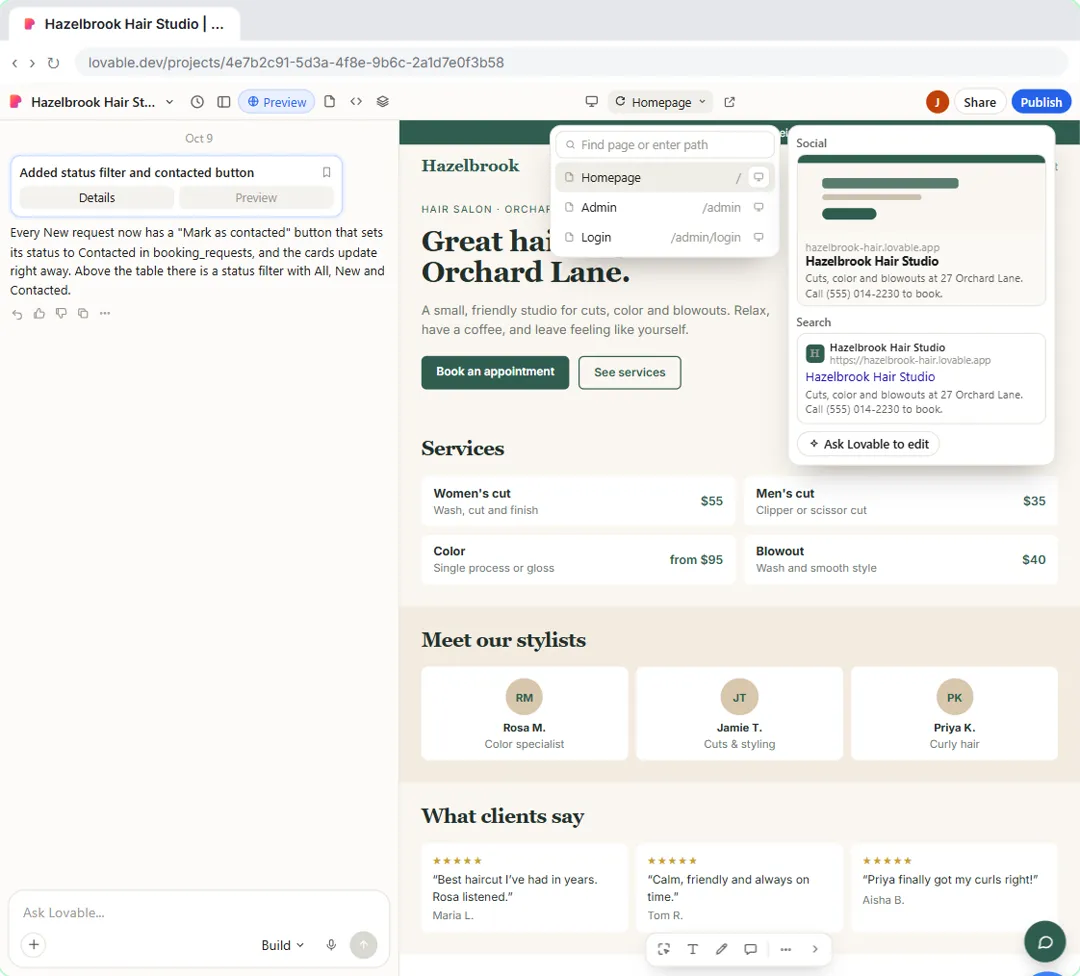
- How your site looks when shared: open the page selector above the preview and point at the preview icon next to Homepage. The Social card shows the title, description and image used in link previews, and the Search card shows how the page appears in search results, with its favicon. Lovable generated all of it while it built the site, and the image is a screenshot. Click Ask Lovable to edit, ask for a new title, a meta description and a new social sharing image, and send it. Then click Publish and Publish changes so the live site gets the update.
- Open Domains: click More in the project toolbar, then Settings. General shows the URL subdomain that forms your lovable.app address, which you can change there. Then click Domains.
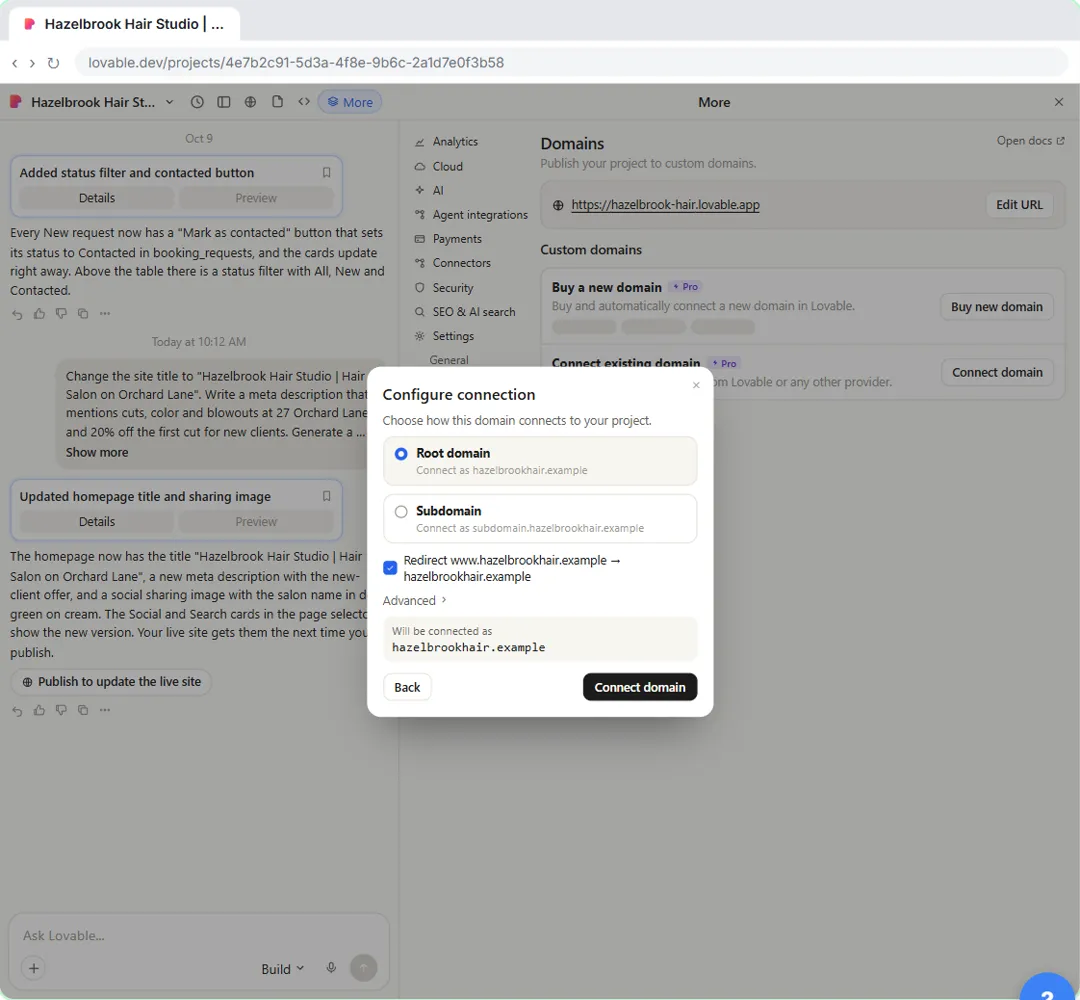
- Connect your domain: under Connect existing domain, click Connect domain, type the domain without https or slashes, and click Continue. On Configure connection, keep Root domain and the option that redirects the www version, then click Connect domain. Both addresses appear with Complete setup. Click Complete setup next to the root domain, then Continue. If your provider isn't in the list, choose Go to our manual setup.
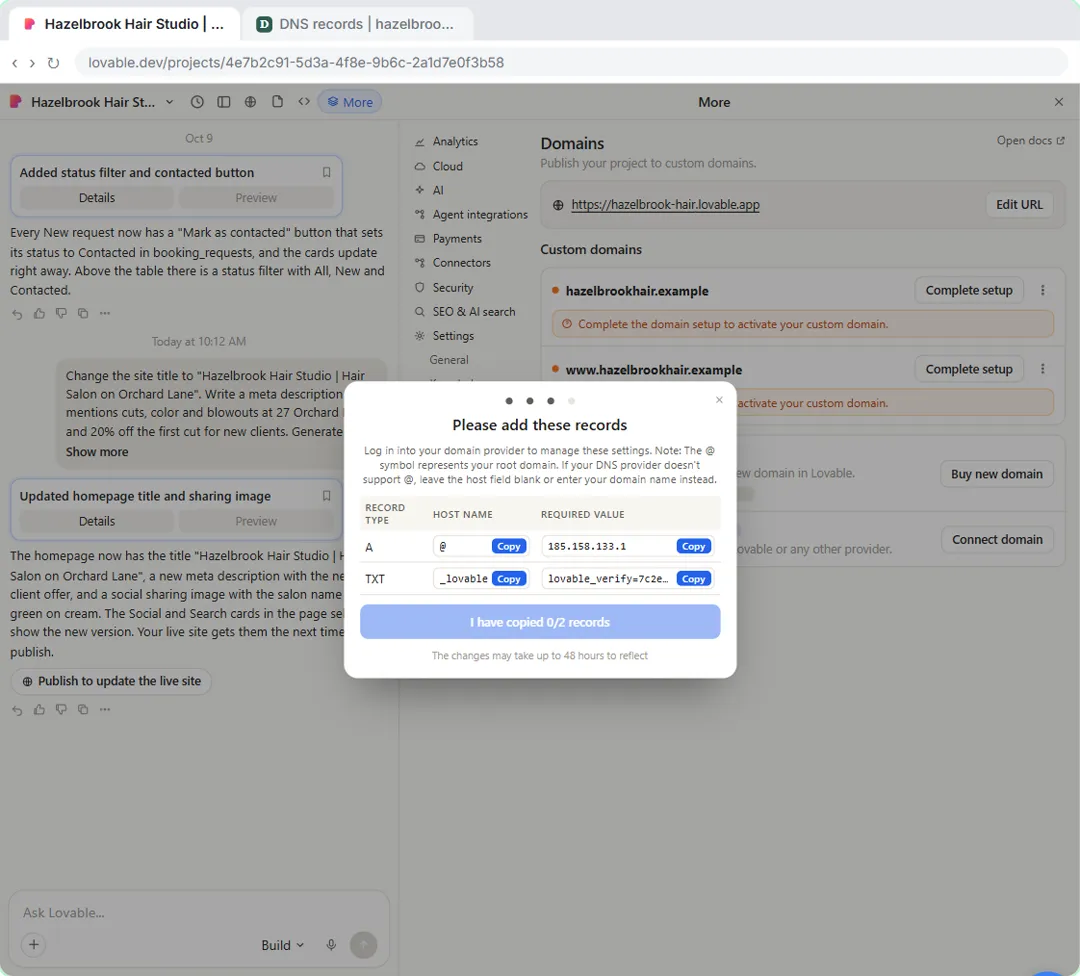
- Add the DNS records: Lovable shows an A record with the value 185.158.133.1 and a TXT record named _lovable with a lovable_verify value that is unique to your domain. At your domain provider, delete any old A record for the domain, add the A record with host @, then add the TXT record, copying its value rather than typing it. Leave MX records alone so email keeps working. Back in Lovable, confirm you added both records and click Done.
- Wait for Live: the domain shows Verifying while the records spread. Click Check status once they have had time. Domain verified moves it to Setting up while Lovable issues the SSL certificate, then to Live. Open the site on its new address.
How long DNS takes, and what to check if it doesn't work
DNS changes take time to reach every network. Many providers apply them within minutes and most are live within a few hours, but some take up to 72 hours. Wait for Live before you share the address: while the status says Setting up, browsers show a security warning because the certificate isn't ready yet.
If a domain stays on Verifying, check both records at your provider, especially the full TXT value, and look for leftover A, AAAA or CNAME records from an old host. Some providers don't accept @ as the host; leave it blank or enter the domain name instead. You can also ask Lovable in the project chat which records it expects and whether it can see them.
Don't forget the www version
When you connect a root domain with the www redirect switched on, Lovable lists www as a separate address with its own Complete setup. It needs its own two records: an A record named www and a TXT record named _lovable.www with the value from its own setup window. Once it is Live, visitors who type www are sent to your primary domain.
Don't own a domain yet? On the same Domains page, Buy new domain registers one through Lovable, adds the records and sets up the certificate for you. Domains bought through Lovable are billed separately from your plan.
How the interactive lesson works
Each step plays first in the Watch panel with a short voice-over, then you do it yourself in Your turn, on a practice copy of Lovable and a made-up domain provider. Every click is checked, and Do it for me helps if you get stuck. Nothing is published, no domain is connected, no DNS record is changed and no credits are used. The domain, records and verification code in the lesson are made up.
Try it yourself, free
Reading the steps is a start. Doing them is how it sticks. The interactive module walks you through every click in a practice copy of Lovable, checks each step, and never touches your real accounts.
Start “Publish Your Lovable Site and Connect Your Own Domain”Step by step: Publish Your Lovable Site and Connect Your Own Domain
All 35 steps of the interactive module, in order. In the module you watch each one, then do it yourself in a practice copy that checks your work.
1. How your site looks when shared
- Open the page selector. Your salon site has been live at hazelbrook-hair.lovable.app since module 1. Click the page selector above the preview (it says Homepage).
Your salon site has been live on its lovable dot app address since module 1. Before you give it its own domain, check how it looks when someone shares the link or finds it on Google.
- Show the Social and Search cards. Point at the preview icon at the end of the Homepage row. (In Lovable you hover over it; here, click it.)
Every page has its own title, description and picture for link previews and search results. Point at the little preview icon at the end of the Homepage row. Here, just click it.
- Ask Lovable to edit. Lovable wrote the title, description and favicon while it built the site, and the social image is a screenshot. To change them, click Ask Lovable to edit.
Lovable wrote this title, description and little icon while it built the site, and the sharing picture is just a screenshot. There's no form to fill in: you change them by chatting.
- Say what to change. Lovable starts the message for you: I want to update my homepage's social and search information. What I want to change: Add a clearer title, a description with your offer, and a new sharing image. Like any chat request, this uses Lovable credits. Paste in the request.
Lovable starts a message about the homepage for you. Say what to change: a clearer title, a description with your new-client offer, and a proper sharing image.
I want to update my homepage's social and search information.

What I want to change: Change the site title to "Hazelbrook Hair Studio | Hair Salon on Orchard Lane". Write a meta description that mentions cuts, color and blowouts at 27 Orchard Lane and 20% off the first cut for new clients. Generate a new social sharing image: the salon name in deep green on our cream background.
- Send it. Click the send arrow.
- Open Publish. Done, and the page selector cards now show the new version. Like any change, it reaches your live site only when you publish. Click Publish.
Done. Like any other change, the new title and picture reach your live site only when you publish.
- Publish changes. Click Publish changes. Publishing from this dialog uses no credits.
Publishing from this dialog is free.
2. Open Domains
- Open More. The search preview shows the new title. Now for your own domain. Custom domains need a paid Lovable plan (Pro or above); Jess upgraded for this. Click More in the toolbar.
Now for your own domain. One thing first: connecting a custom domain needs a paid Lovable plan, such as Pro. Jess upgraded for this module.
- Open Settings. Click Settings at the bottom of the list.
- Open Domains. This is General. Your lovable.app address comes from URL subdomain; you could change it here. Click Domains.
This is General. Your lovable dot app address comes from URL subdomain, and you could change it here. Keep it.
3. Connect your domain
- Connect an existing domain. Buy new domain registers one through Lovable and sets it all up for you. Jess already owns hazelbrookhair.example at another company, so click Connect domain.
There are two ways to get a domain. Buy a new domain registers one through Lovable and sets everything up for you. Jess already owns her domain at another company, so under Connect existing domain, click Connect domain.
- Enter your domain. Type hazelbrookhair.example (no https, no slashes).
- Continue. Click Continue.
- Connect the root domain. Keep Root domain, and keep the www redirect checked so people who type www still reach you. Click Connect domain.
Keep Root domain. And keep the w w w box checked, so people who type w w w in front still reach your site.
- Complete setup. Two addresses were added: hazelbrookhair.example and its www version. Neither works until you add DNS records where you bought the domain. Click Complete setup next to hazelbrookhair.example.
Lovable added two addresses: your domain, and its w w w version. Neither works yet. First you add two records at the company where you bought the domain.
- Continue. Lovable can log in to many domain providers and add the records for you. Click Continue.
For many domain providers, Lovable can log in and add the records for you.
- Go to manual setup. Jess's provider isn't in the list, so she'll add the records herself. Click Go to our manual setup.
Jess's provider isn't in the list, so she'll add the records herself. It only takes a few minutes.
4. Add the DNS records
- Copy the A record value. Two records: an A record that points your domain at Lovable (185.158.133.1), and a TXT record that proves it's yours. Click Copy next to the A record's value.
You need two records. An A record points your domain at Lovable's servers, and a TXT record proves the domain is yours.
- Go to your domain provider. Jess's domain provider is open in the other tab. Click the DNS records tab.
Your domain provider's DNS page is open in the other tab.
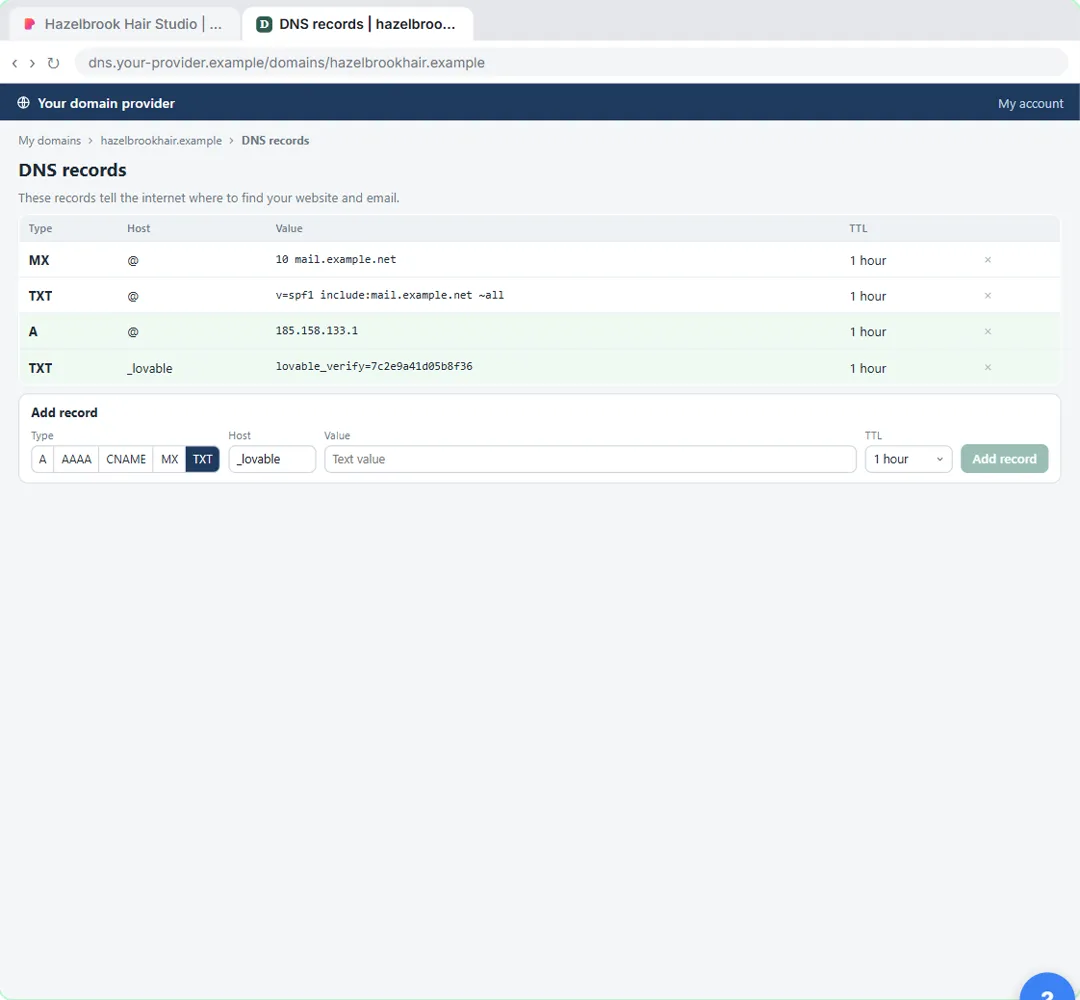
- Delete the old A record. An old A record still points to a parked page (203.0.113.24). Delete it, or some visitors land there. Leave the MX and email TXT records alone. Click the × on the old A record.
Here are the domain's records. The old A record points to a parked page. Delete it, or some visitors will land there instead of your site. Leave the MX and email records alone.
- Paste the A value. The new record is already type A with host @ (your domain itself). Paste in the value.
The new record is already set to type A, and the host is the at sign, which stands for the domain itself.
- Add the record. Click Add record.
- Back to Lovable. Now the TXT record. Click the Lovable tab.
Now the TXT record. Go back to the Lovable tab.
- Copy the TXT value. The TXT value is unique to your domain, so copy it instead of typing it. Click Copy next to the TXT value.
The TXT value is unique to your domain, so always copy it rather than typing it.
- Back to your provider. Click the DNS records tab.
Back to your provider.
- Choose TXT. Under Type, click TXT.
- Enter the host. Type _lovable in Host (it's the host name Lovable showed).
In Host, type the host name Lovable showed: underscore lovable.
- Paste the TXT value. Paste in the value to paste lovable_verify=7c2e9a41d05b8f36.
- Add the record. Click Add record.
- Back to Lovable. Both new records are in the list. Click the Lovable tab.
Both new records are in. Go back to Lovable.
- Confirm the records. Click I have added 2/2 records above to my domain's provider.
Tell Lovable you added both records.
- Done. Click Done.
5. Wait for Live
- Check status. hazelbrookhair.example is Verifying while the records spread across the internet. That can take minutes, usually a few hours at most, and up to 72 hours. When your records have had time, click Check status.
Now your domain says Verifying, while the new records spread across the internet. That can take a few minutes, usually a few hours at most, and sometimes up to 72 hours. When they've had some time, click Check status.
- Refresh a little later. Domain verified. Now Lovable is setting up the certificate for https; wait for Live before you open the site. A few minutes later, click Domains to refresh the page.
Verified. Now Lovable sets up the security certificate, so your site loads with https. Wait for Live before you open it. A few minutes later, click Domains to refresh the page.
- Open your domain. It's Live. The star means it's your primary domain: the first domain you connect becomes primary, and your lovable.app address now redirects here. Click hazelbrookhair.example.
It's live. The star means this is your primary domain. The first domain you connect becomes primary automatically, so your old lovable dot app link now sends people here.
Screenshots
Frequently asked questions
- Do I need a paid plan to use a custom domain in Lovable?
- Yes. Connecting or buying a custom domain needs a paid Lovable plan. Publishing to a lovable.app address works on every plan, and domains that are already connected keep working if you downgrade later.
- What DNS records does Lovable need for a custom domain?
- Two per address: an A record pointing to 185.158.133.1, and a TXT record named _lovable (or _lovable.www, _lovable.blog and so on for a subdomain) with the lovable_verify value from your setup window. Add them at the company that manages your domain's DNS.
- How do I change my Lovable site's title, description or share image?
- Ask Lovable in the project chat, for example to change the site title and generate a new social sharing image. To check the result, open the page selector above the preview and look at the Social and Search cards for the page. Publish to update the live site.
- Is this course really free?
- Yes. Stepthrough is completely free, and the practice copy needs no accounts. To do it for real you need your own Lovable account on a paid plan and access to your domain's DNS settings.
More in Build Apps with Lovable
Describe a small business website in one prompt, let Lovable build it, then change it by chatting, by pointing at the page and by typing on it. Undo a change from…
Free · Live ~9 min
◷Add a Contact Form That Saves to a Database in LovableAdd a booking request form to a small business site by chatting, turn on Lovable Cloud (Lovable's built-in backend, built on Supabase), send a test request and find it…
Free · Live ~8 min
◷Add an AI Chatbot to Your Website with Lovable AIAsk Lovable for a chat assistant that answers visitors' questions from your own services, prices and hours, using Lovable's built-in AI with no API key. Test it in the…
Free · Live ~8 min
All 5 modules in Build Apps with Lovable
More Lovable tutorials
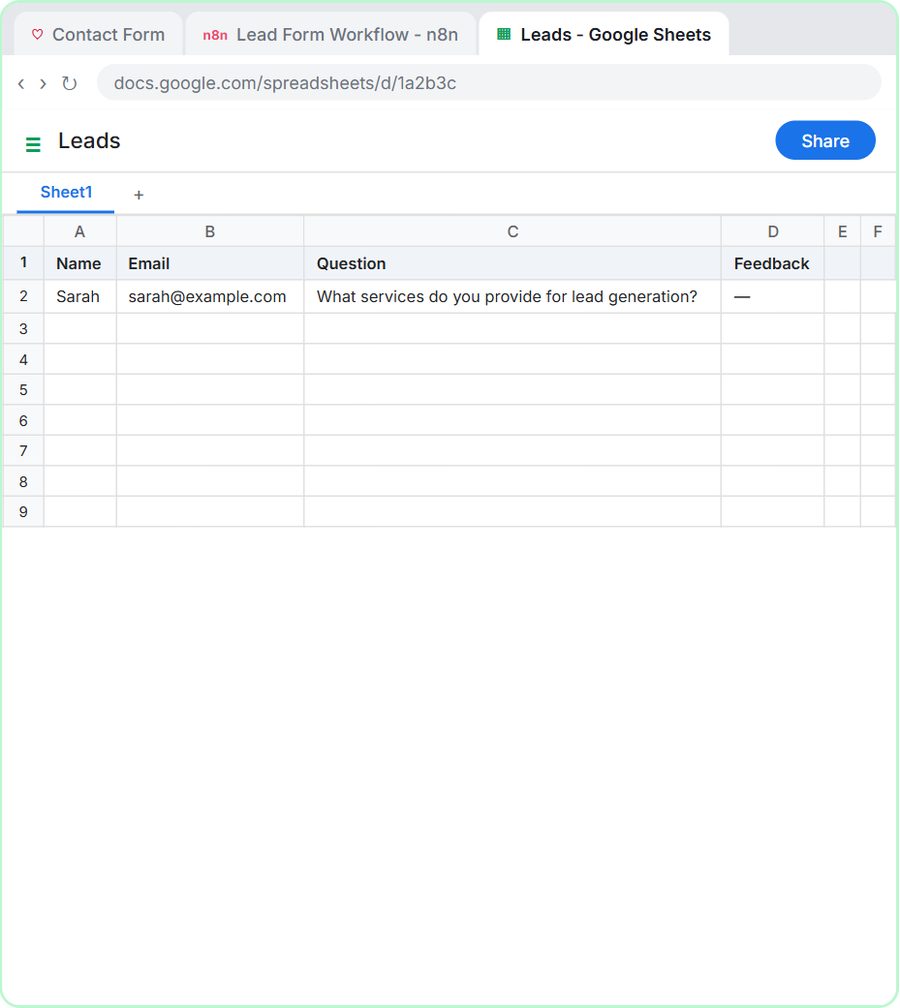 Lovable + n8n: Build a Web App with an AI Backend
Build a contact form in Lovable and connect it to an n8n workflow — webhook trigger, AI Agent, Google Sheets, Gmail, and a Respond node that ties it all together.
Free · Live ~15 min
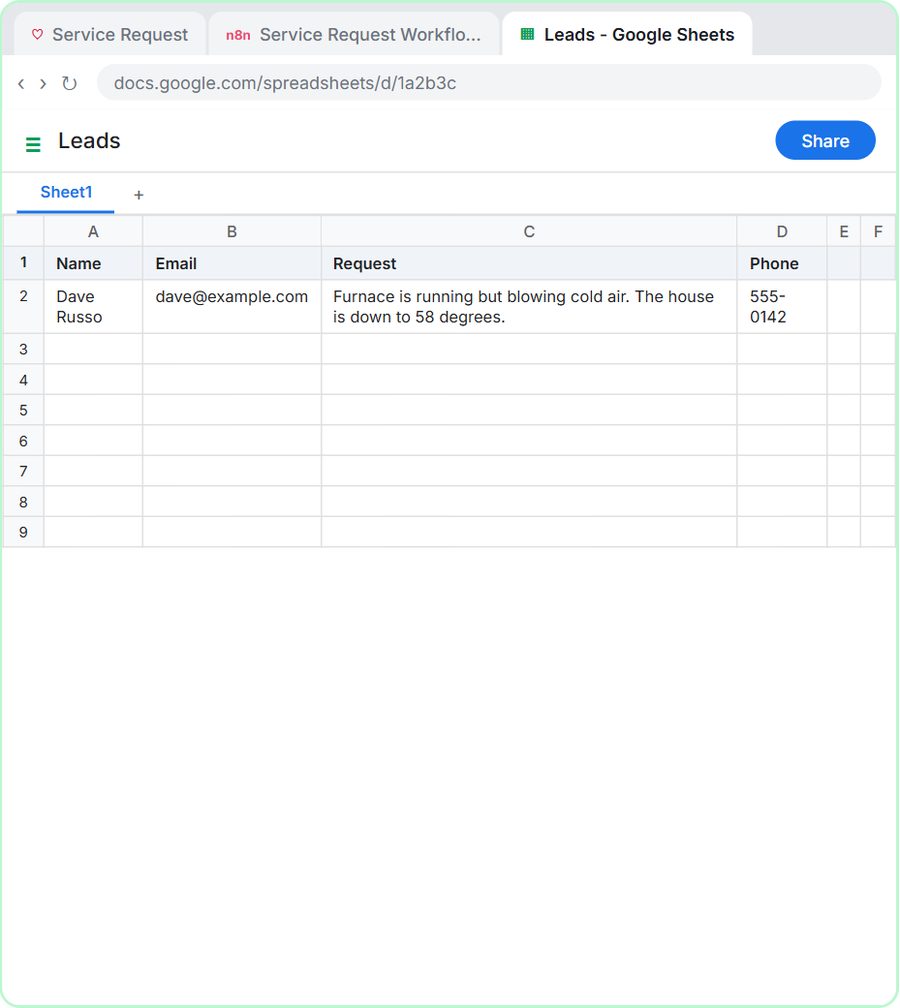 Build an AI Service Request Form for Your HVAC Company
Build a service request form in Lovable for Cedar Ridge Heating & Air and connect it to n8n — the AI agent sorts each job into repair, maintenance, install or…
Free · Live ~15 min
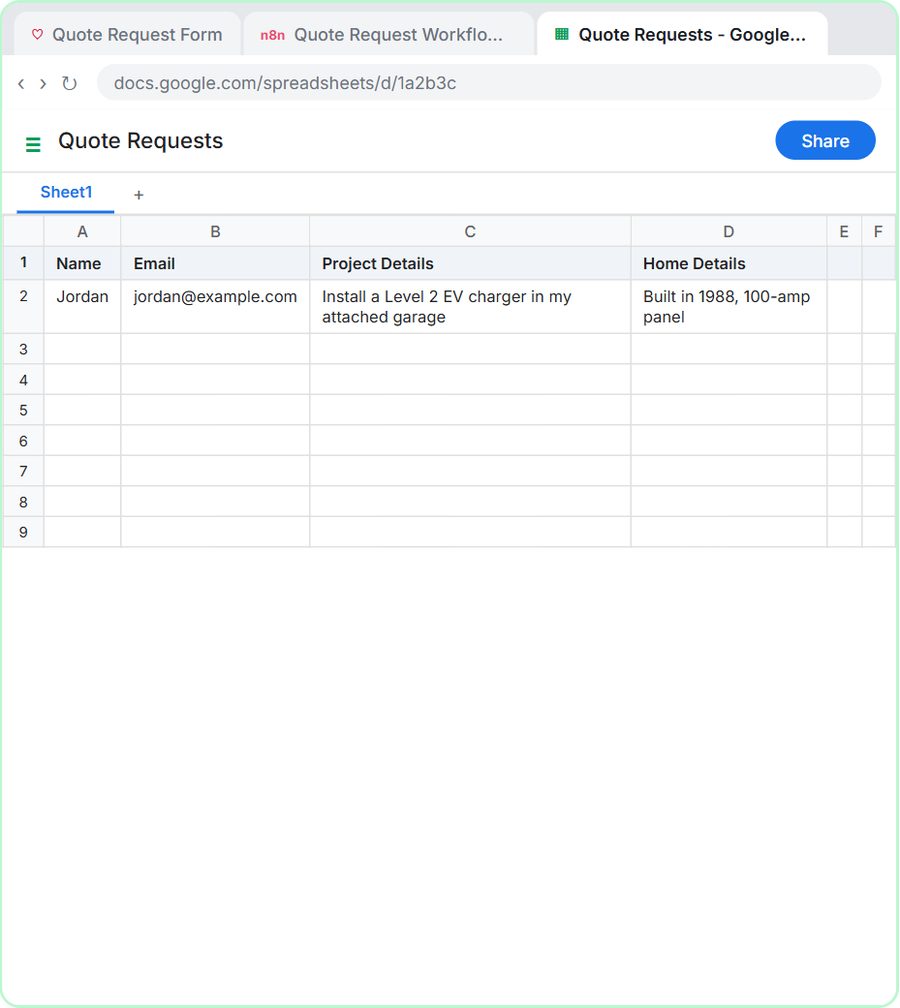 Build an AI Quote Request Form for Electrical Contractors
Build a quote request form in Lovable and connect it to an n8n workflow — webhook trigger, an AI Agent that drafts an initial estimate note, Google Sheets, Gmail, and a…
Free · Live ~15 min
 Build an AI Emergency Request Form for Your Plumbing Company
Build an emergency service-request form in Lovable and connect it to an n8n workflow — webhook trigger, AI Agent that prioritizes the job, Google Sheets, Gmail, and a…
Free · Live ~15 min
 Build an AI Demo Request Form That Qualifies Leads
Build a "Book a demo" form in Lovable for Northwind Scheduling Software and connect it to n8n — the AI agent rates each lead hot, warm or nurture, saves it to Google…
Free · Live ~15 min
 Build a Lead Magnet Signup Form with an AI Welcome Email
Build a "Get the free guide" signup form in Lovable for Harbor & Pine Coffee Roasters and connect it to n8n — the AI agent tags each lead by interest, saves it to…
Free · Live ~15 min