Updated . Built against the tool’s current screens and checked step by step. How we check this lesson
Build one repair-request form with required unit and contact details, a job-type dropdown, a photo upload and a red call-now banner that only shows for emergencies, then get every request by email.
At a glance
| Question | Answer |
|---|---|
| What you build | Build one repair-request form with required unit and contact details, a job-type dropdown, a photo upload and a red call-now banner that only shows for emergencies, then get every request by email. |
| Tools | Fillout |
| Time | About 10 minutes, 49 steps in 5 parts |
| Level | Beginner, no coding needed |
| Cost | Free |
| Ways to learn it | Practice it step by step |
The 5 parts, in short
- Switch Fillout on: Requests get lost, Find the Fillout switch, Turn Fillout on, Back to your dashboard, and 2 more steps.
- Ask the right questions: Build it yourself, Pick a calm theme, Create the form, Name it, and 12 more steps.
- Flag emergencies: A warning that only some people see, Write the warning, Make it red, Error style, and 10 more steps.
- Publish and get alerts: Where answers go, Keep it simple, Your share link, Email me every request, and 3 more steps.
- Test it as a tenant: Be the tenant, Pick the trade, The warning appears, Send the request, and 2 more steps.
Start here first: How to Do OCR in n8n: Read Receipt Photos into Google Sheets with AI (module 1 of Business Automations)
In the course: Part 9 · n8n Automation Toolkit (Module 156 of the full course)
Part of: AI for Real Estate (step 16 of 17). Next up: Rankite: Fix a Real Estate Office's Local Listings
Part of: AI Apps Worth Knowing (step 172 of 175). Next up: Fillout: Send Emergency Requests to Their Own Thank-You Page with Page Logic
What you'll build
You run the office at a small property company (made up). Repair requests come in by text, voicemail and email. Half have no unit number, none have a photo, and the leak reported late on Friday waits until Monday. In this lesson you build one Fillout form for every request: the tenant's name, unit and email, a dropdown for the type of job, a photo, and a description with access times. One question asks about danger, leaks, heat, gas or power, and a red banner with your emergency number appears only when the answer is yes. Then you publish it, get each request by email, and test it as a tenant.
You built a Fillout form that asks every tenant the same questions, flags emergencies with a call-now banner, takes a photo and emails each request to your coordinator. Put the link in your tenant welcome pack and on the lobby notice. Next in the Fillout course: send emergency requests to their own thank-you page with page logic.
- Tools: Fillout
- Time: about 10 minutes, 49 steps in 5 chapters
- Level: beginner, no coding needed
- Price: free
Practice first, then build it for real
Practice copy built from real Fillout screens (app.zite.com), captured 16 November 2026 on the Free plan. Nothing here touches a Fillout account. The property company, tenant and phone number are made up. To build it for real you need your own Fillout account, and some services charge once you use them for real work, so check each tool's current pricing.
Try it yourself, free
Reading the steps is a start. Doing them is how it sticks. The interactive module walks you through every click in a practice copy of Fillout, checks each step, and never touches your real accounts.
Start “Fillout: Build a Tenant Maintenance Request Form That Flags Emergencies”Step by step: Fillout: Build a Tenant Maintenance Request Form That Flags Emergencies
All 49 steps of the interactive module, in order. In the module you watch each one, then do it yourself in a practice copy that checks your work.
1. Switch Fillout on
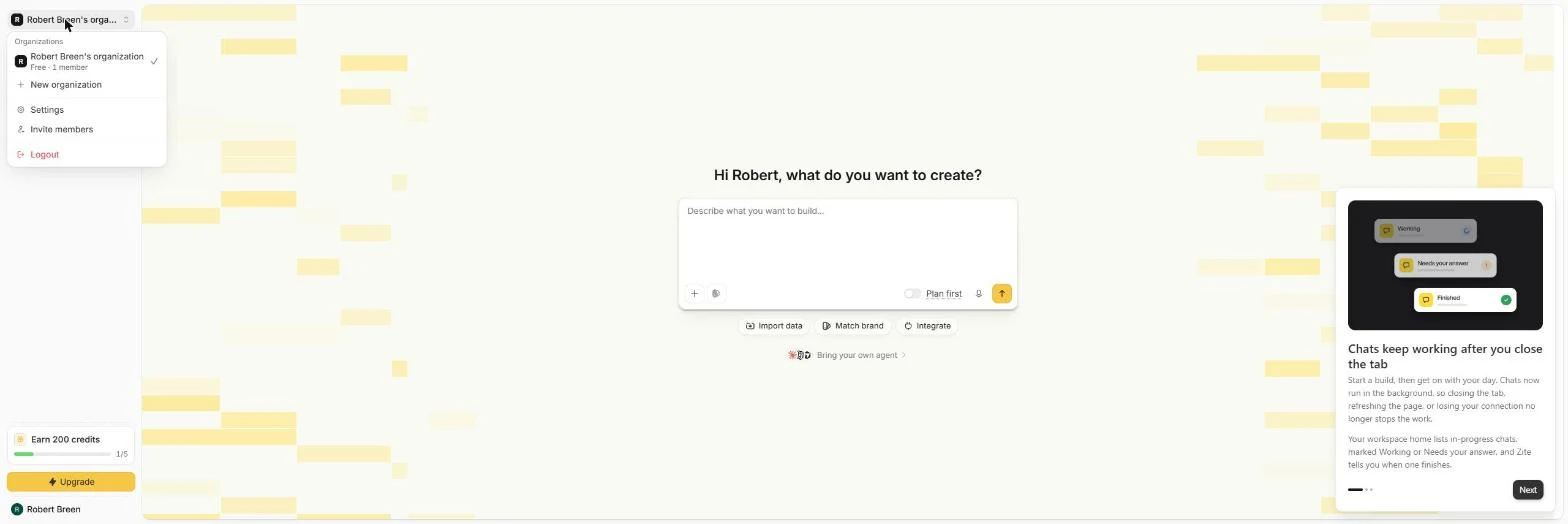
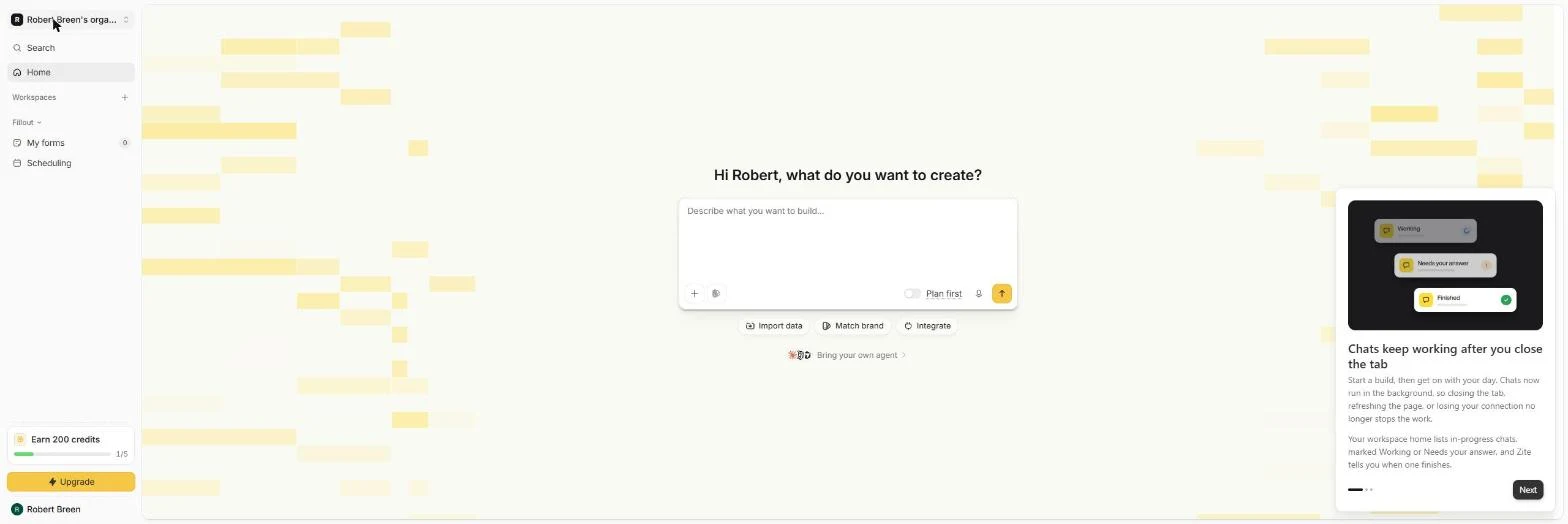
- Requests get lost. You run the office at a made-up property company. Repair requests arrive by text, voicemail and email, with no unit number and no photo, and the leak reported on Friday night waits until Monday. One Fillout form fixes that. Fillout now lives inside Zite. If you don't see Fillout in the side menu, it is switched off. We clicked the organization name. Click Settings.
Repair requests arrive by text, voicemail and email, and some get lost. One Fillout form fixes that. Fillout lives inside Zite now.
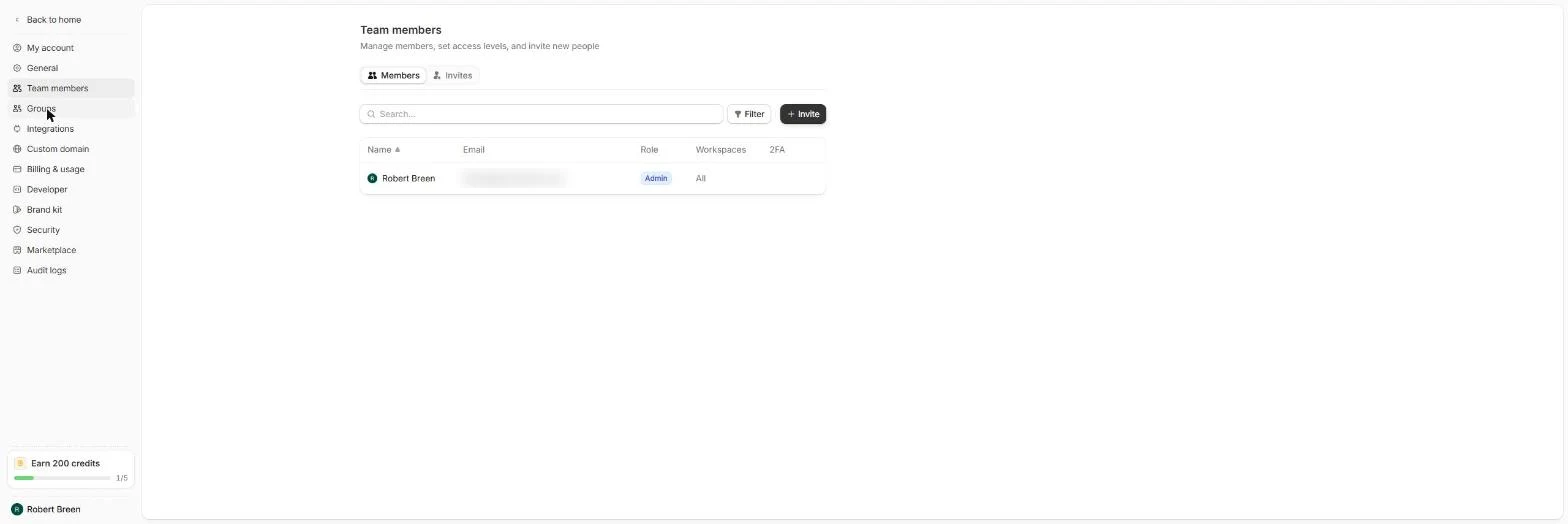
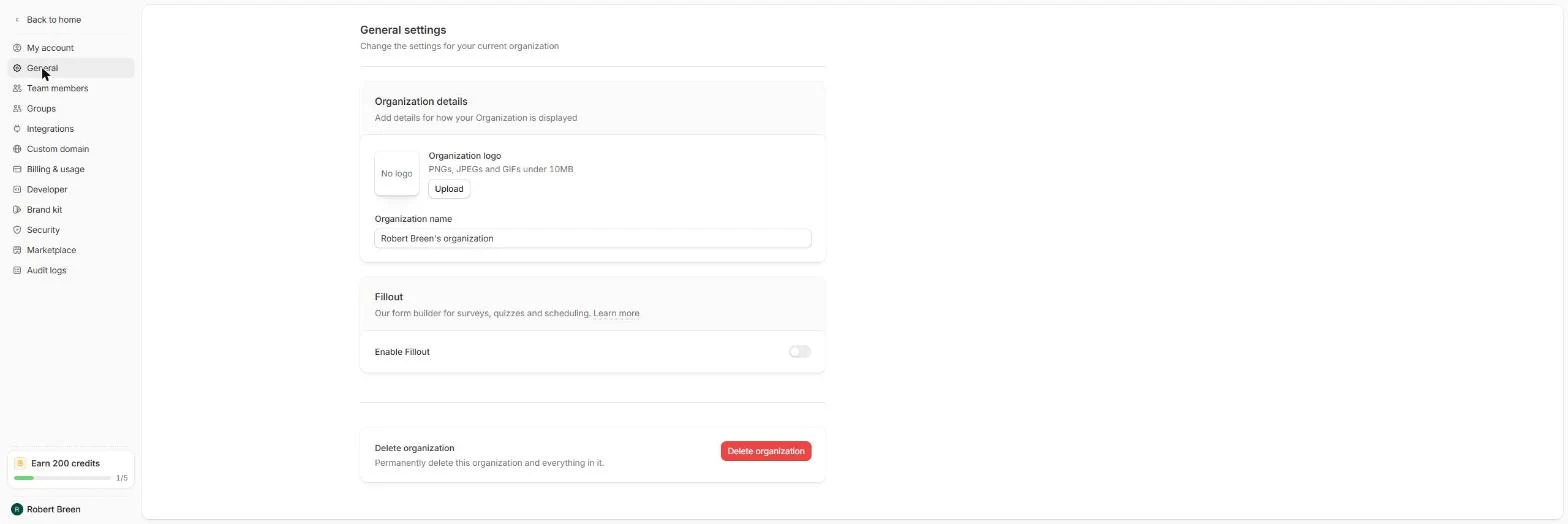
- Find the Fillout switch. Settings opens on Team members. Click General.
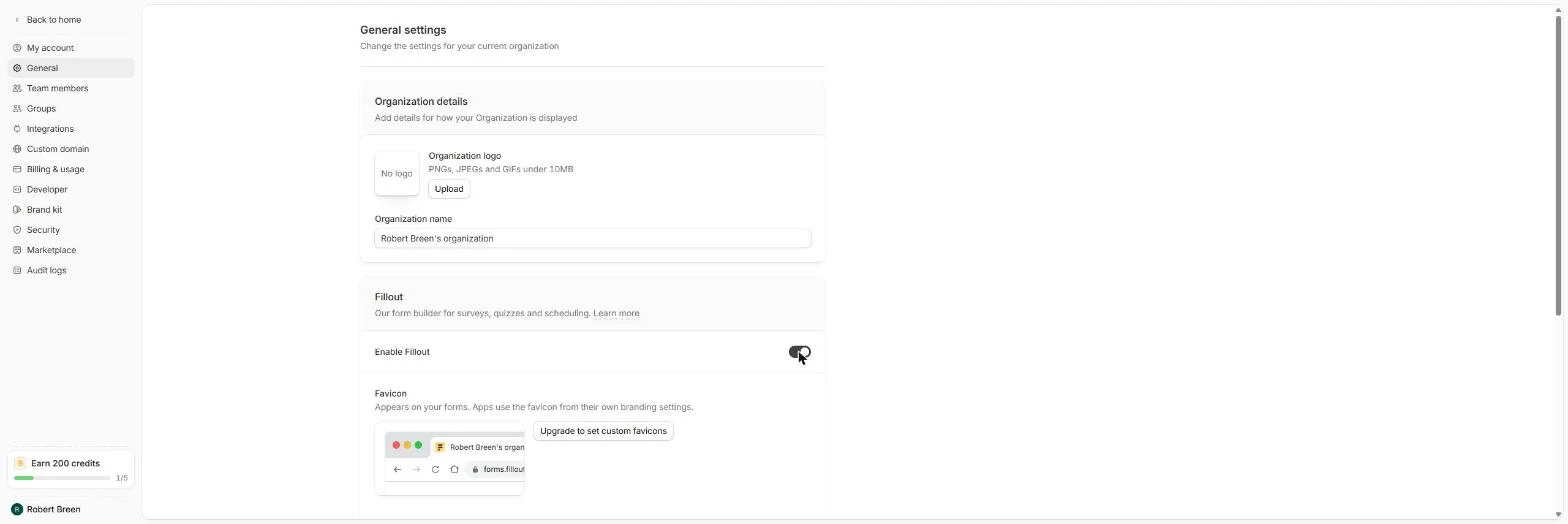
- Turn Fillout on. Under Fillout it says Our form builder for surveys, quizzes and scheduling. Only an organization admin sees this switch. Turn on Enable Fillout.
Turn on Enable Fillout.
- Back to your dashboard. It's on. Click Back to home.
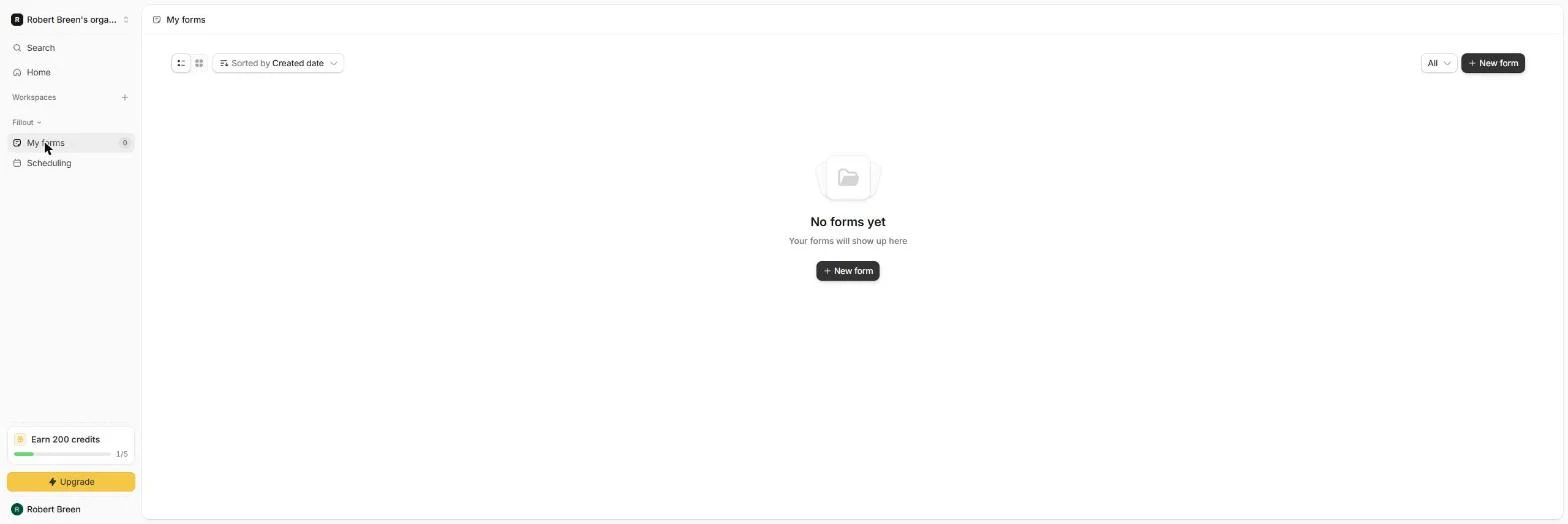
- Your forms live here. The side menu now has a Fillout section with My forms and Scheduling. Click My forms.
A Fillout section appears in the side menu.
- Start a new form. No forms yet. Click New form in the upper right.
2. Ask the right questions
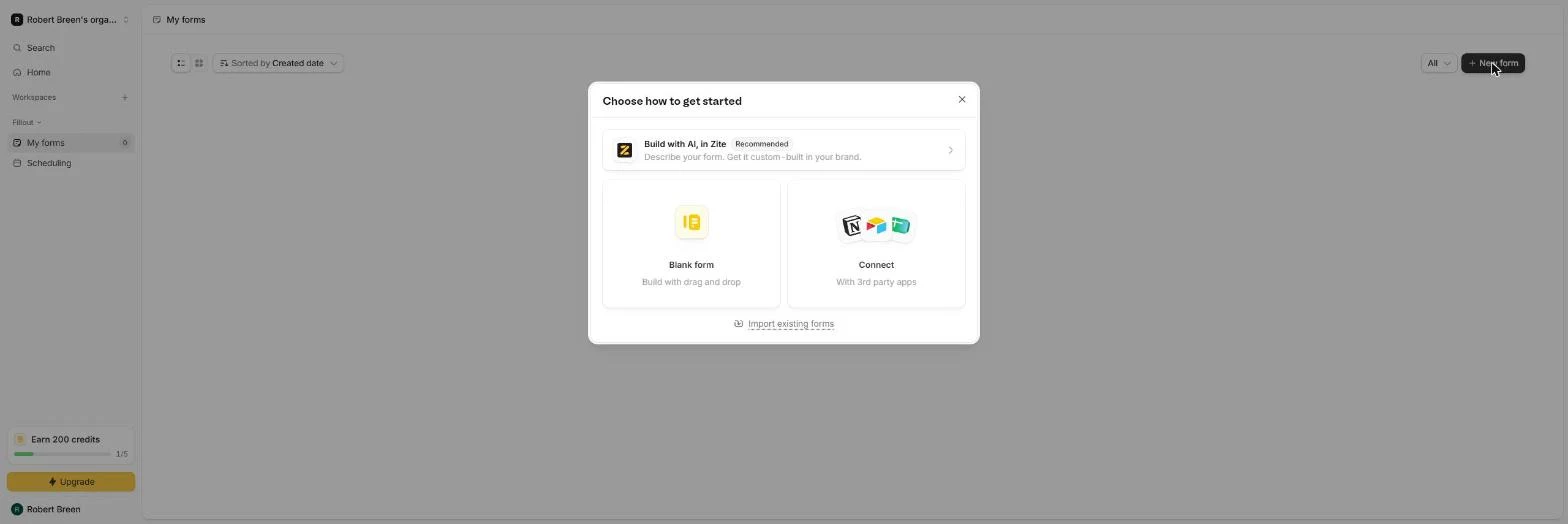
- Build it yourself. Build with AI, in Zite makes an app instead of a Fillout form, and Connect starts from Airtable, Notion or Google Sheets. You want a plain form you control, so click Blank form.
Build with AI makes an app, not a form.
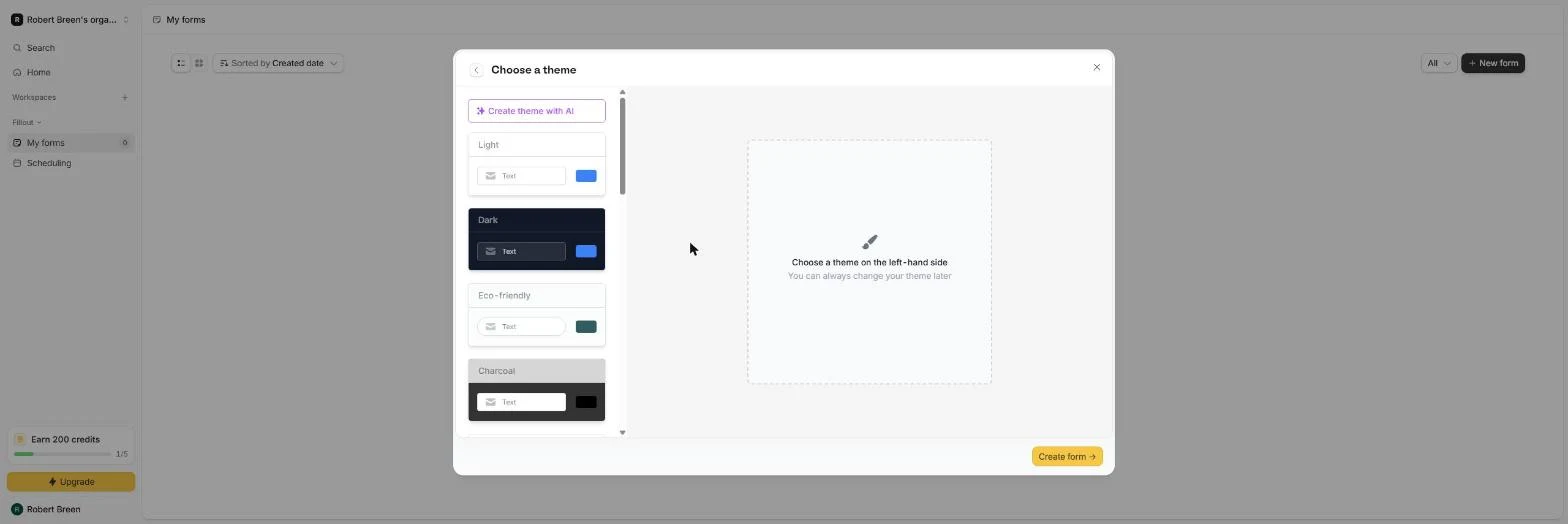
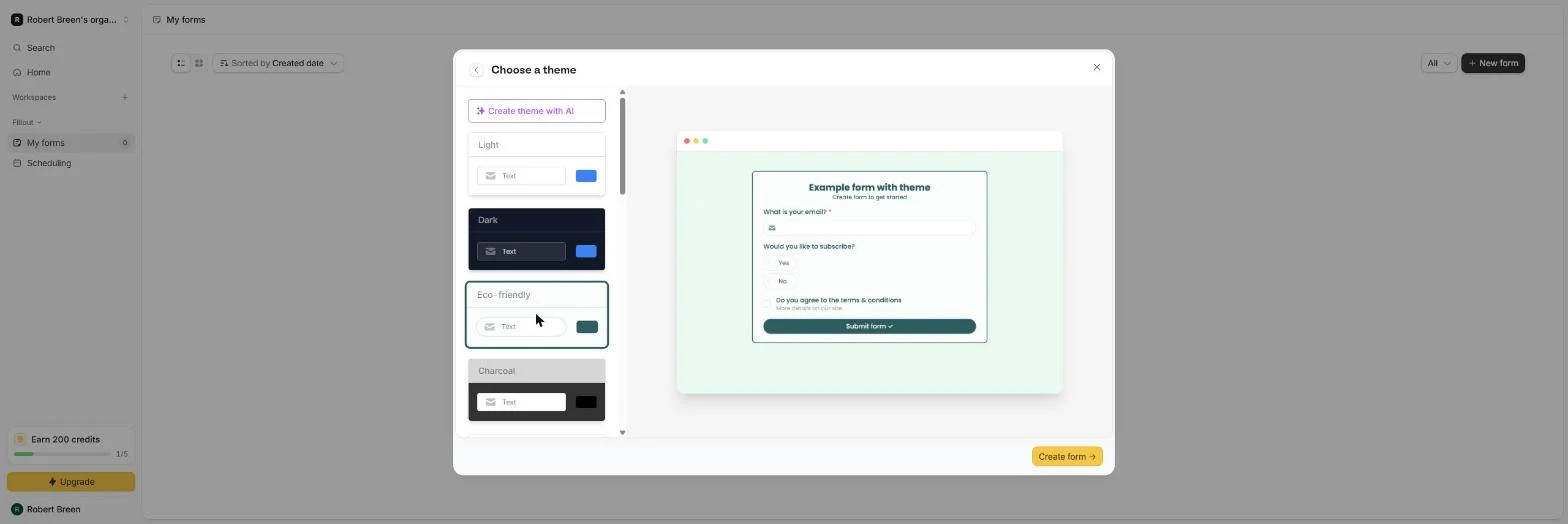
- Pick a calm theme. Pick a look now; you can change it later with Theme. Click Eco-friendly.
Pick a theme.
- Create the form. The preview turns green. Click Create form.
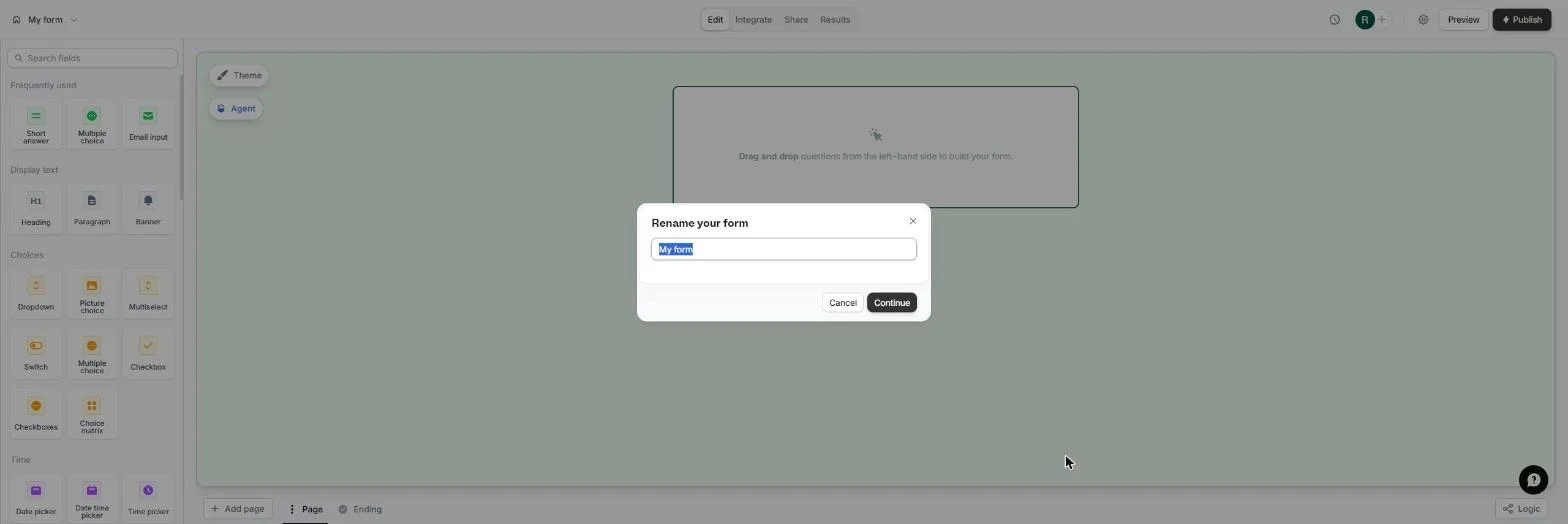
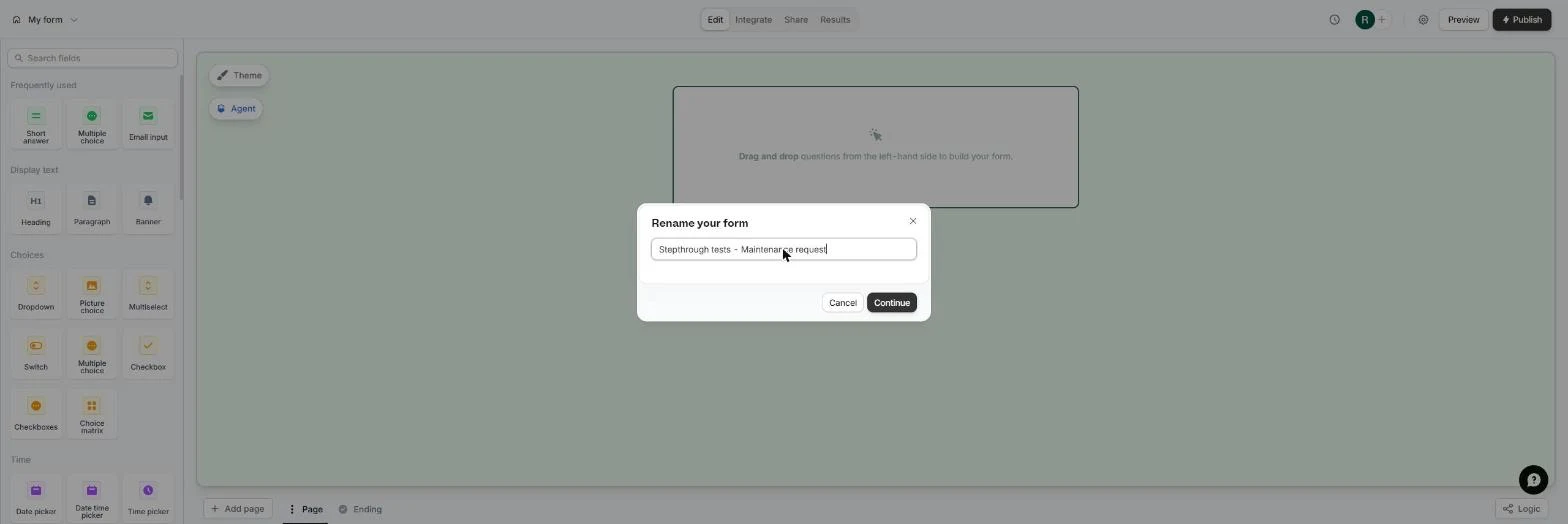
- Name it. Give the form a name your team will recognise in My forms. Ours has a Stepthrough tests prefix.
Name the form.
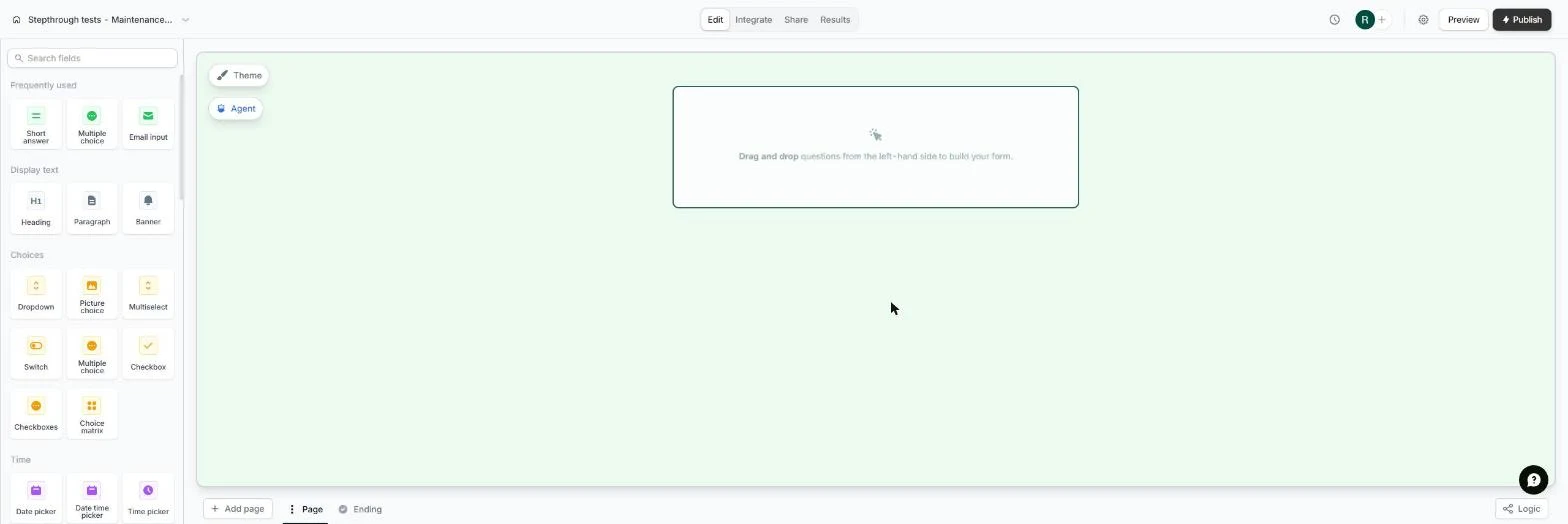
- Save the name. Click Continue.
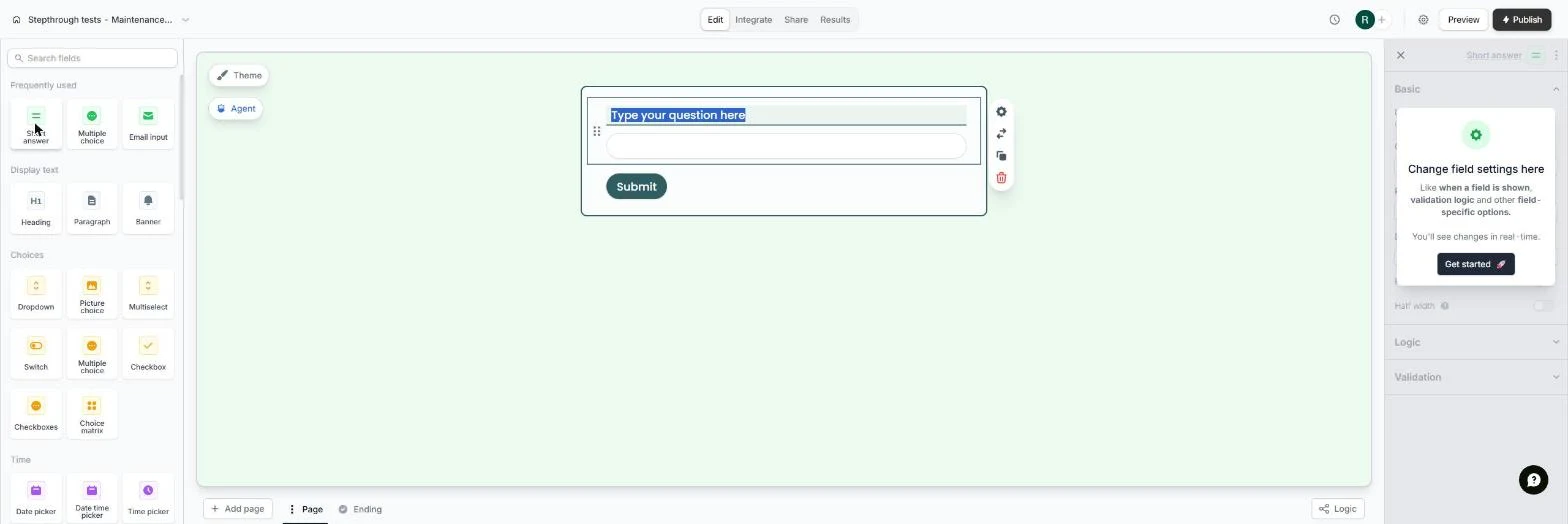
- Add the first question. The editor: field types on the left, your form in the middle, settings on the right. Click Short answer.
Field types are on the left.
- Who is asking. The question text is selected, so just type over it.
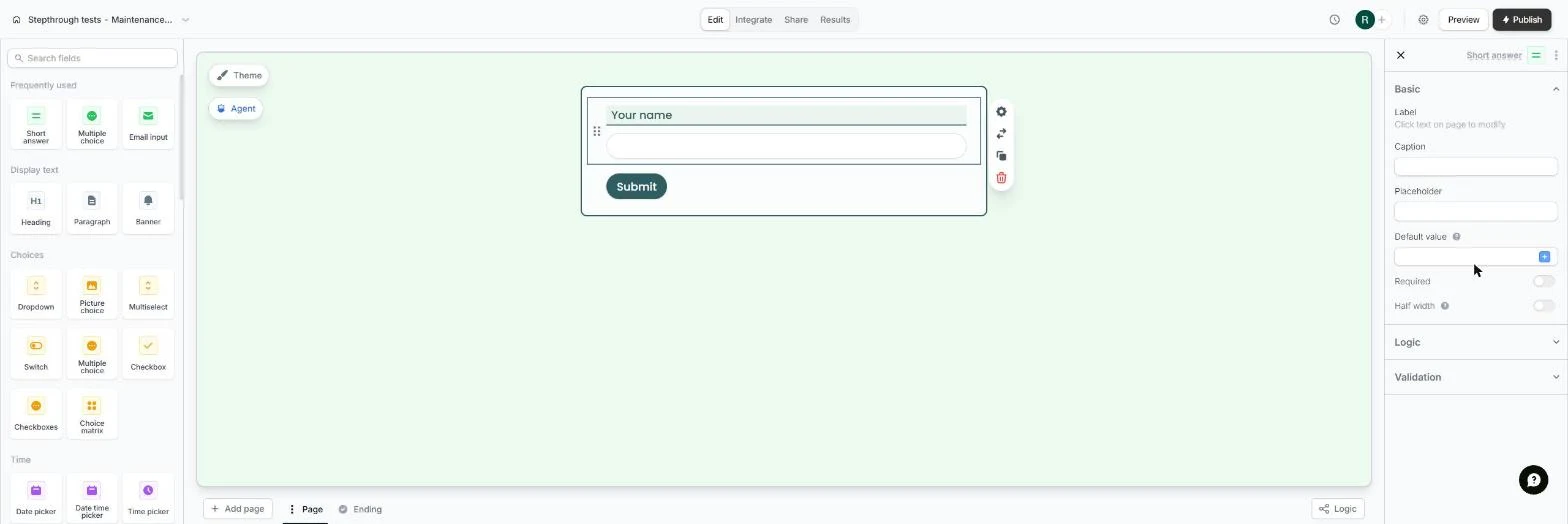
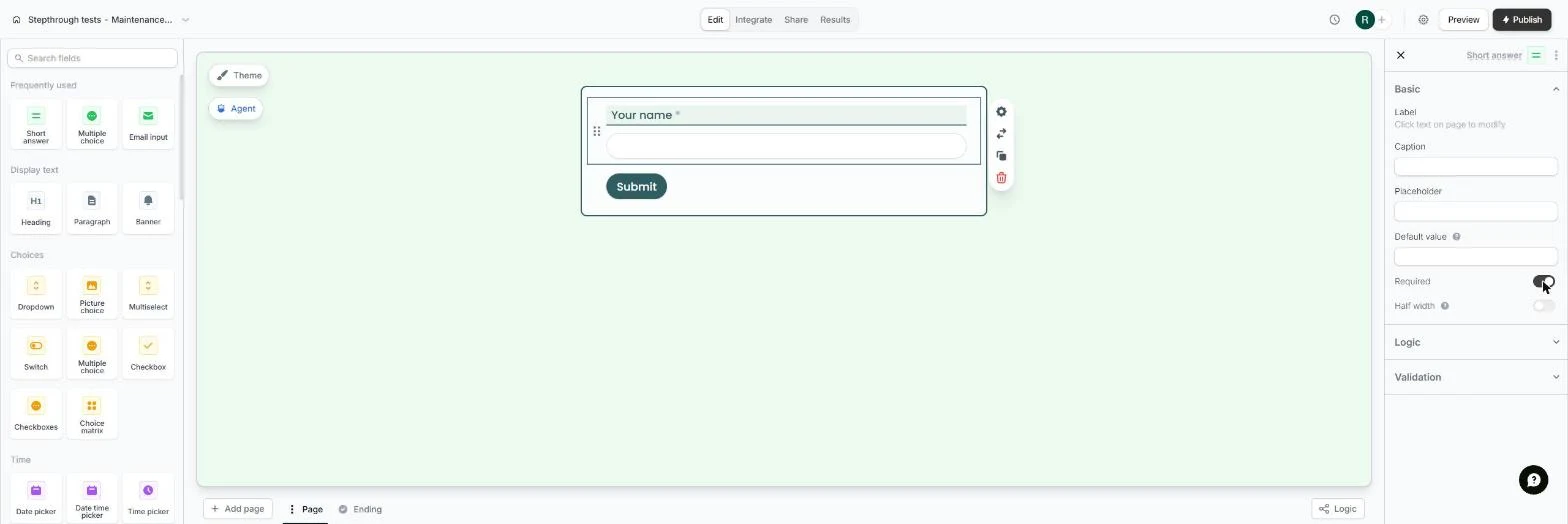
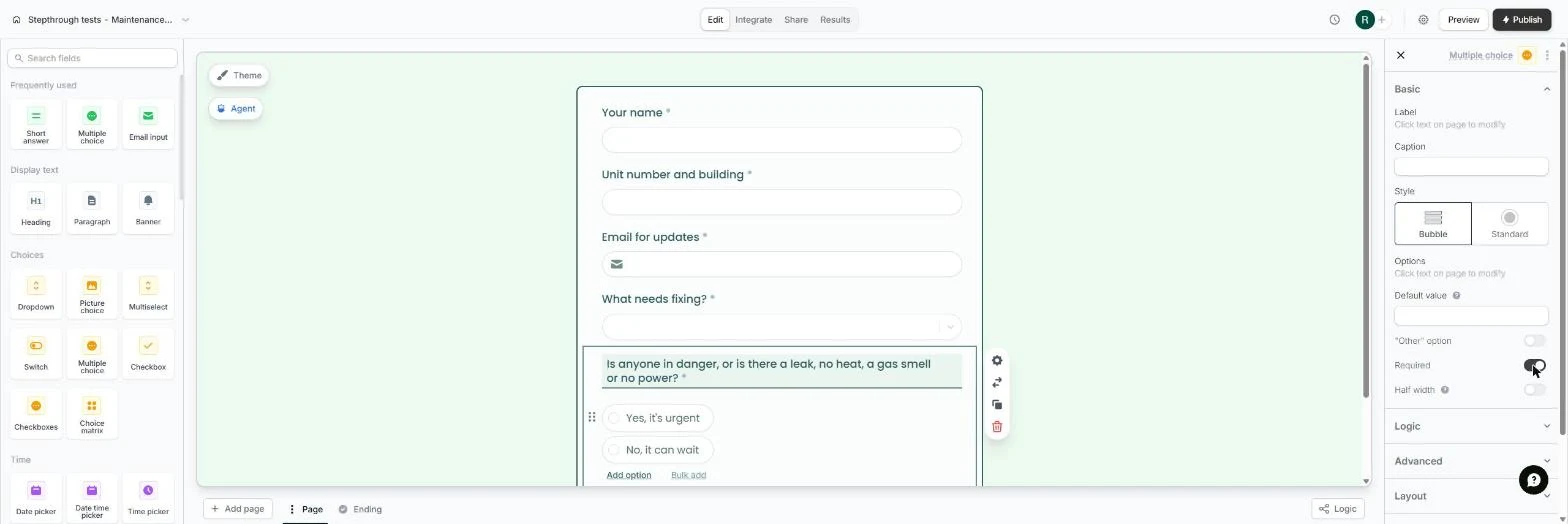
- Make it required. The right panel shows this field's settings. A request with no name is no use, so turn on Required.
Turn on Required.
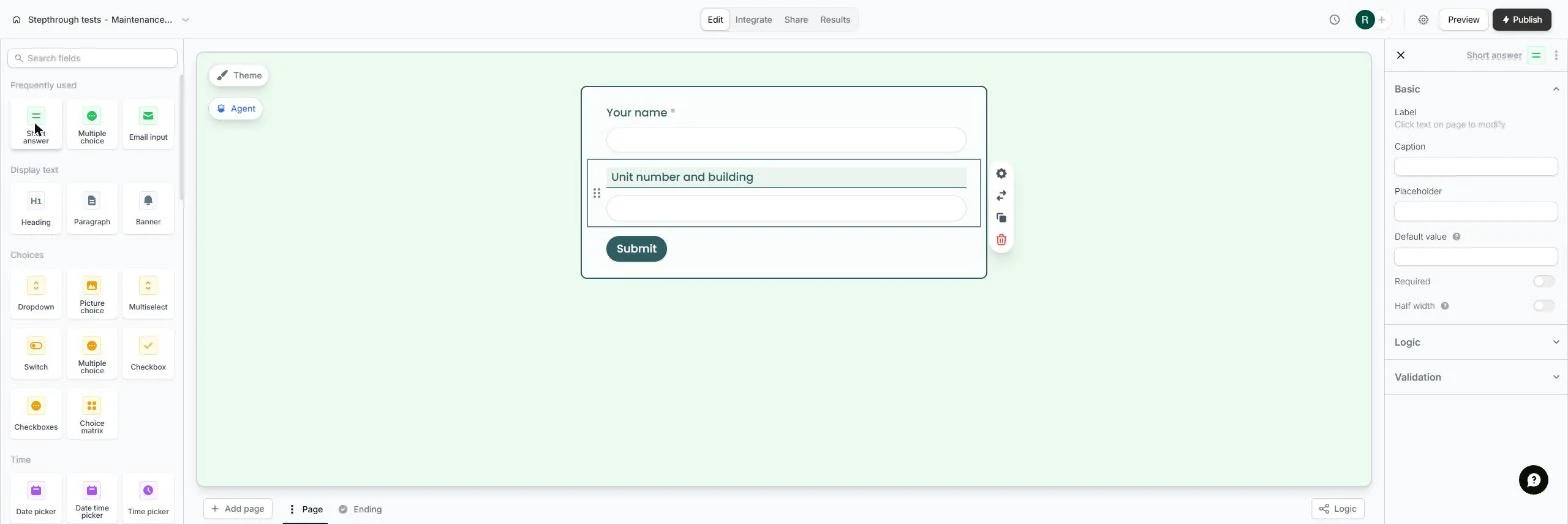
- Which unit. A red star marks it required. Most "it's broken" messages have no unit number. Click Short answer again for the next question.
Most requests miss the unit number.
- Unit number, required. We typed Unit number and building. Turn on Required.
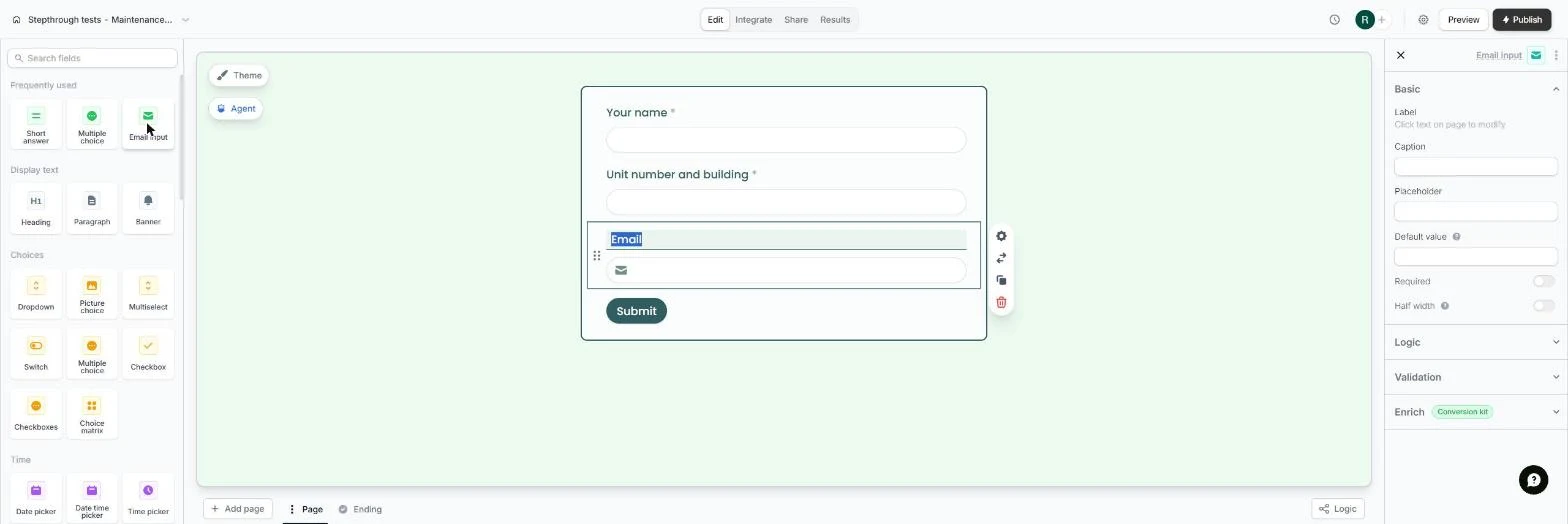
- Where to send updates. Then we clicked Email input, which checks that the address looks real. Type over Email.
We added an Email input.
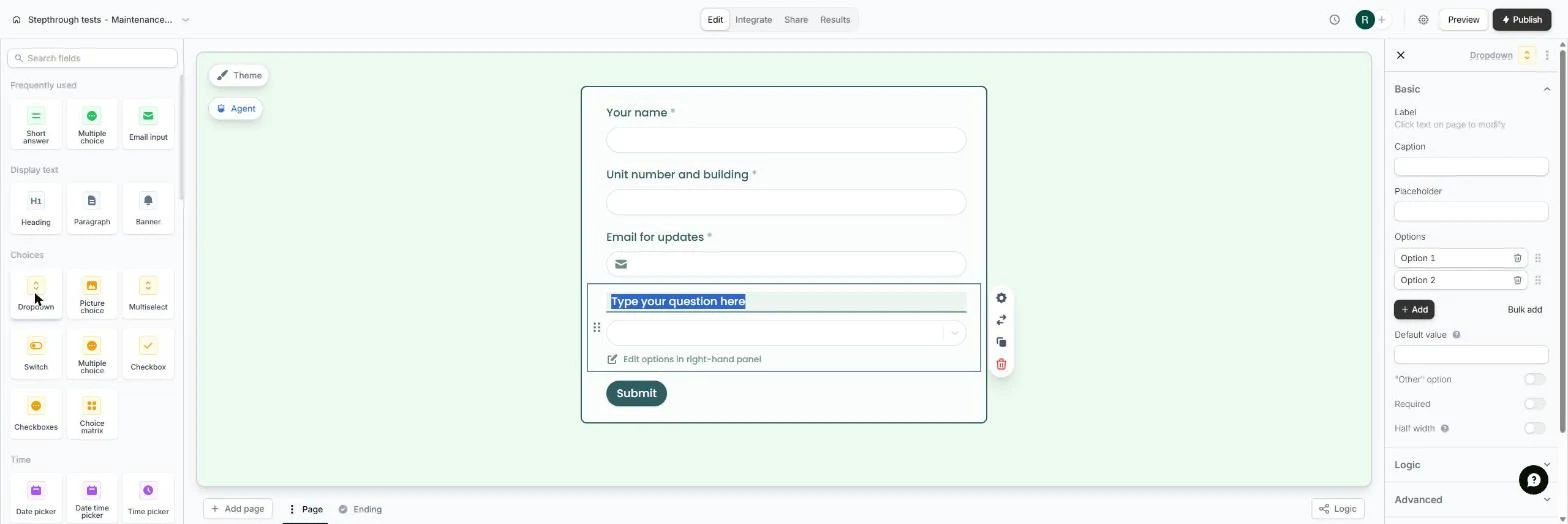
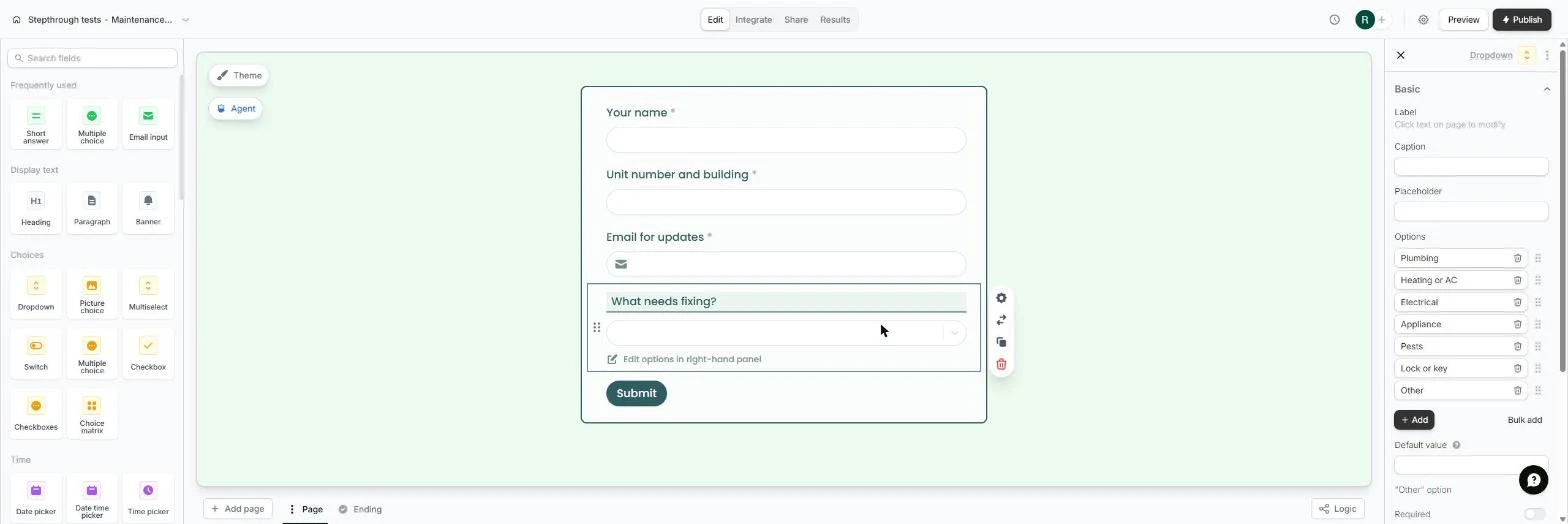
- What kind of job. We made the email required and clicked Dropdown, so every request lands in a category your team can sort by. Type the question.
A dropdown sorts each request into a category.
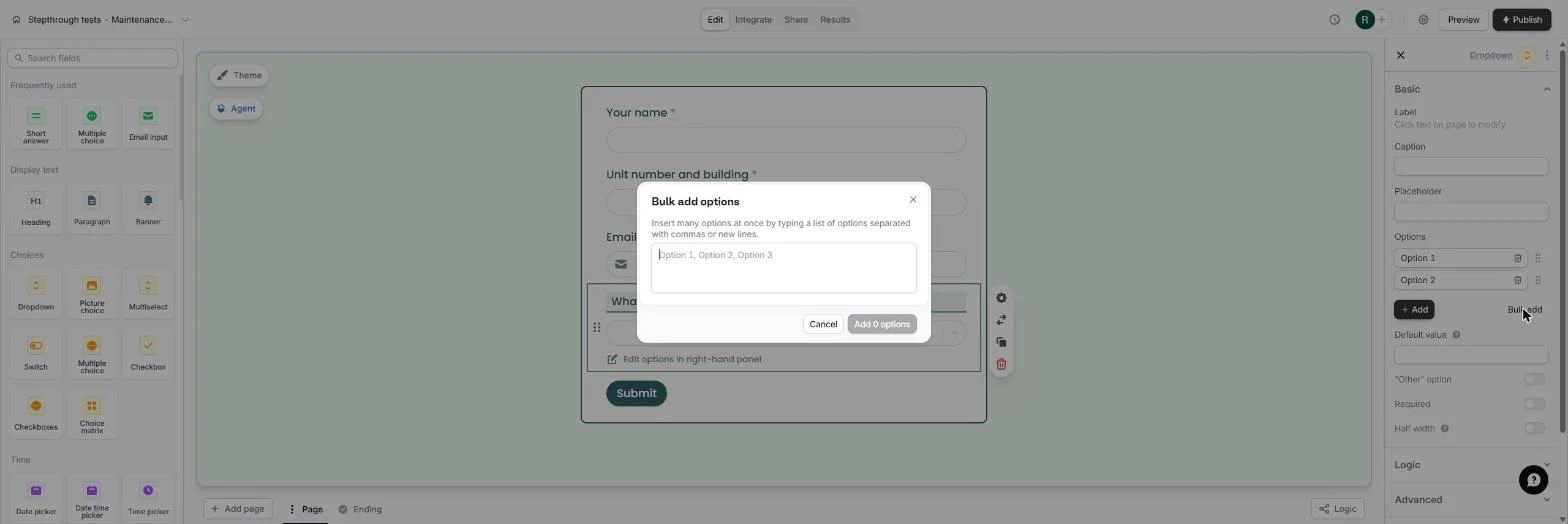
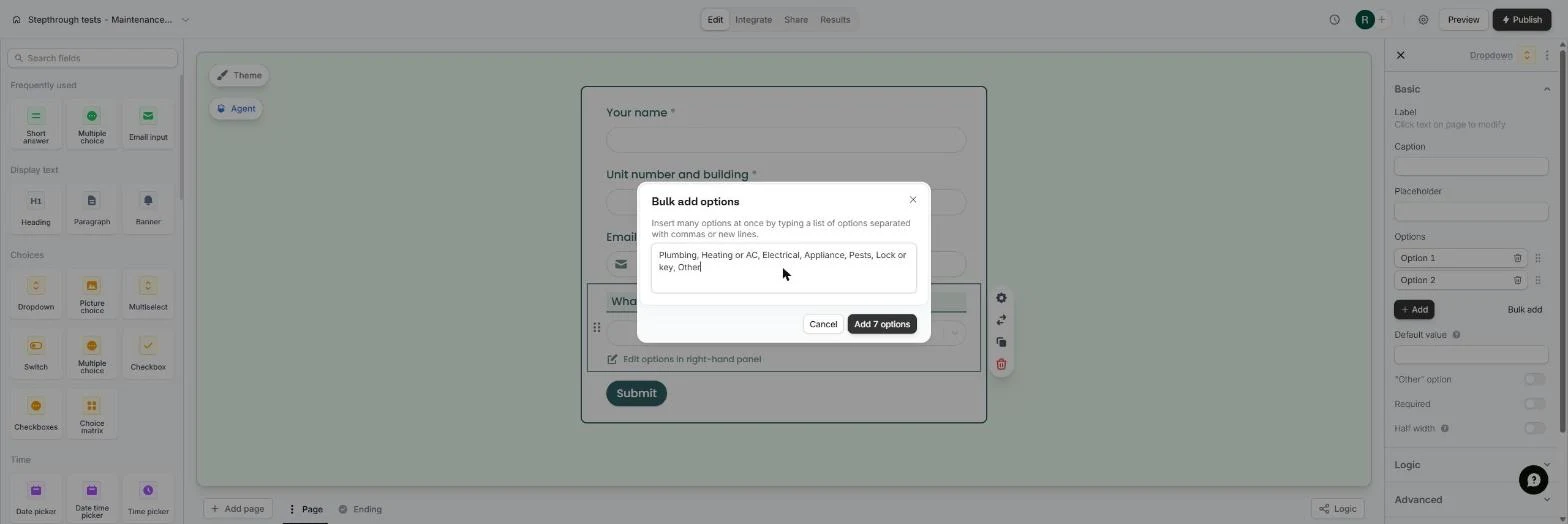
- All the options at once. Instead of typing Option 1, Option 2 in the right panel, we clicked Bulk add. Type the list, separated by commas.
Bulk add takes the whole list at once.
- Add them. Click Add 7 options.
- Ask about danger. Seven options in the right panel. We turned on Required at the bottom of the panel. Now the most important question: click Multiple choice.
Now the most important question.
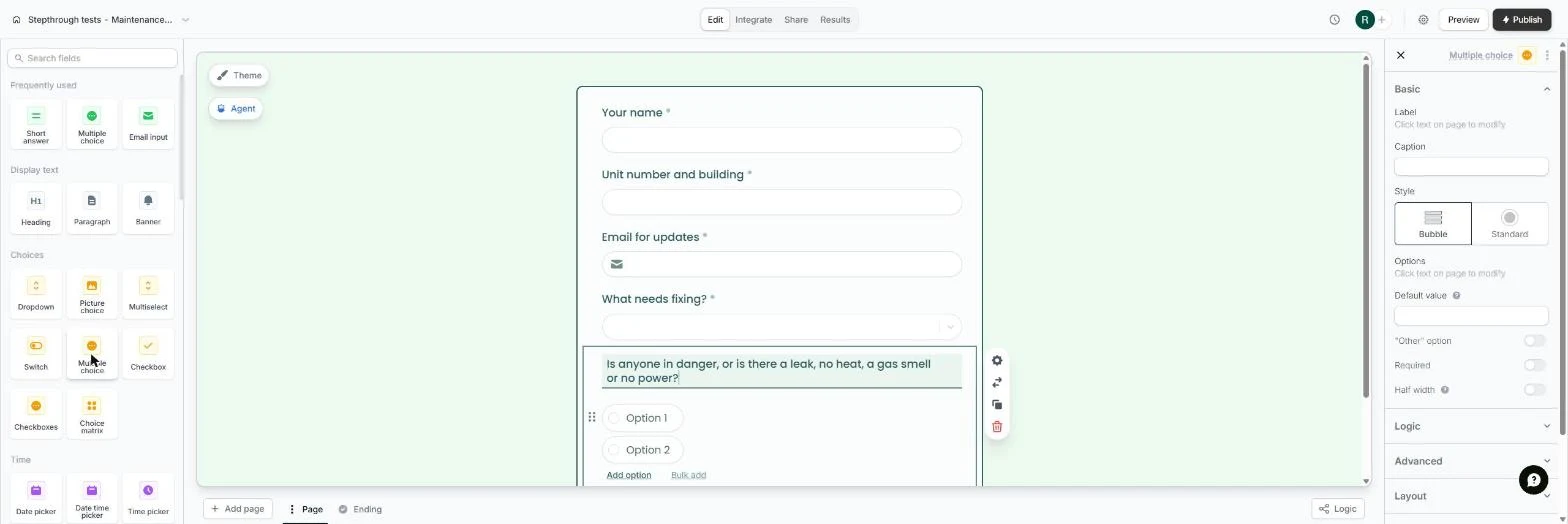
- Two clear answers. We typed Is anyone in danger, or is there a leak, no heat, a gas smell or no power? Click Option 1, select its text and type Yes, it's urgent. Do the same for Option 2 with No, it can wait.
Ask about danger, leaks, heat, gas and power. Change the two options to Yes, it's urgent, and No, it can wait.
3. Flag emergencies
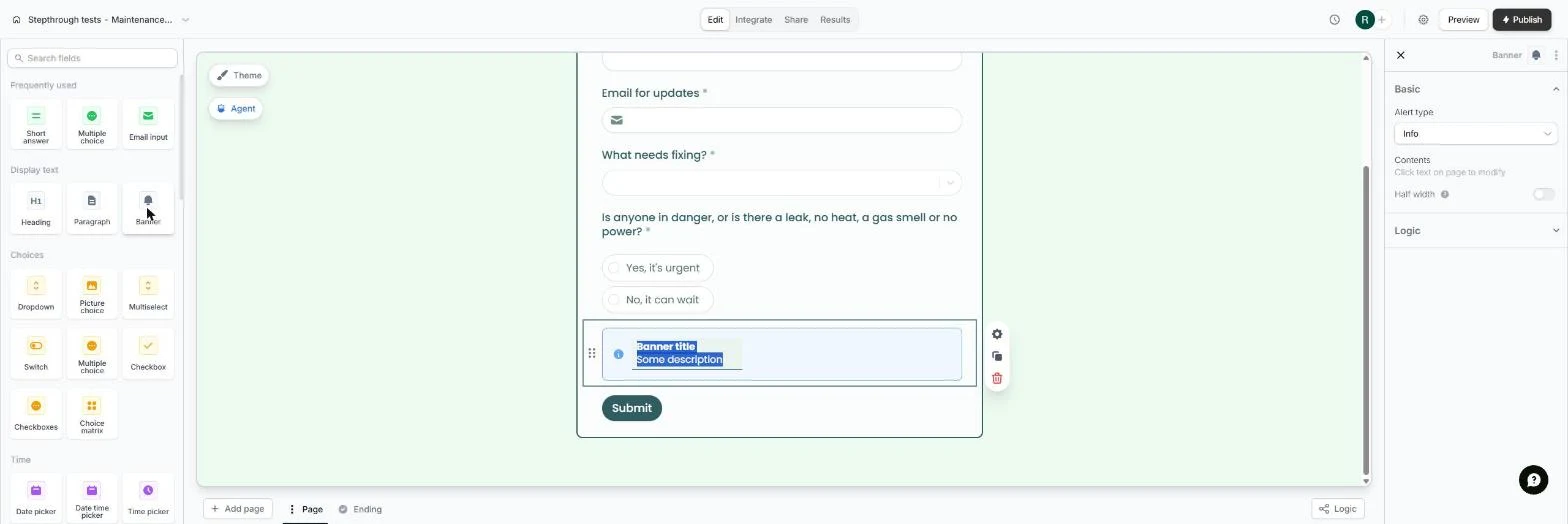
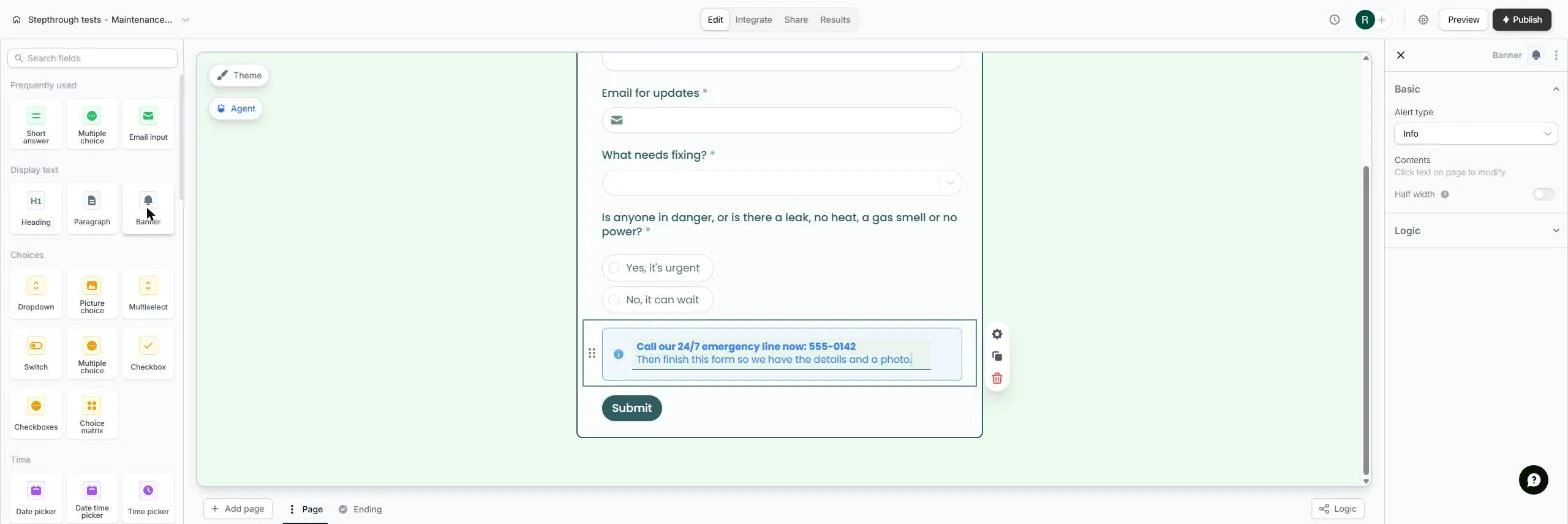
- A warning that only some people see. Both answers are in and the question is required. Someone with water coming through the ceiling should call, not wait for an email. Click Banner.
Someone with a leak should call, not wait for an email.
- Write the warning. A banner has a bold title and a line under it. Type the title. We added Then finish this form so we have the details and a photo. on the second line.
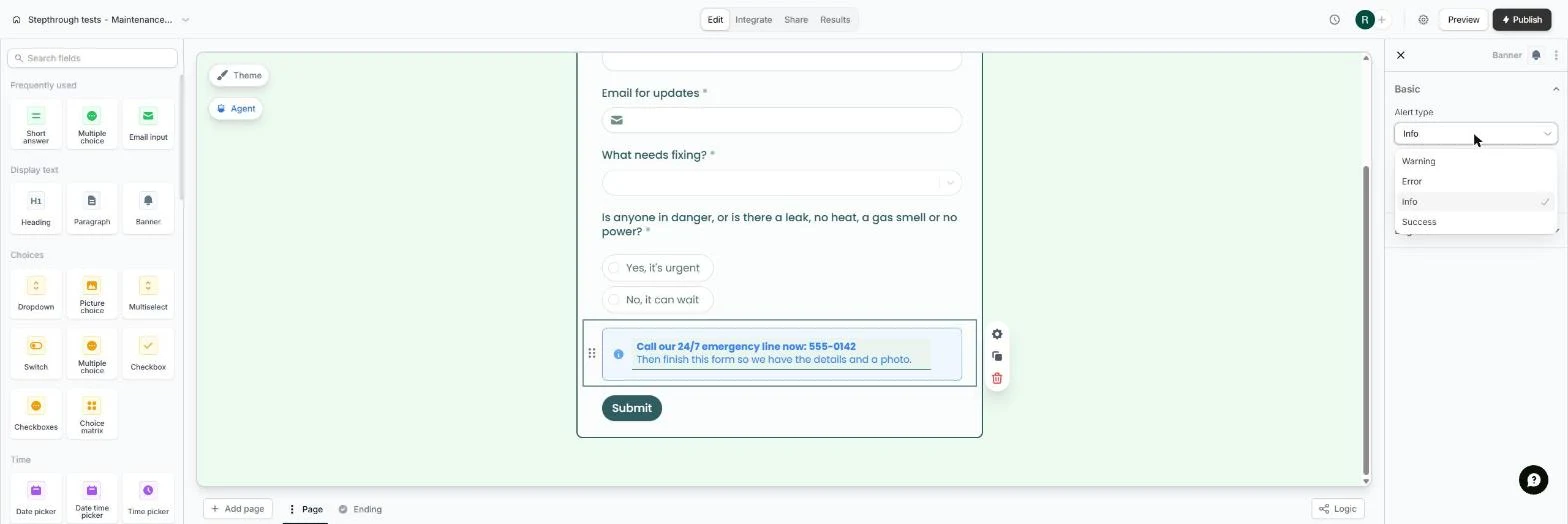
- Make it red. A blue Info banner is easy to miss. Open Alert type.
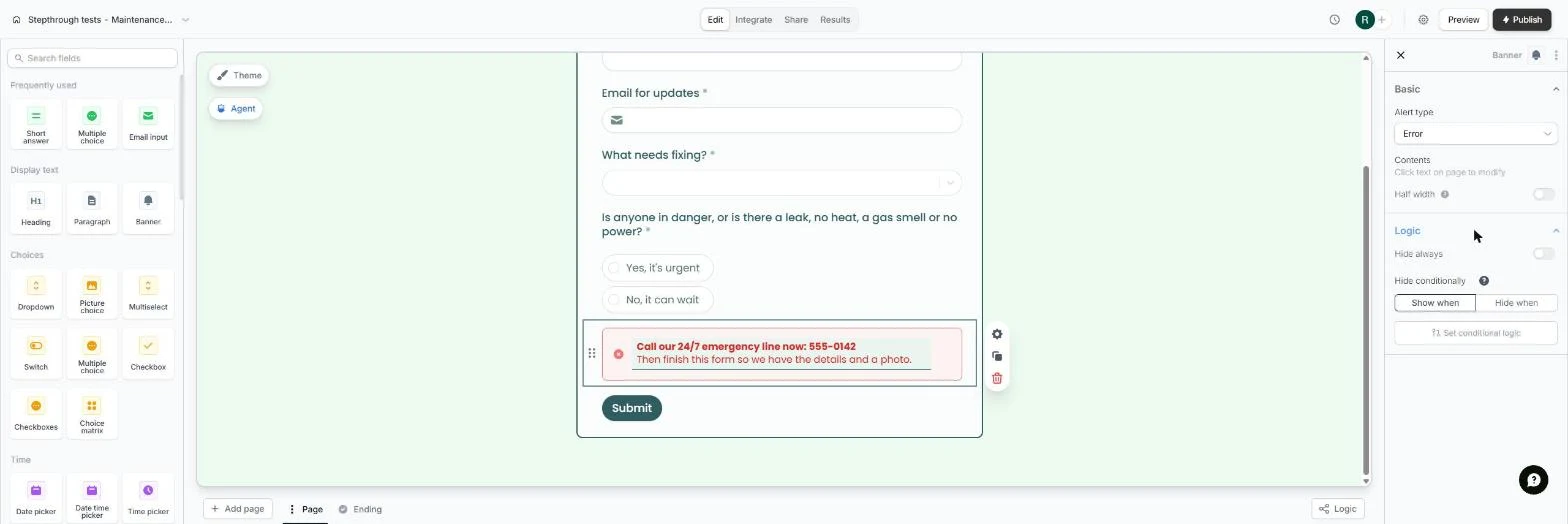
- Error style. Click Error.
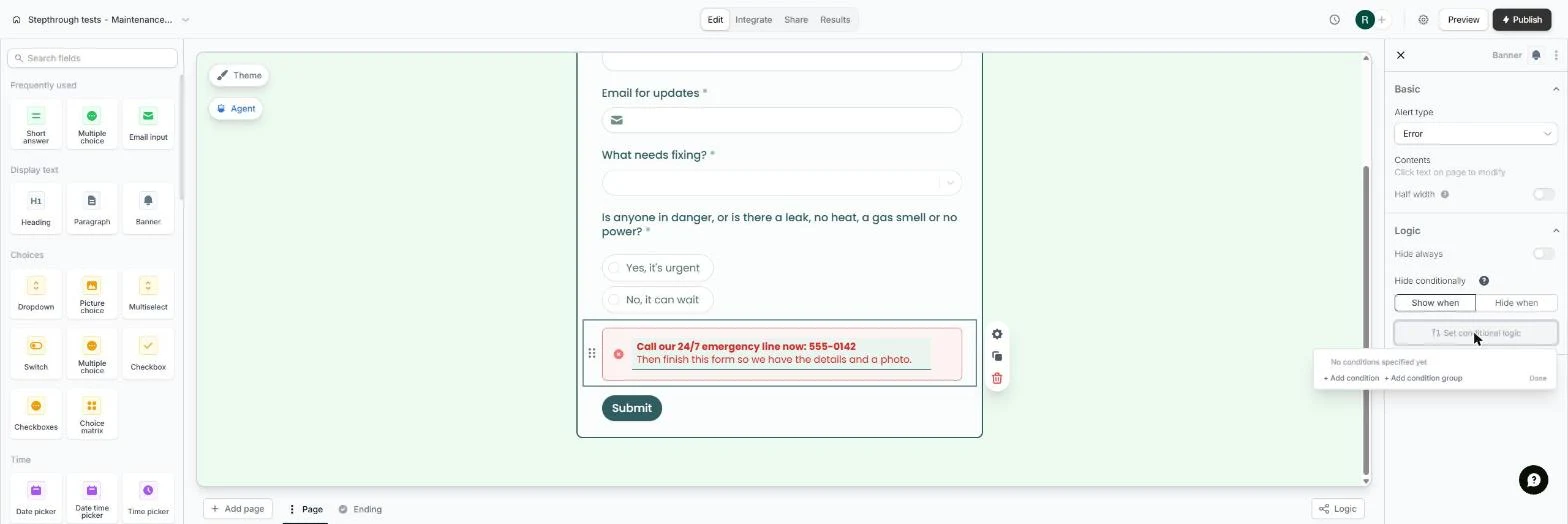
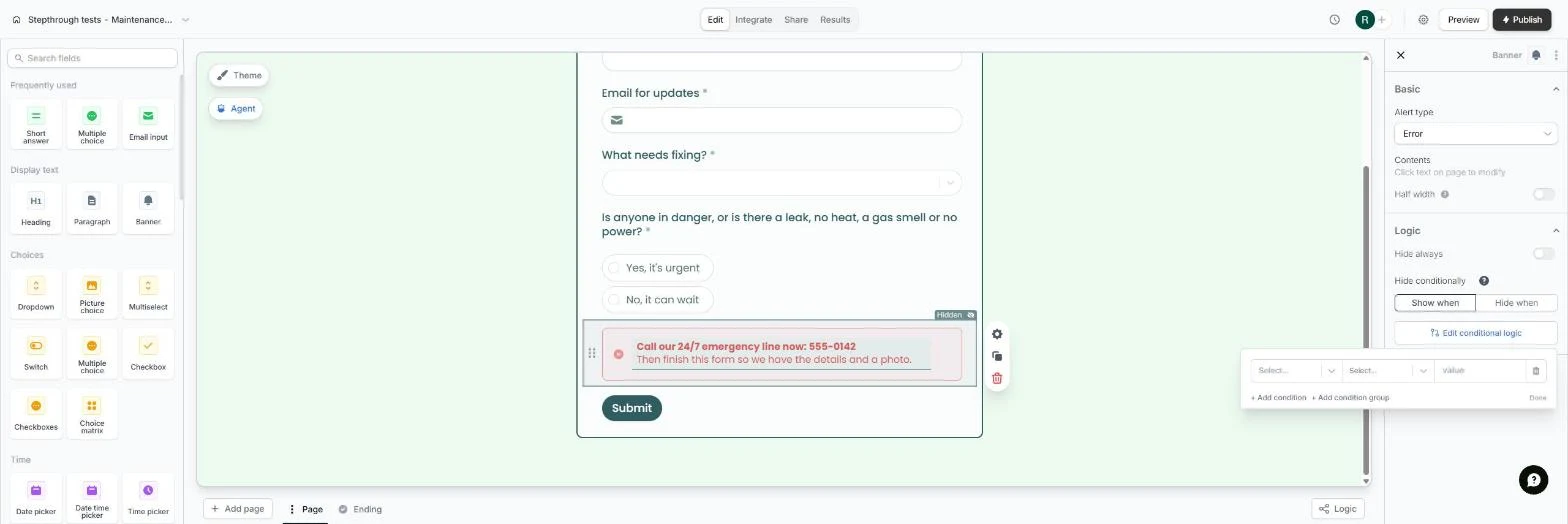
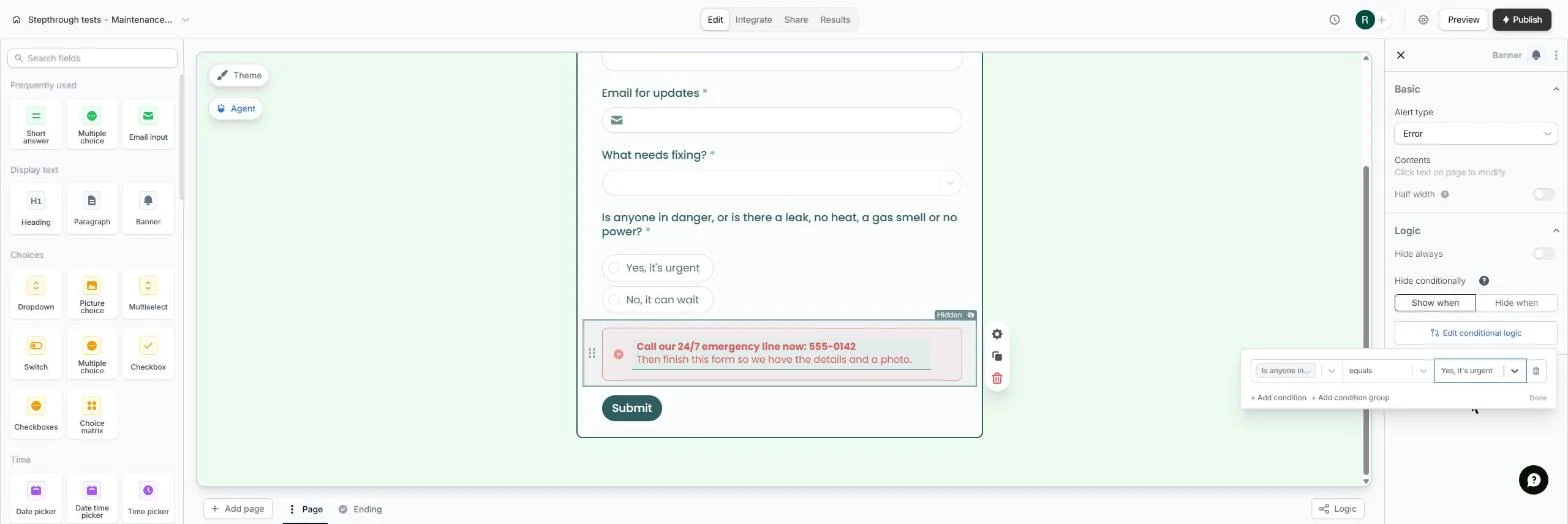
- Only show it for emergencies. It's red now. We opened Logic under it. Keep Show when and click Set conditional logic.
Keep Show when, and click Set conditional logic.
- Add a condition. No conditions specified yet. Click + Add condition.
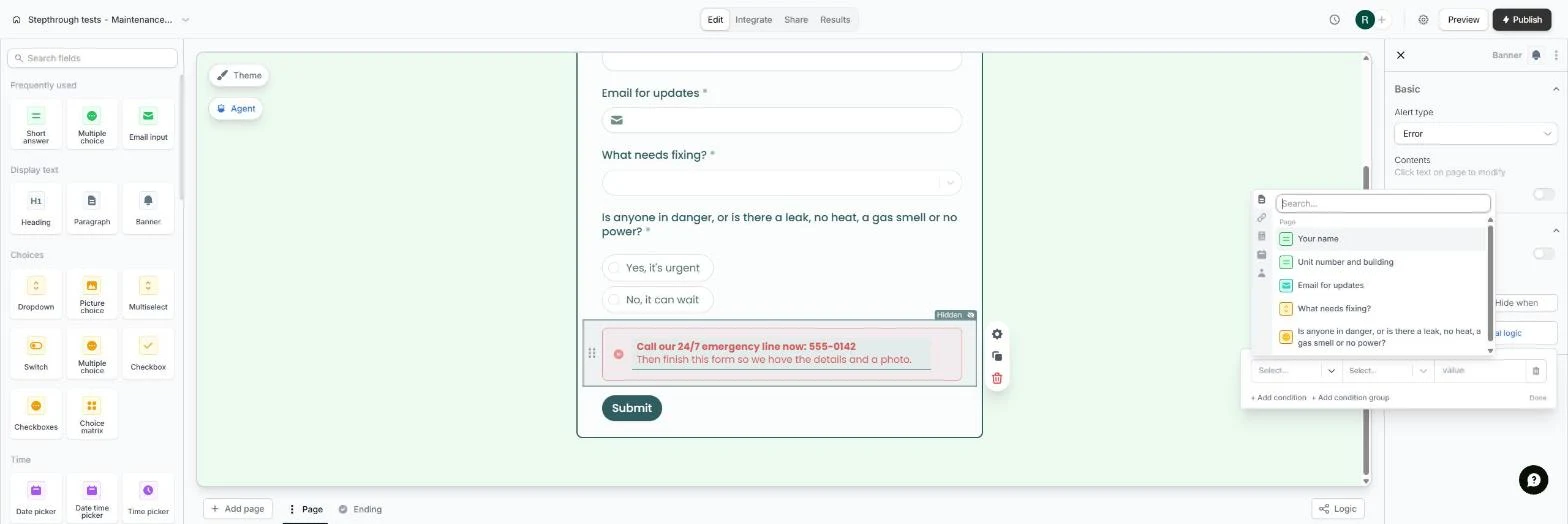
- Pick the question. The banner is marked Hidden in the editor. A condition is a question, a test and an answer. Open the first Select....
- The danger question. Every question on the form is listed. Click Is anyone in danger, or is there a leak....
Pick the danger question.
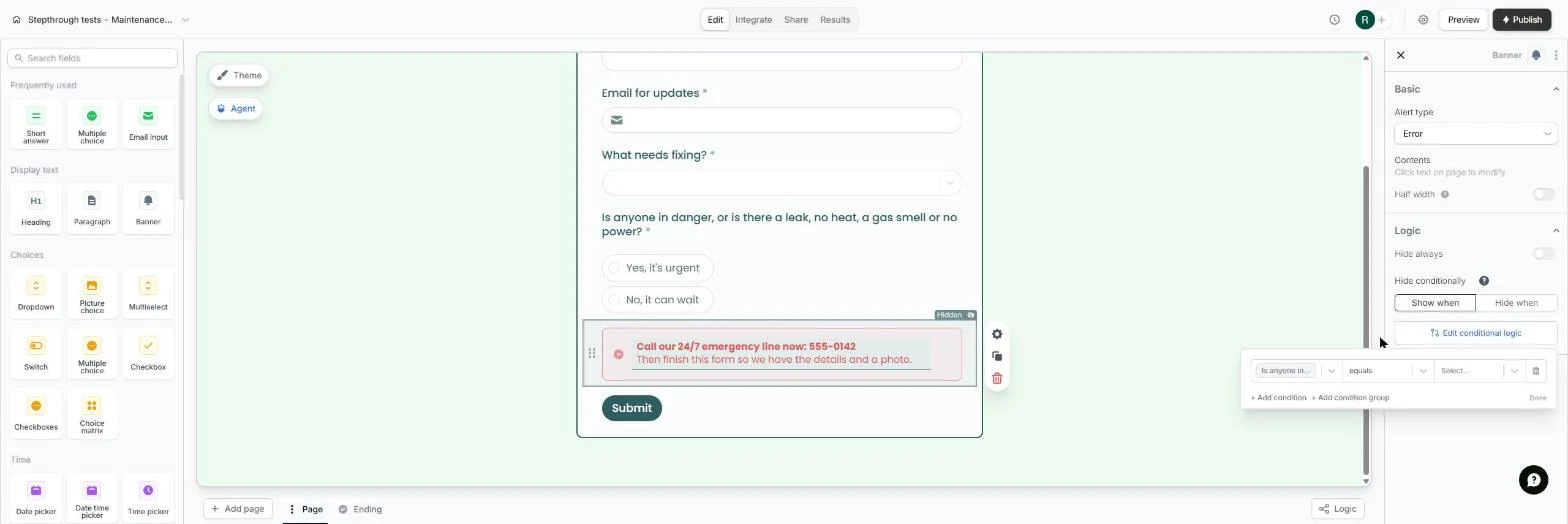
- Equals which answer. The test is already equals. Open the last Select....
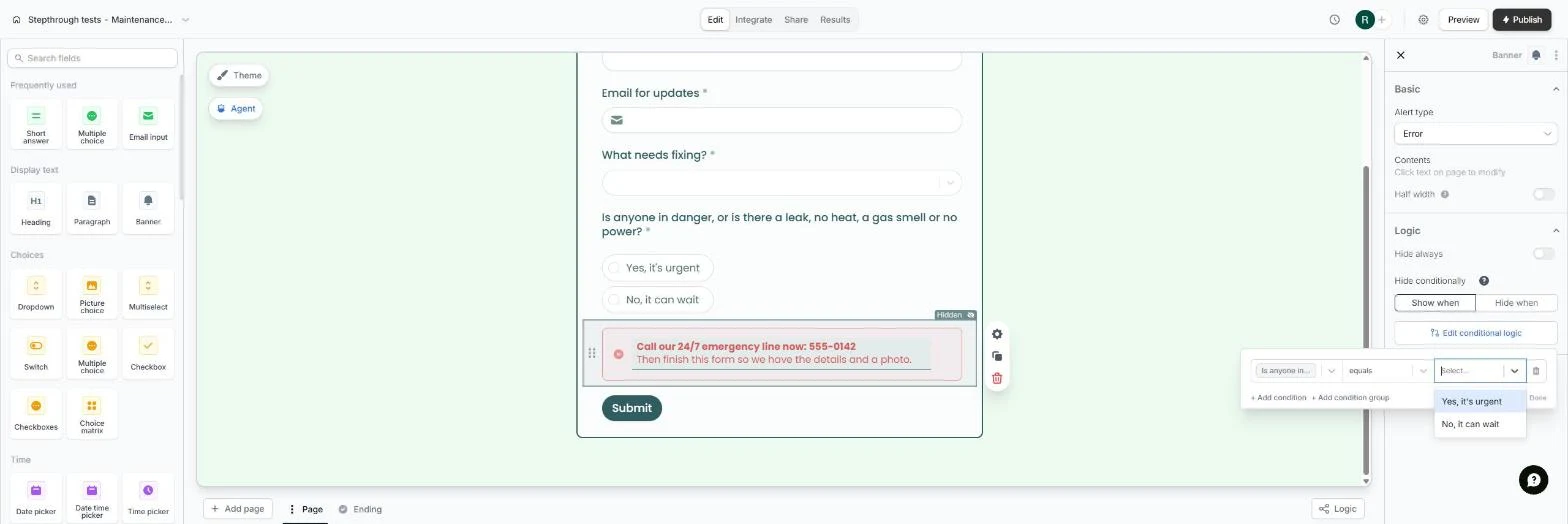
- Yes, it's urgent. Click Yes, it's urgent.
Pick Yes, it's urgent.
- Save the rule. The rule reads: show the banner when the danger question equals Yes, it's urgent. Click Done.
Show the banner only when the answer is yes.
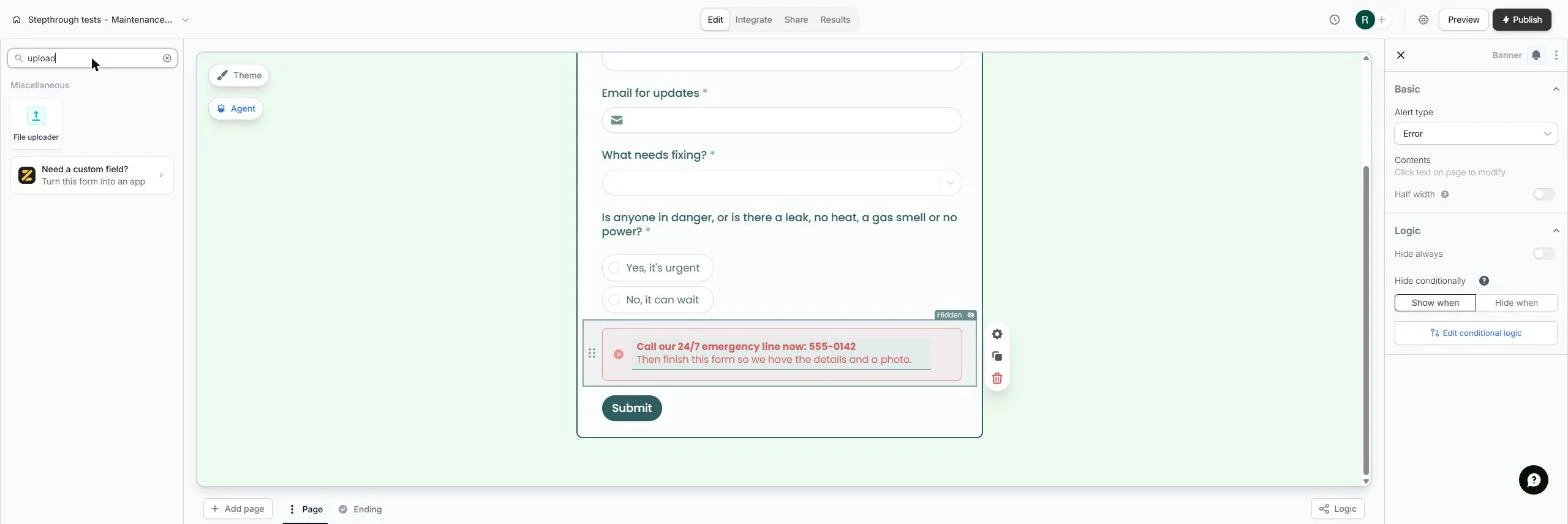
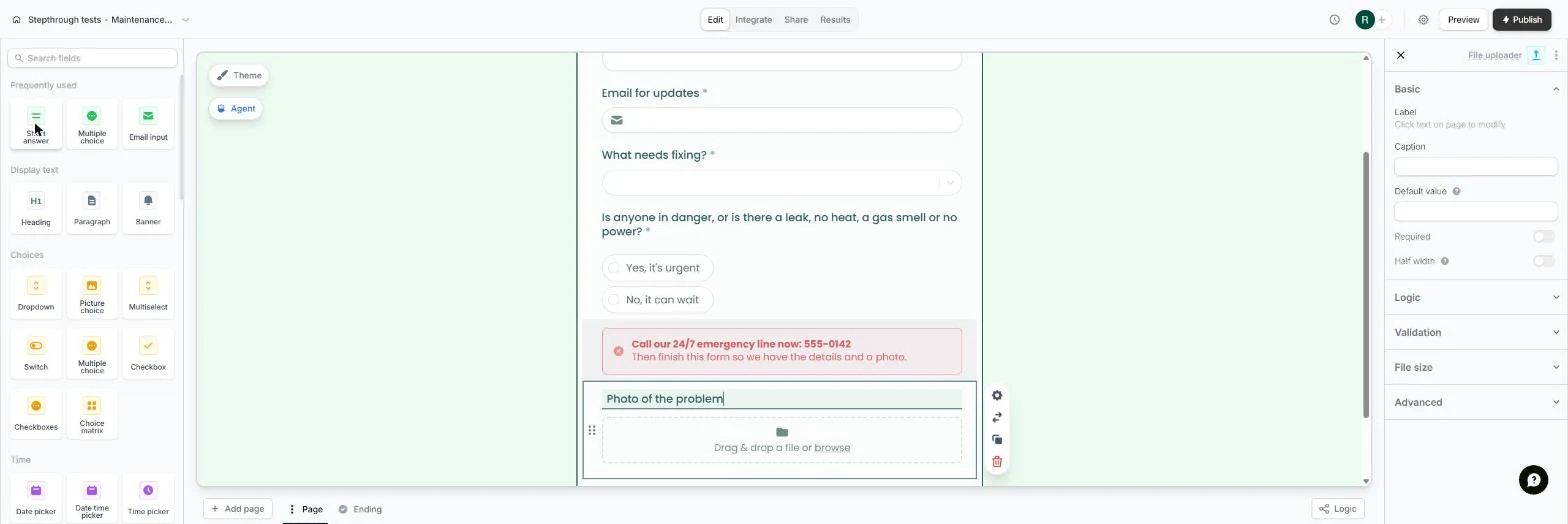
- Ask for a photo. A photo saves a wasted trip: the plumber brings the right part. We typed upload in Search fields. Click File uploader.
A photo tells the plumber which part to bring.
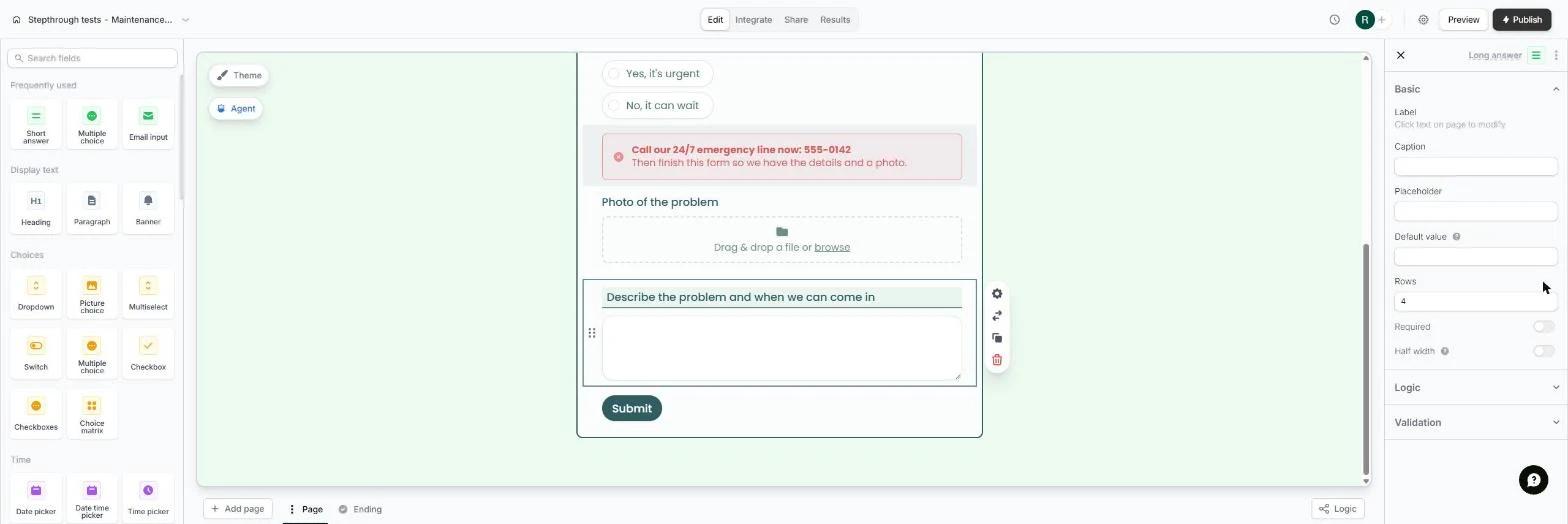
- And a description. We typed Photo of the problem and left it optional, so nobody gets stuck without a camera. Last question: click Search fields, type long and click Long answer.
Leave the photo optional. Then search long, and add a Long answer.
- When can we come in. We typed Describe the problem and when we can come in, which gets you access times without a phone call. Turn on Required.
Ask when you can come in. Turn on Required.
4. Publish and get alerts
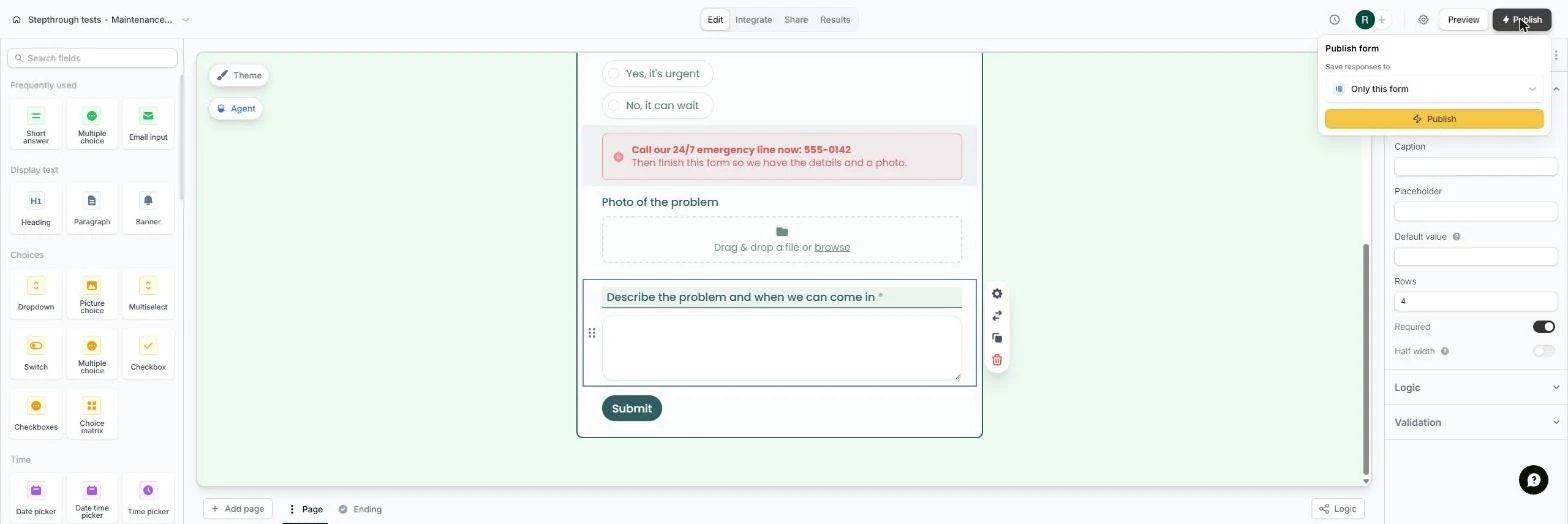
- Where answers go. We clicked Publish. The first time, Fillout asks where to keep responses. Open Save responses to.
We clicked Publish.
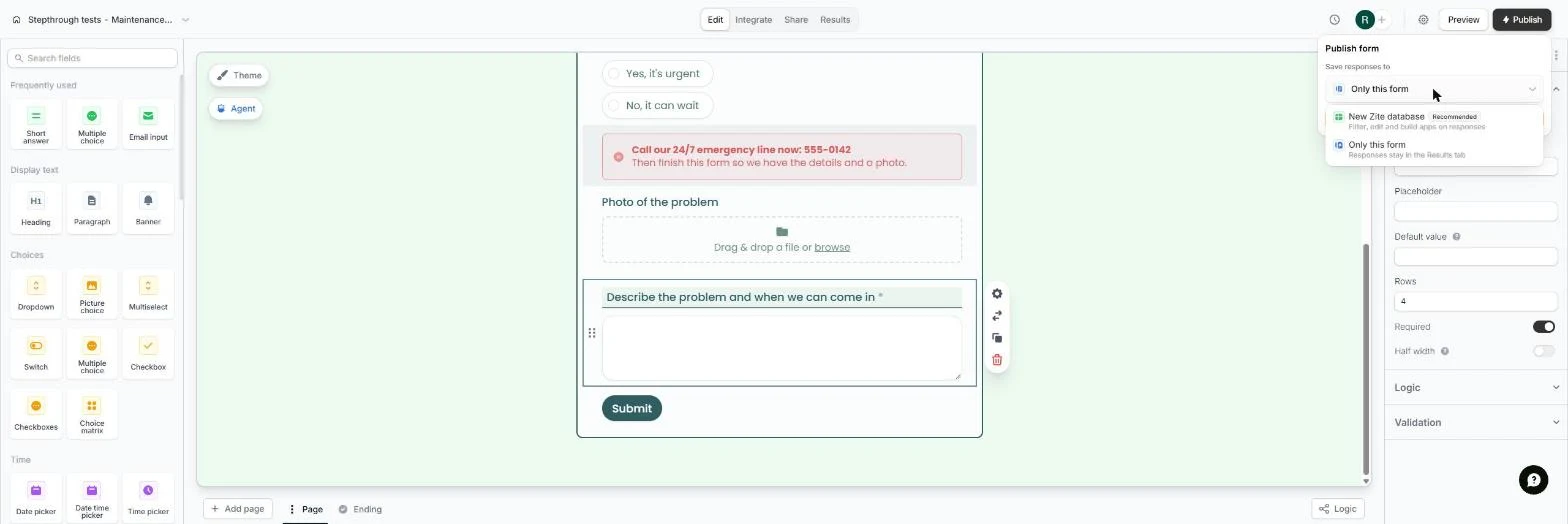
- Keep it simple. New Zite database builds a table you can make apps on. Only this form keeps answers in the form's Results tab, which is all a small office needs to start. Click Only this form.
Only this form keeps answers in the Results tab.
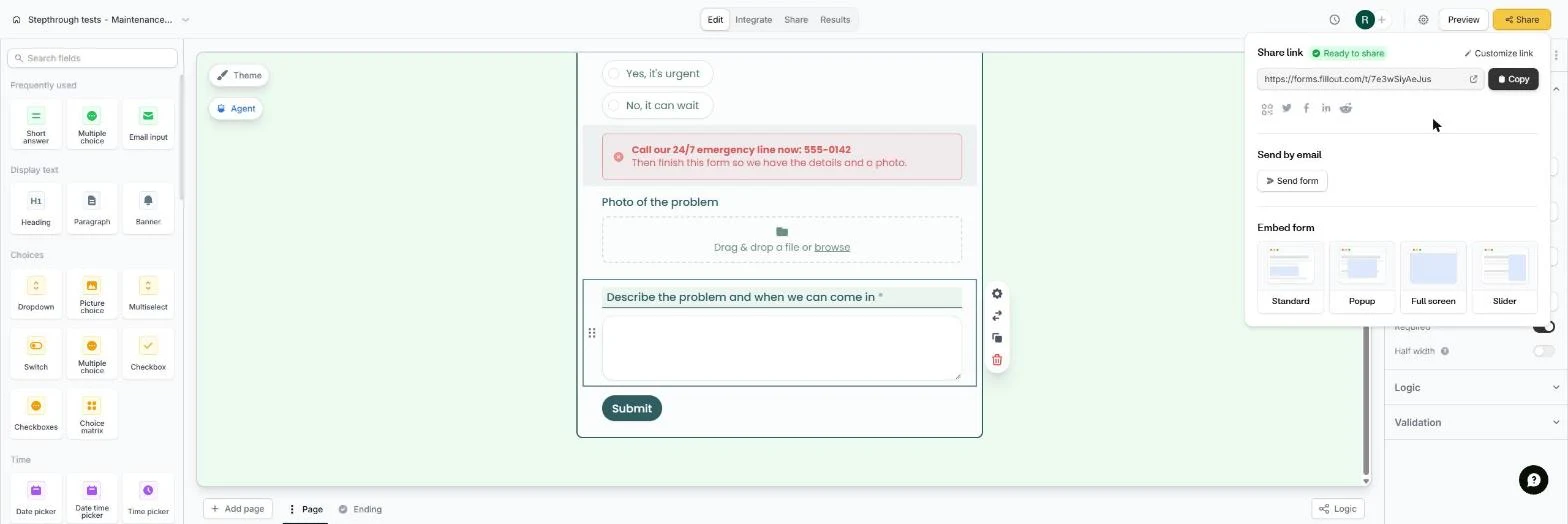
- Your share link. We clicked Publish. Ready to share: copy the link for your tenant emails and lobby notice, or embed it on your website. Now get an alert for each request: click the settings gear.
Your form is live. Copy the link for tenants.
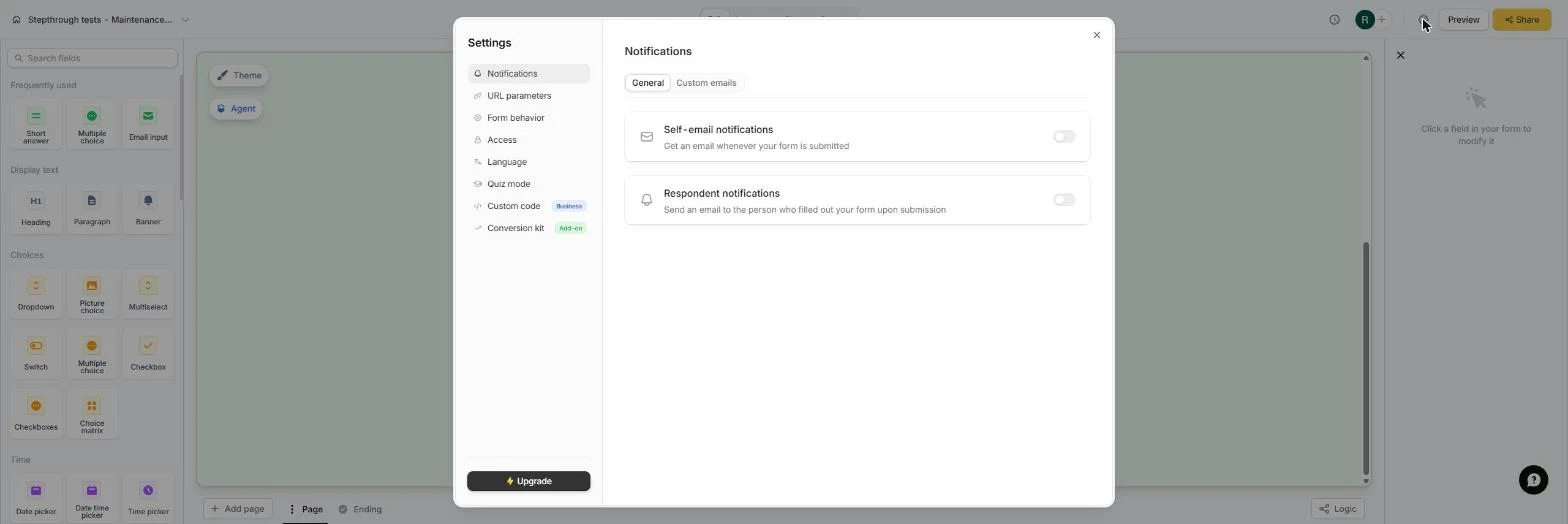
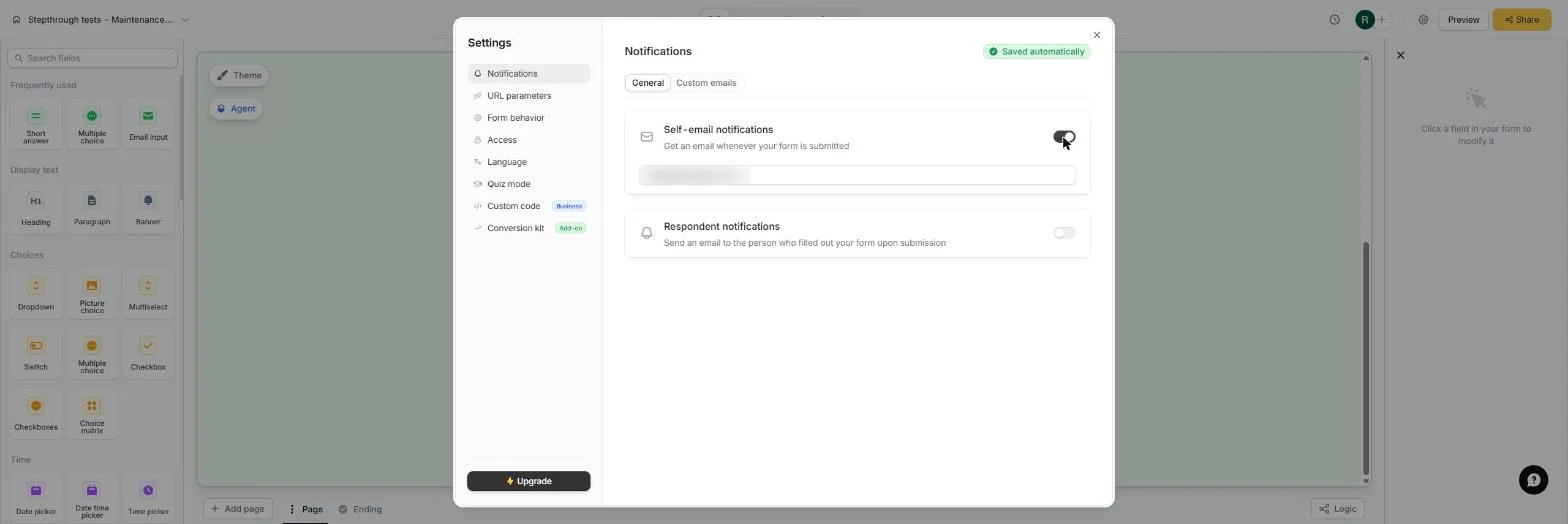
- Email me every request. Under Notifications, turn on Self-email notifications.
Turn on Self email notifications.
- Who gets the alert. It saves automatically. Your sign-in email is added; type the maintenance coordinator's address in the same box. (We blurred ours.) Close Settings.
Add the maintenance coordinator's email. Then close Settings.
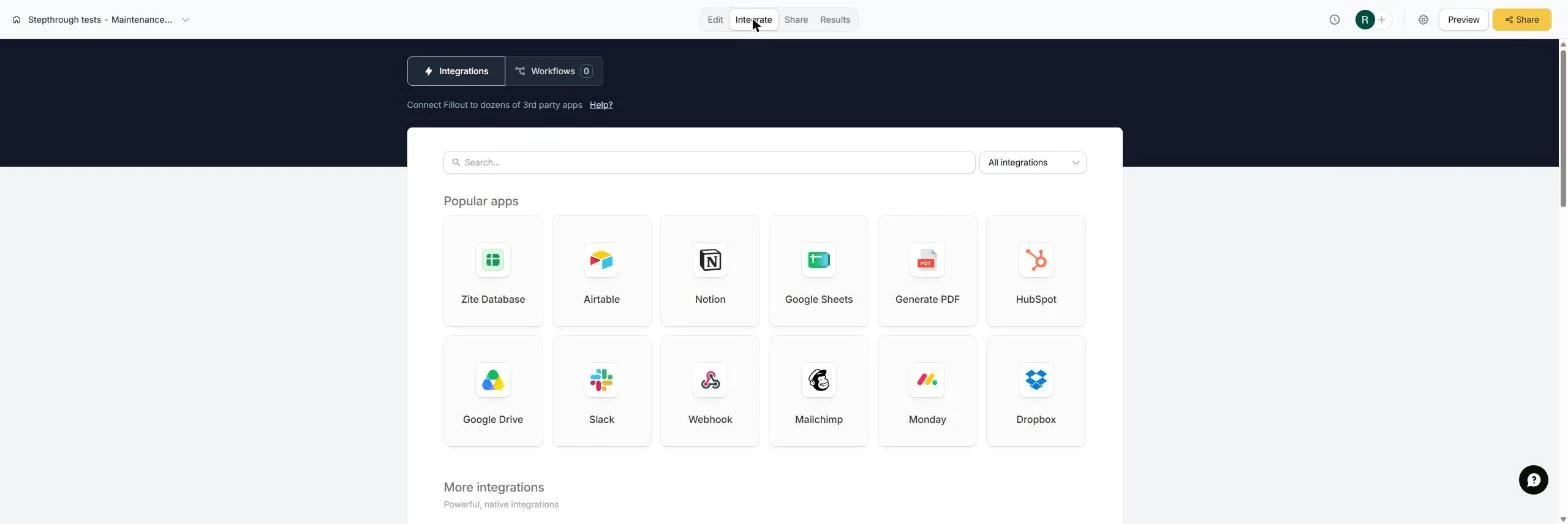
- A log in Google Sheets. We clicked Integrate. Fillout sends answers to Google Sheets, Airtable, Notion, Slack and more. Click Google Sheets.
Integrate sends answers to other apps.
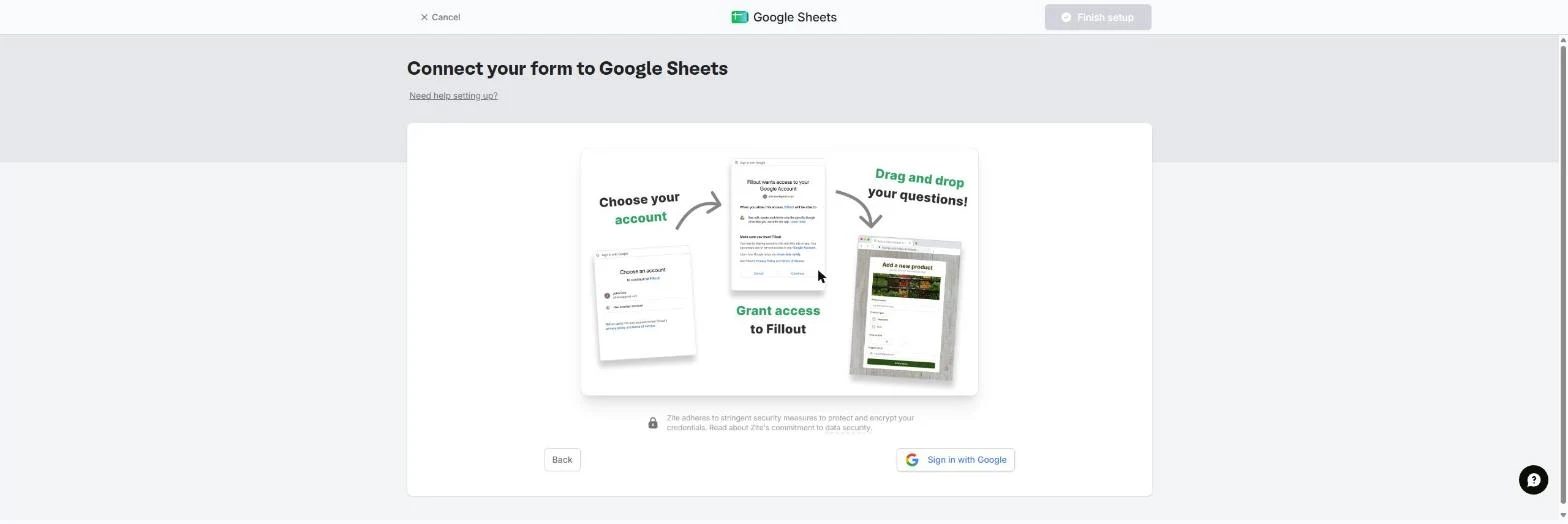
- Connect your own sheet. In your account you click Sign in with Google, allow Fillout, pick the spreadsheet and drag questions onto columns. We didn't connect a sheet in this test, so click Cancel.
In your own account, sign in with Google and pick a sheet. We skipped it.
5. Test it as a tenant
- Be the tenant. We opened the share link (forms.fillout.com/t/...) in a new tab. There is no red banner yet. Fill in a made-up tenant, unit and email (we used Jordan Lee, Unit 4B and tenant@example.com), then open What needs fixing?.
Now test it as a tenant. Fill in the first three answers, then open What needs fixing.
- Pick the trade. Click Plumbing.
- The warning appears. We picked Yes, it's urgent and the red banner appeared. Picking No, it can wait hides it again. Scroll down to the rest of the form.
Pick yes, and the red banner appears. Pick no, and it hides.
- Send the request. We typed what happened and when someone is home. Click Submit.
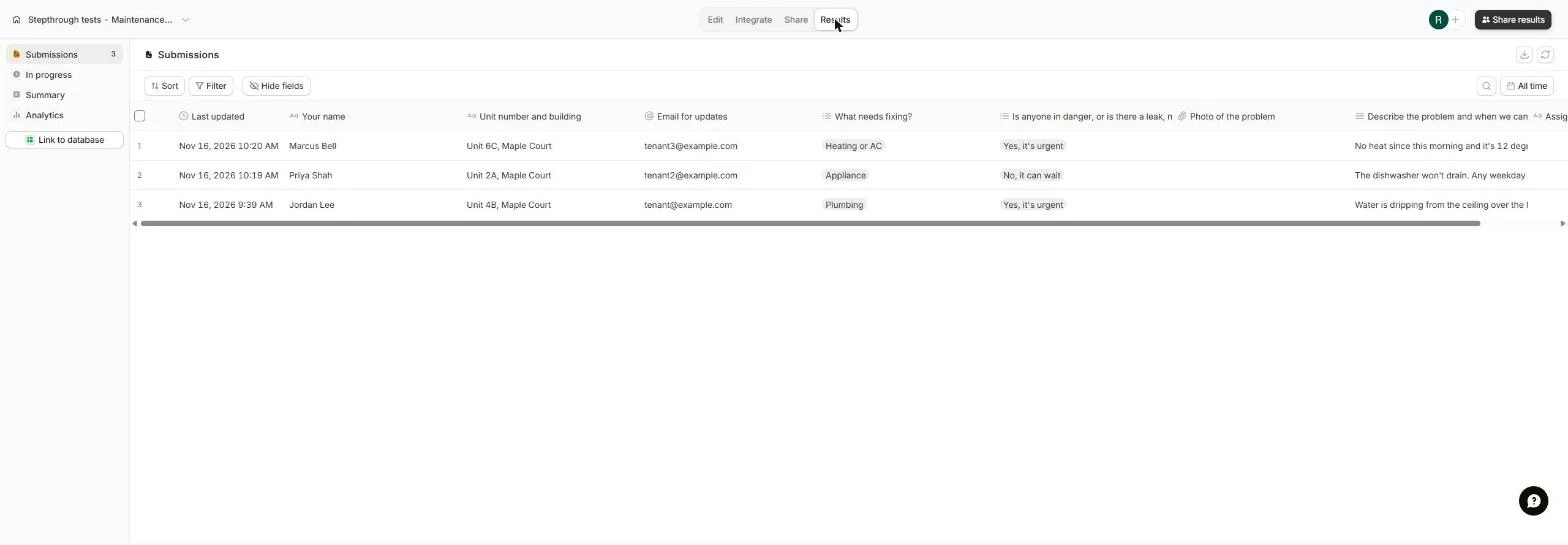
- Request received. The tenant sees Thank you, and the coordinator gets the email. Back in the editor, open Results.
The tenant sees thank you. Back in the editor, open Results.
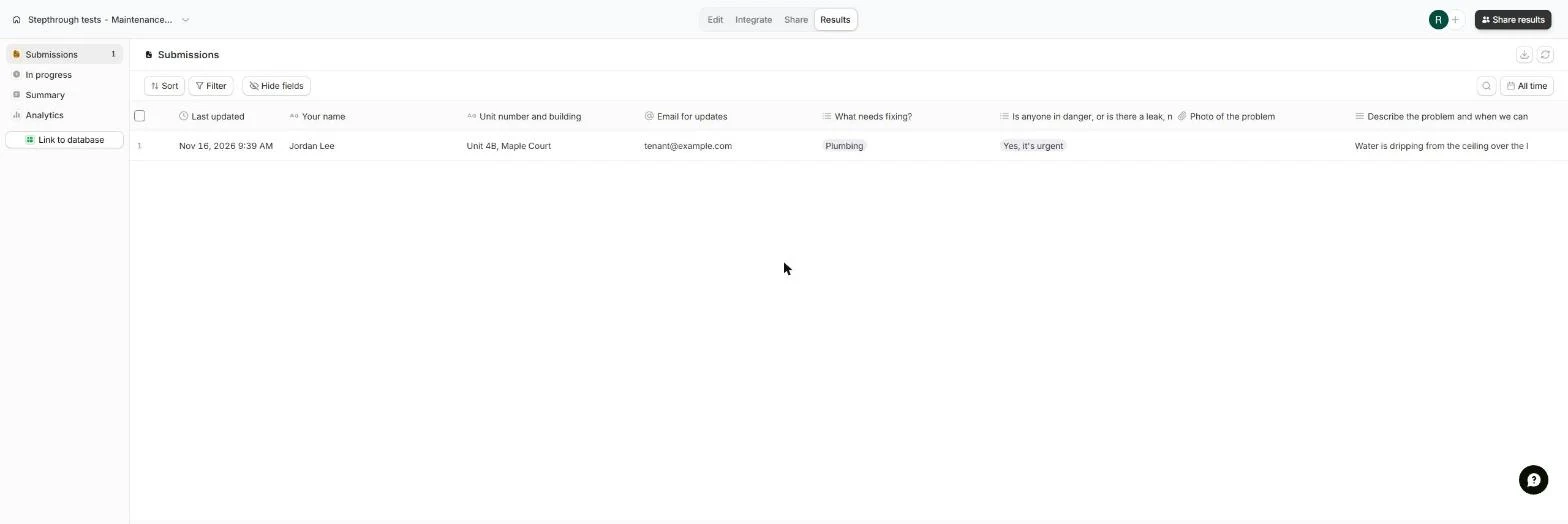
- Every request in one table. One row per request, with every answer in its own column: name, unit, email, Plumbing, Yes, it's urgent and the description. Filter and Sort find the urgent ones; the download icon exports a CSV.
Every request is one row, with every answer in its own column.
Screenshots





More in Business Automations
 How to Do OCR in n8n: Read Receipt Photos into Google Sheets with AI
Drop a photo of a receipt into an n8n chat. An AI agent reads it, pulls out the date, vendor and amount, picks a category, and adds a row to Google Sheets.
Free · Live ~12 min Intermediate
 n8n AI Email Responder: Draft Gmail Replies Automatically
Build an n8n agent that watches your Gmail, reads each new customer email, and writes a reply as a draft in the same thread, ready for you to check and send.
Free · Live ~12 min Intermediate
 How to Make an n8n Workflow That Emails Each Tech Their Jobs from Sheets
Every morning at 7, n8n reads a plumbing company's jobs sheet, skips anything not assigned yet, and emails each job to the tech it's assigned to — customer, address…
Free · Live ~10 min Intermediate
 Gmail AI Triage: Auto-Label Every Email and Draft Replies
Build an n8n workflow that reads each new email, sorts it as a lead, a client or an invoice with a Text Classifier, adds the matching Gmail label, and drafts a reply to…
Free · Live ~18 min Advanced
 How to Use n8n to Build AI Agents: A Support Agent That Answers from Your Docs
Turn an n8n chat agent into a support agent that answers only from your policies in a Google Doc, refuses what it should, and hands off to a person by email.
Free · Live ~13 min Advanced
 Chatbase: Answer Customer FAQs with an AI Agent
A business case for a small firm that answers the same customer questions every week: build a Chatbase AI agent on your FAQ in the real app, make it say when it does…
Free · Live ~15 min Beginner
All 56 modules in Business Automations
More Fillout tutorials
Terms in this lesson
Plain-English definitions, each with an example from a free lesson.