Updated . Built against the tool’s current screens and checked step by step. How we check this lesson
Set up a client project, give every task an owner who acts next, a day and a checklist, hand finished work to a reviewer, and check the timeline your client asks about.
At a glance
| Question | Answer |
|---|---|
| What you build | Set up a client project, give every task an owner who acts next, a day and a checklist, hand finished work to a reviewer, and check the timeline your client asks about. |
| Tools | GoodDay |
| Time | About 8 minutes, 25 steps in 5 parts |
| Level | Beginner, no coding needed |
| Cost | Free |
| Ways to learn it | Practice it step by step |
The 5 parts, in short
- Set up the client project: One project per client, A blank project, Name it after the client, File it under Active Projects, and 1 more step.
- Add the work: One project, many views, Add the first task, Open the wireframe task.
- Who has the ball: Who has to act next?, Give it to the designer, When will Taylor do it?, Schedule it for Monday, and 4 more steps.
- Hand it over for review: Owners and dates at a glance, The board, with more behind each card, Move it to Review, Pass the ball, and 2 more steps.
- See the whole project: Will we make Nov 30?, The timeline the client asks about, Your inbox of work.
Start here first: AI Receipt Extractor: Receipts to Google Sheets with n8n (module 1 of Business Automations)
In the course: Part 9 · n8n Automation Toolkit (Module 136 of the full course)
Part of: AI for Consulting & Agencies (step 35 of 35)
Part of: AI Apps Worth Knowing (step 154 of 157). Next up: Poptin: Turn Leaving Shoppers into Email Subscribers with an Exit-Intent Popup
What you'll build
You run a small marketing agency, and your made-up client, Oakline Coffee, wants its website relaunched by November 30. On a plain card board, a card shows where the work is, but not who is holding it up, so hand-offs wait for days. In this lesson you set up the client project in GoodDay, add the four deliverables, and give the first one an owner who acts next, a day and a checklist. When the wireframe is done, you move it to Review and pass the ball to the reviewer. Then you check the Gantt chart for the deadline and see the task land in your own My Work.
You set up a client project with a deadline, added the deliverables, and gave the wireframe an owner who acts next, a day and a checklist. Then you moved it to Review, passed the ball to the reviewer, and checked the timeline and your own My Work. Next, set up your real client in GoodDay and make "who has to act next" the one field nobody leaves empty.
- Tools: GoodDay
- Time: about 8 minutes, 25 steps in 5 chapters
- Level: beginner, no coding needed
- Price: free
Practice first, then build it for real
Practice copy built from real GoodDay screens (goodday.work), captured 13 November 2026 in a free workspace. Nothing here touches a GoodDay account. The agency, the client and the project are made up; the teammates are GoodDay sample users. To build it for real you need your own GoodDay account, and some services charge once you use them for real work, so check each tool's current pricing.
Try it yourself, free
Reading the steps is a start. Doing them is how it sticks. The interactive module walks you through every click in a practice copy of GoodDay, checks each step, and never touches your real accounts.
Start “GoodDay: Run an Agency Client Project Board (Beyond Trello)”Step by step: GoodDay: Run an Agency Client Project Board (Beyond Trello)
All 25 steps of the interactive module, in order. In the module you watch each one, then do it yourself in a practice copy that checks your work.
1. Set up the client project
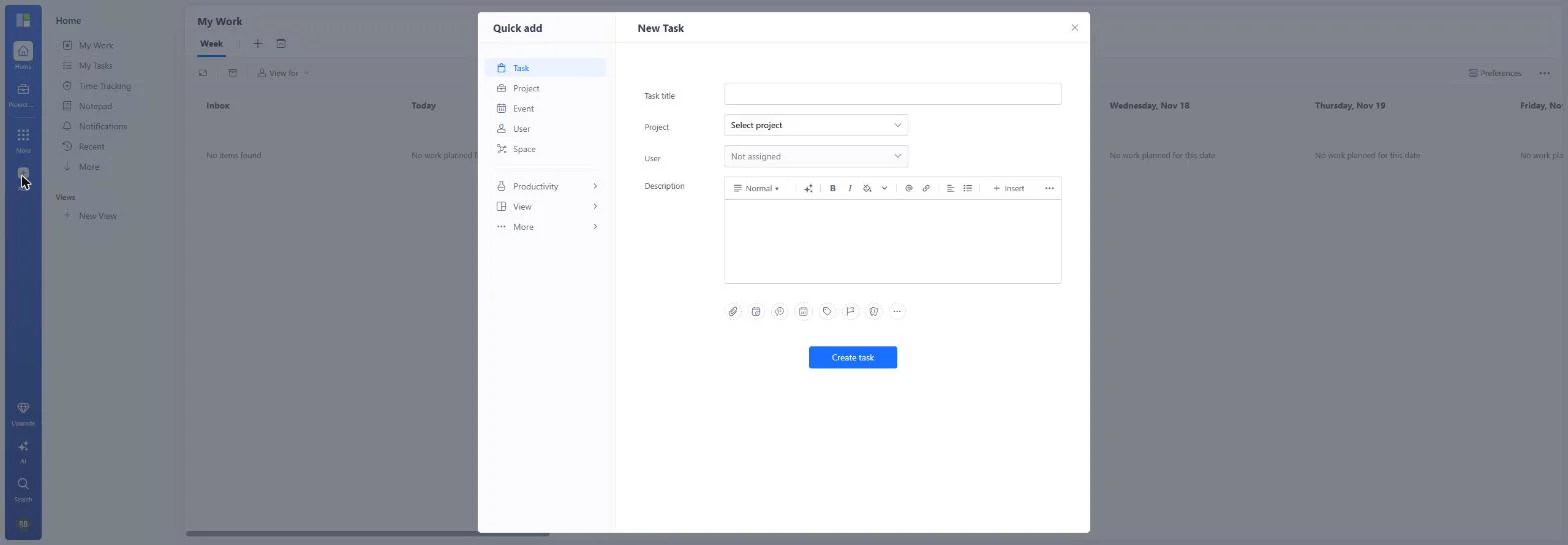
- One project per client. You run a small marketing agency. Your client Oakline Coffee (made up) wants its website relaunched by November 30. On a plain card board, a card can sit in a column for a week and nobody knows who is waiting on whom. In GoodDay, every task also says who has to act next. We opened Add (the + in the left bar). Click Project.
You run a small agency. Oakline Coffee wants its website relaunched by November 30. In GoodDay, every task says who has to act next.
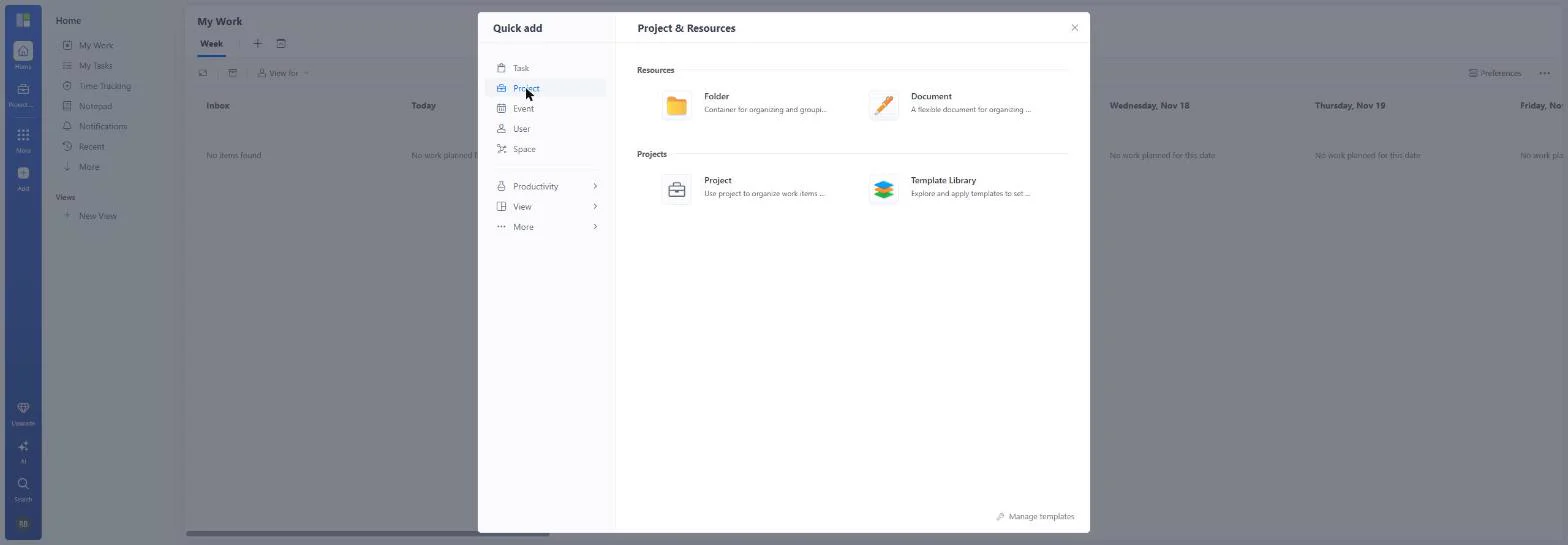
- A blank project. You can start from a folder, a document, the Template Library, or a blank Project. Click Project.
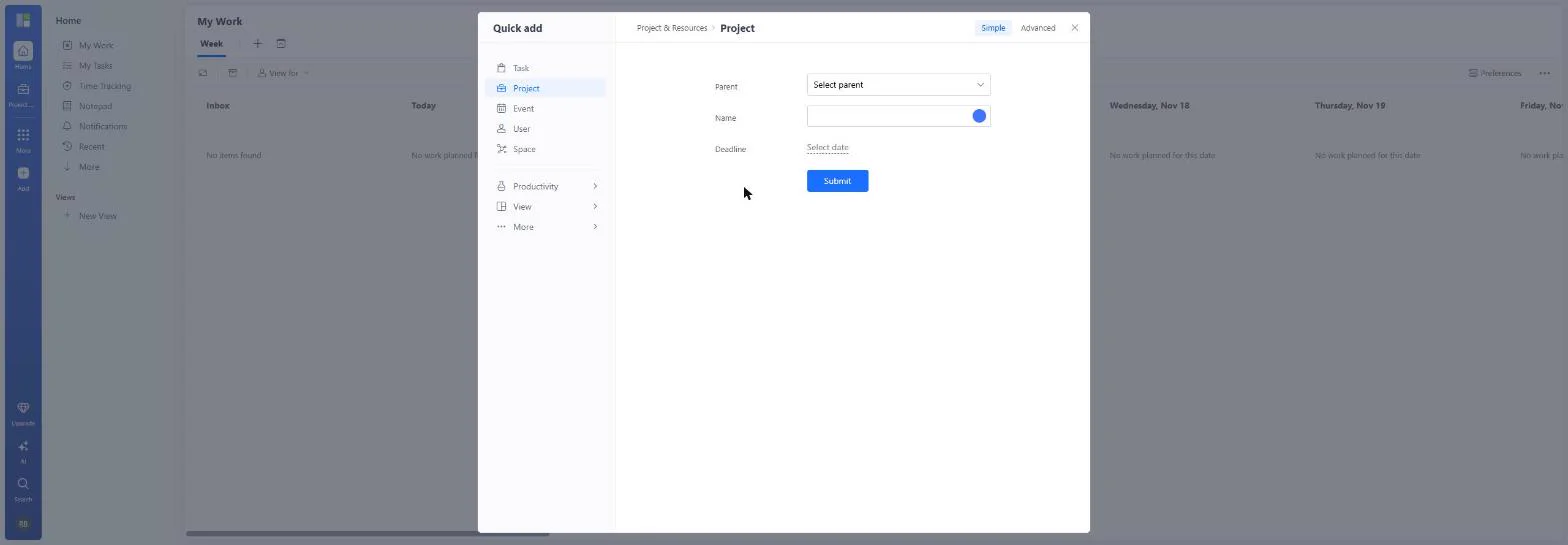
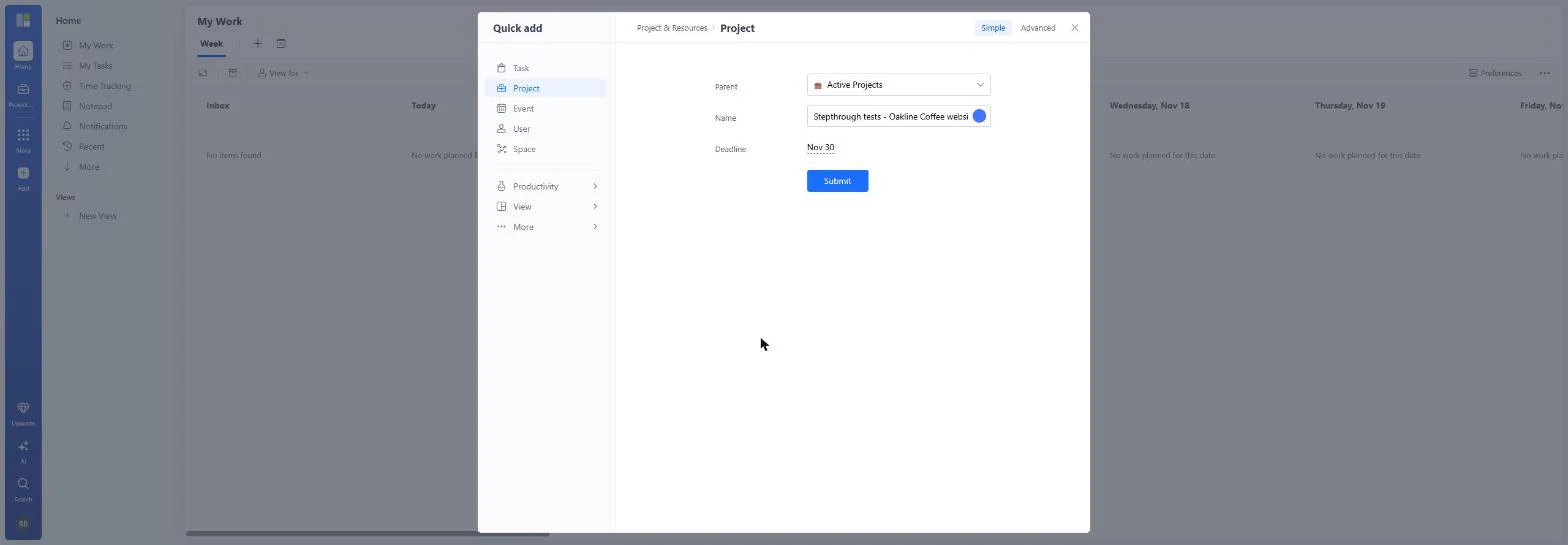
- Name it after the client. Name the project after the client and the job, so it is easy to find among the others.
Name the project after the client and the job.
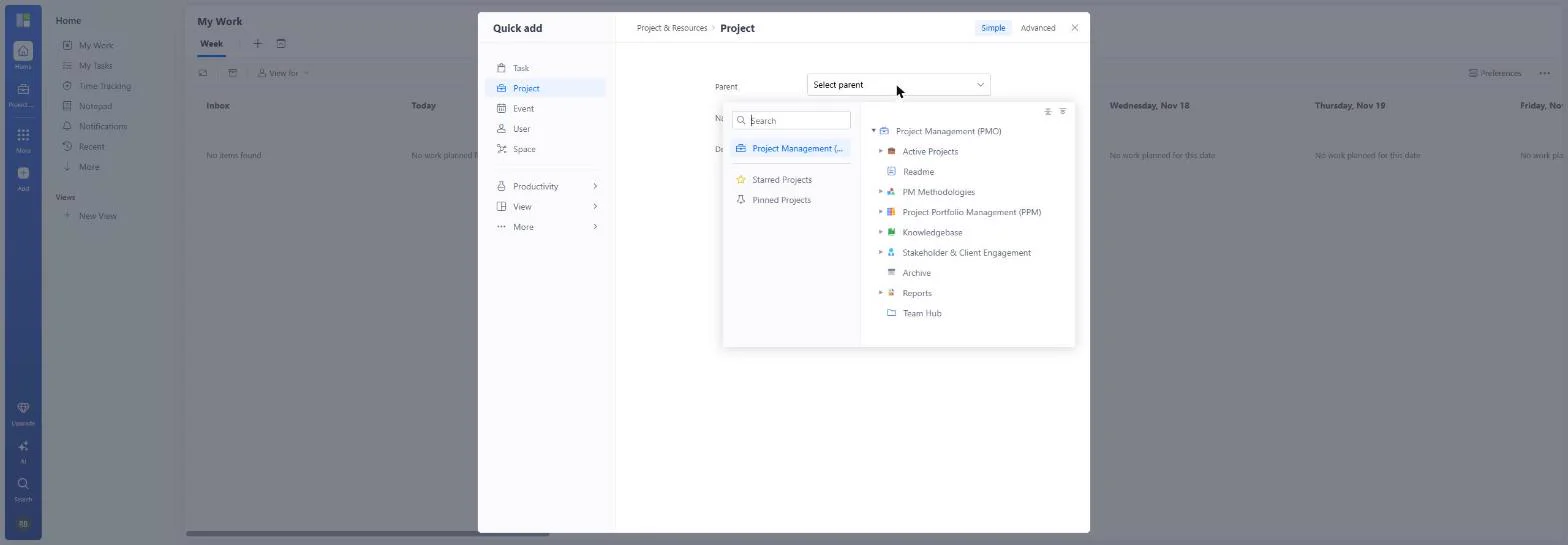
- File it under Active Projects. Open Parent and pick Active Projects. Our free workspace came with this Project Management (PMO) setup. Your folders may have other names; pick where your live client work sits.
Pick Active Projects as the parent.
- Set the deadline and create it. Set Deadline to Nov 30, the date you promised the client. Our test copy has a Stepthrough tests prefix in its name. Click Submit.
Set the deadline to November 30, and click Submit.
2. Add the work
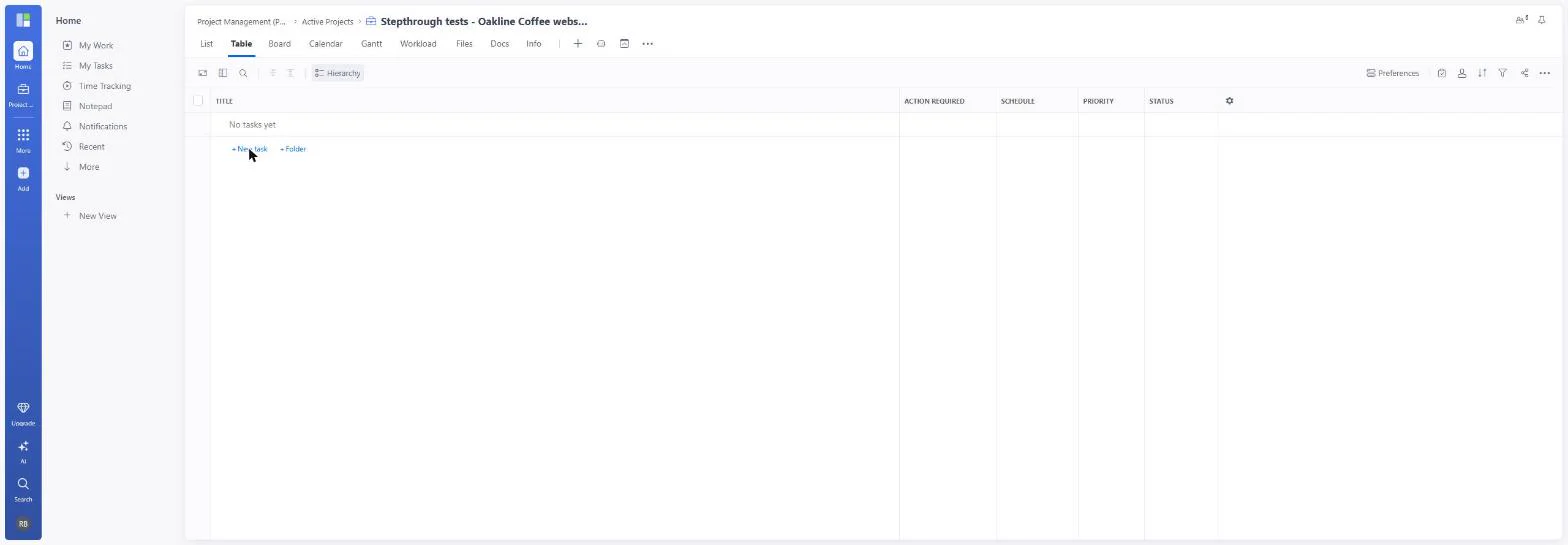
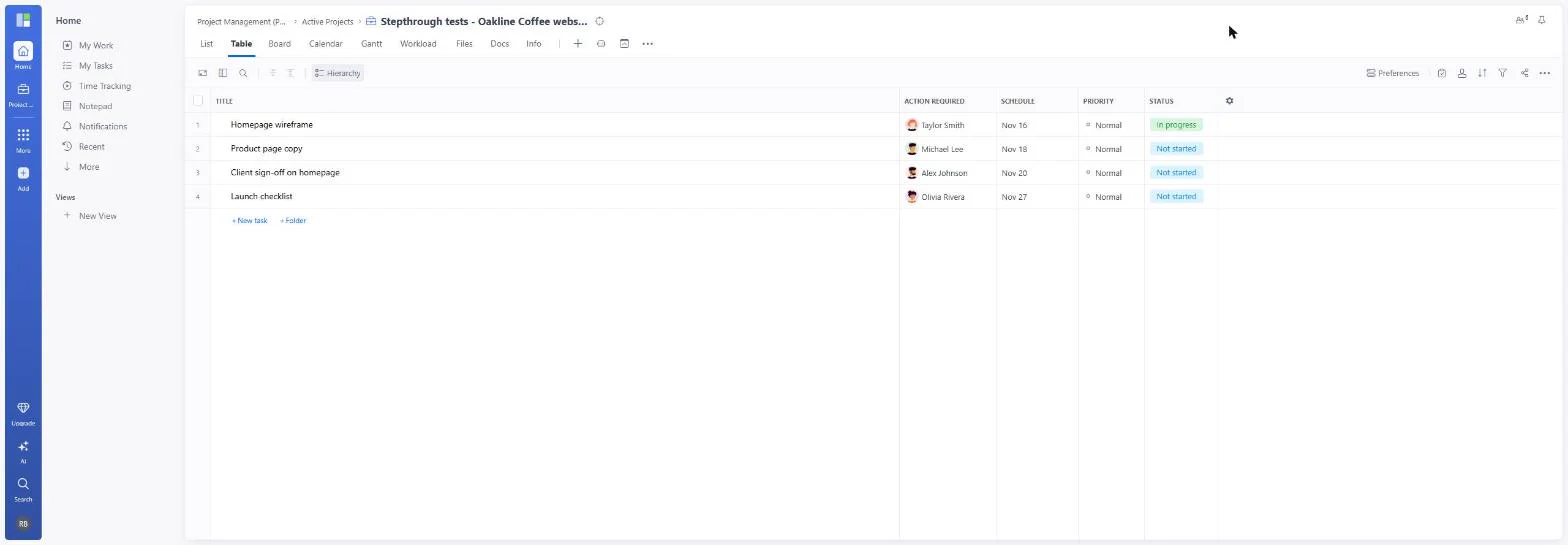
- One project, many views. The project opens in Table view. Along the top are List, Table, Board, Calendar, Gantt and Workload: the same tasks, shown different ways. Click + New task.
The project has many views of the same tasks.
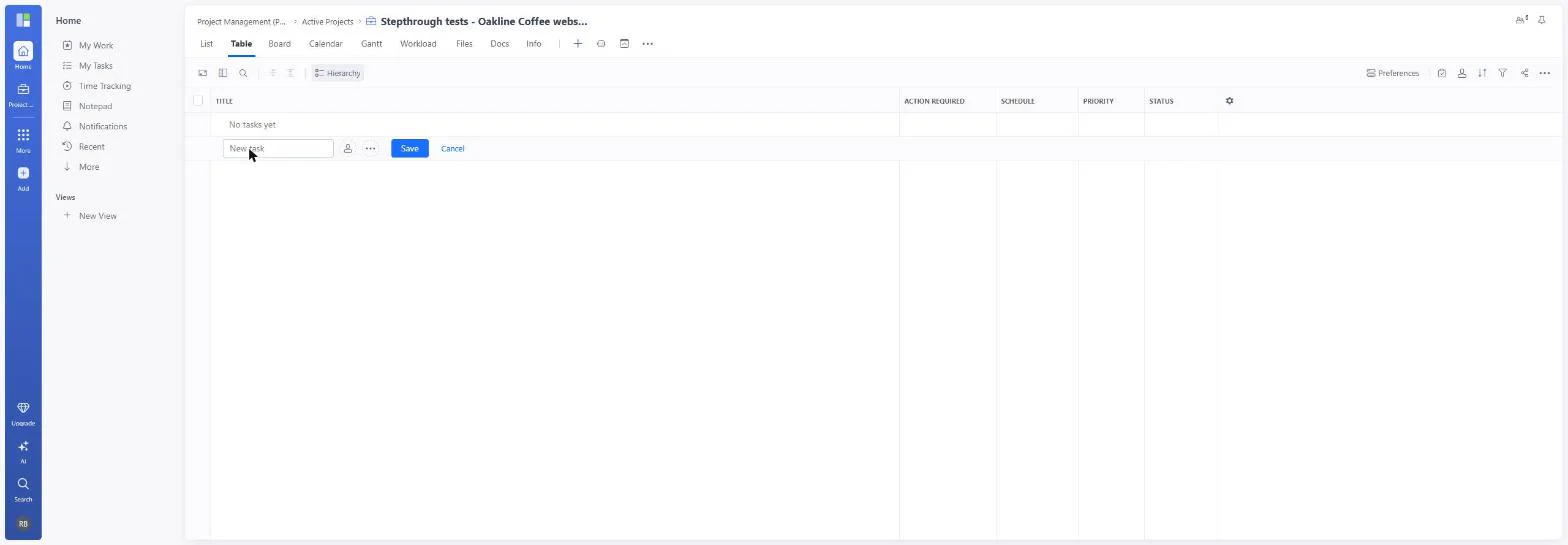
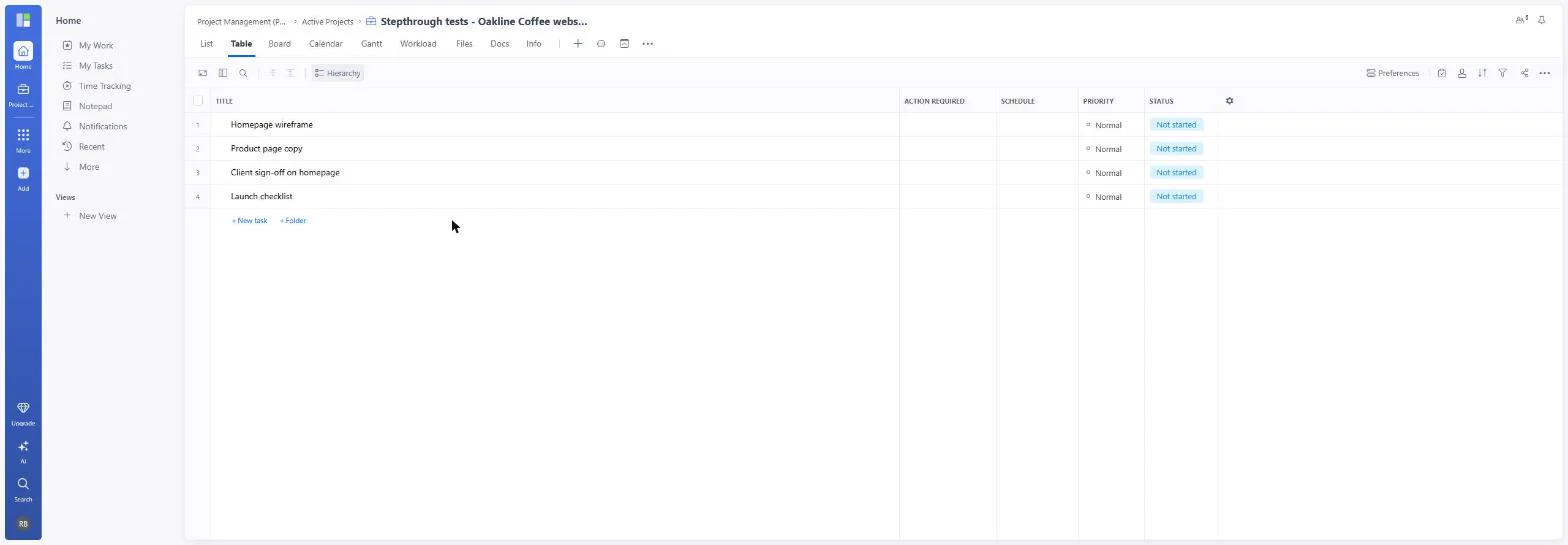
- Add the first task. Type the first deliverable and press Enter. Then add the other three the same way: Product page copy, Client sign-off on homepage and Launch checklist.
Then add the other three.
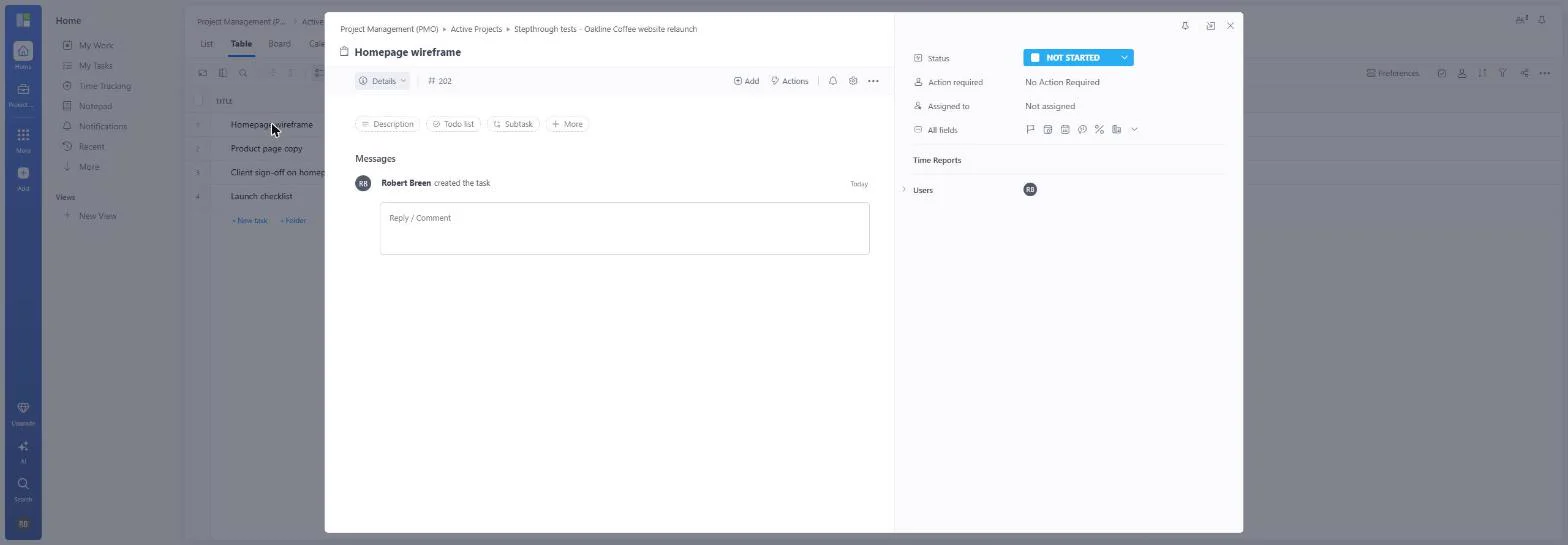
- Open the wireframe task. Four tasks, each Normal priority and Not started. The Action required and Schedule columns are empty: nobody owns anything yet. Click Homepage wireframe.
Four tasks, and nobody owns them yet.
3. Who has the ball
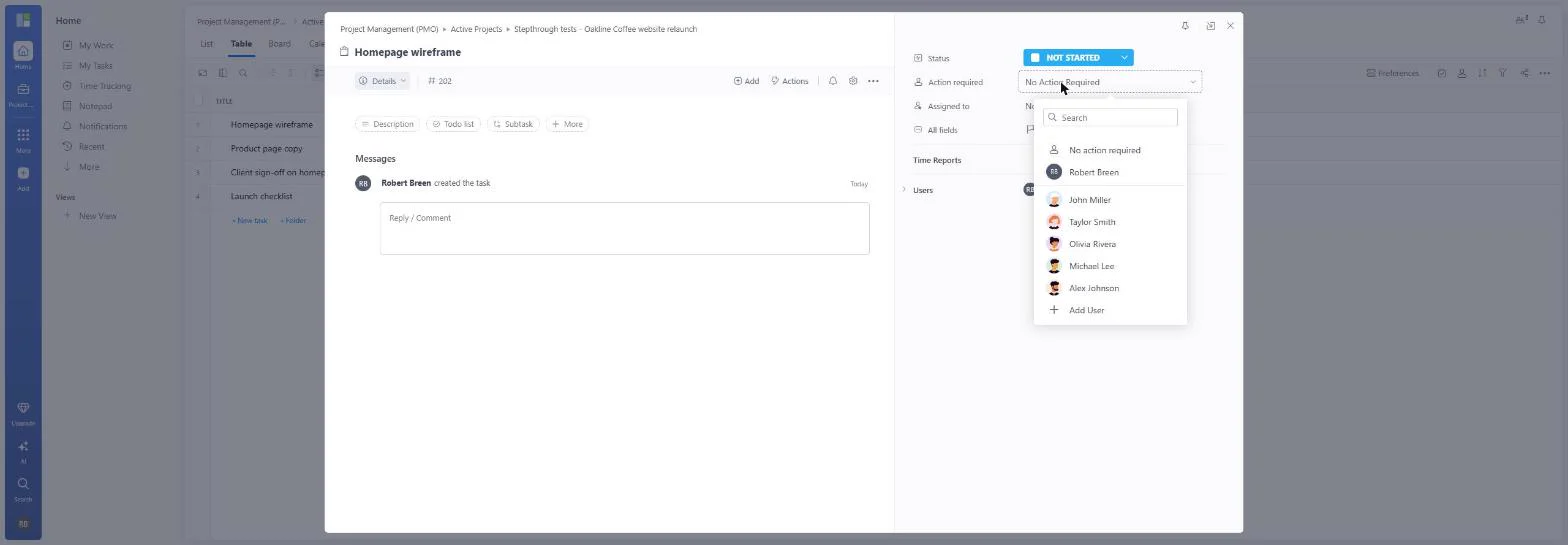
- Who has to act next?. Action required is GoodDay's big idea: one person who has the ball right now. It shows up in that person's My Work. Click No Action Required.
Action required is the one person who has to act next.
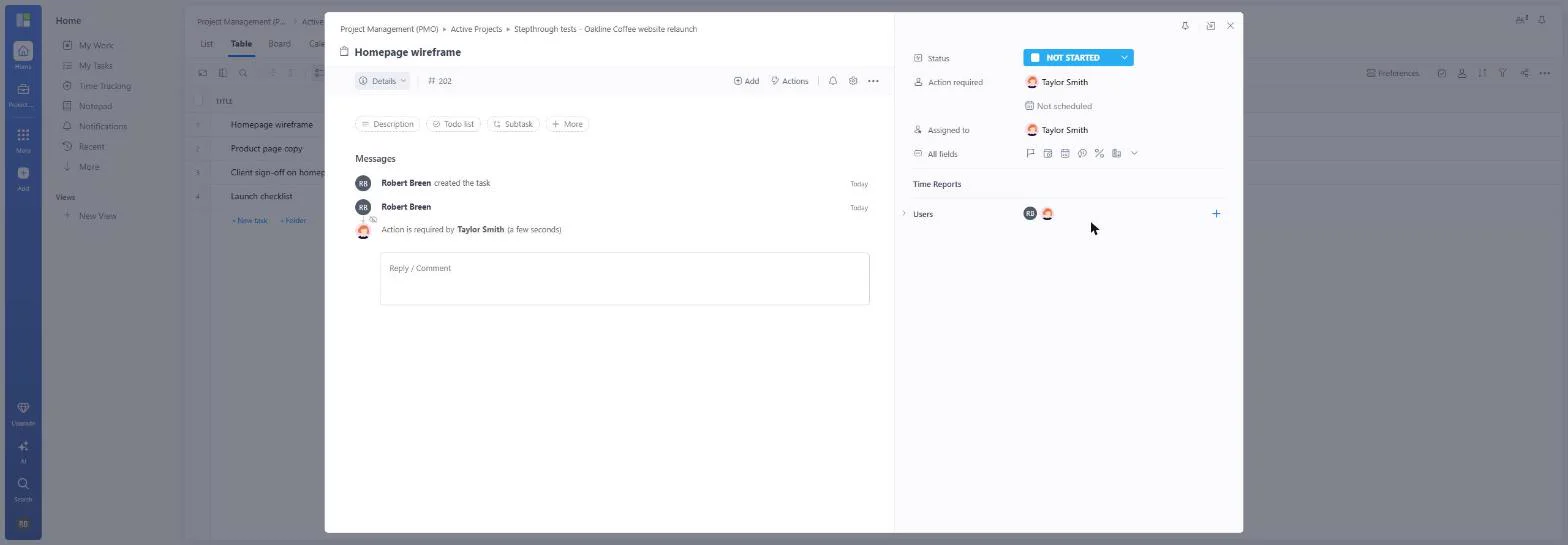
- Give it to the designer. These teammates are GoodDay's sample users. Pick Taylor Smith, your designer.
Pick Taylor Smith, your designer.
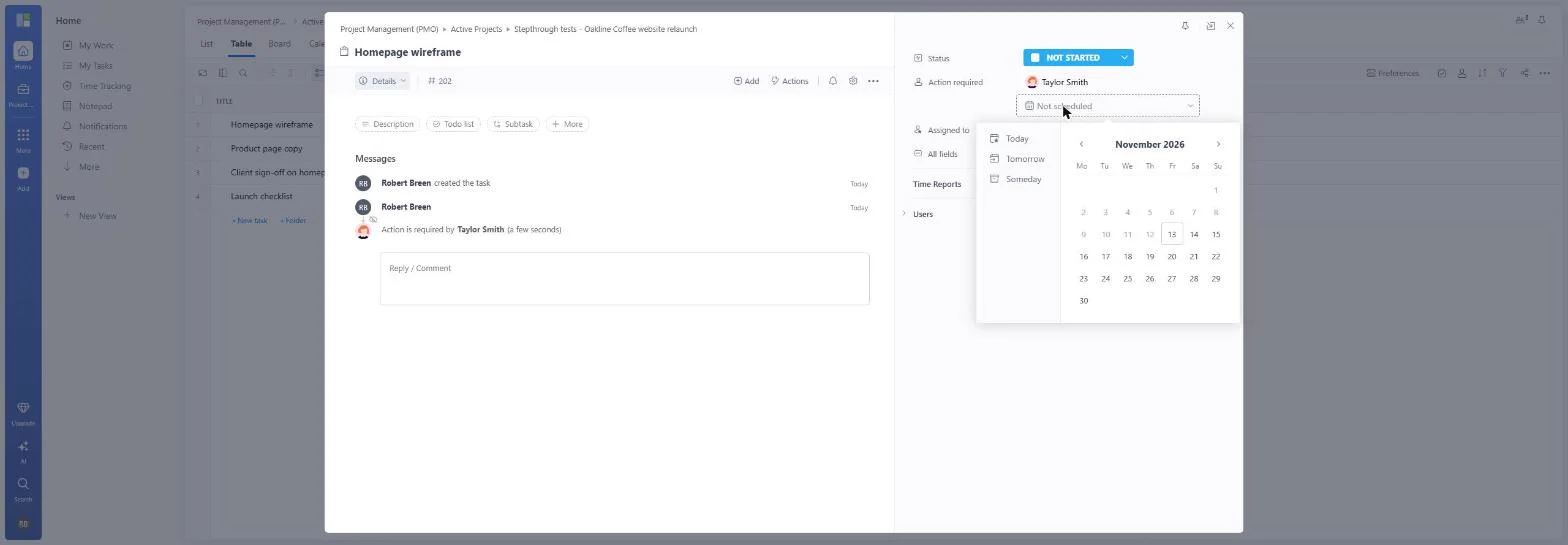
- When will Taylor do it?. Assigned to filled in with Taylor too. The task history says "Action is required by Taylor Smith". Now plan the day. Click Not scheduled.
Taylor is now assigned too.
- Schedule it for Monday. Pick 16, next Monday. You can also pick Today, Tomorrow or Someday.
Pick Monday the sixteenth.
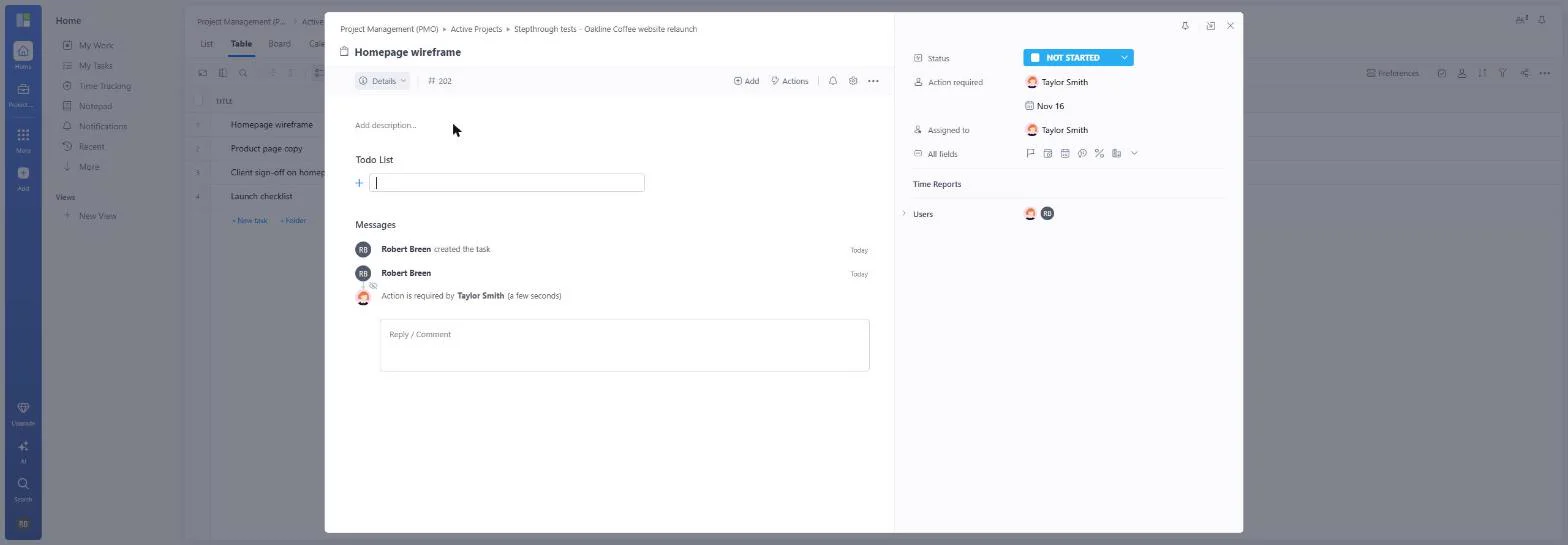
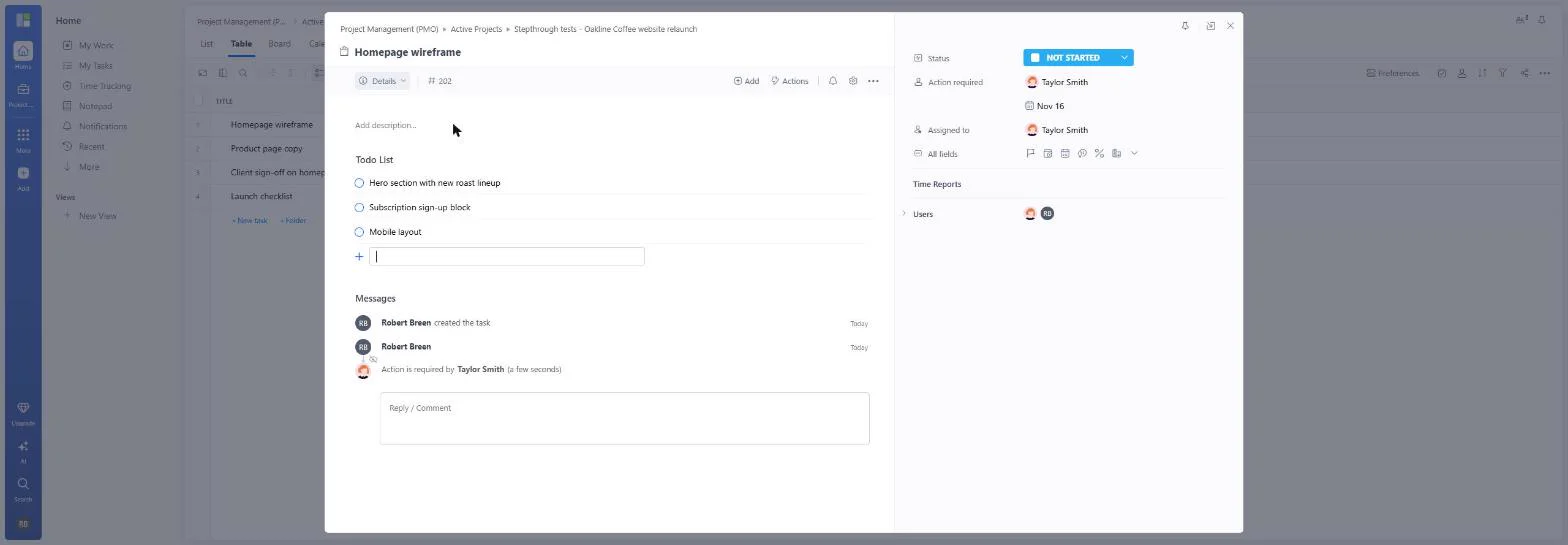
- Break it into a checklist. Click Todo list and add what the wireframe must cover. Type the first item and press Enter. We also added Subscription sign-up block and Mobile layout.
Add a to do list of what the wireframe must cover.
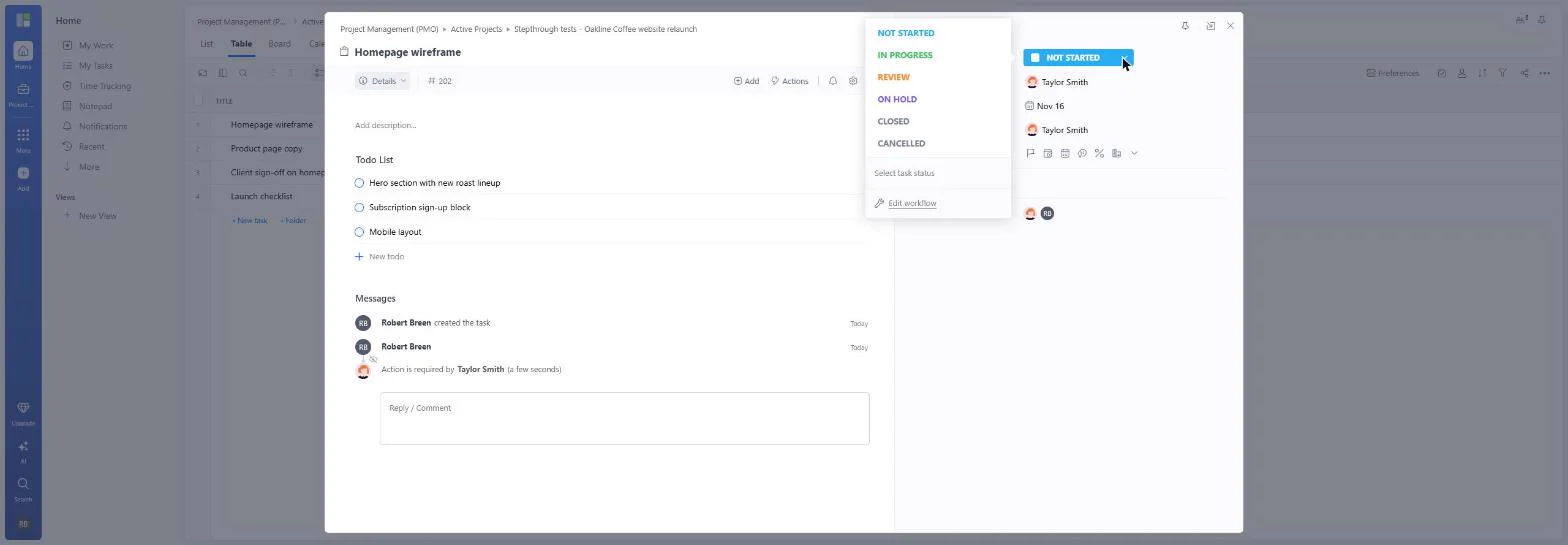
- Taylor starts work. Taylor starts on Monday. Open the status menu.
Taylor starts work.
- Statuses, not just columns. The statuses are Not started, In progress, Review, On hold, Closed and Cancelled. Edit workflow lets you change them per project. Click IN PROGRESS.
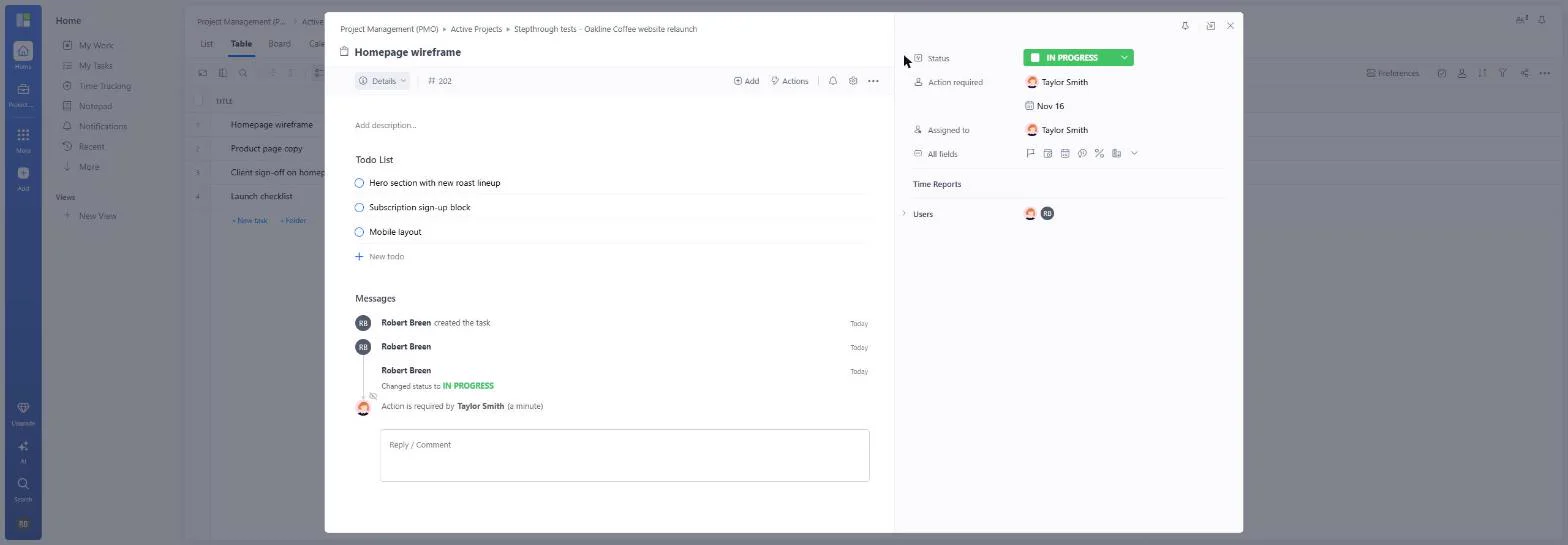
Pick In progress.
- Every change is logged. The Messages list keeps who changed what, so you never ask "who moved this card?". Close the task with the X.
Every change is logged in the messages. Close the task.
4. Hand it over for review
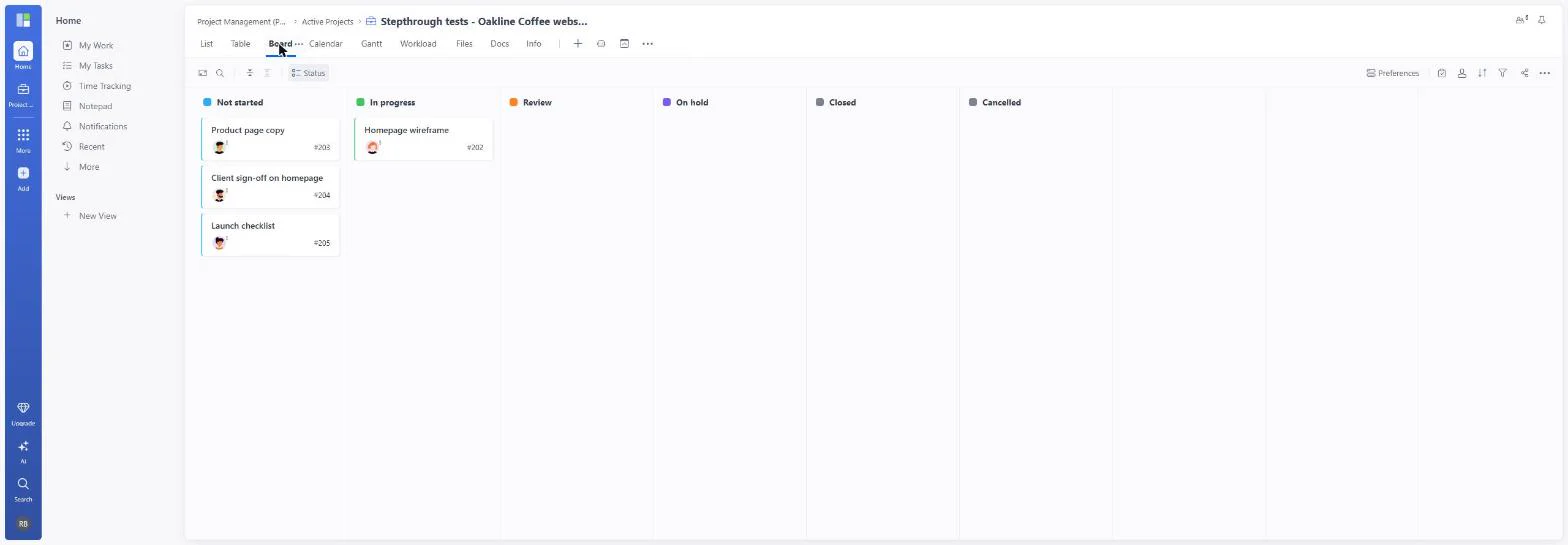
- Owners and dates at a glance. We gave the other tasks owners and days the same way: Michael Lee writes the copy by Nov 18, Alex Johnson gets the client sign-off by Nov 20, and Olivia Rivera runs the launch checklist by Nov 27. Now the board your team knows from Trello. Click Board.
Every task now has an owner and a day.
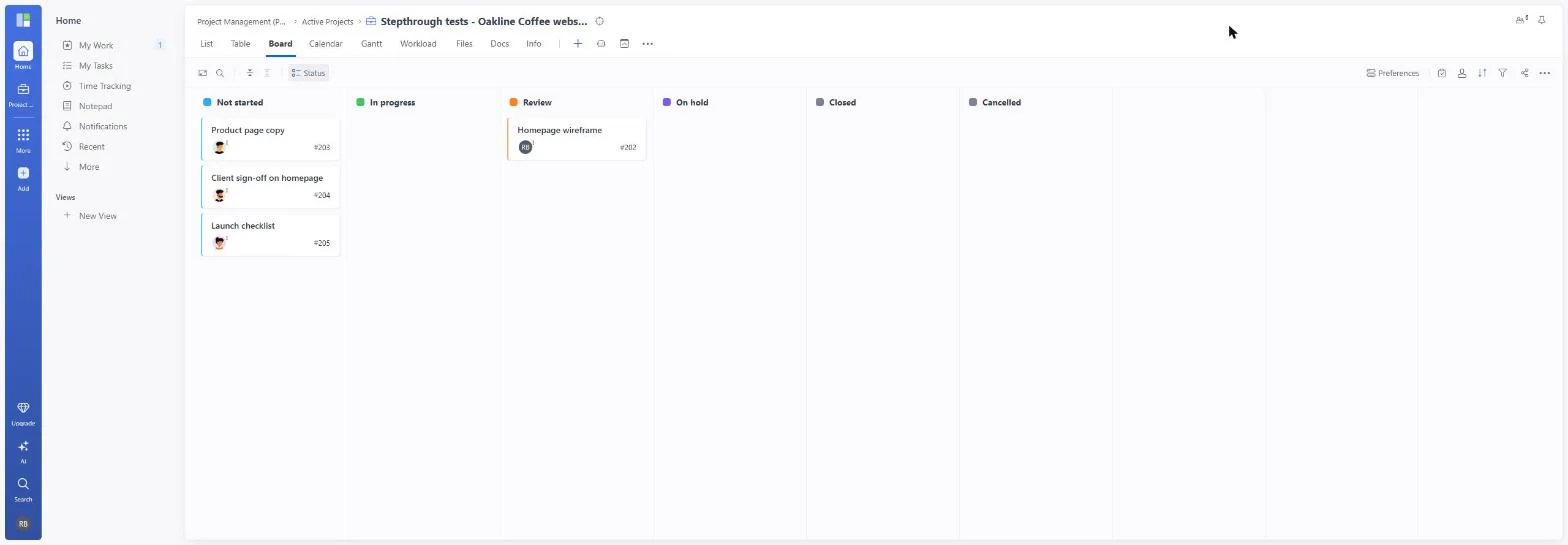
- The board, with more behind each card. Columns are the statuses. Each card shows the face of who has to act. The wireframe is done, so it goes to review. Click the Homepage wireframe card.
Each card shows who has to act. The wireframe is done.
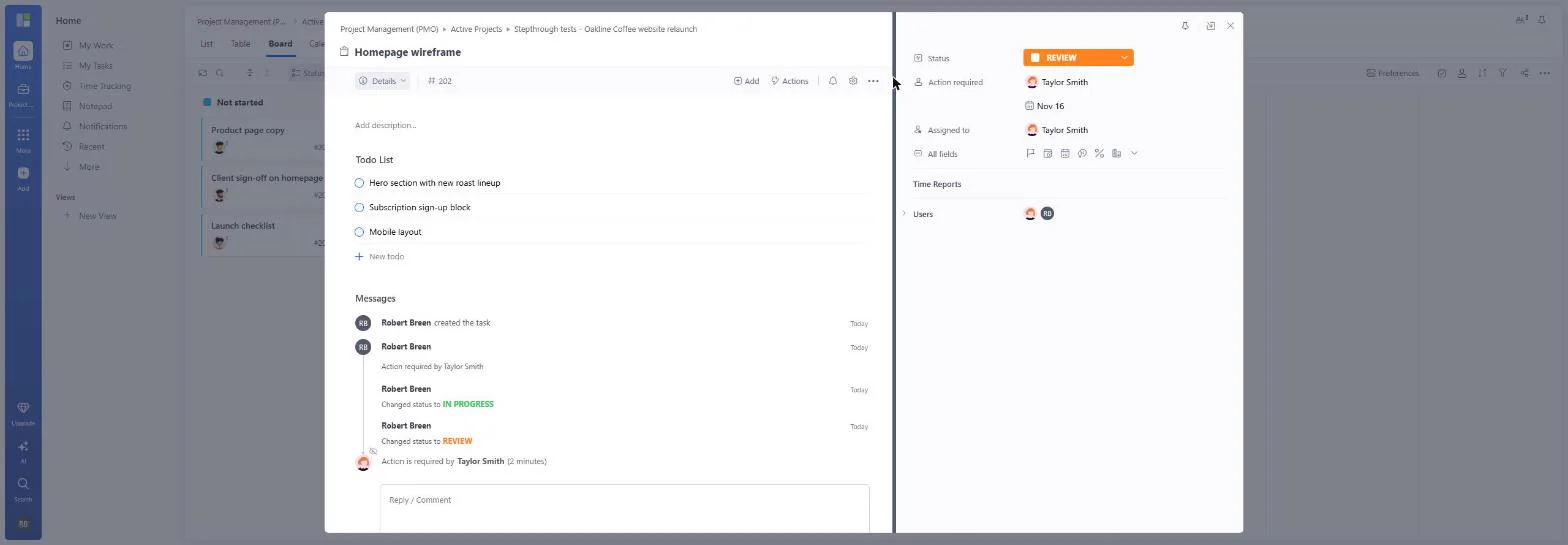
- Move it to Review. Open the status menu and pick REVIEW. Moving it on the board does the same.
Set the status to Review.
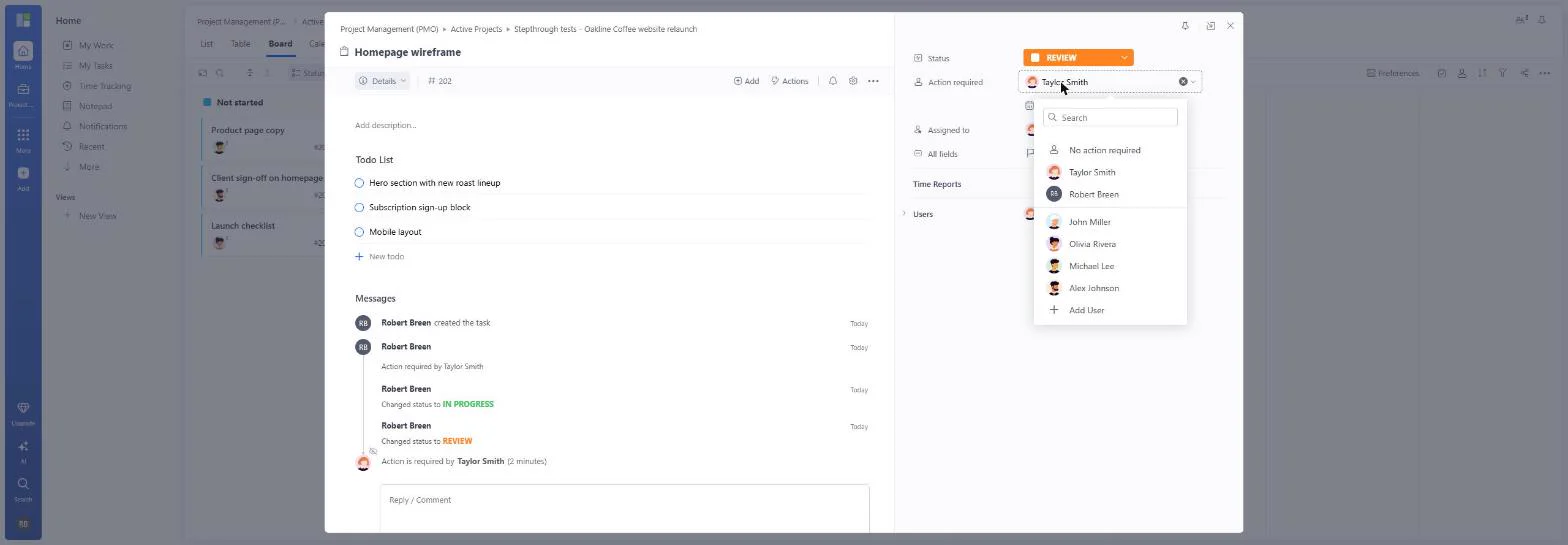
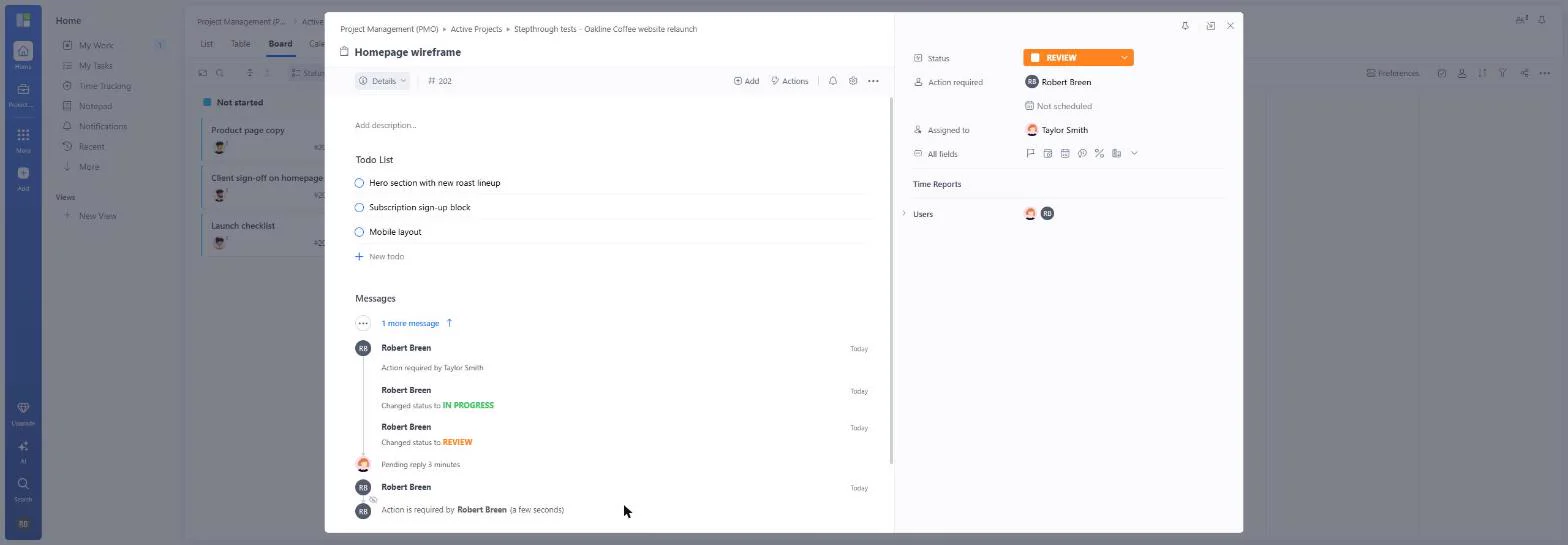
- Pass the ball. It is in Review, but Action required still says Taylor. That is how work stalls on a plain board: the card moved, the person did not. Click Taylor Smith.
It is in review, but Taylor still has the ball.
- Hand it to the reviewer. Pick Robert Breen, the account owner in our test. In your agency, pick whoever checks work before the client sees it.
Hand it to the reviewer.
- Now it is on your list. "Action is required by Robert Breen", and My Work in the left menu now shows a 1. Taylor is still the assignee; only the ball moved. Close the task.
Now it is on your list, and My Work shows a one. Close the task.
5. See the whole project
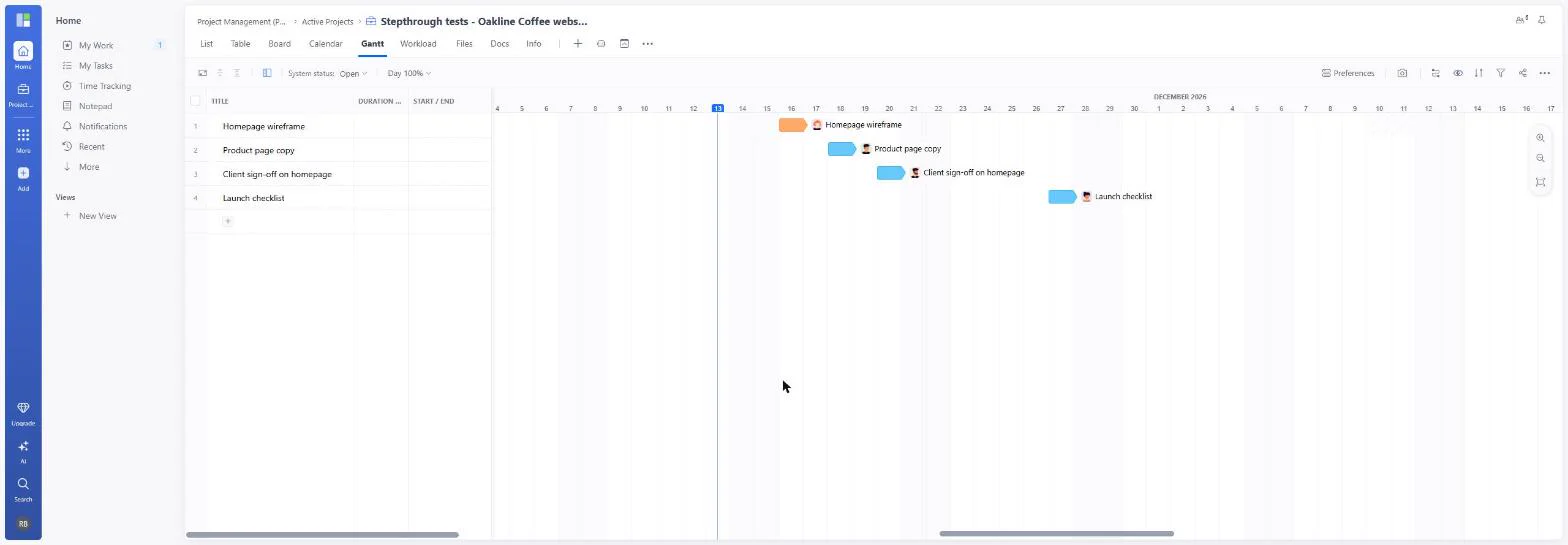
- Will we make Nov 30?. The wireframe sits in Review with your face on it. Clients ask "are we on track?", so check the dates. Click Gantt.
Clients ask if you are on track.
- The timeline the client asks about. Each task is a bar on its day, from Nov 16 to Nov 27, with its owner, before the Nov 30 deadline. Trello needs a paid plan for a timeline; here it is one tab. Now see your own day. Click My Work.
Each task is a bar with its owner, before the deadline.
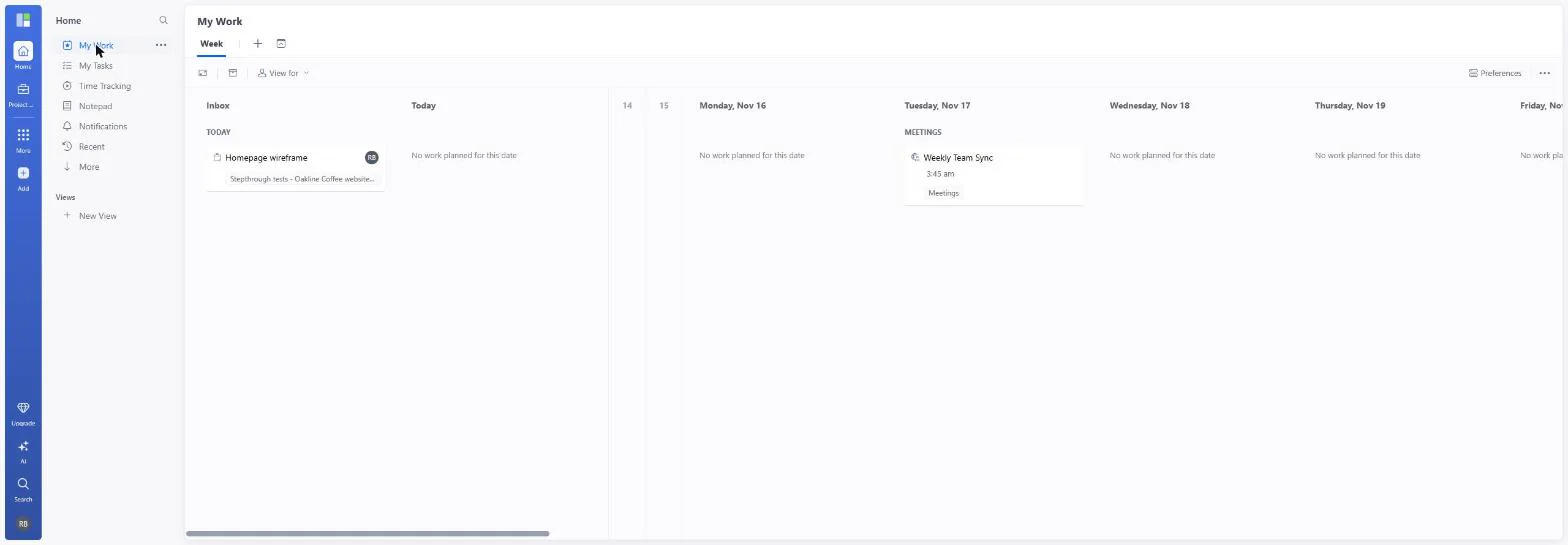
- Your inbox of work. My Work pulls everything waiting on you from every project into one Inbox. The wireframe review is there, without anyone sending you a message. Click it.
My Work collects everything waiting on you, from every project. The wireframe review is here.
Screenshots
More in Business Automations
 AI Receipt Extractor: Receipts to Google Sheets with n8n
Drop a photo of a receipt into an n8n chat. An AI agent reads it, pulls out the date, vendor and amount, picks a category, and adds a row to Google Sheets.
Free · Live ~12 min Intermediate
 n8n AI Email Responder: Draft Gmail Replies Automatically
Build an n8n agent that watches your Gmail, reads each new customer email, and writes a reply as a draft in the same thread, ready for you to check and send.
Free · Live ~12 min Intermediate
 Daily Job Alerts: Email Each Tech Their Jobs from Google Sheets with n8n
Every morning at 7, n8n reads a plumbing company's jobs sheet, skips anything not assigned yet, and emails each job to the tech it's assigned to — customer, address…
Free · Live ~10 min Intermediate
 Gmail AI Triage: Auto-Label Every Email and Draft Replies
Build an n8n workflow that reads each new email, sorts it as a lead, a client or an invoice with a Text Classifier, adds the matching Gmail label, and drafts a reply to…
Free · Live ~18 min Advanced
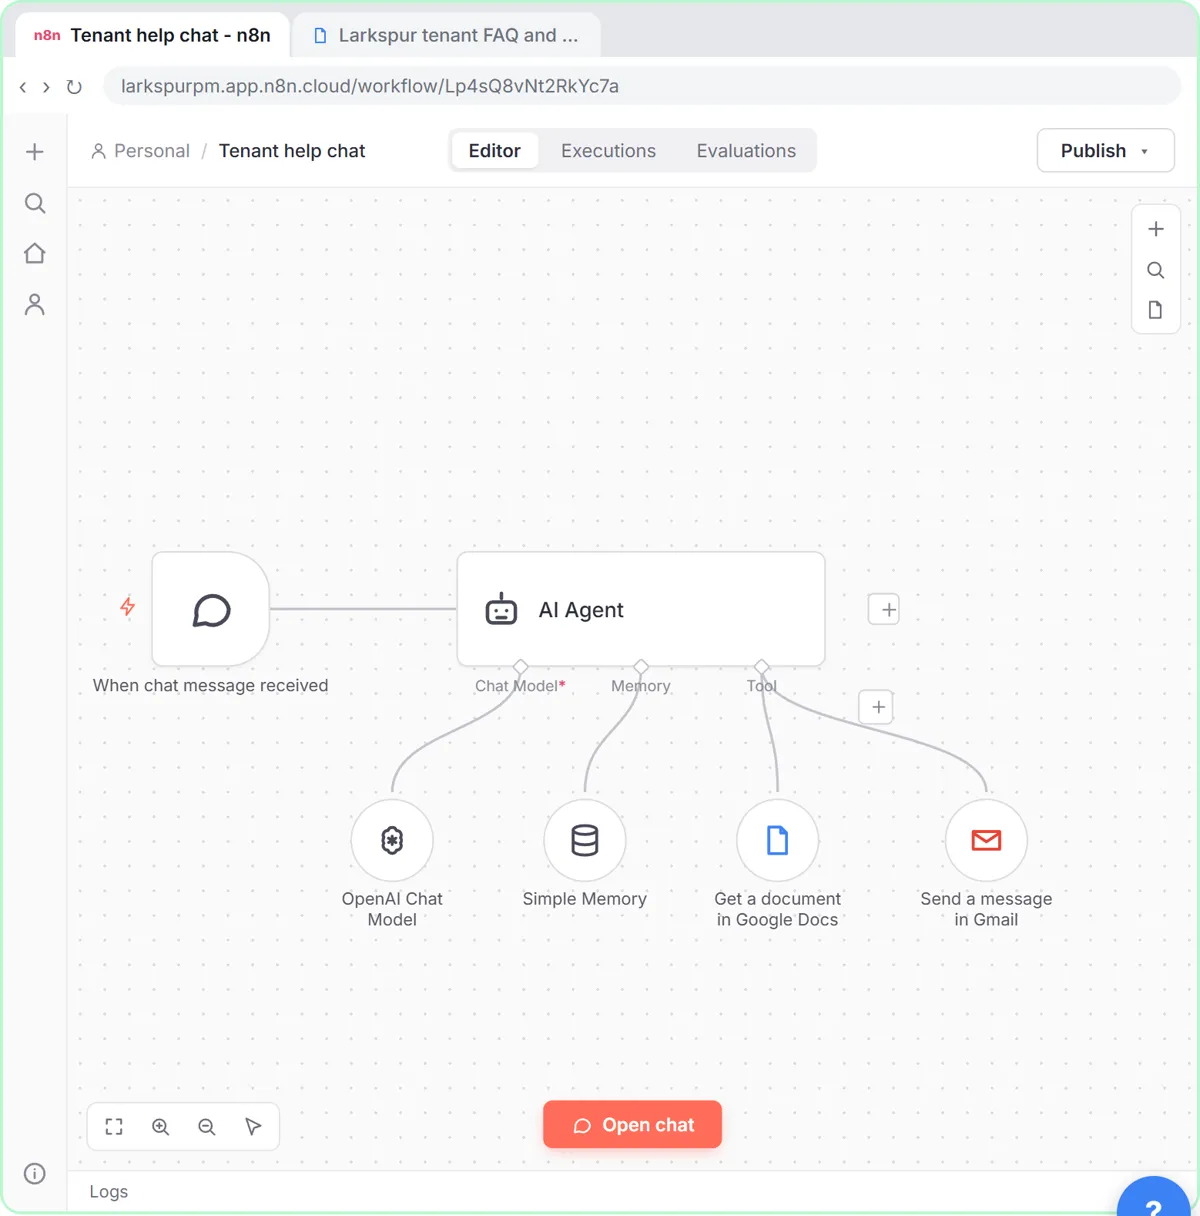 A Support Agent That Answers from Your Own Docs
Turn an n8n chat agent into a support agent that answers only from your policies in a Google Doc, refuses what it should, and hands off to a person by email.
Free · Live ~13 min Advanced
 Chatbase: Answer Customer FAQs with an AI Agent
A business case for a small firm that answers the same customer questions every week: build a Chatbase AI agent on your FAQ in the real app, make it say when it does…
Free · Live ~15 min Beginner
All 47 modules in Business Automations
Terms in this lesson
Plain-English definitions, each with an example from a free lesson.