Why this matters
Agents shoot listings on their phones, and each photo is about 4000 pixels wide and 5 MB. Uploaded as they are, a listing page loads slowly on a buyer's phone, and the same photos turn up on rental-scam ads with nothing to show where they came from.
Three free browser tools fix a photo in about two minutes: Image Resizer brings it to website size, Watermark Adder puts the brokerage name on it, and Image Compressor makes it small. In our test one photo went from 5.6 MB to 142 KB.
Practice
Do every step yourself in a practice copy of the real tool. It checks your work, and “Do it for me” finishes any step you get stuck on.
What you’ll build
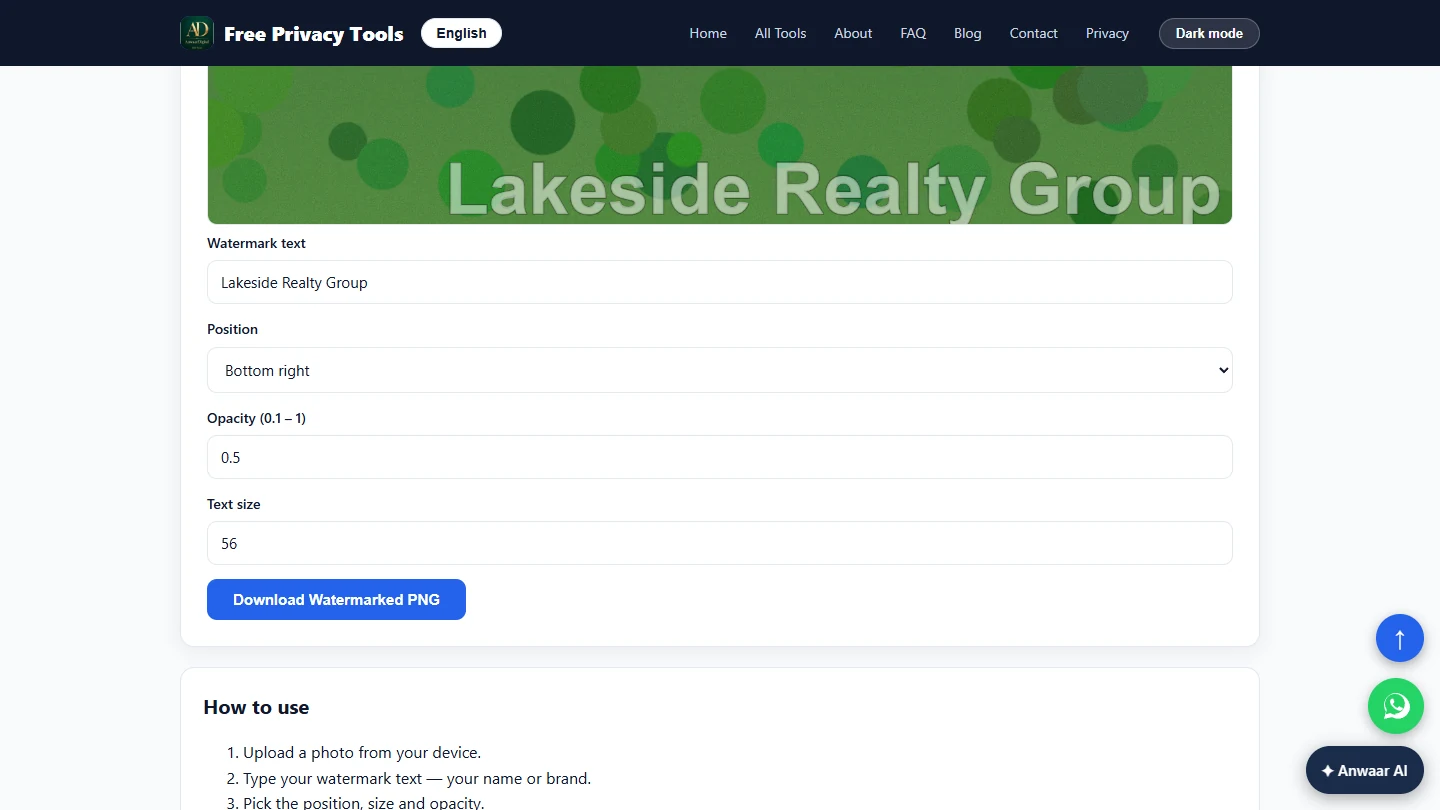
You do marketing at a made-up real estate brokerage. You resize a listing photo to 1600 x 1200 with the aspect ratio locked, add a half-opacity "Lakeside Realty Group" watermark, and compress it to a quality 75 JPG.
The screens are real screenshots of Free Privacy Tools by Anwaar Digital, captured November 2026 while doing the task with a made-up photo.
What you need
- Nothing to start the practiceThe lesson is a practice copy of real screens. The brokerage and the house are made up.
- The real tools, freeImage Resizer, Watermark Adder and Image Compressor on Free Privacy Tools by Anwaar Digital. No account; the pages say images stay in your browser.
- Your listing portal's photo rulesSome portals and MLS systems limit watermarks or file types. Check before you brand every photo.
Concepts
Resize, watermark, then compress
Image Resizer and Watermark Adder both save PNG files, which keep every pixel and stay heavy: our resized and watermarked PNGs were 4.6 MB each.
Compress once, at the end. Image Compressor turned the same photo into a 142 KB JPG at quality 75, with no visible difference on screen.
Lock the aspect ratio
With Keep aspect ratio ticked, set only the width and the height follows (4032 x 3024 became 1600 x 1200), so the house is never stretched.
The one-click sizes, such as Instagram Post 1080x1080, change the shape of the photo. Use them for social posts, not for listing photos.
A watermark that helps, not hurts
Bottom right at opacity 0.5 keeps the name readable without hiding the property. Watermark the resized copy, so the text size suits the final photo.
Do it for real
Now repeat it in your own account. Tick each step as you go.
Quick check
3 questions to check you’ve got it.
1. In which order should you use the three tools?
- Resize, watermark, then compress
- Compress, resize, then watermark
- Watermark, compress, then resize
Show the answer
Resize, watermark, then compress. The resizer and watermark tool save PNG files, so compressing earlier is undone. Compress last.
2. Your photo is 4032 x 3024 and you type 1600 as the width with Keep aspect ratio ticked. What height do you get?
- 1200
- 1600
- 3024
Show the answer
1200. The ratio stays 4:3, so 1600 wide means 1200 high and nothing is stretched.
3. A listing portal does not accept WebP. Which button do you use in Image Compressor?
- Compress & Download JPG
- Compress & Download WebP
- Resize & Download
Show the answer
Compress & Download JPG. JPG works everywhere. WebP is smaller but not every portal or MLS accepts it.