How to find and Use n8n Templates: step-by-step guide with screenshots
Updated
Skip the blank canvas. Find a ready-made workflow in the n8n template gallery, import it into your workspace, connect Google Sheets and Gmail, test it with a real form entry and publish it.
About the screenshots. They come from Stepthrough’s simulated practice environment (a practice copy of n8n), not the live tool, so no real account appears. The buttons and labels match the real screens the lesson was built against. Practice it yourself free at learn.ynteractive.com.
- Tools: n8n
- Time: about 9 minutes, 36 steps in 6 parts
- Level: beginner, no coding needed
Part 1: Open the gallery
Step 1: Open Templates
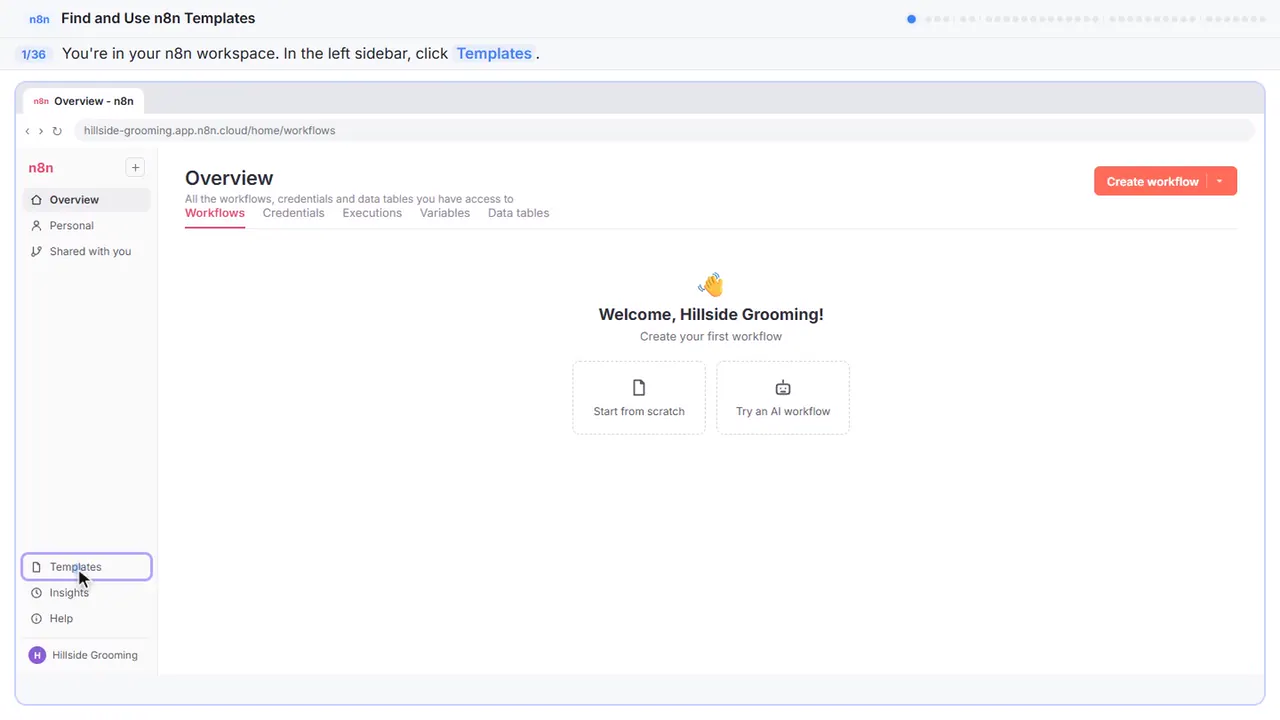
Here's the n8n workspace for Hillside Pet Grooming, and it's still empty. Before you build anything from scratch, check whether someone already has. In the sidebar, click Templates.
Part 2: Find a template
Step 2: Pick a category
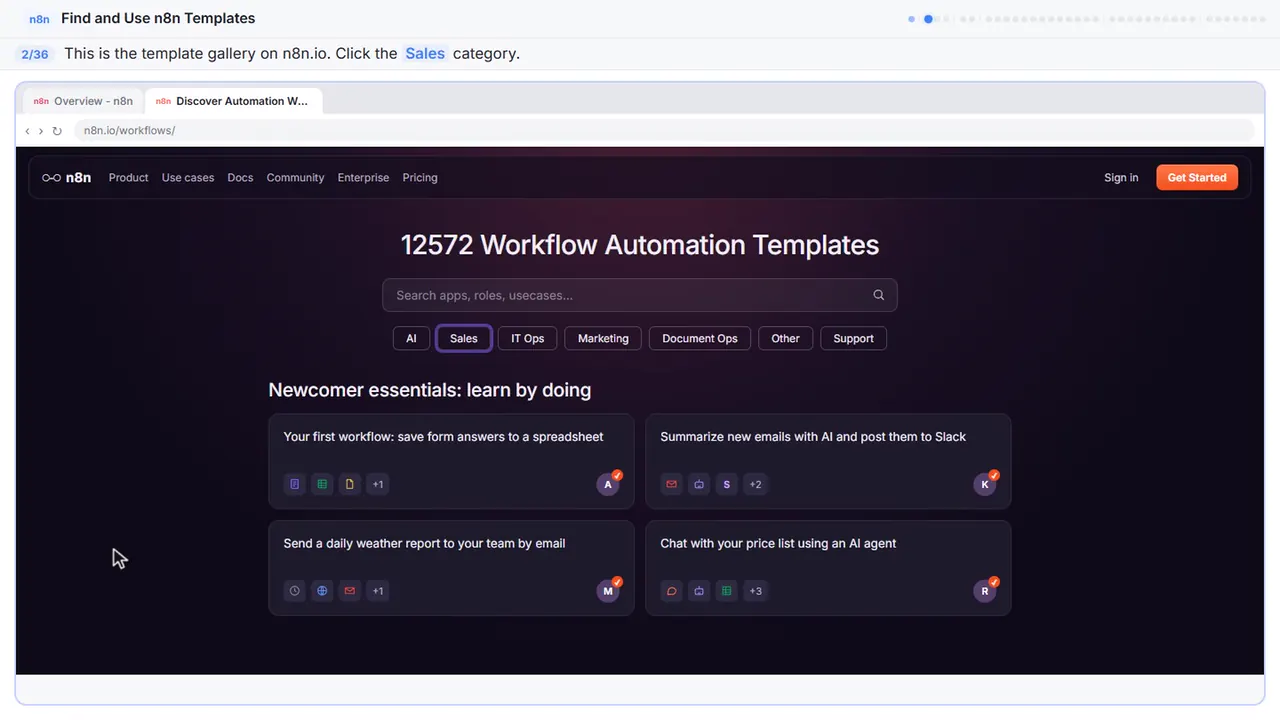
That opens the n8n template gallery in a new tab. Thousands of free workflows, sorted into categories like AI, Sales, IT Ops and Marketing. Booking requests are really sales leads, so click Sales.
Step 3: Narrow it down
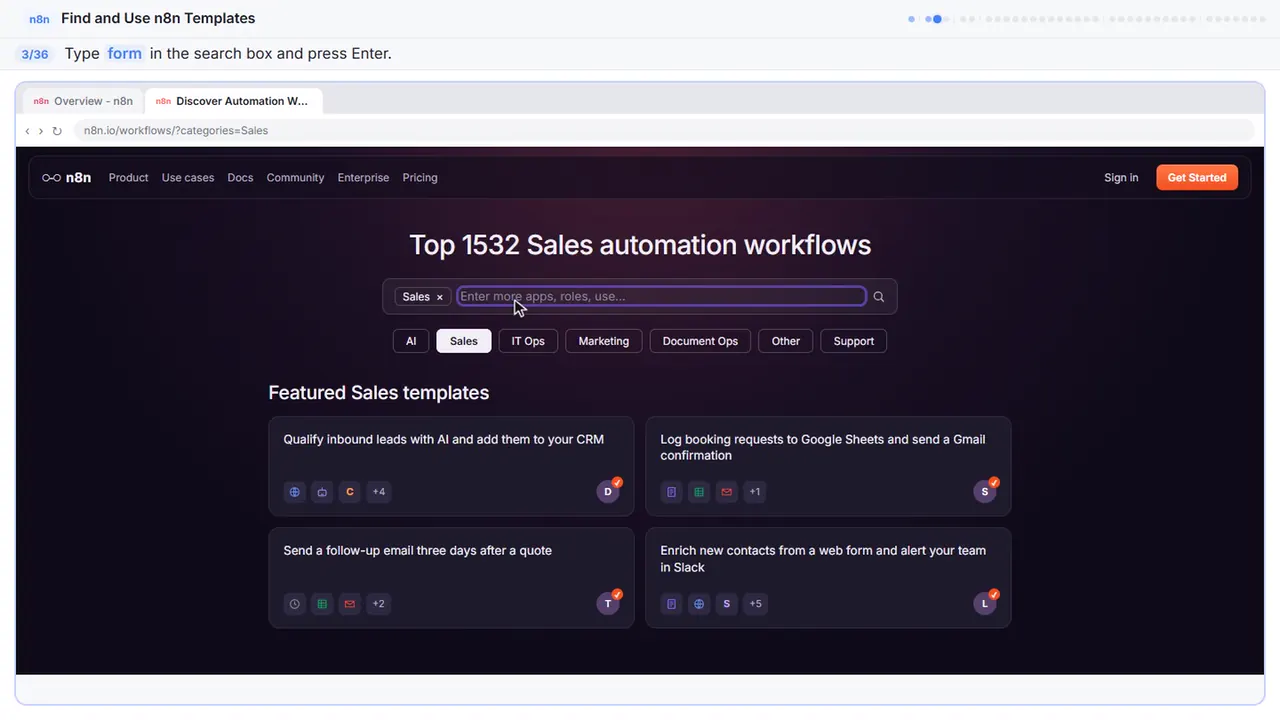
Now narrow it down. Hillside takes bookings through a form, so type form in the search box and press Enter.
Step 4: Open the template
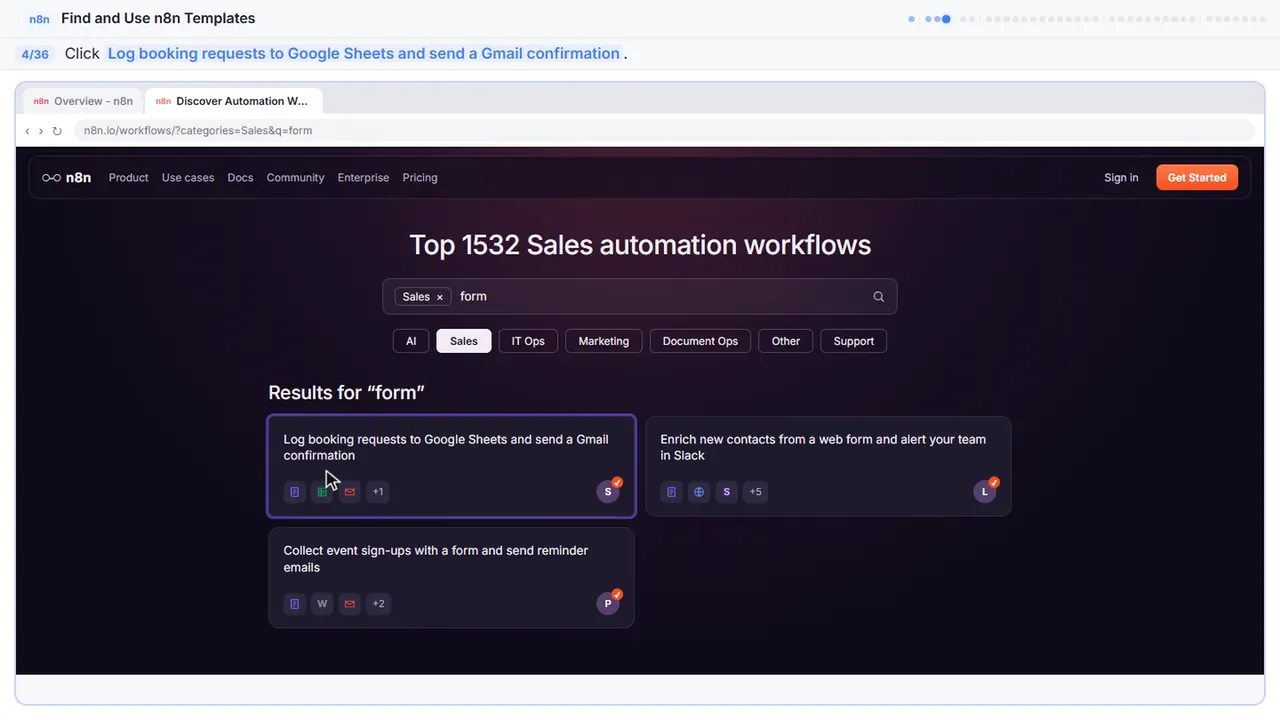
This one fits: it logs every booking request to a Google Sheet and sends a confirmation from Gmail.
Part 3: Import it
Step 5: Use for free
The template page shows a preview of the workflow, who made it, and a description of what it does and what you need.
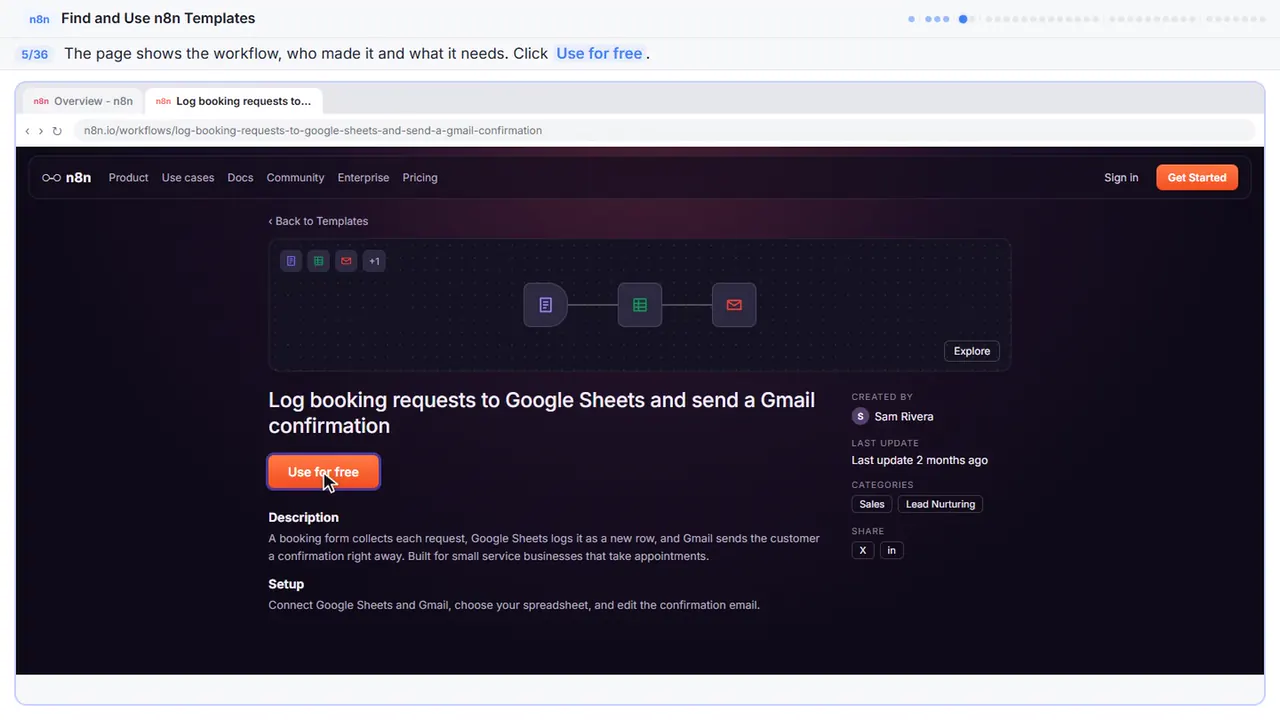
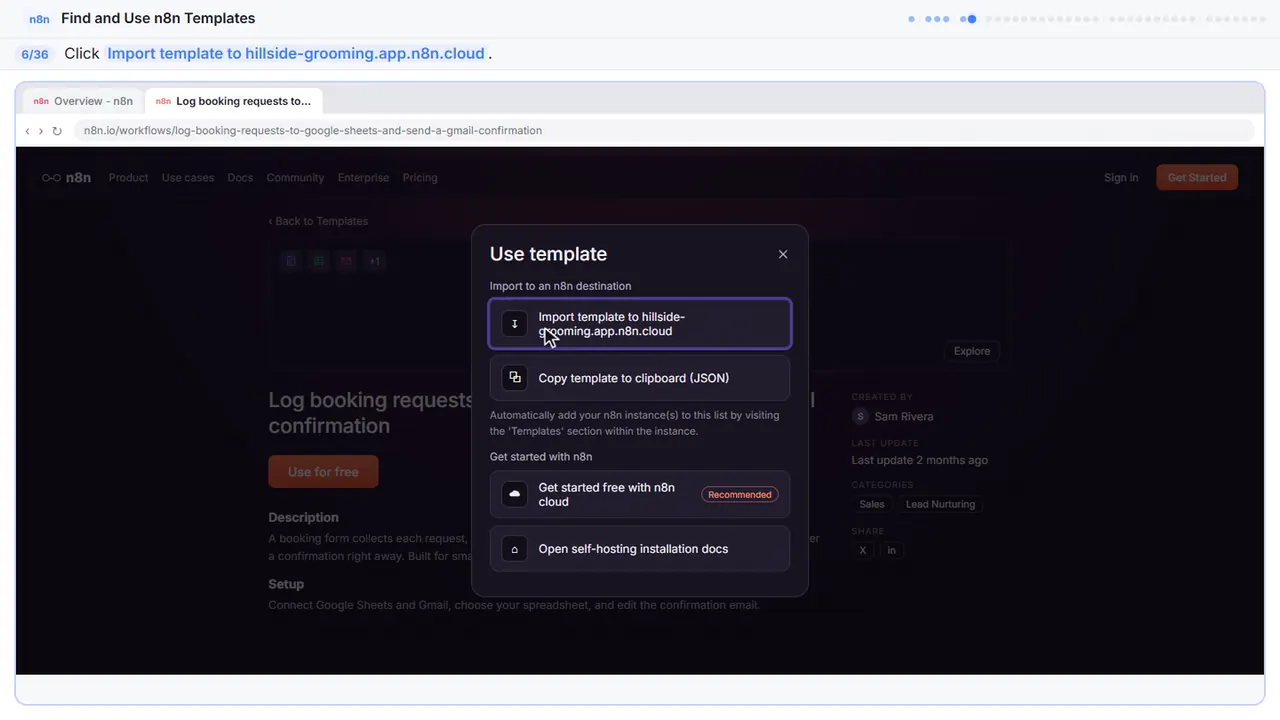
Step 6: Import into your workspace
Because you came here from your own workspace, n8n lists it right here. The Copy template to clipboard option works anywhere too: you'd paste it straight onto an empty canvas.
Part 4: Set up credentials
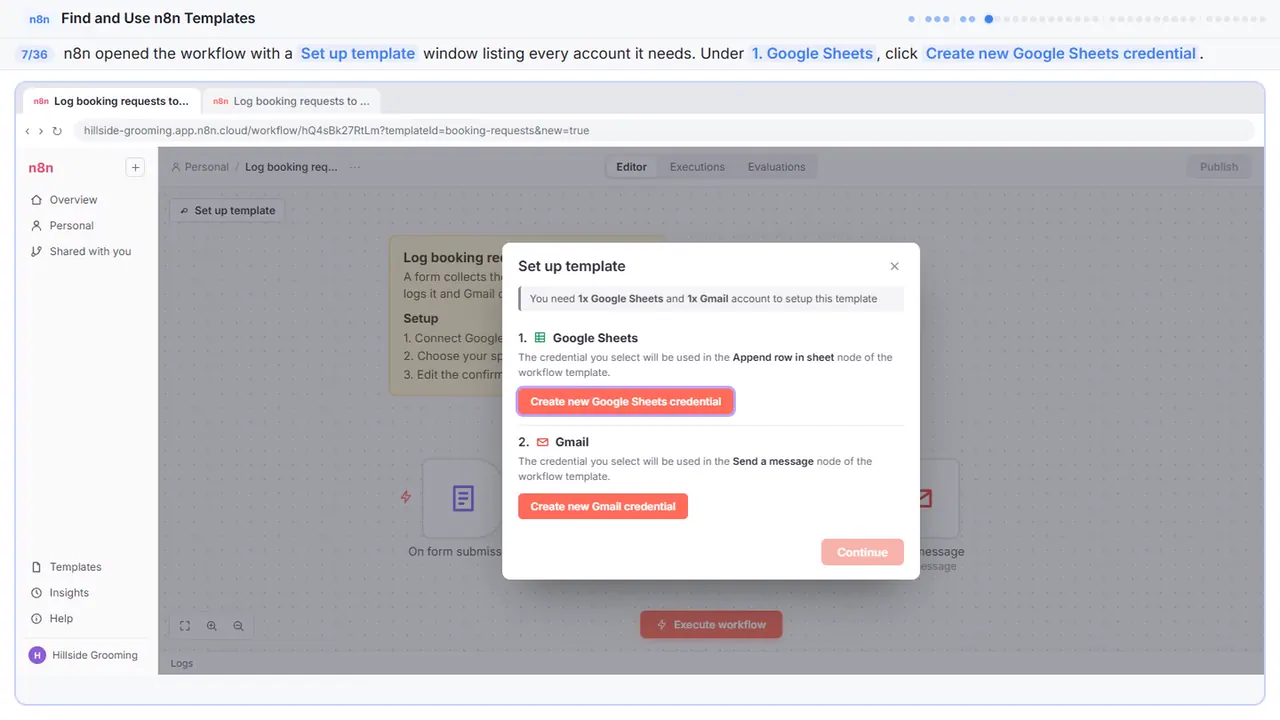
Step 7: Connect Google Sheets
Back in n8n, the workflow is already on your canvas, and a Set up template window lists every account it needs. Two here: Google Sheets and Gmail.
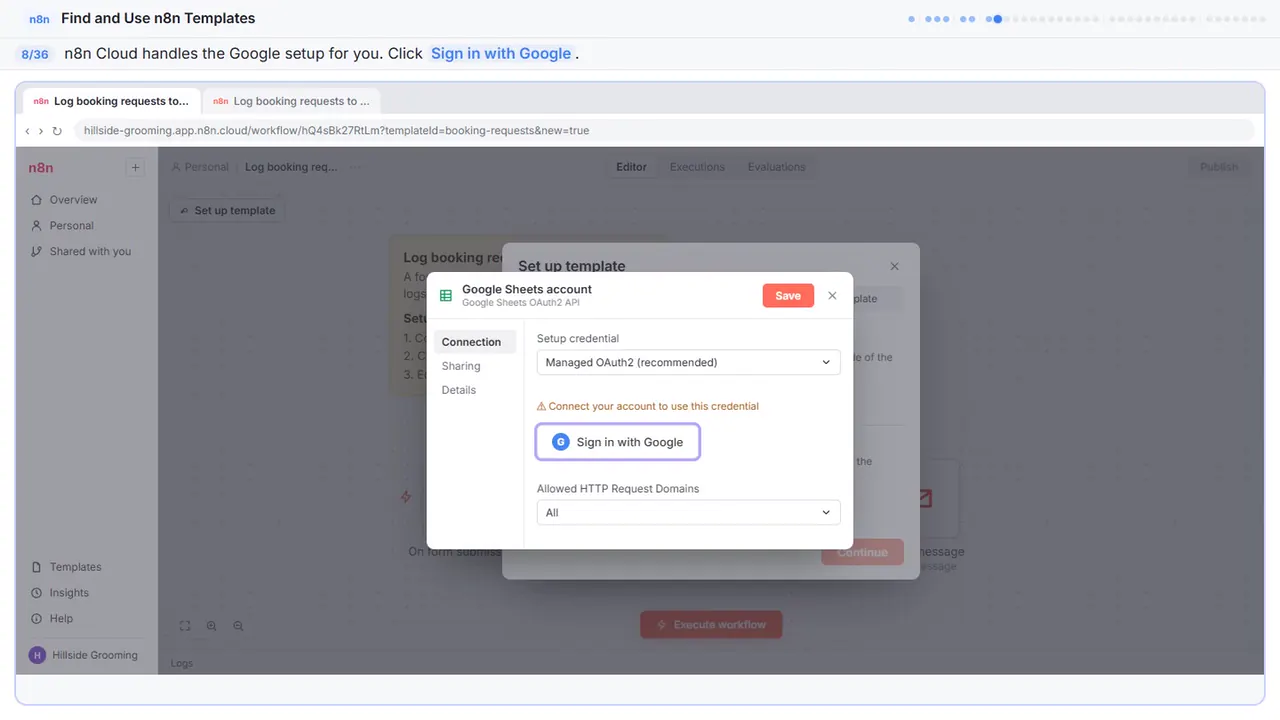
Step 8: Sign in with Google
On n8n Cloud you don't need any Google developer setup.
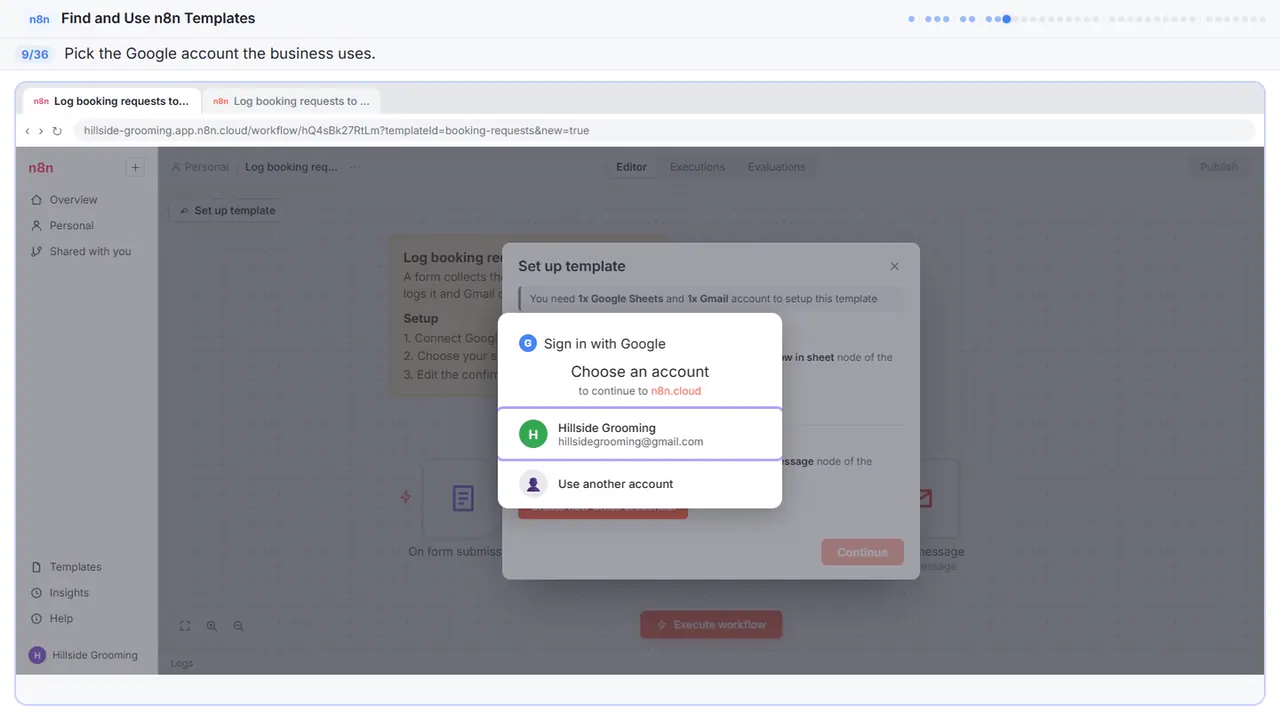
Step 9: Choose your account
Pick the Google account your business uses. Here that's the Hillside Grooming account.
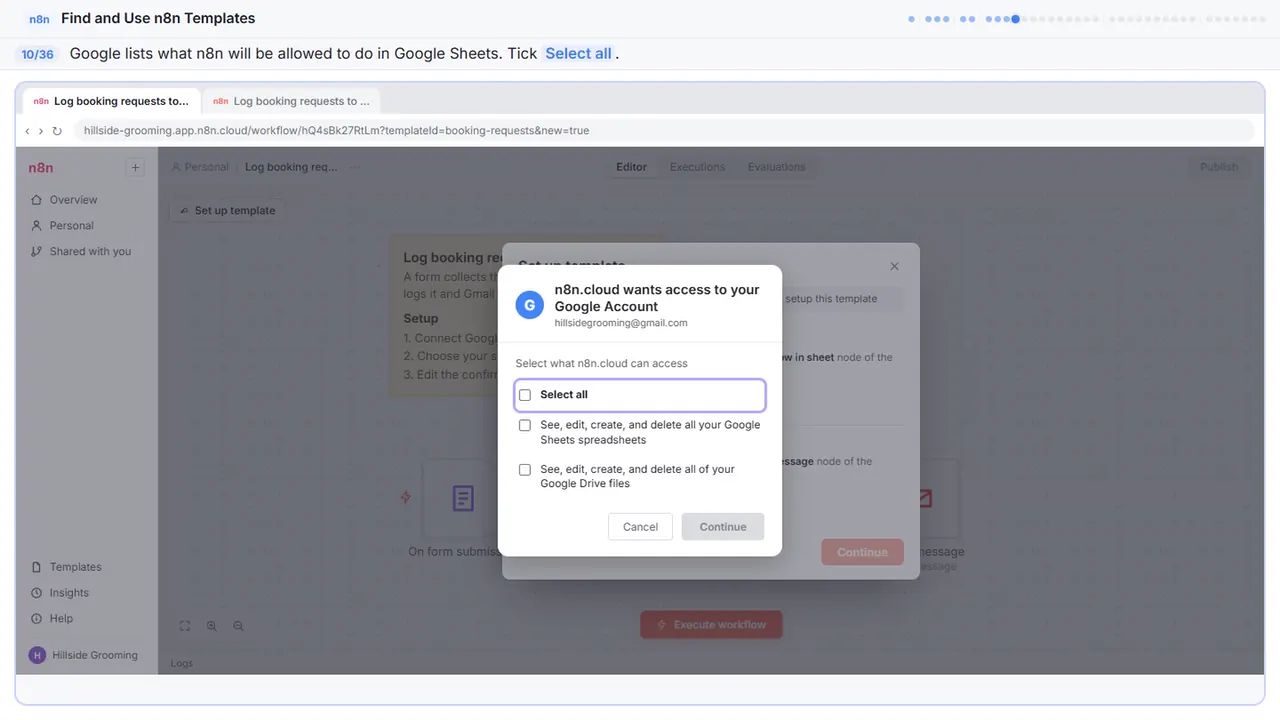
Step 10: Allow access
Google shows exactly what n8n will be allowed to do. Tick Select all, so the workflow can add rows to your sheet.
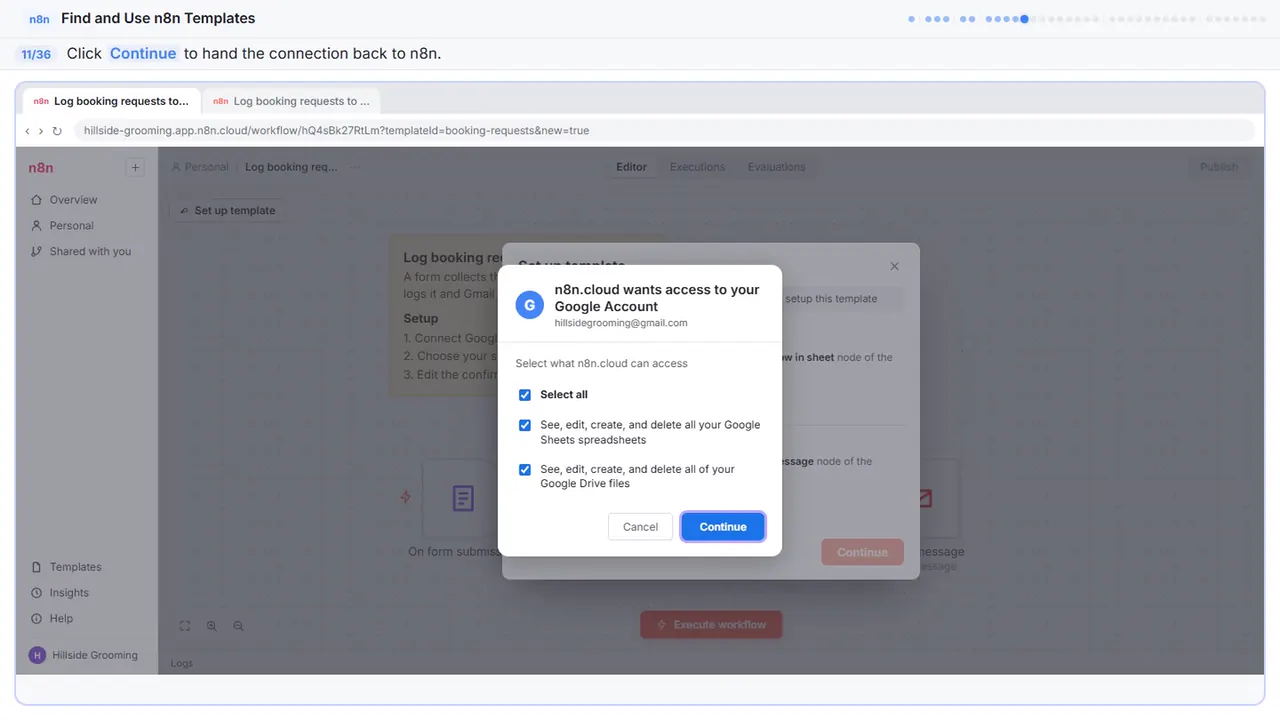
Step 11: Continue
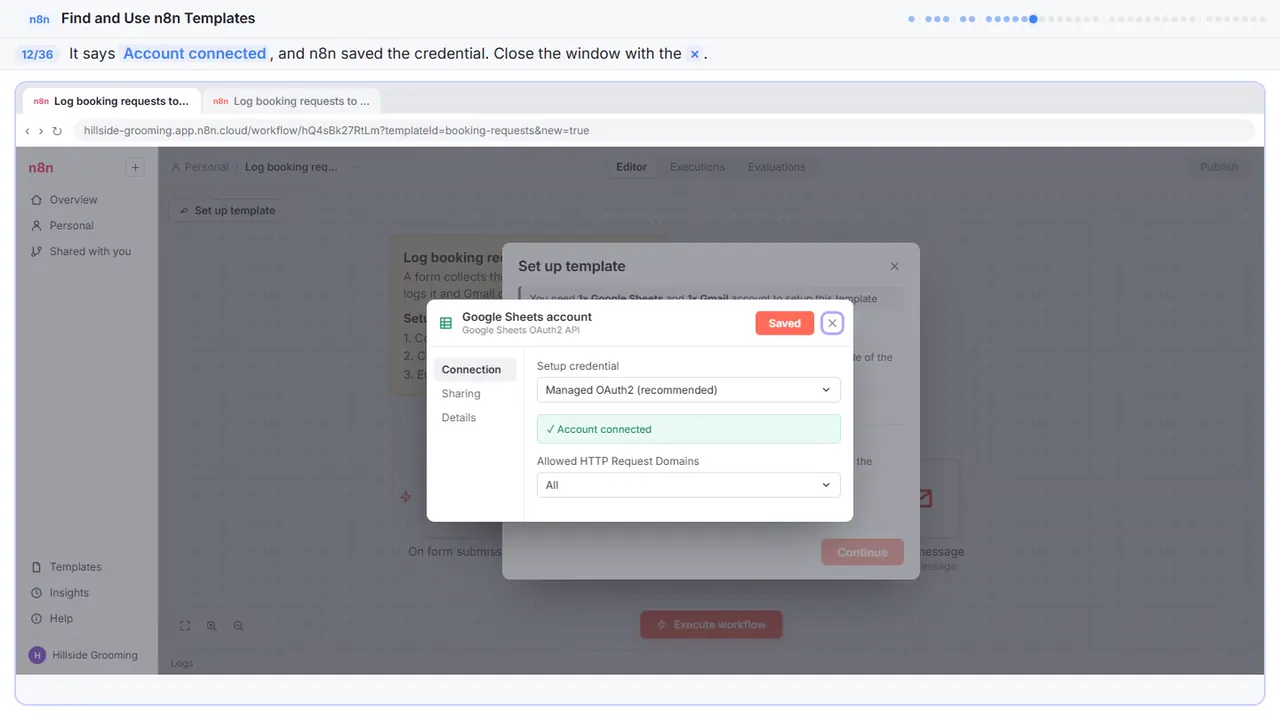
Step 12: Close the credential
Account connected. n8n saves the credential for you, so you can use it in any workflow from now on. Close this window.
Step 13: Connect Gmail
Google Sheets is done. Now Gmail.
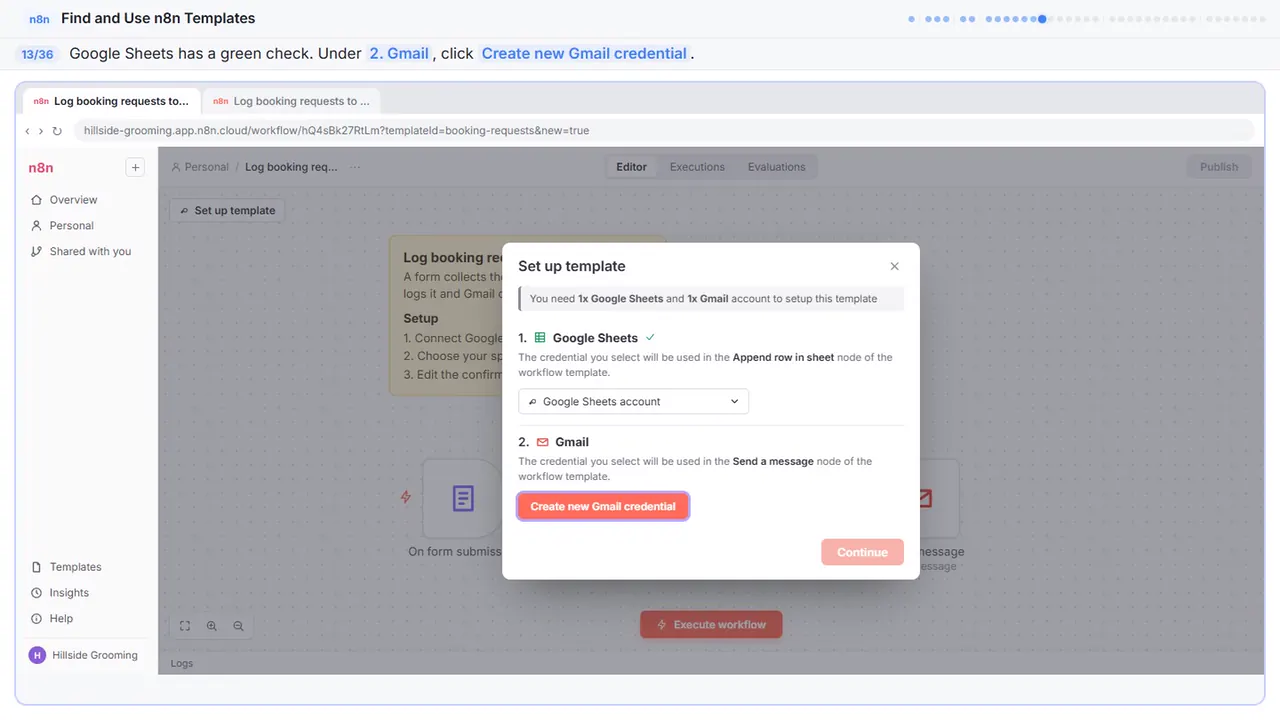
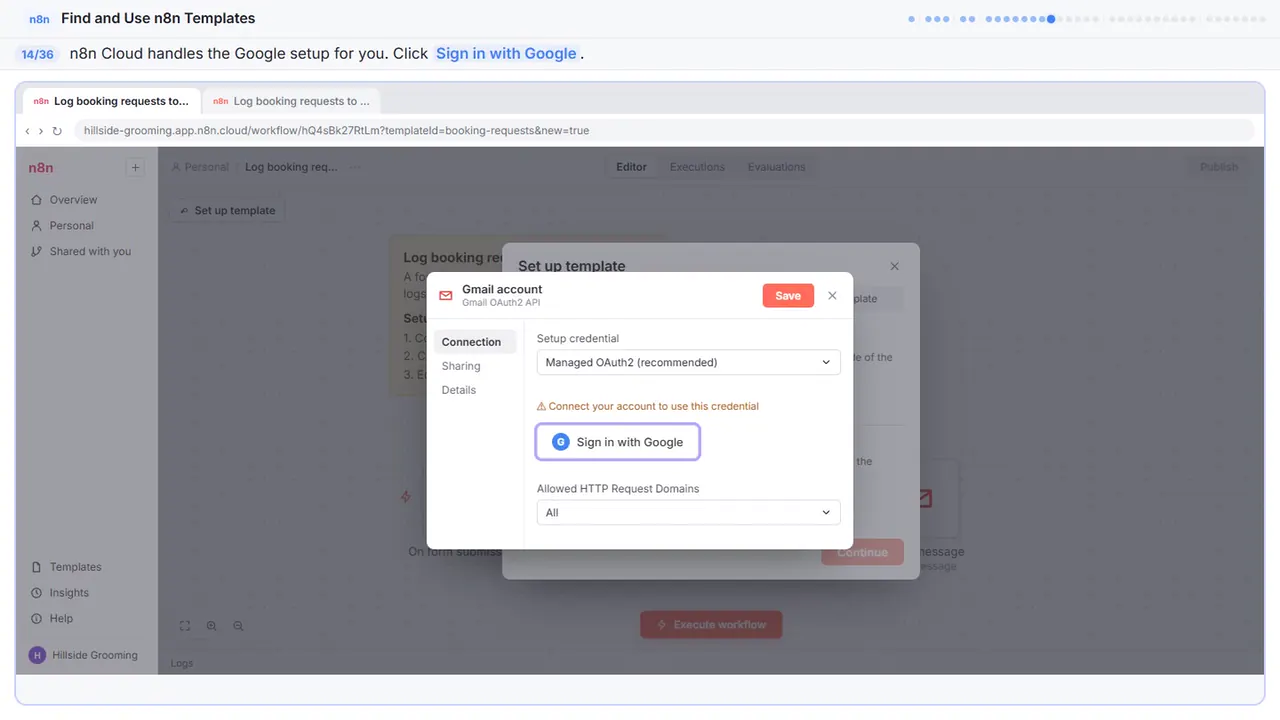
Step 14: Sign in with Google
Same as before.
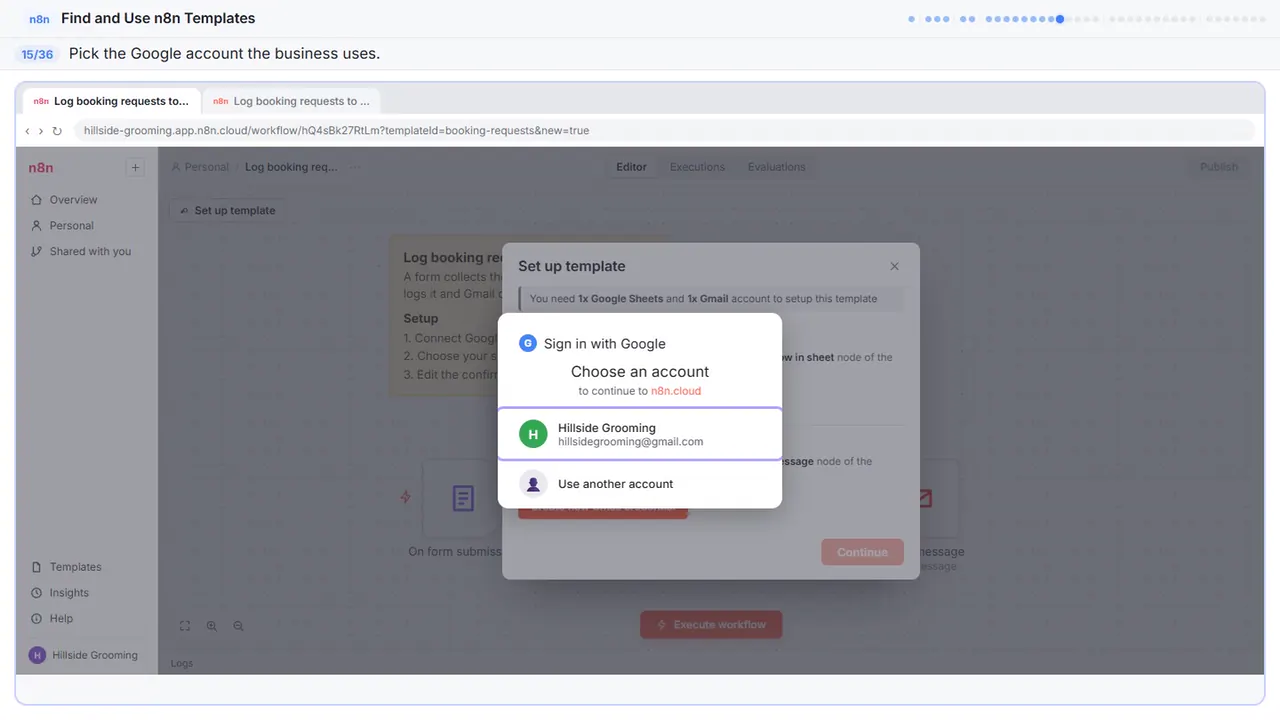
Step 15: Choose your account
Pick the Hillside Grooming account again.
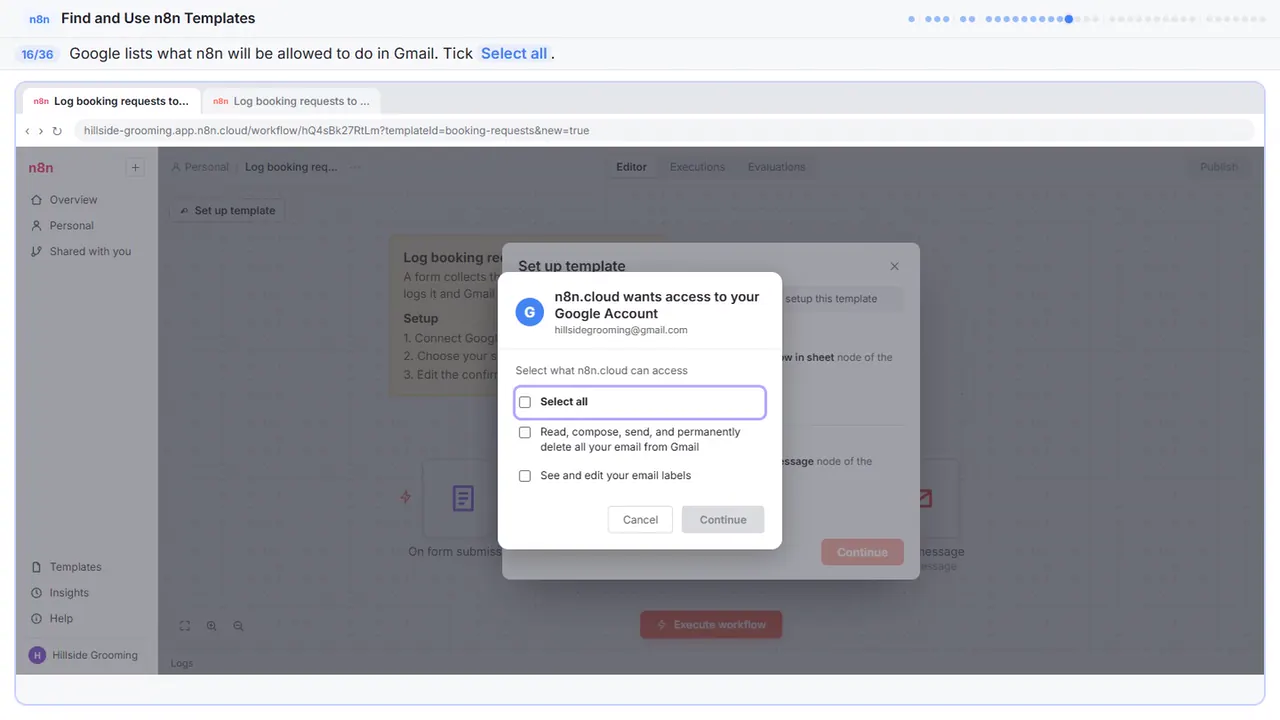
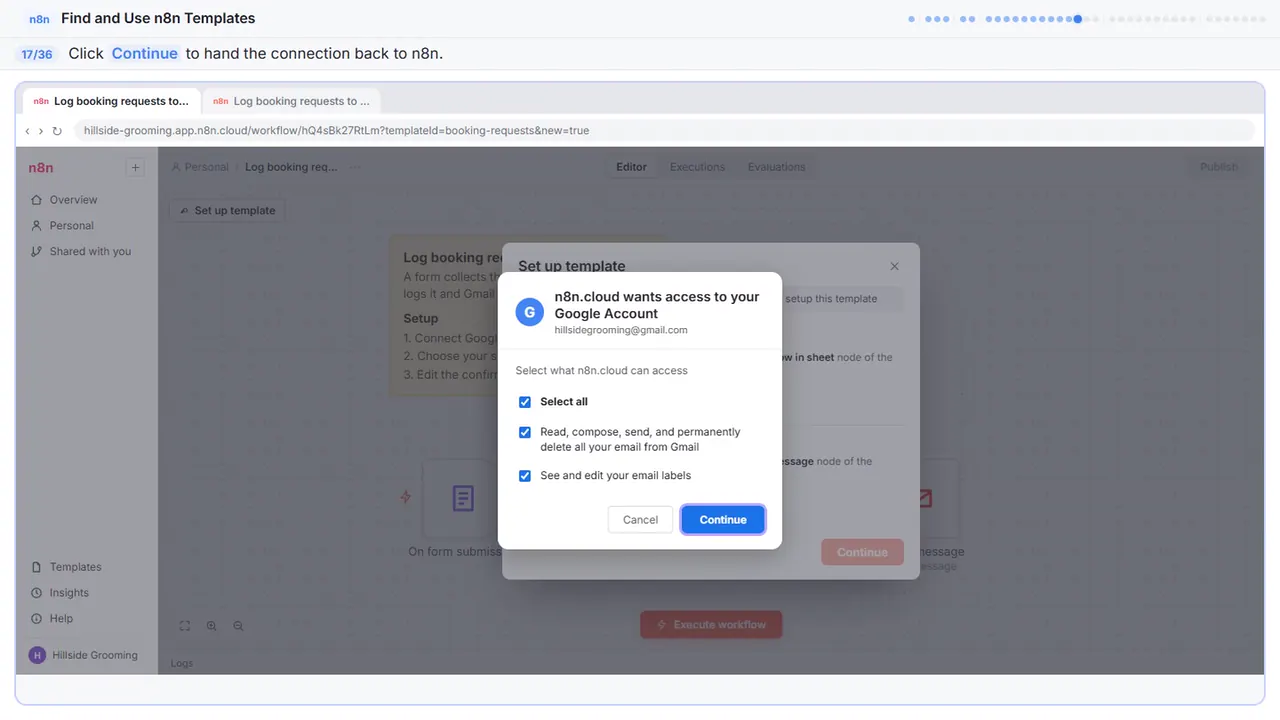
Step 16: Allow access
This time the permissions are for Gmail, so the workflow can send the confirmation email. Tick Select all.
Step 17: Continue
And Continue.
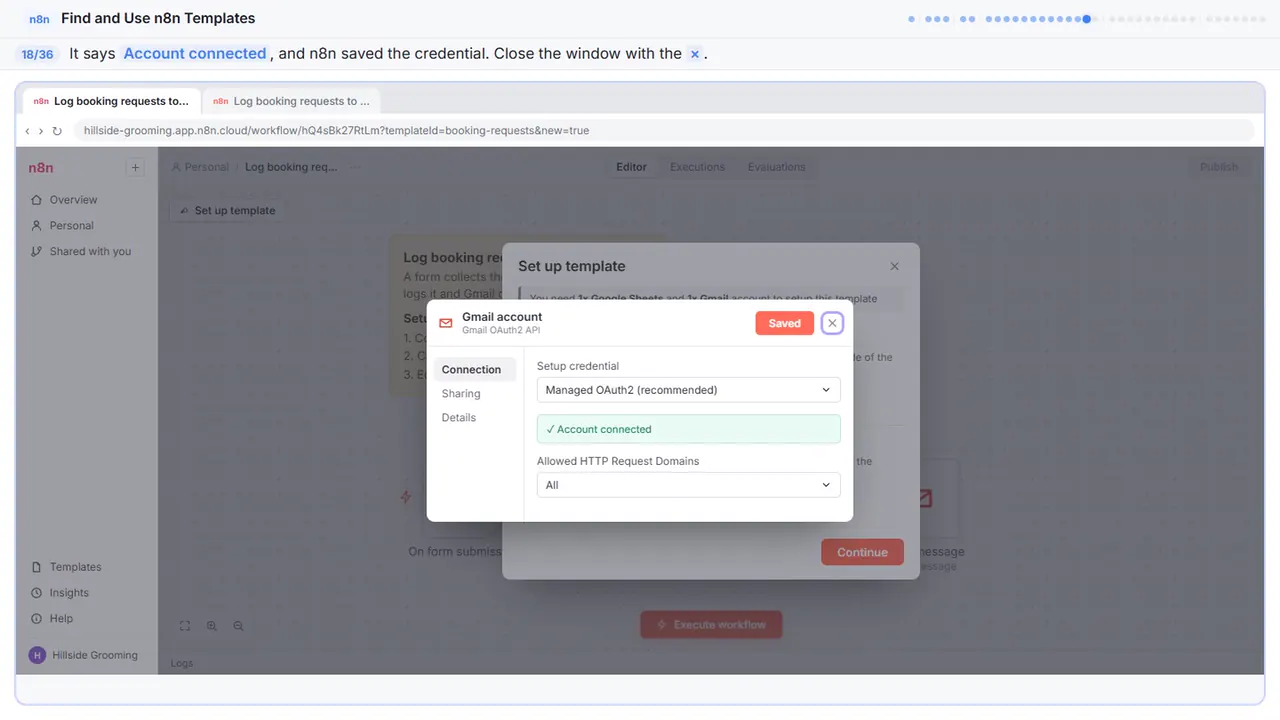
Step 18: Close the credential
Connected. Close the window.
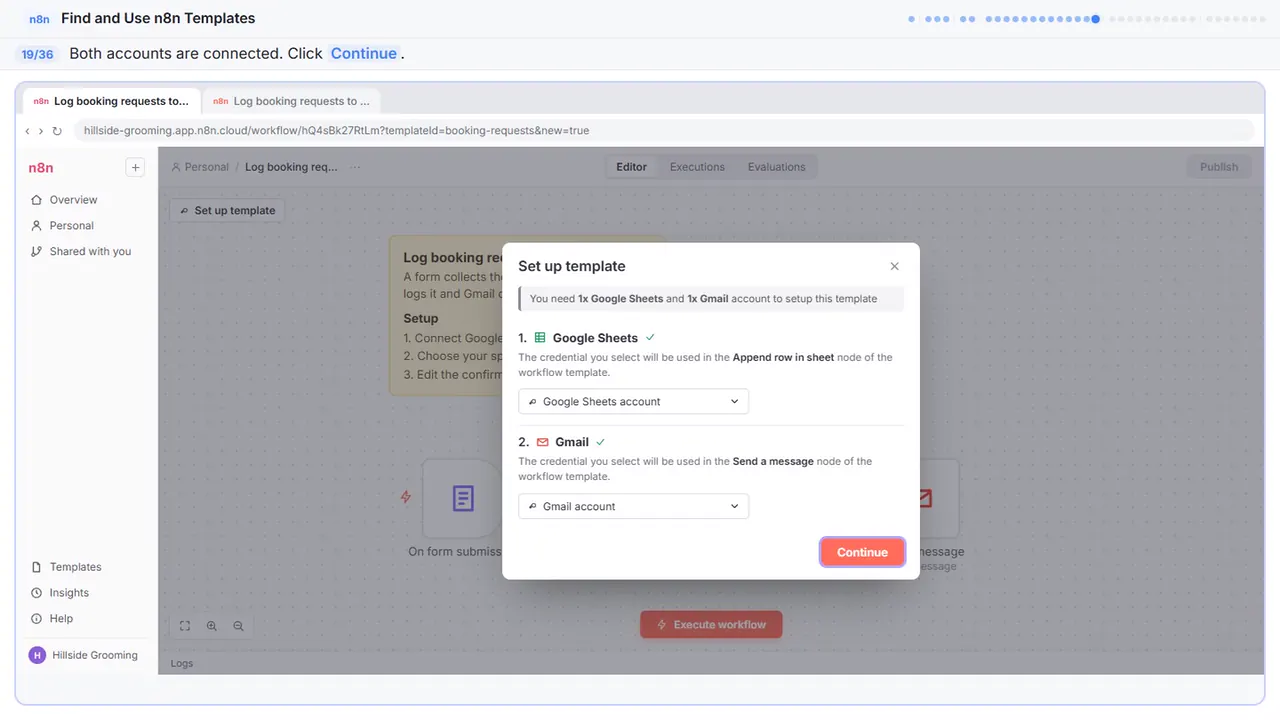
Step 19: Finish the set-up
Both accounts are connected.
Part 5: Finish the setup
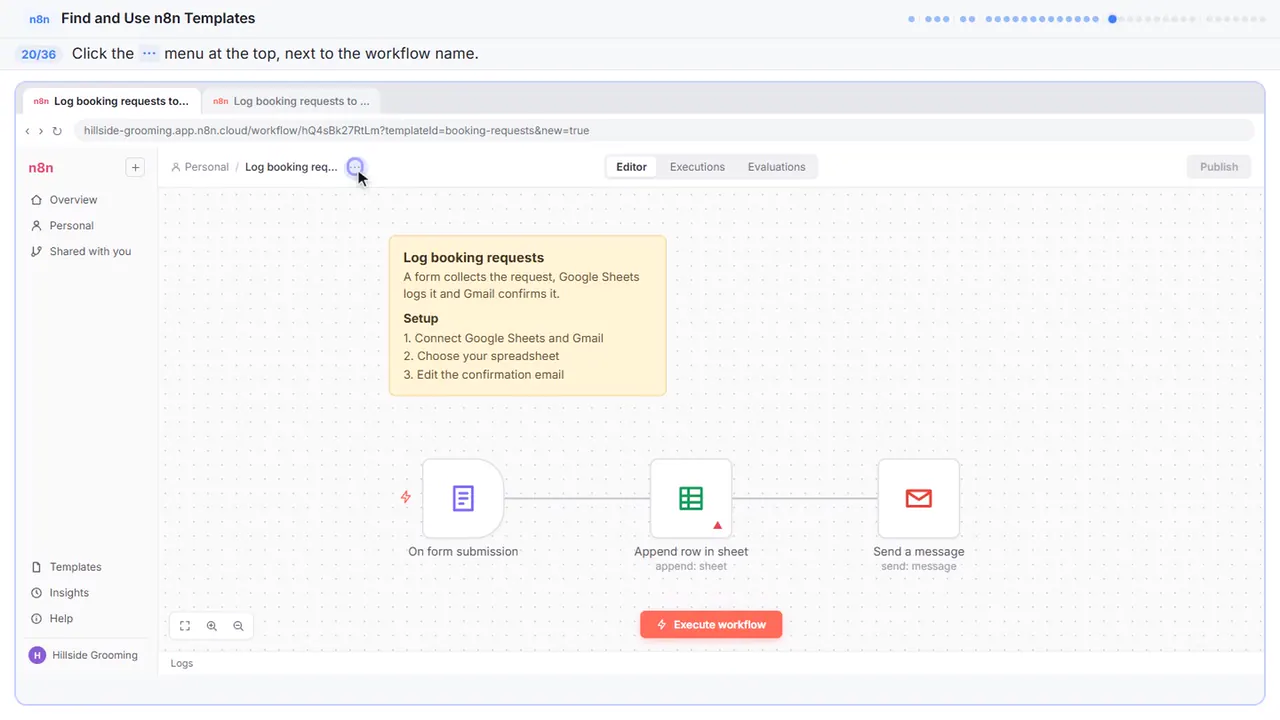
Step 20: Know the other way in
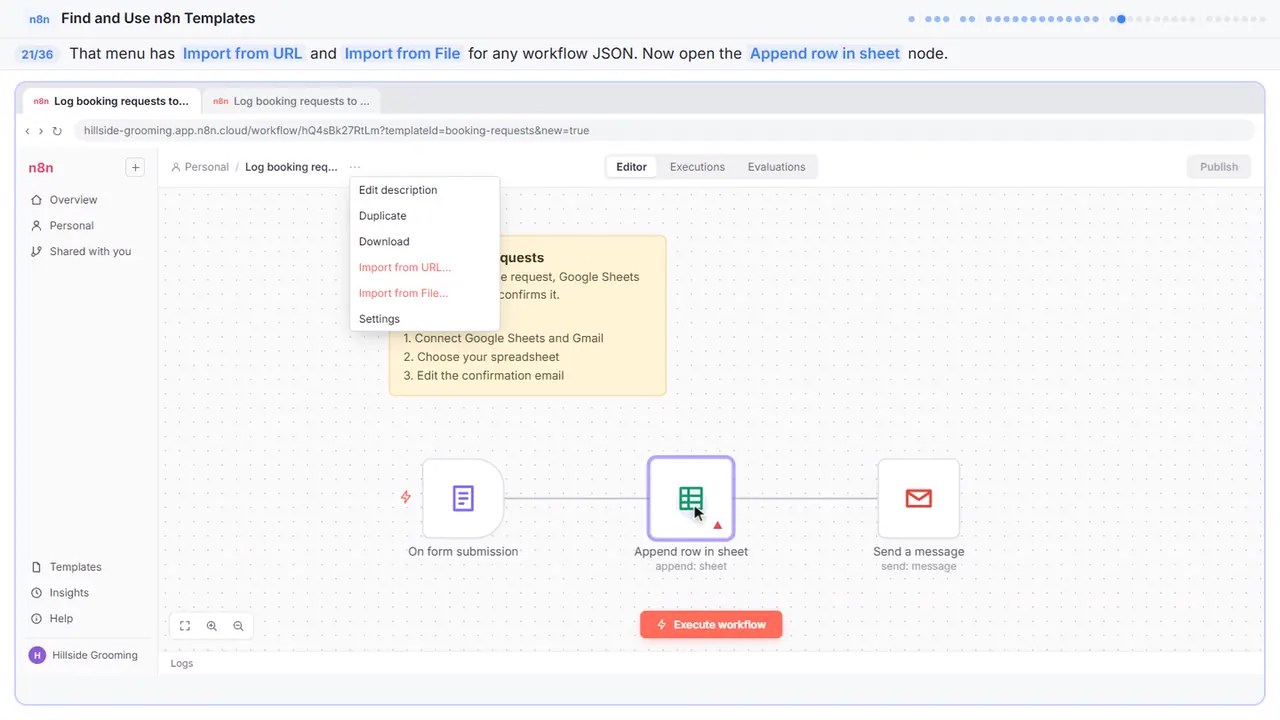
There's the whole workflow: a form, a Google Sheets step and a Gmail step, plus a sticky note from the creator. Quick detour: click the three dots at the top.
Step 21: Open the Sheets step
This menu has Import from URL and Import from File, for when someone sends you a workflow file. Good to know. The warning means it still needs your spreadsheet.
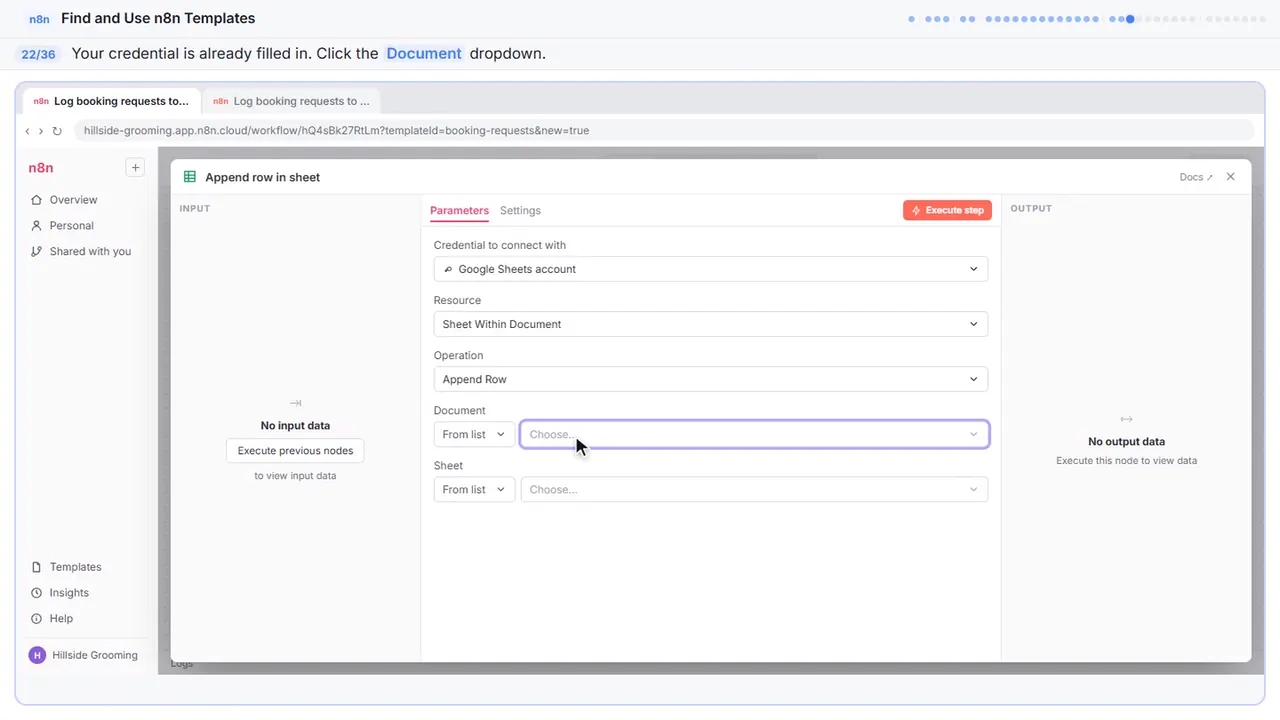
Step 22: Choose your spreadsheet
Your Google Sheets credential is already filled in. The template can't know which spreadsheet is yours, so click the Document dropdown.
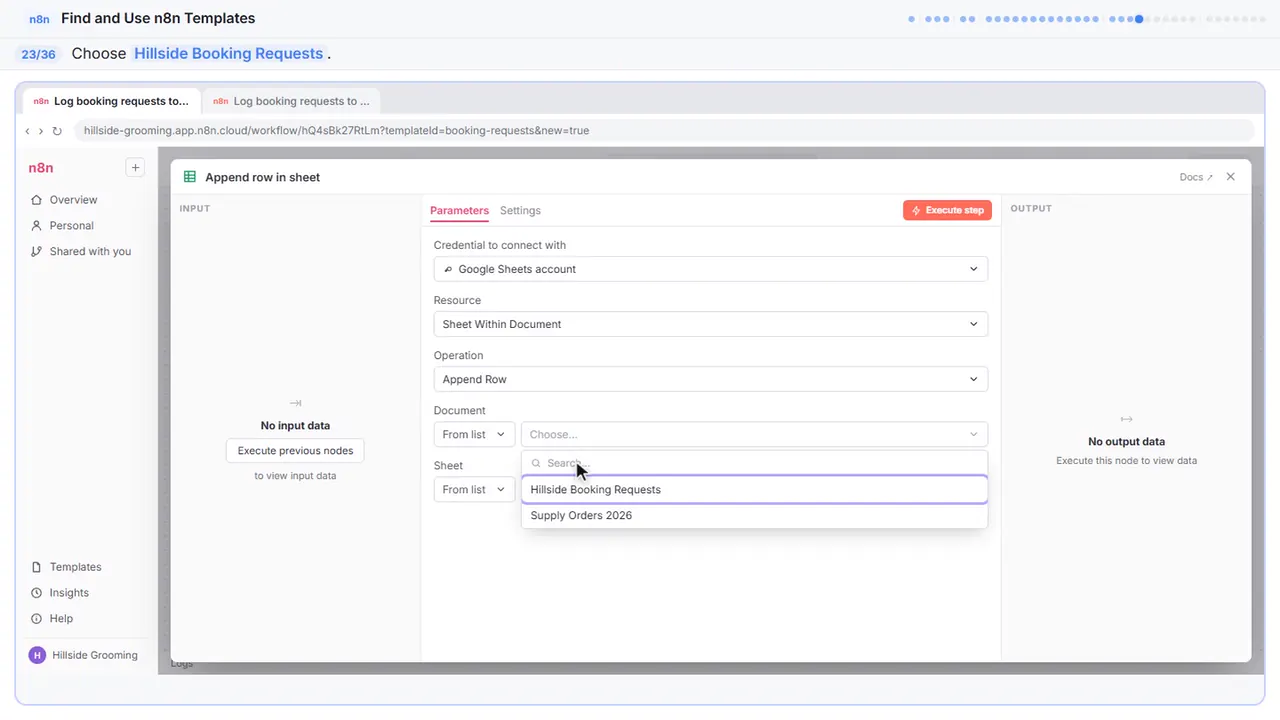
Step 23: Pick the booking sheet
Pick the Hillside Booking Requests sheet.
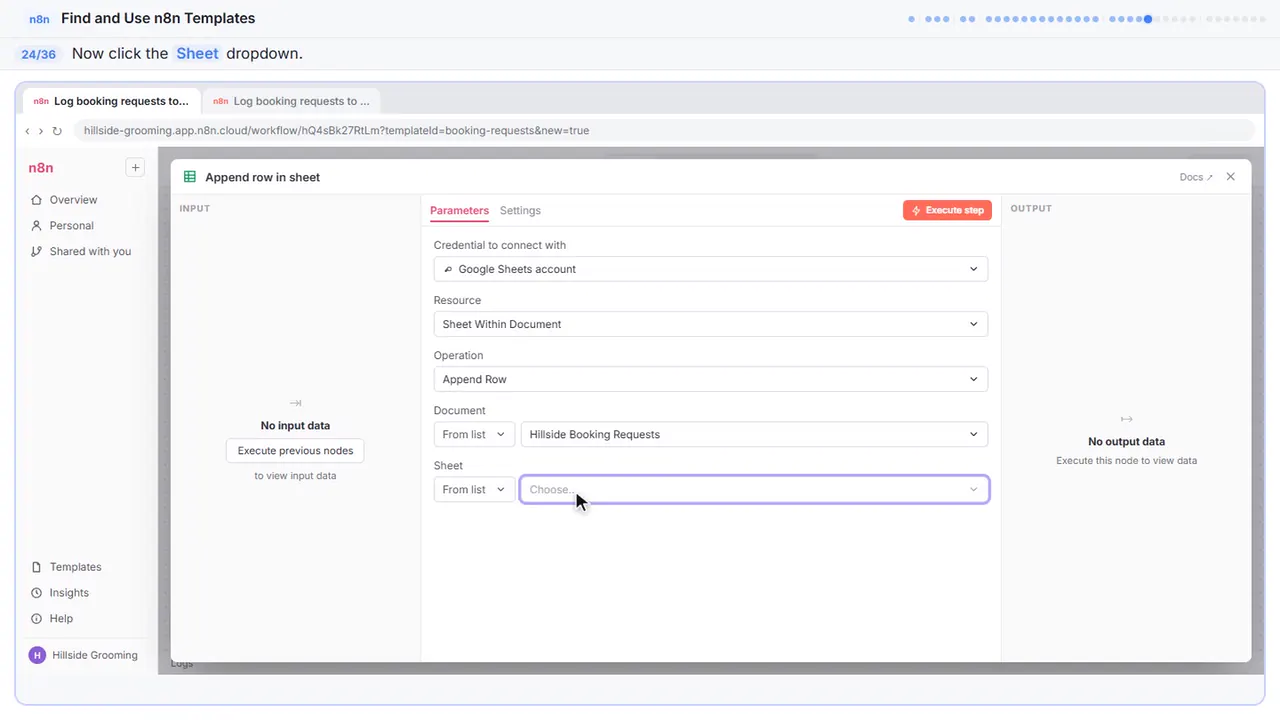
Step 24: Choose the tab
Then the Sheet dropdown, for the tab inside it.
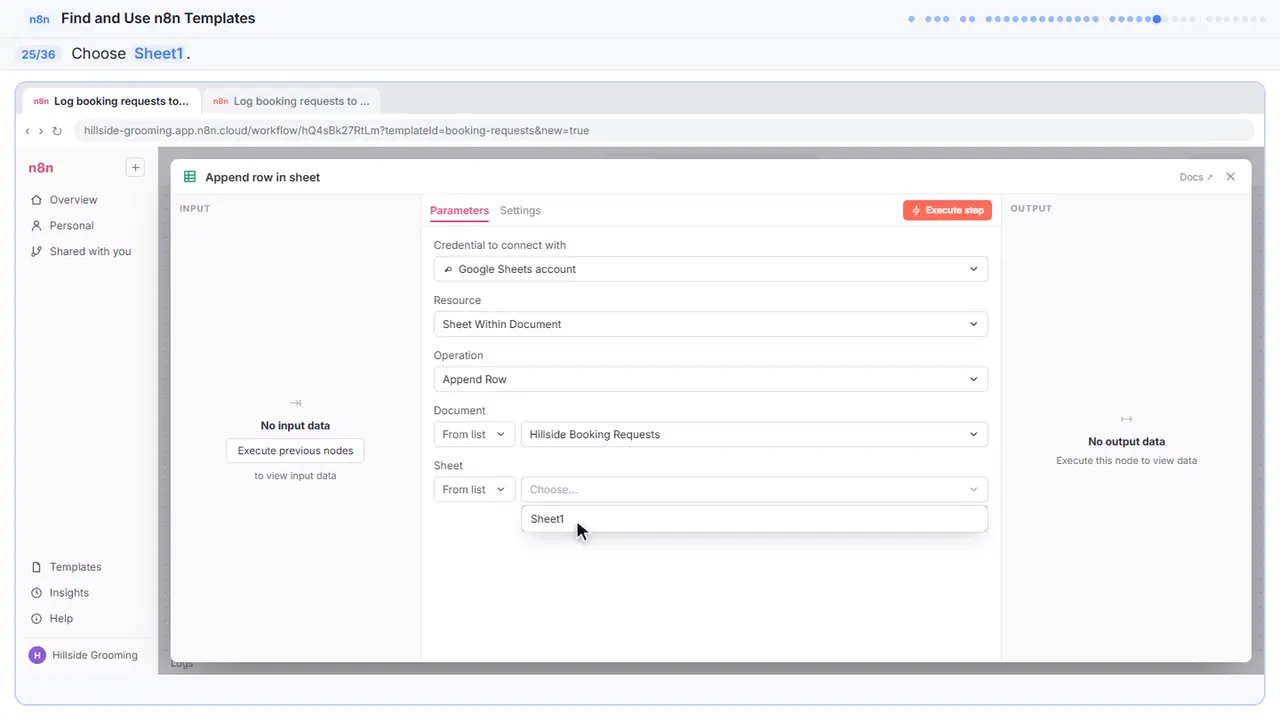
Step 25: Sheet1
Sheet1. The template already maps the columns: name, email, pet name and the time it came in. Your sheet just needs those headers in its first row.
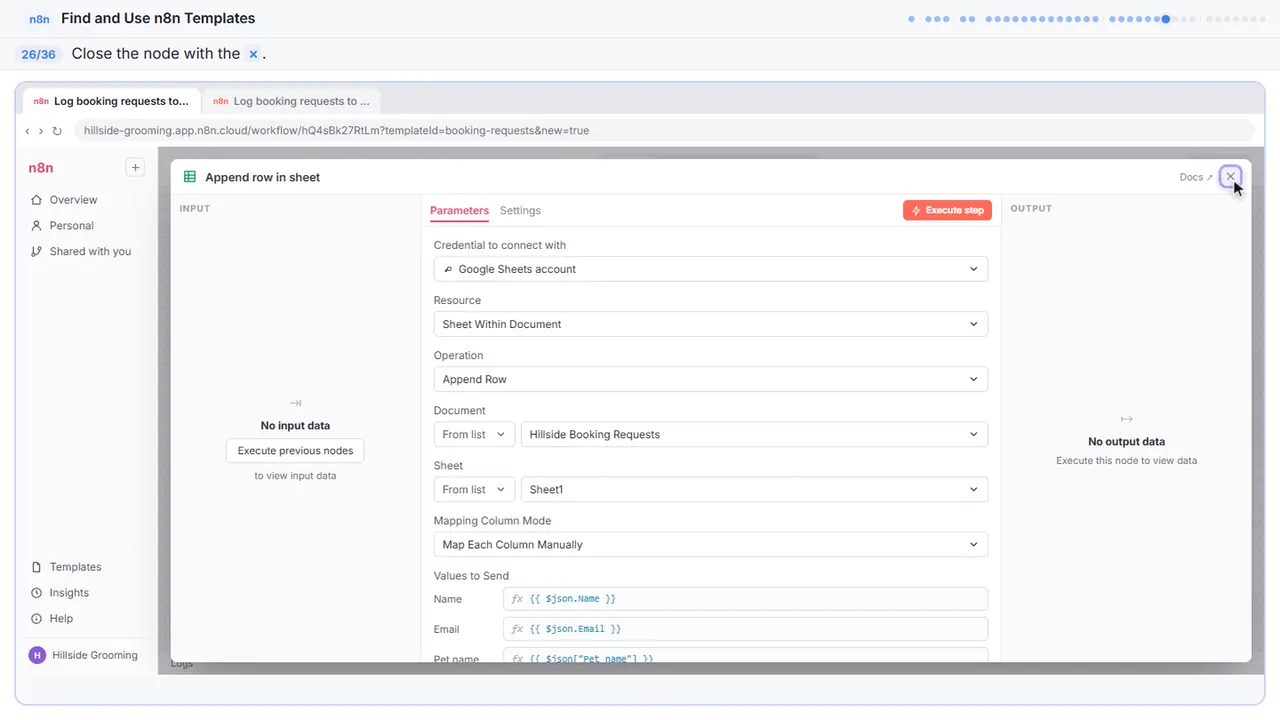
Step 26: Back to the canvas
Close the node.
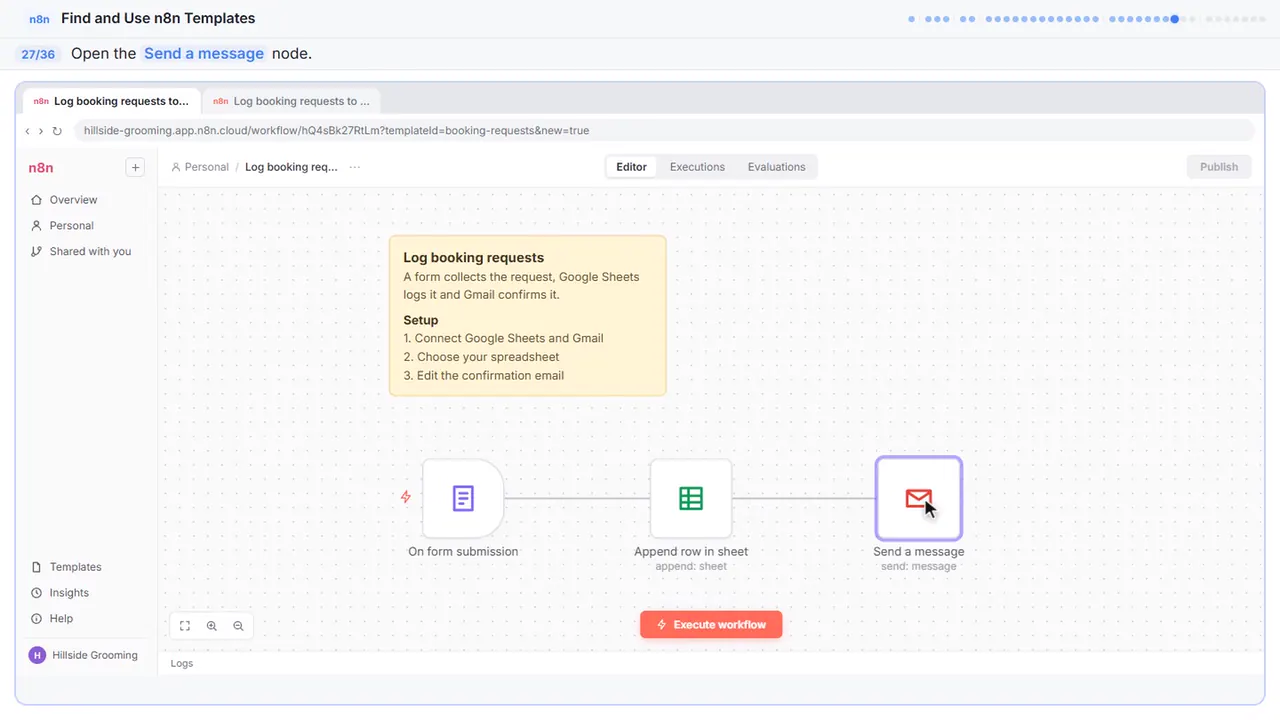
Step 27: Open the Gmail step
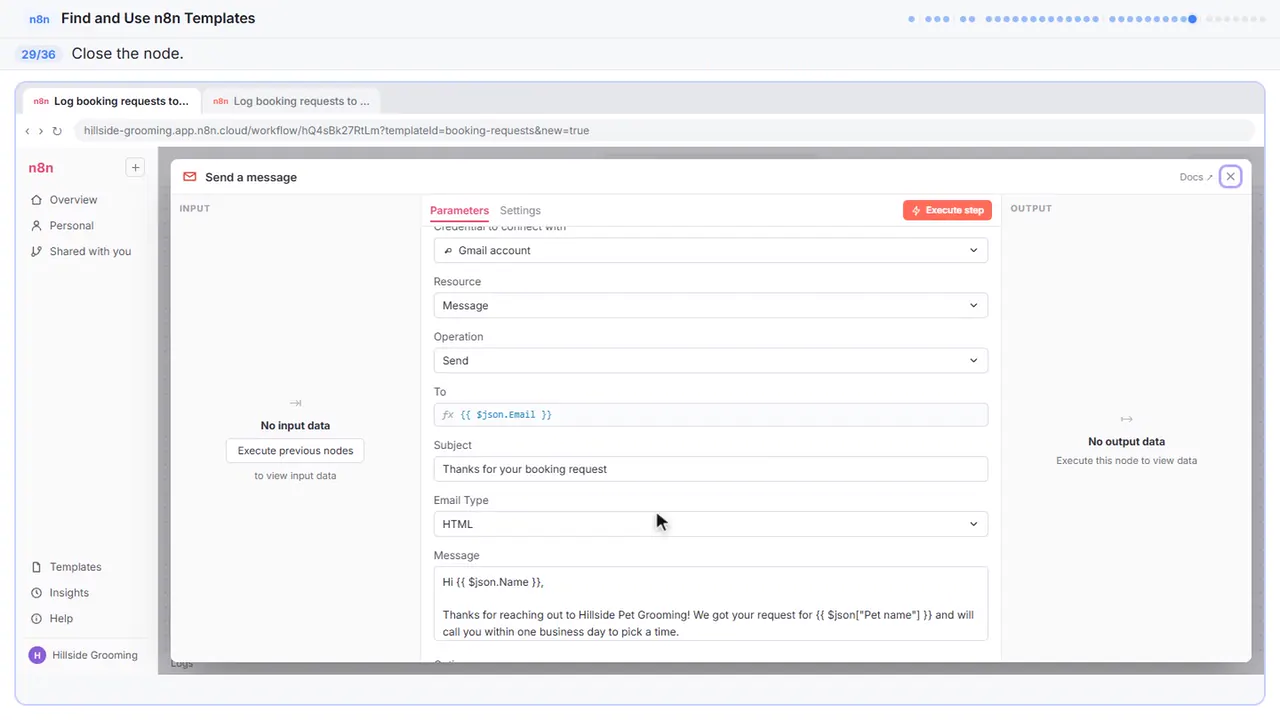
Last bit of set-up: make the email sound like you.
Step 28: Write your message
It already sends to the email address from the form. Swap in Hillside's own message. The parts in double curly braces pull in the customer's name and their pet's name.
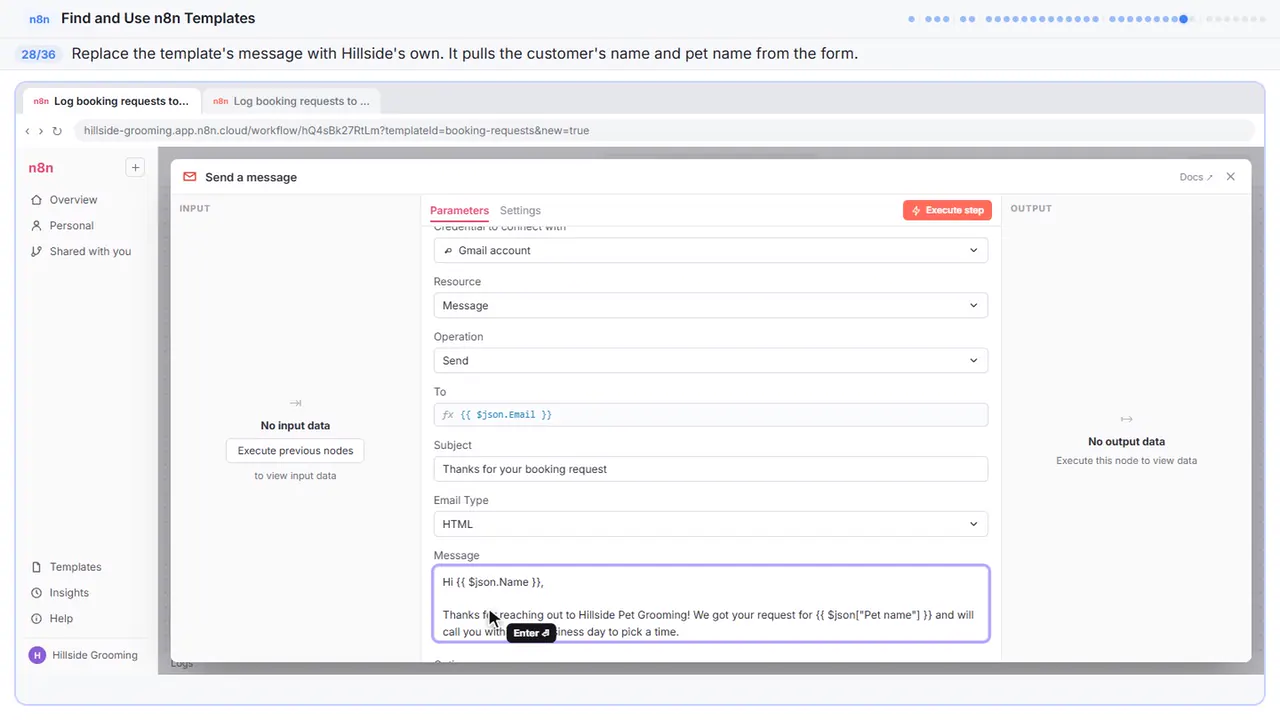
Hi {{ $json.Name }},

Thanks for reaching out to Hillside Pet Grooming! We got your request for {{ $json["Pet name"] }} and will call you within one business day to pick a time.

See you soon,
The Hillside team
Step 29: Back to the canvas
Close it.
Part 6: First test run
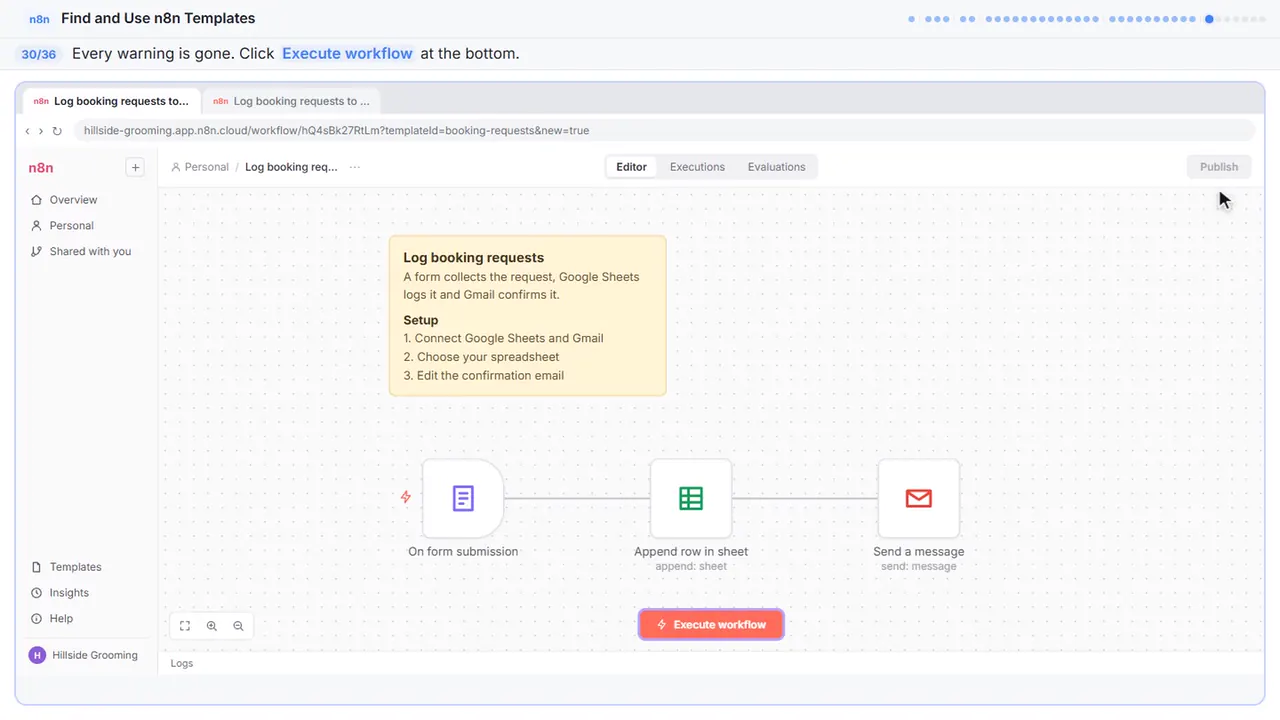
Step 30: Run it once
No more warnings. Time for a test run.
Step 31: Fill in the form
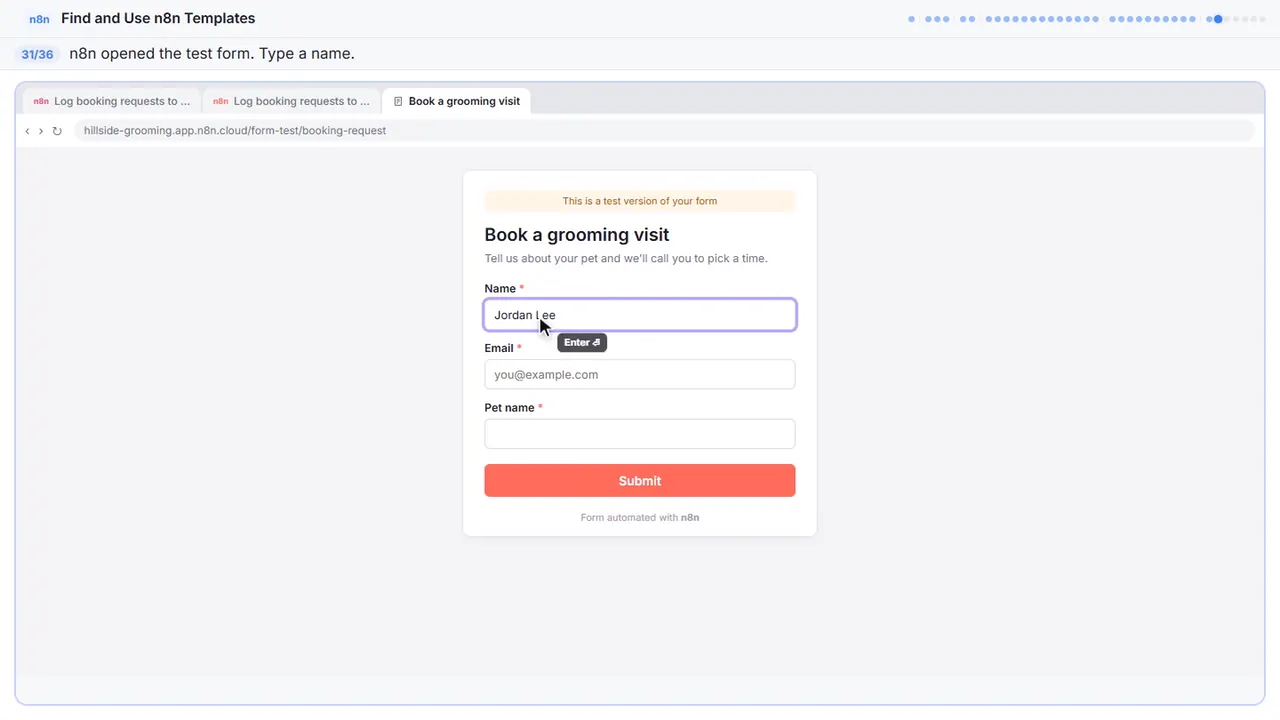
n8n opens the booking form in a new tab and waits. Pretend you're a customer.
Step 32: Your email
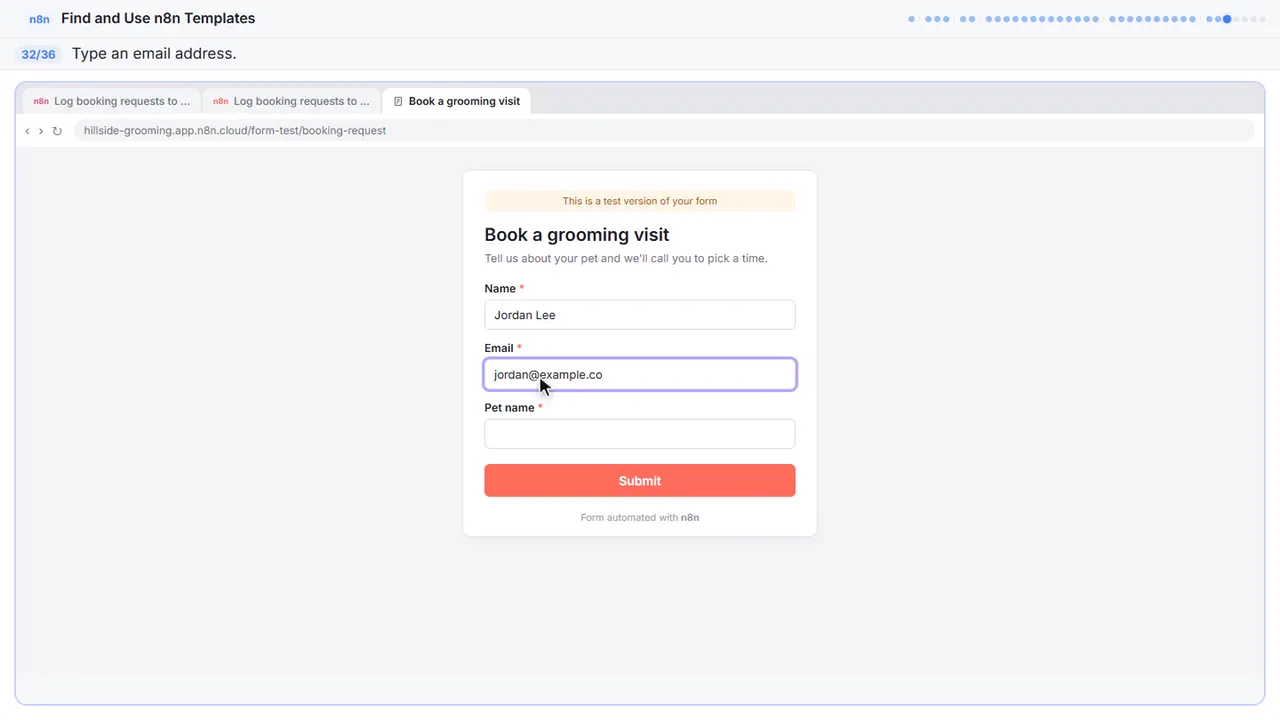
An email. In the real thing, use your own, so you get the confirmation.
Step 33: Pet's name
And the pet's name.
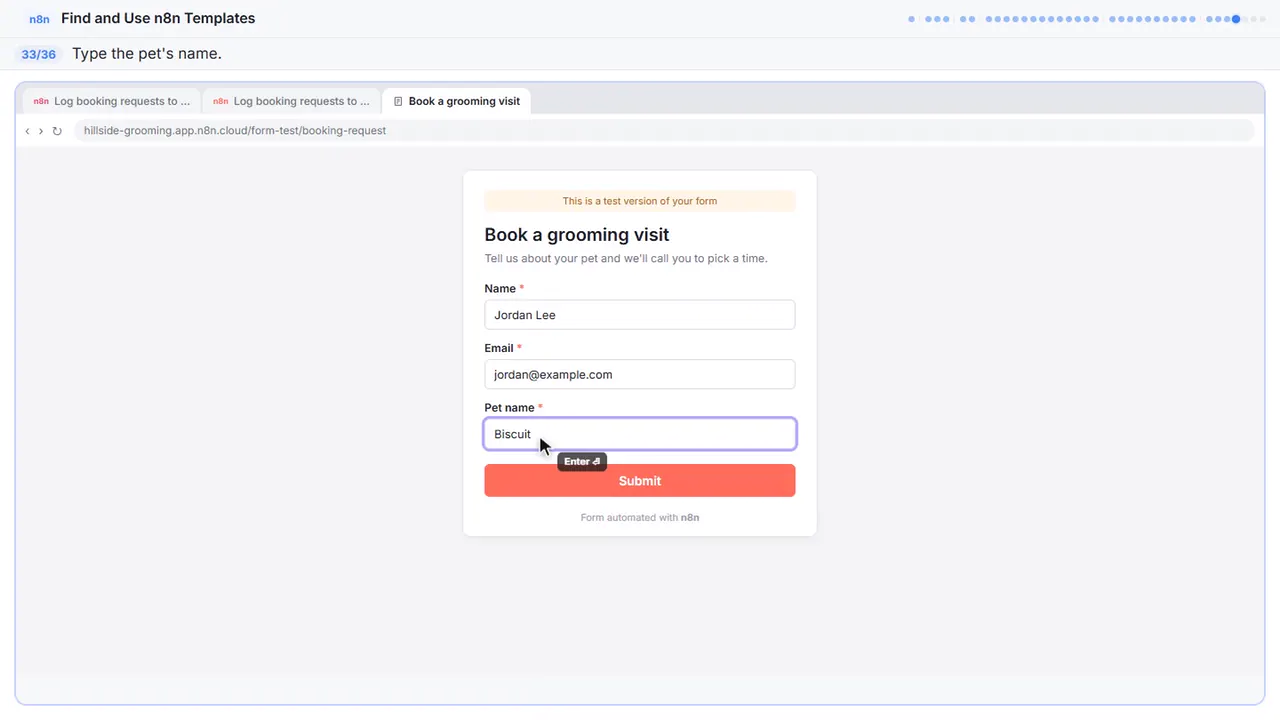
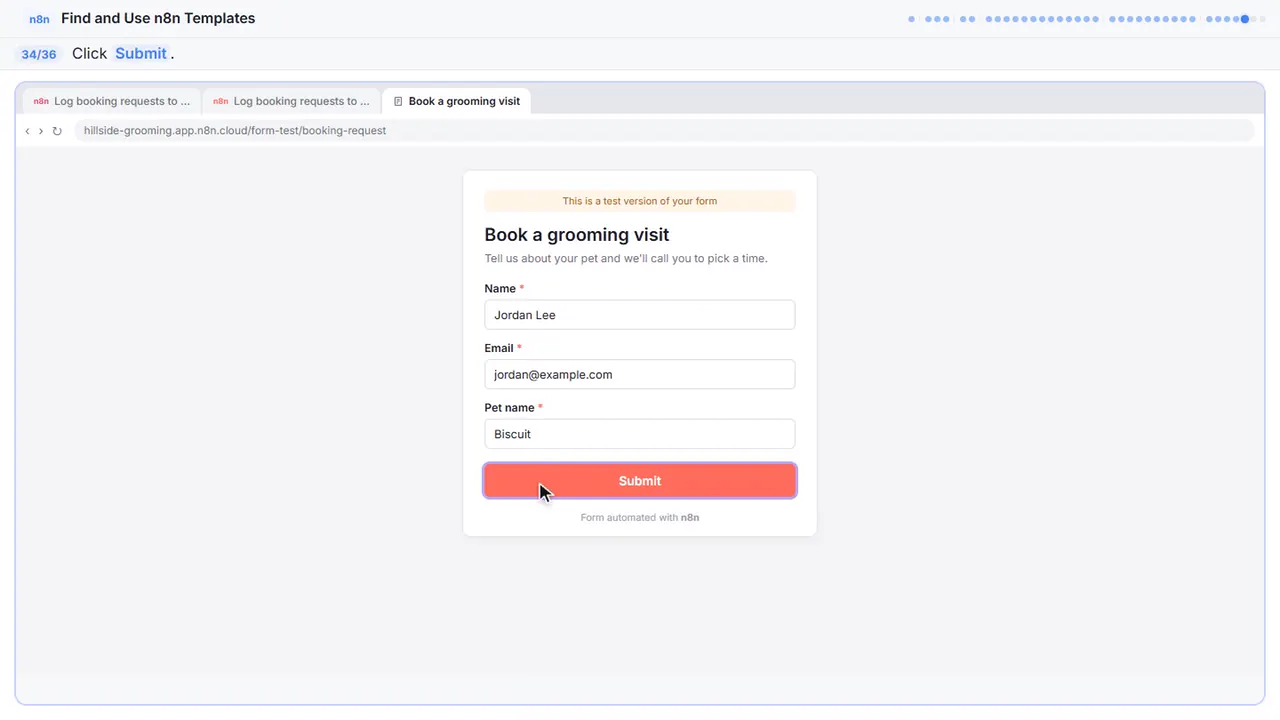
Step 34: Submit
Submit.
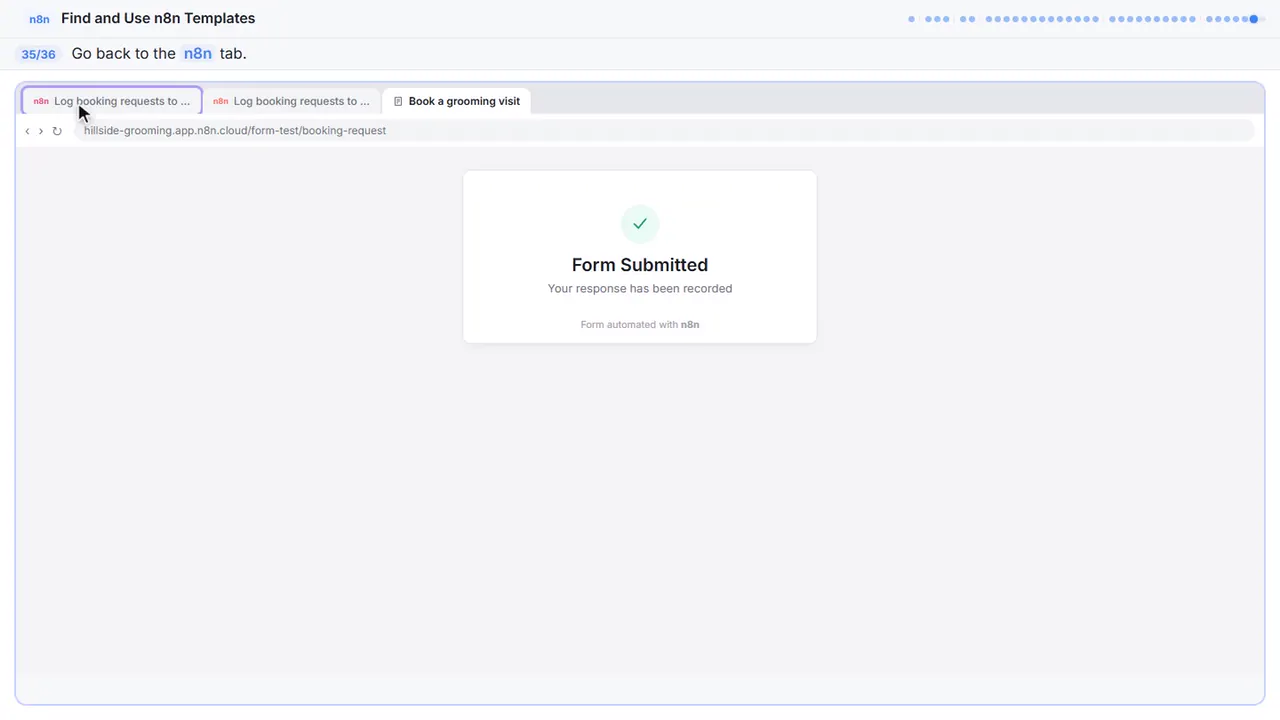
Step 35: Check the run
Now head back to the n8n tab to see what happened.
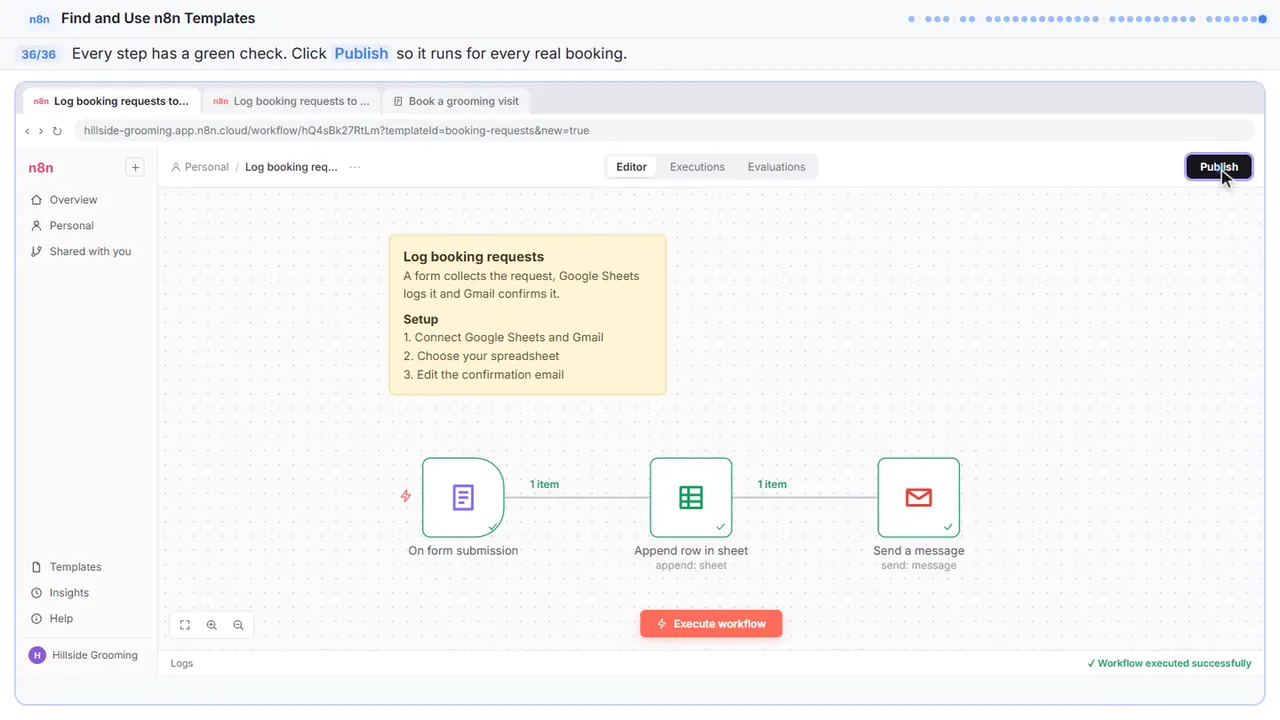
Step 36: Publish it
Every step ran and has a green check: the request went into the sheet and the confirmation went out.
Now do it yourself, free
Reading the steps is a start. Doing them is how it sticks. The interactive lesson puts you in a practice copy of n8n: you do every step yourself, it checks your work, and “Do it for me” finishes any step you get stuck on. Nothing touches your real accounts.
Practice “Find and Use n8n Templates” step by stepWatch the 3:32 video walkthrough · Find and Use n8n Templates: lesson overview · All free tutorials