AI Email Responder: Draft Gmail Replies Automatically with n8n: step-by-step guide with screenshots
Updated
Build an n8n agent that watches your Gmail, reads each new customer email, and writes a reply as a draft in the same thread, ready for you to check and send.
About the screenshots. They come from Stepthrough’s simulated practice environment (a practice copy of n8n), not the live tool, so no real account appears. The buttons and labels match the real screens the lesson was built against. Practice it yourself free at learn.ynteractive.com.
- Tools: n8n
- Time: about 12 minutes, 63 steps in 11 parts
- Level: beginner, no coding needed
Part 1: The email
Step 1: Look at the inbox
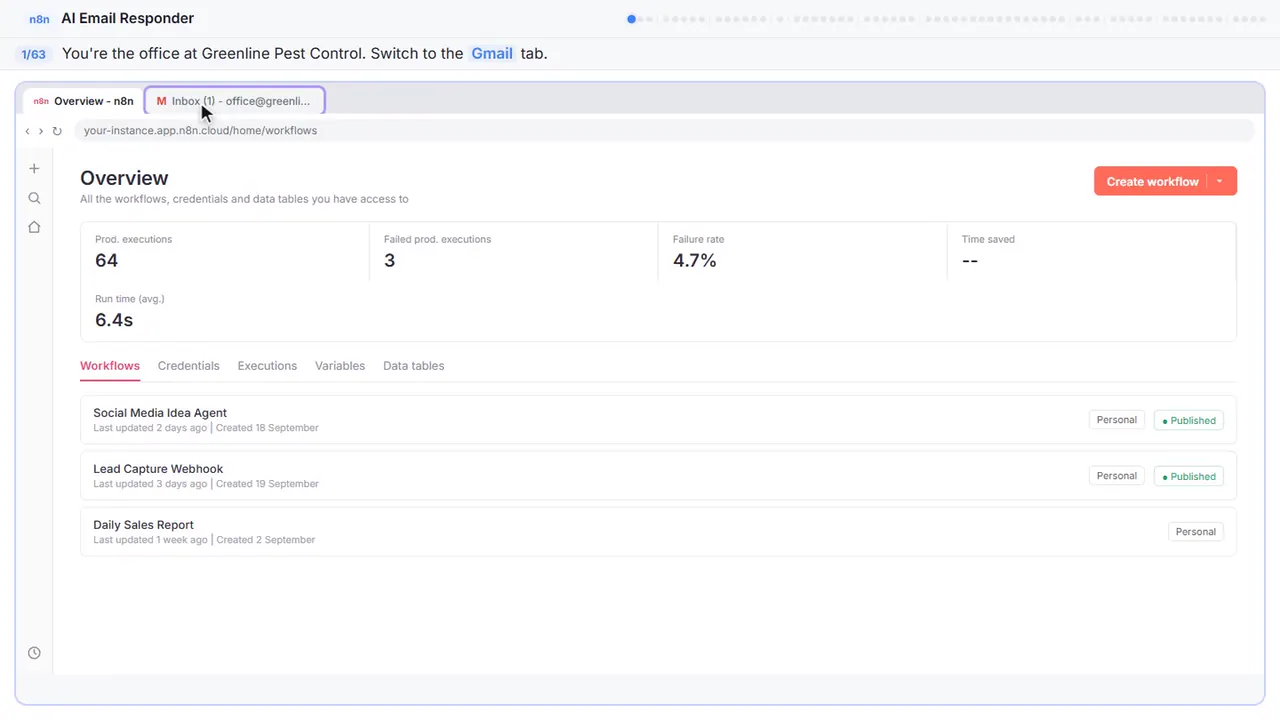
In this module you're the office at Greenline Pest Control, and customers email the same questions all day. Do you cover my area? What does it cost? Let's build an agent that writes those replies for you. First, look at the inbox. Switch to the Gmail tab.
Step 2: Open the email
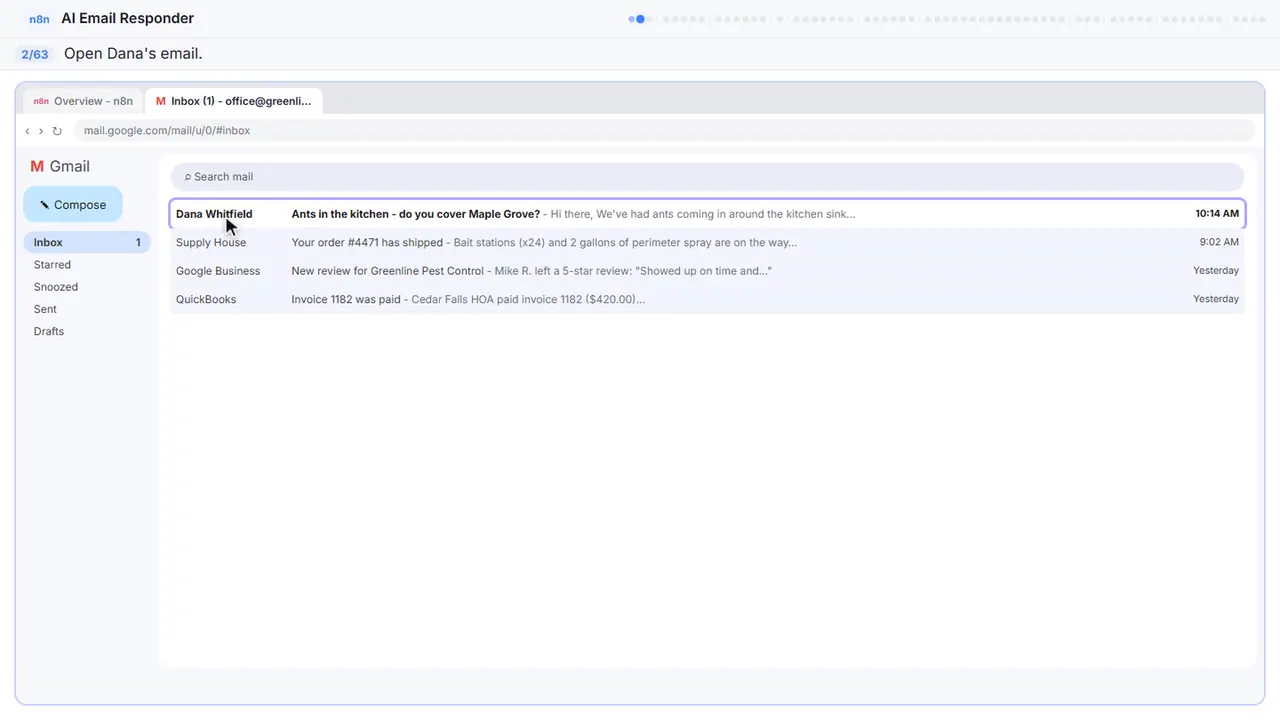
There's a new one from Dana.
Step 3: Back to n8n
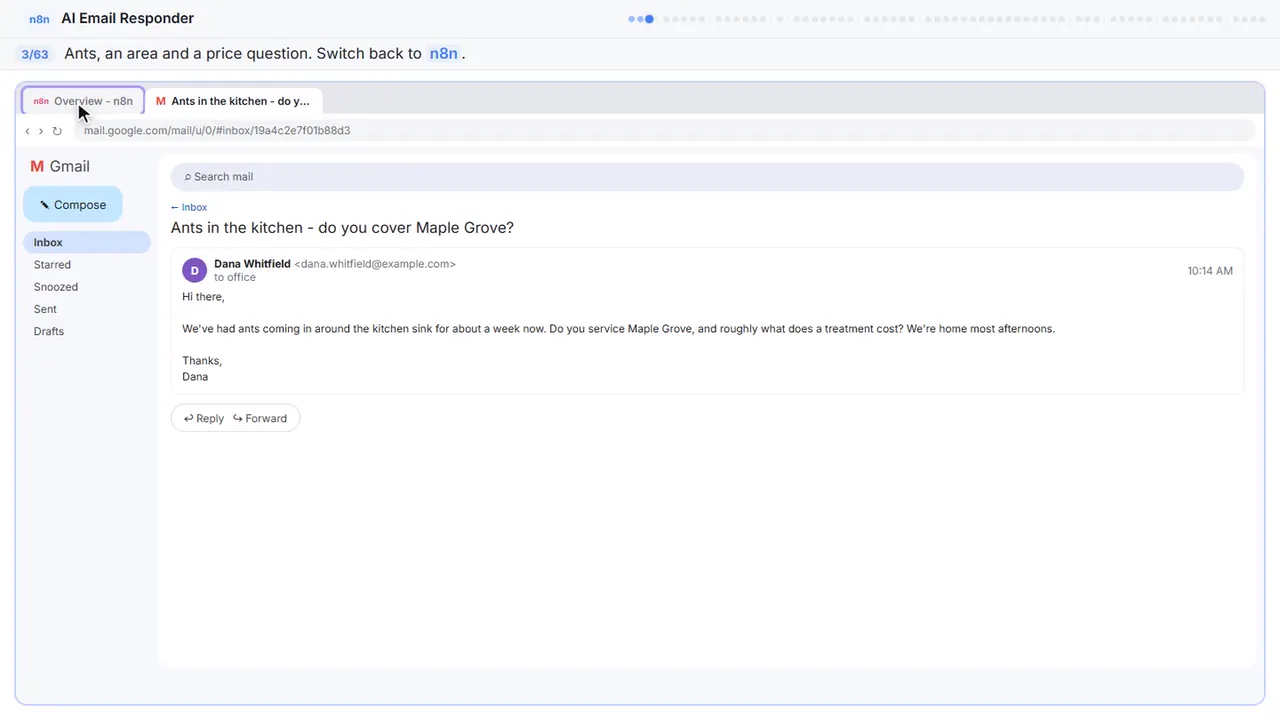
Ants in the kitchen, is Maple Grove covered, and roughly what does it cost. A person could answer that in two minutes. The agent will do it in seconds. Back to the n8n tab.
Part 2: Gmail trigger
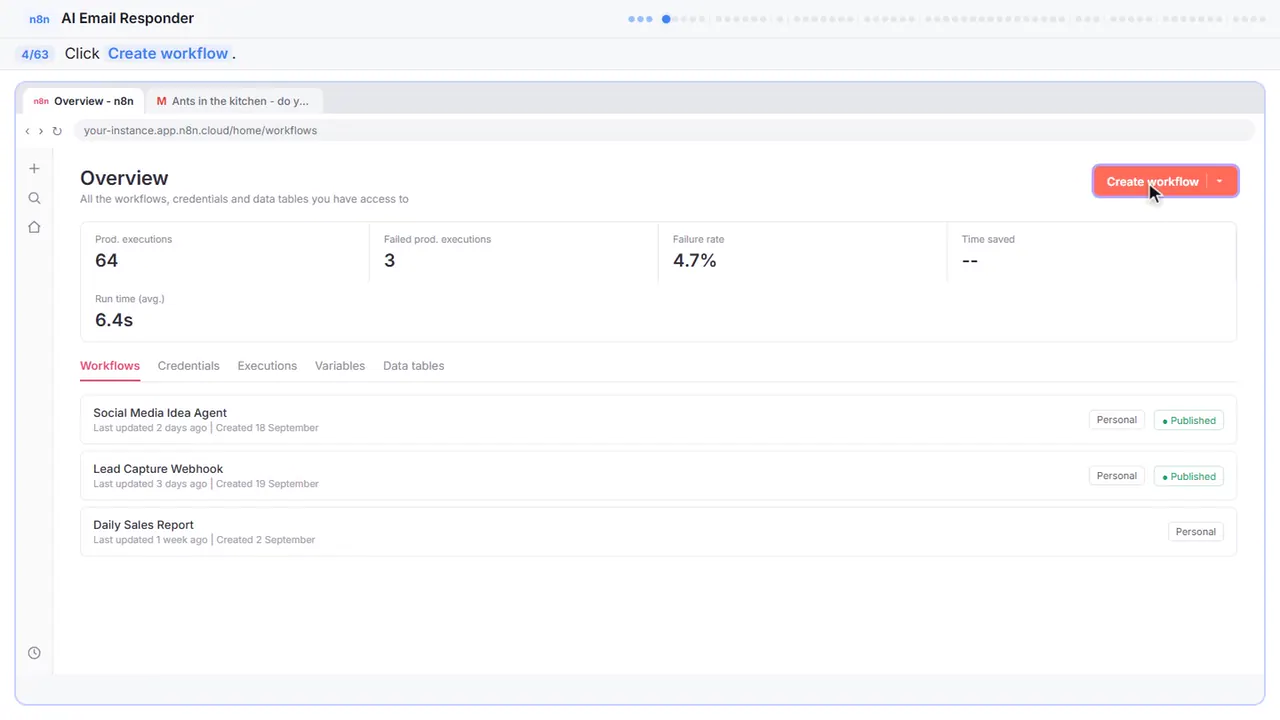
Step 4: Create a workflow
Step 5: Add the trigger
Every workflow starts with a trigger, the event that kicks everything off. Here, that's a new email arriving.
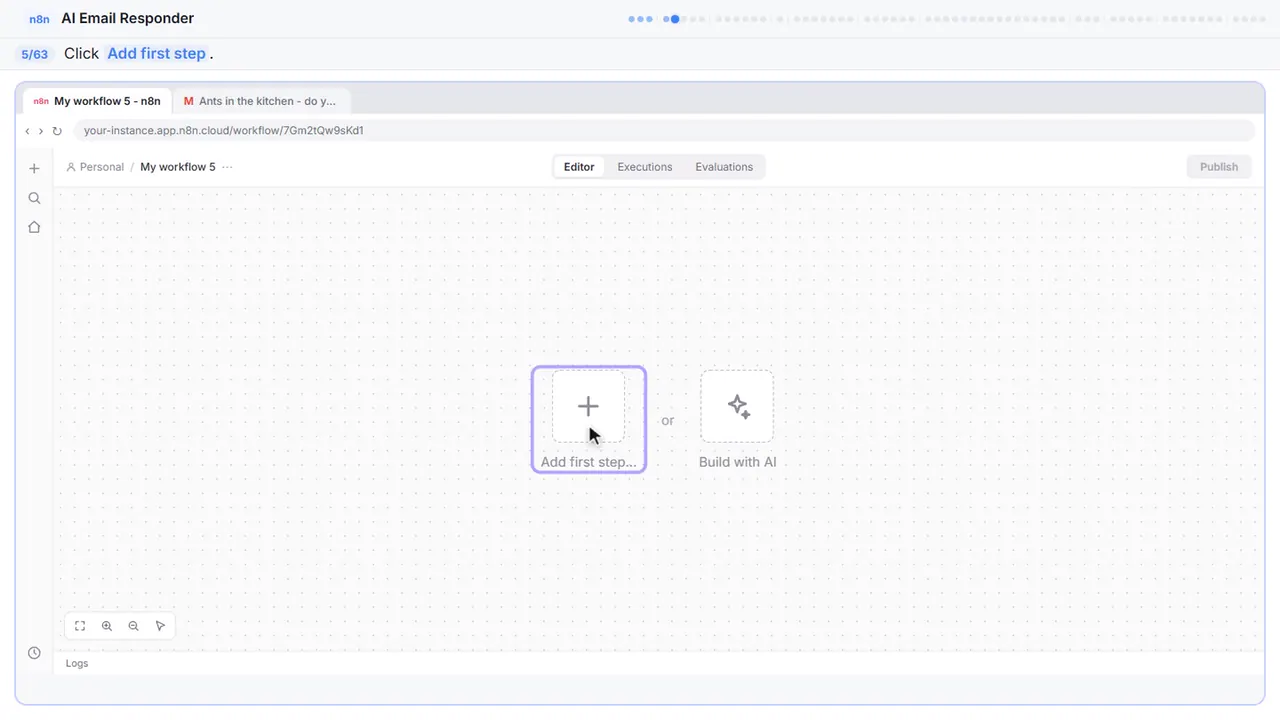
Step 6: Search for Gmail
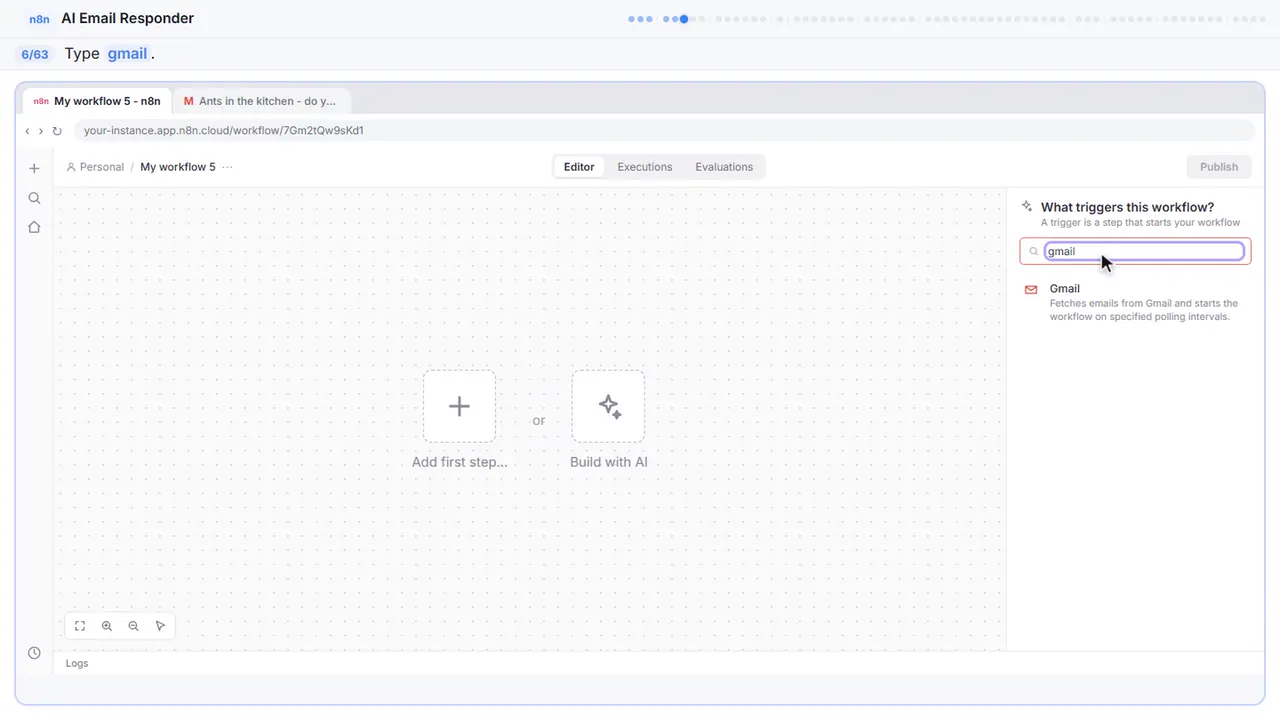
Step 7: Gmail
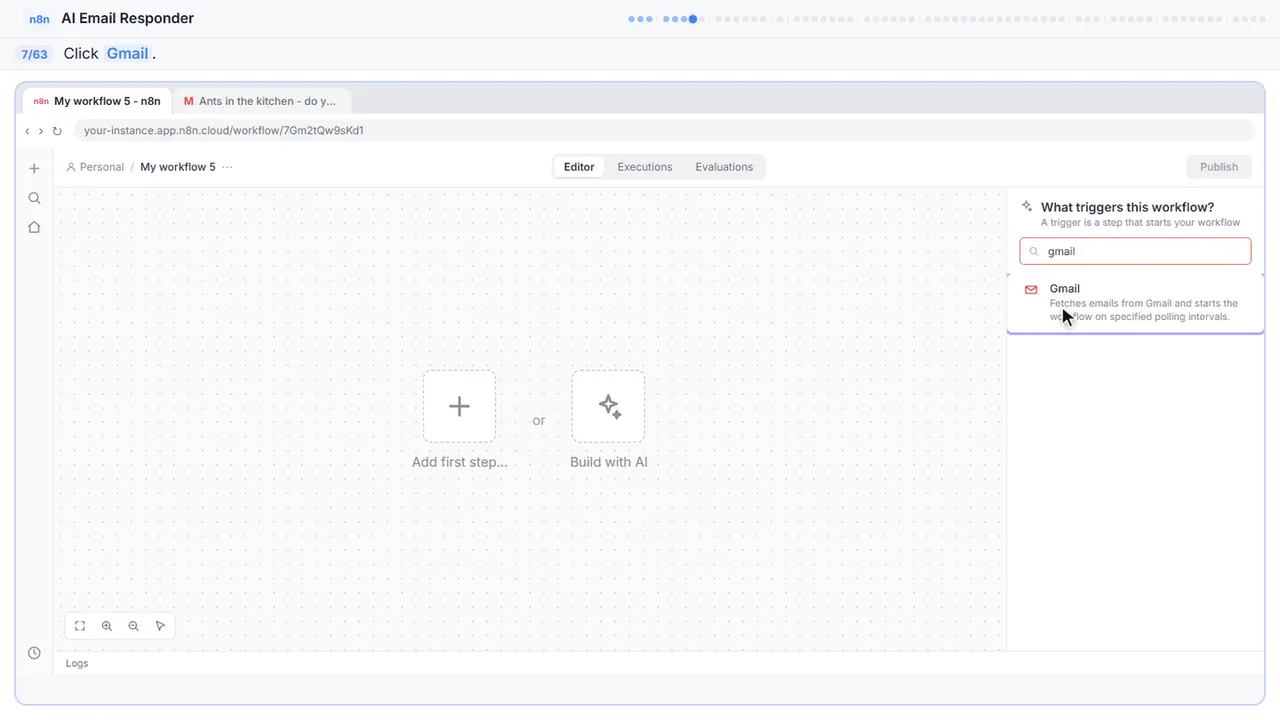
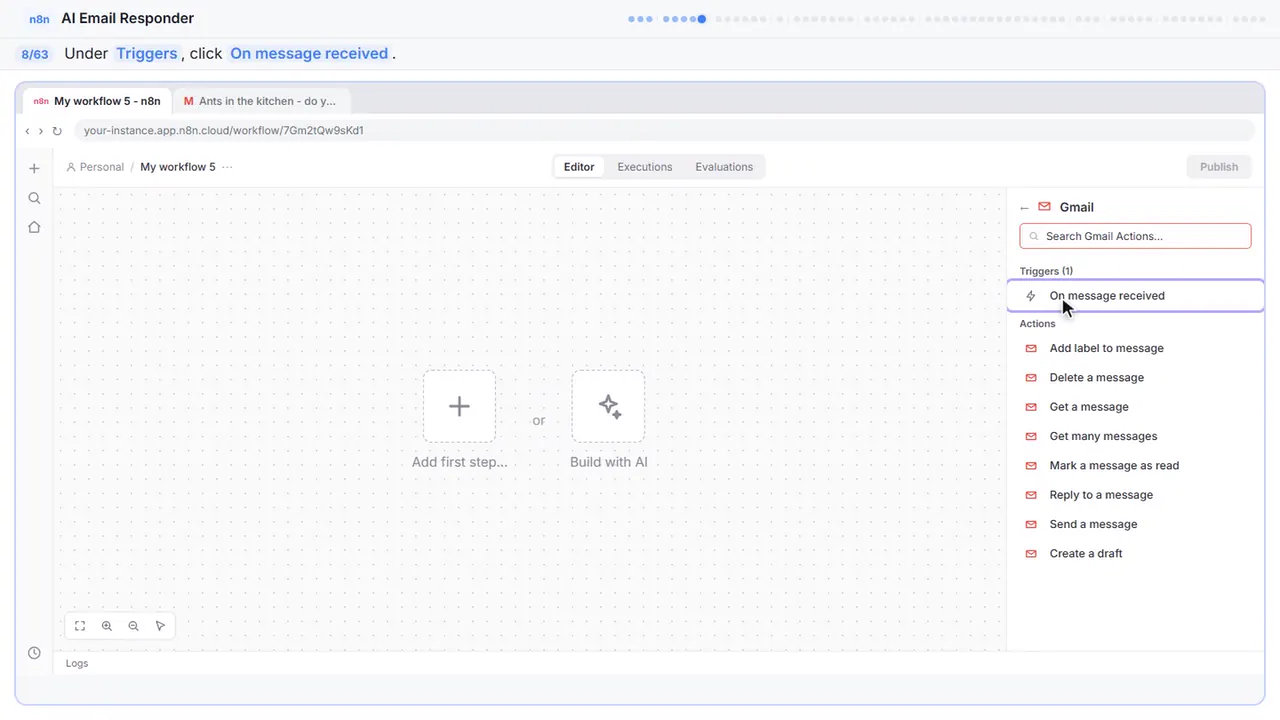
Step 8: On message received
Under triggers, click on message received. That adds the Gmail trigger.
Part 3: Connect Gmail
Step 9: Credential
n8n needs permission to read the inbox.
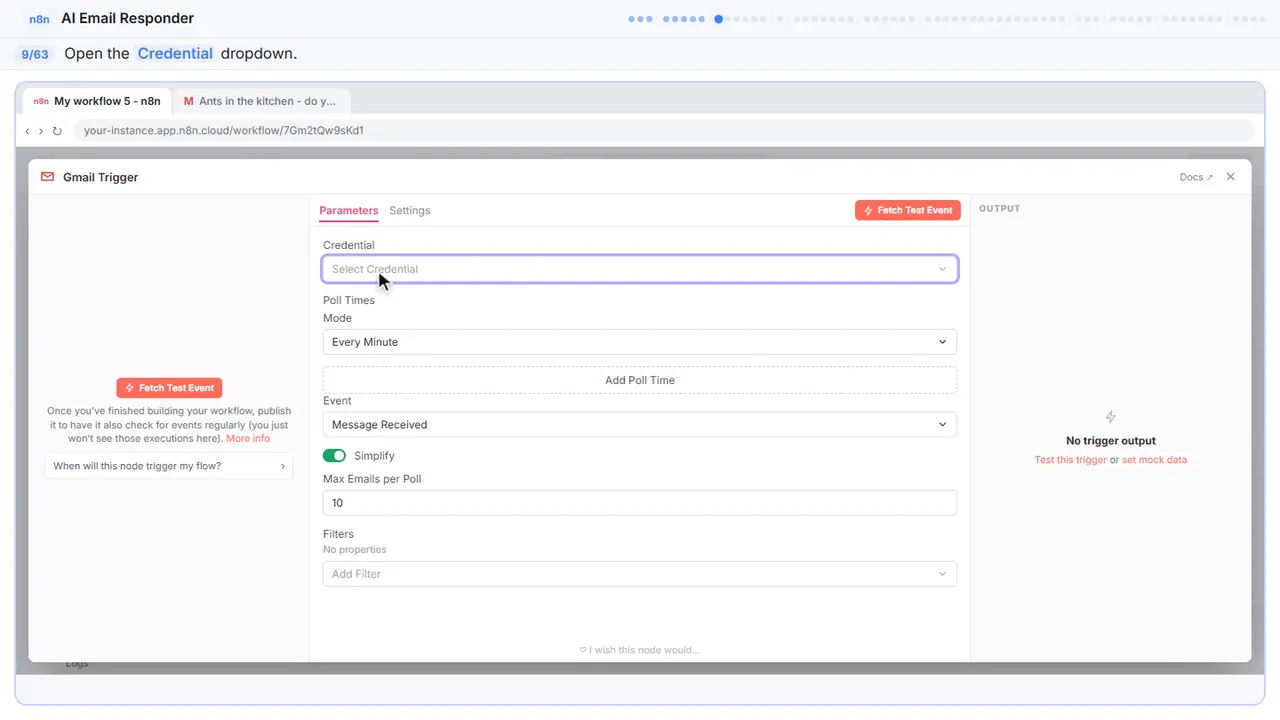
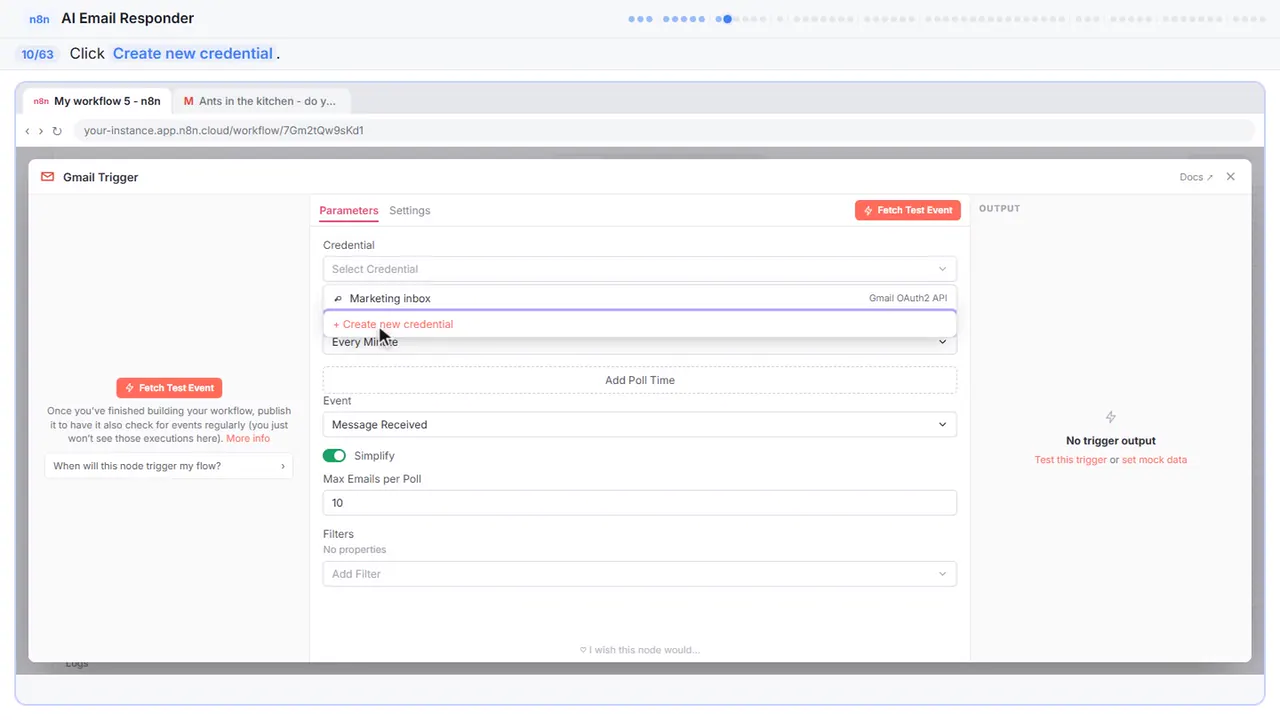
Step 10: New credential
Create new credential.
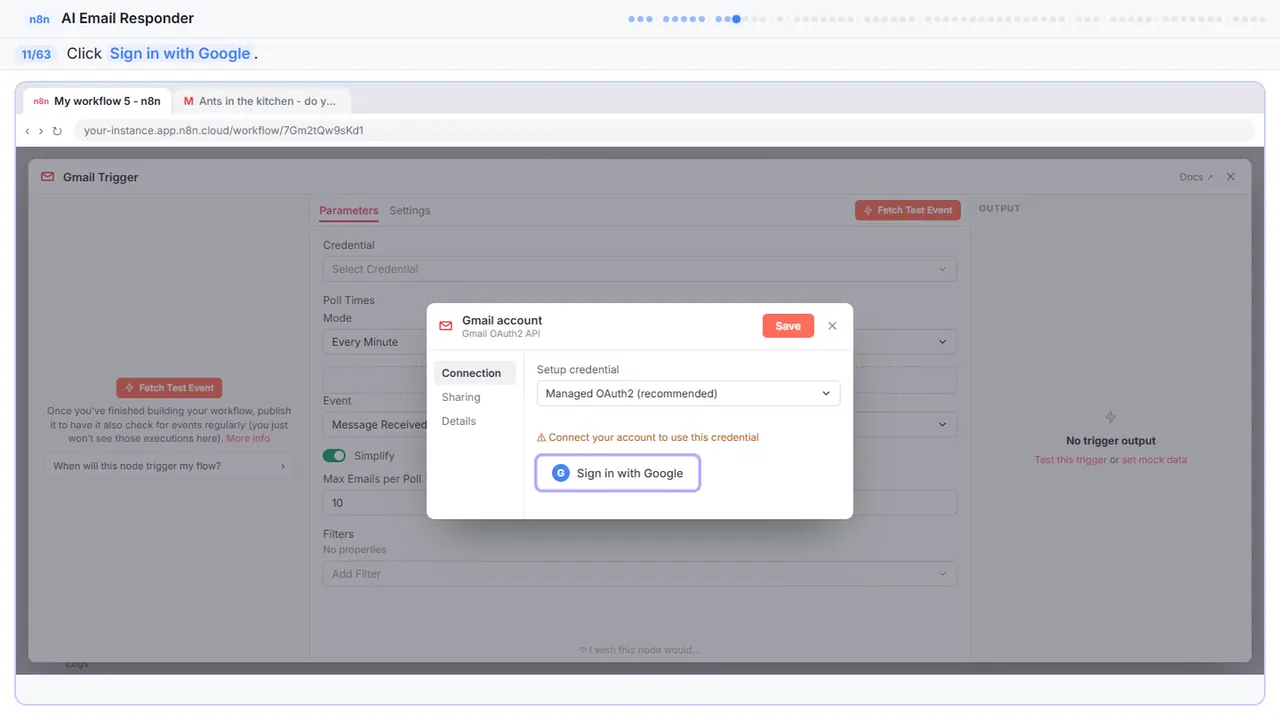
Step 11: Sign in with Google
Leave it on managed OAuth and click sign in with Google.
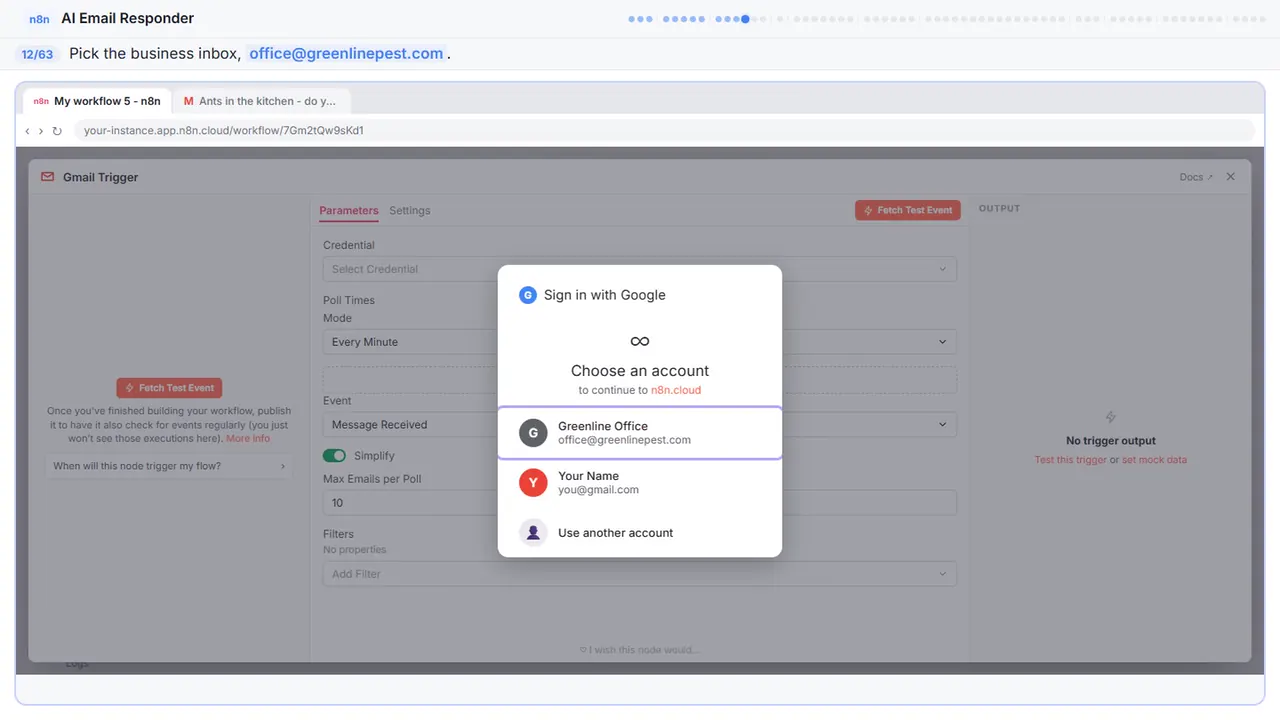
Step 12: Pick the inbox
Pick the inbox customers write to. For Greenline, that is the office account.
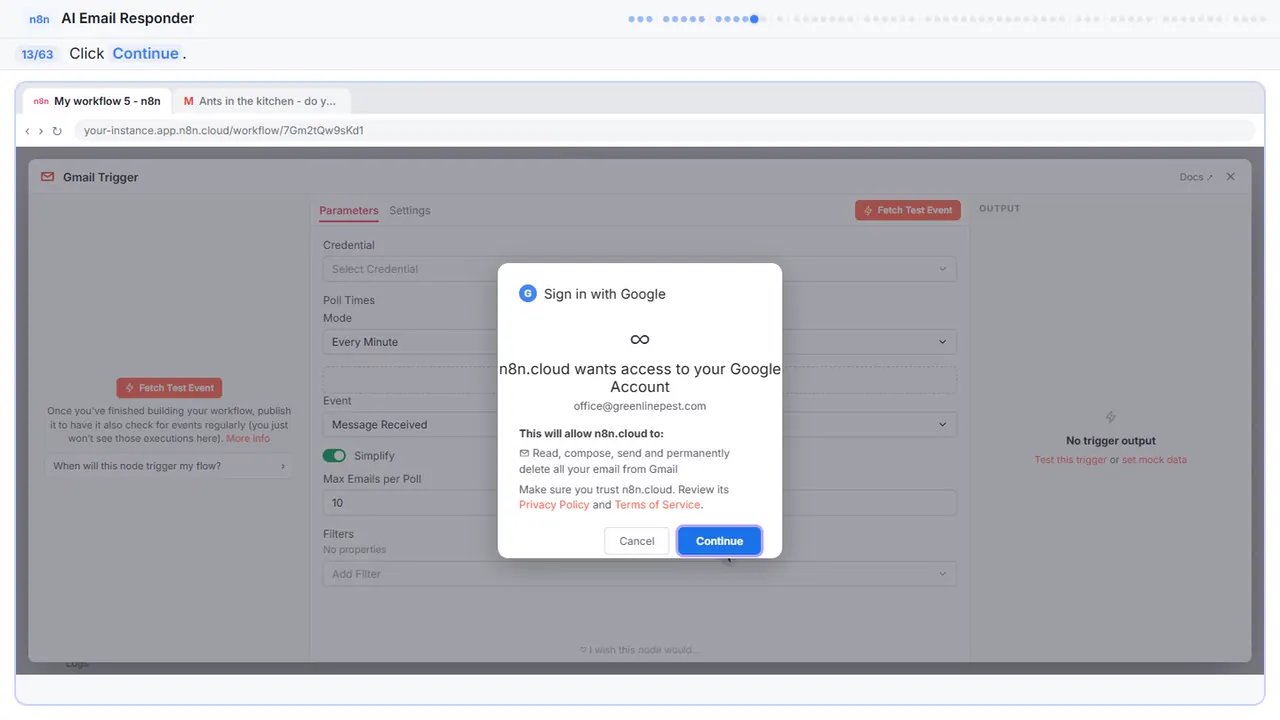
Step 13: Allow access
Google spells out what n8n can do with your mail. That list sounds big. What actually happens is decided by the nodes you add, and ours will only read and write drafts.
Step 14: Fetch a test email
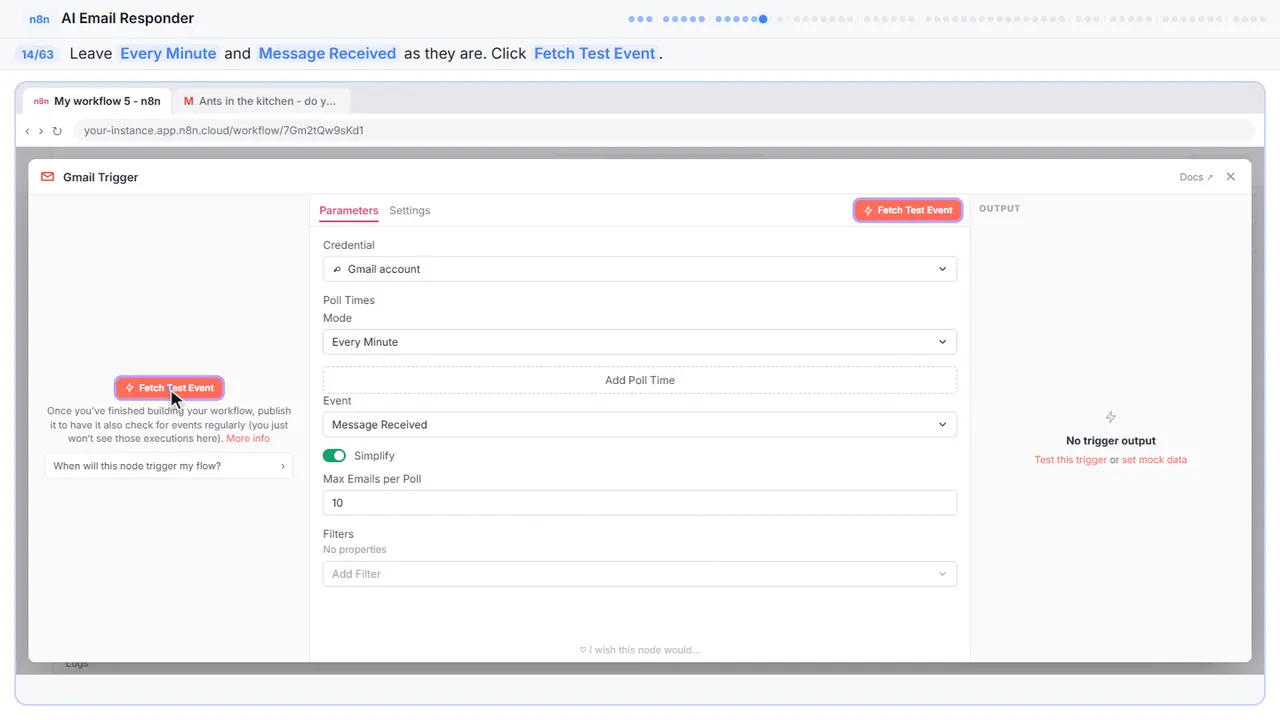
Look at the settings. It checks every minute, and it fires on message received. Both are what we want. n8n grabs the newest email so we can see what it looks like.
Part 4: Gmail trigger
Step 15: Close the node
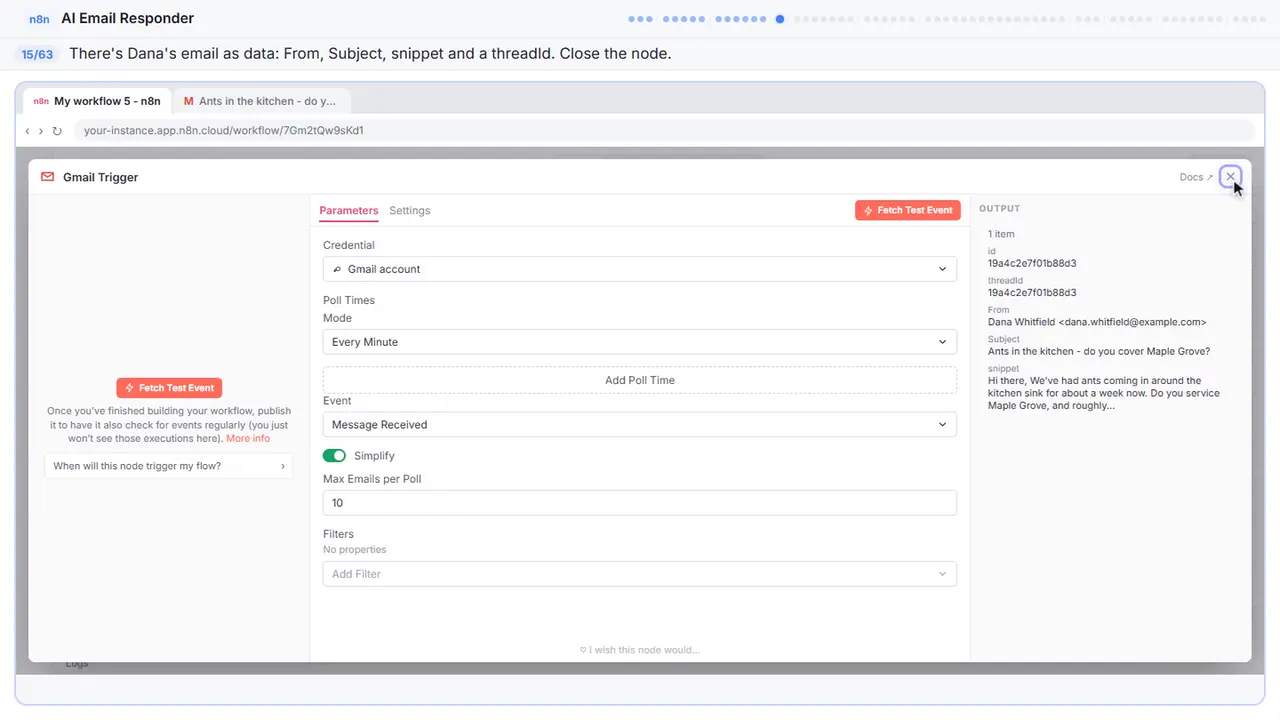
There's Dana's email, broken into fields. From, subject, a snippet of the message, and a thread I D. Think of it as one row in a spreadsheet. We'll use these fields next. Close it.
Part 5: AI Agent
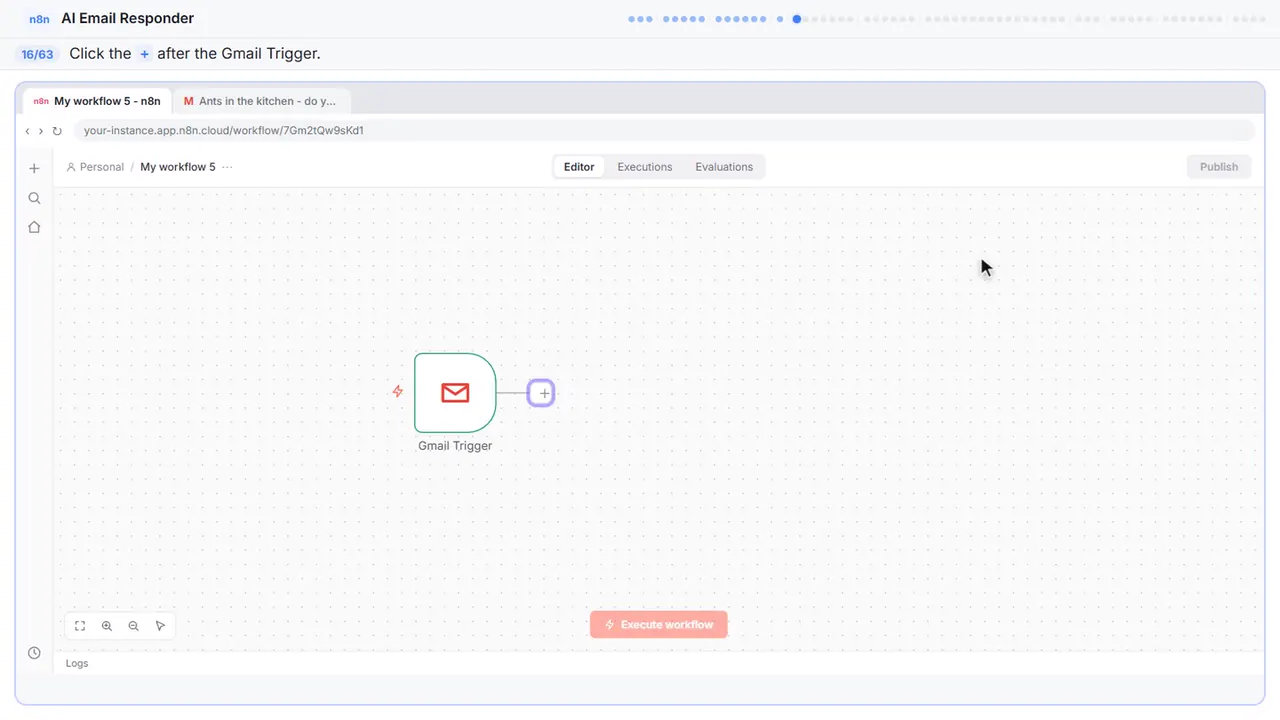
Step 16: Add the next step
Now, what should happen with that email.
Step 17: Search for the agent
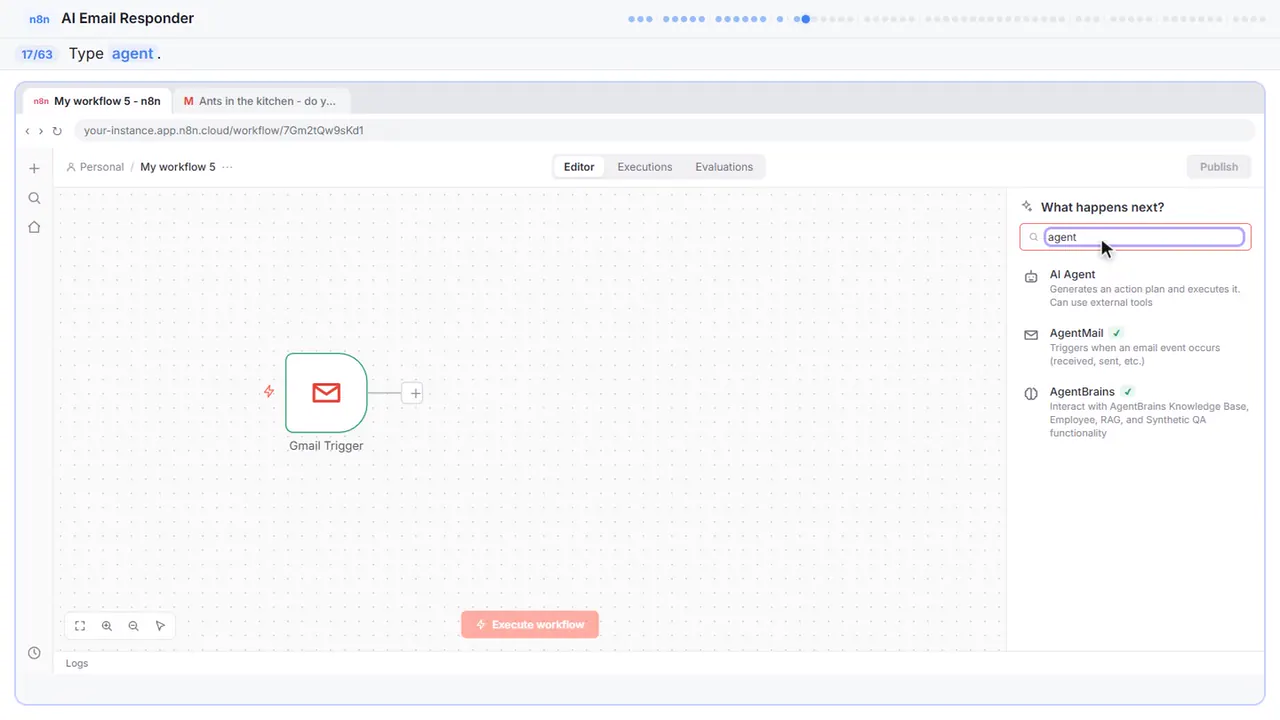
Step 18: AI Agent
AI Agent.
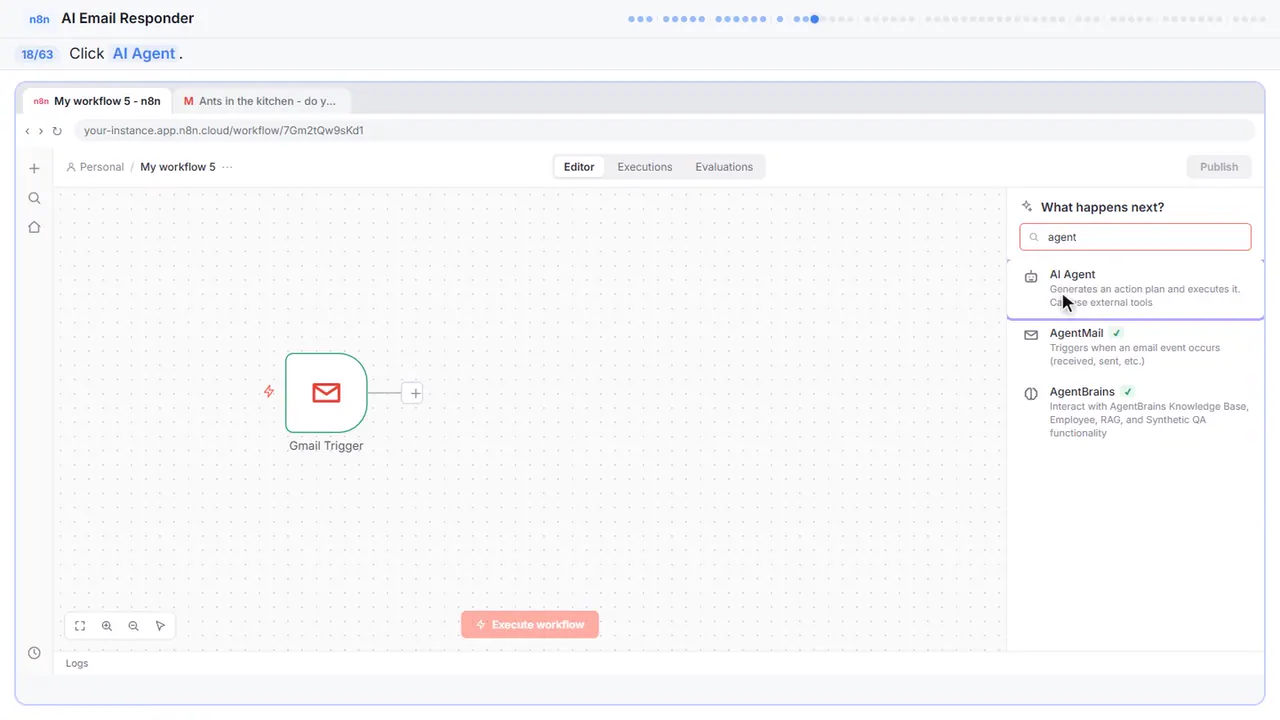
Step 19: Change the prompt source
This is the part people miss. By default the agent expects a chat message, but our input is an email.
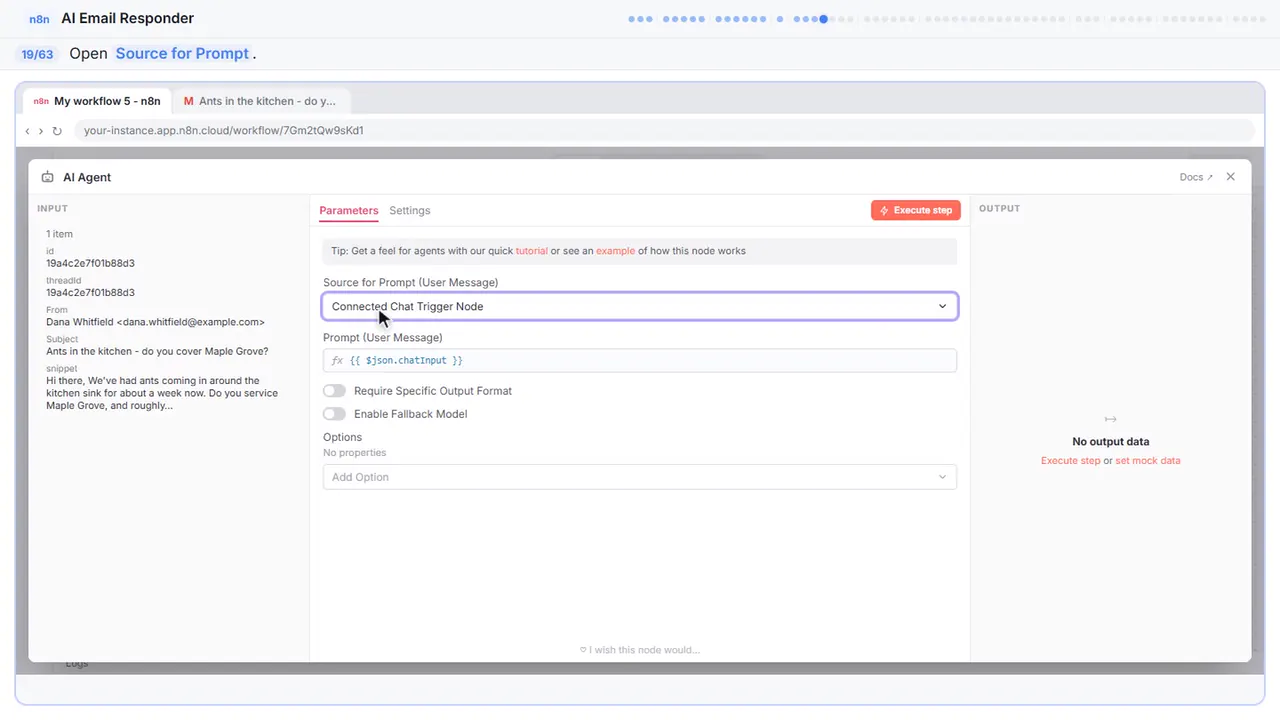
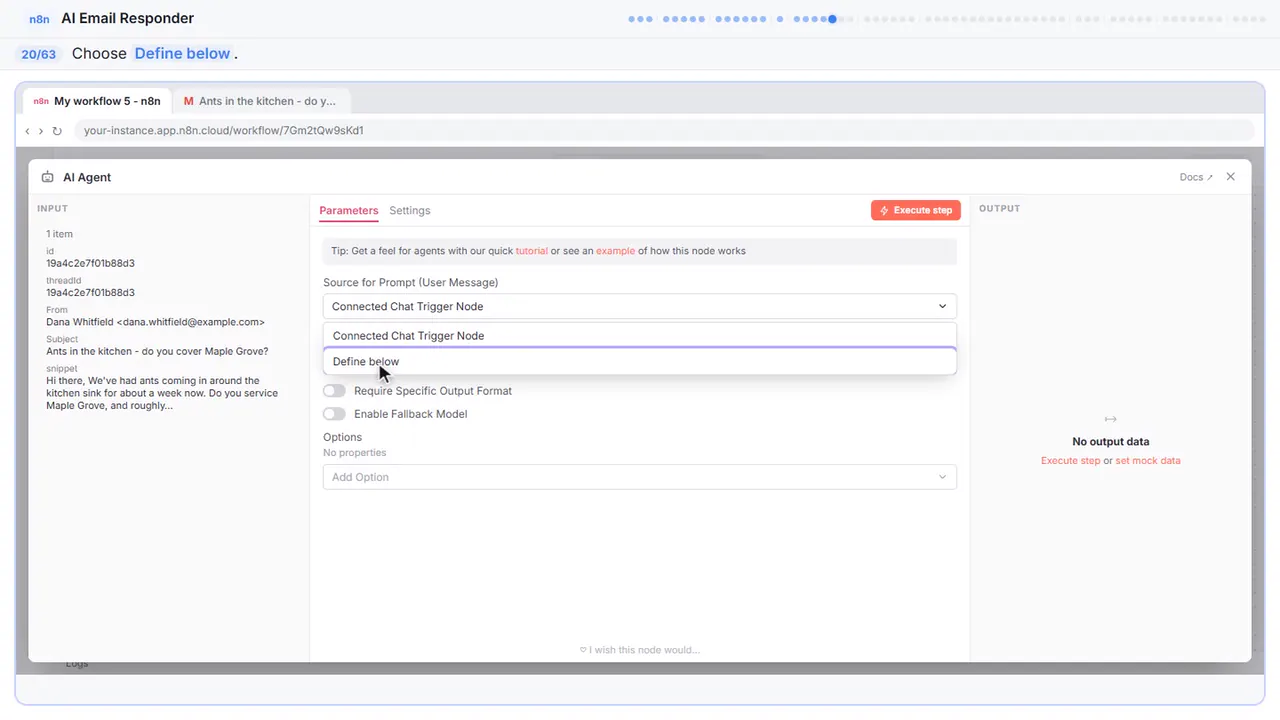
Step 20: Define below
Define below. Now we write the prompt ourselves.
Step 21: Write the prompt
It tells the agent to write a reply and save it as a draft in the same thread. The bits in double curly brackets are expressions. Each one pulls in a field from the email. Who it's from, the subject, and the message. On the left you can see those same fields from the test email.
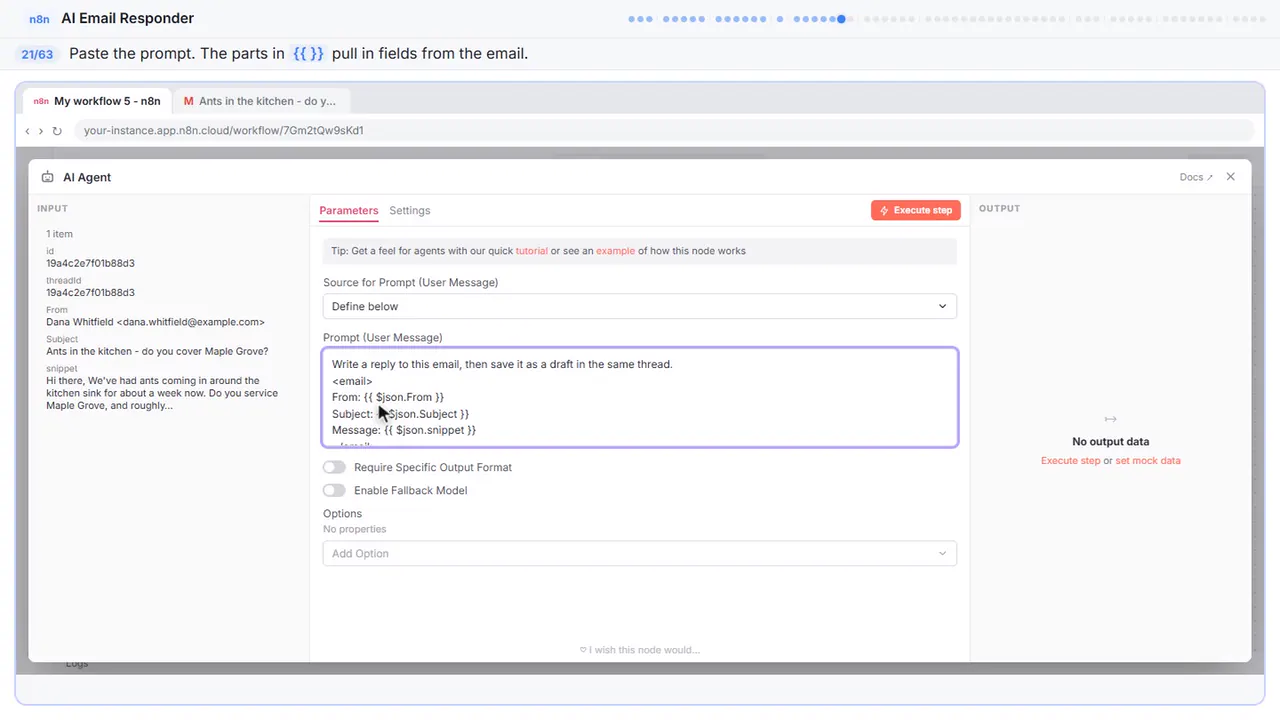
Write a reply to this email, then save it as a draft in the same thread.
<email>
From: {{ $json.From }}
Subject: {{ $json.Subject }}
Message: {{ $json.snippet }}
</email>
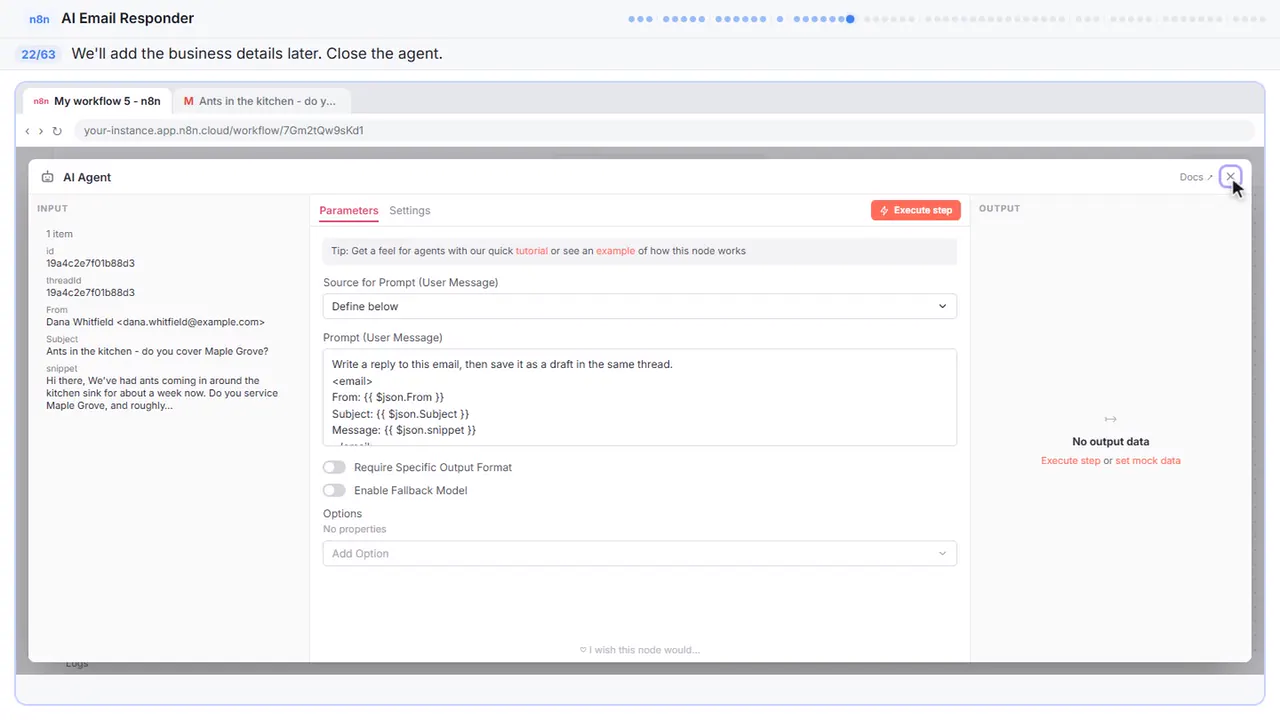
Step 22: Close the node
The agent knows what to do with each email. It doesn't know anything about the business yet. We'll come back for that. Close it.
Part 6: Chat model
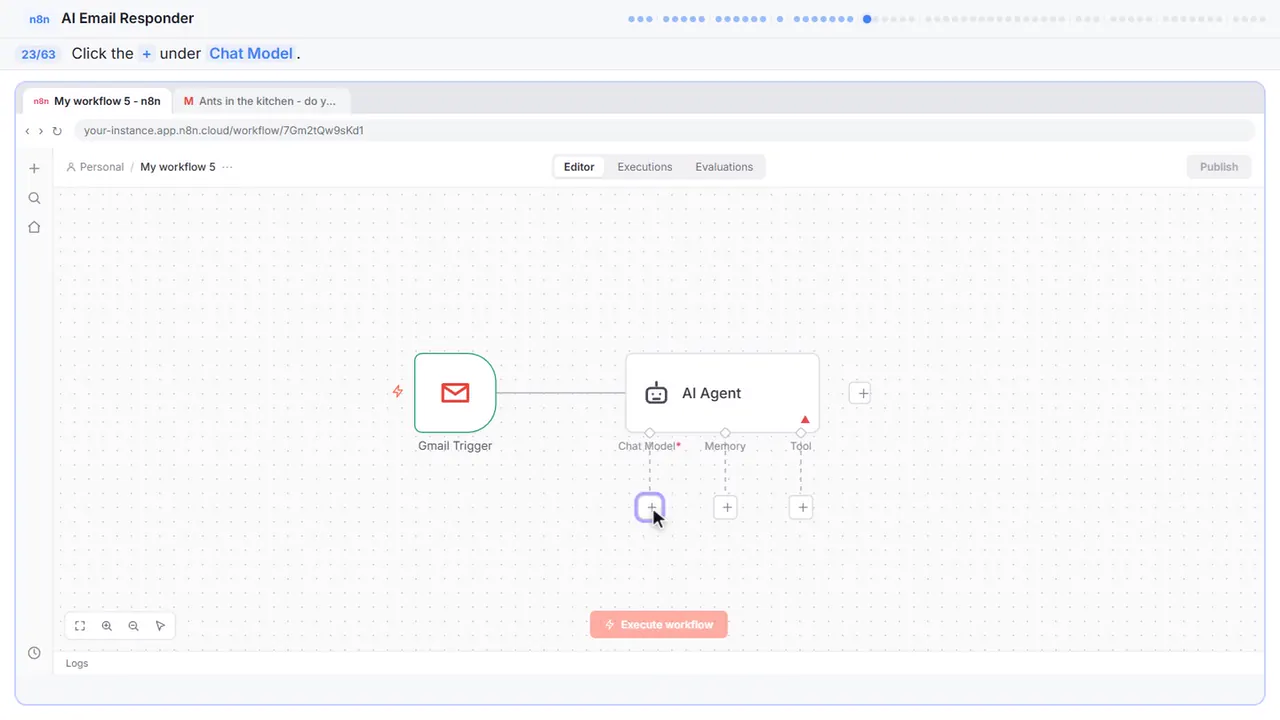
Step 23: Add the model
Give it a brain.
Step 24: Search for OpenAI
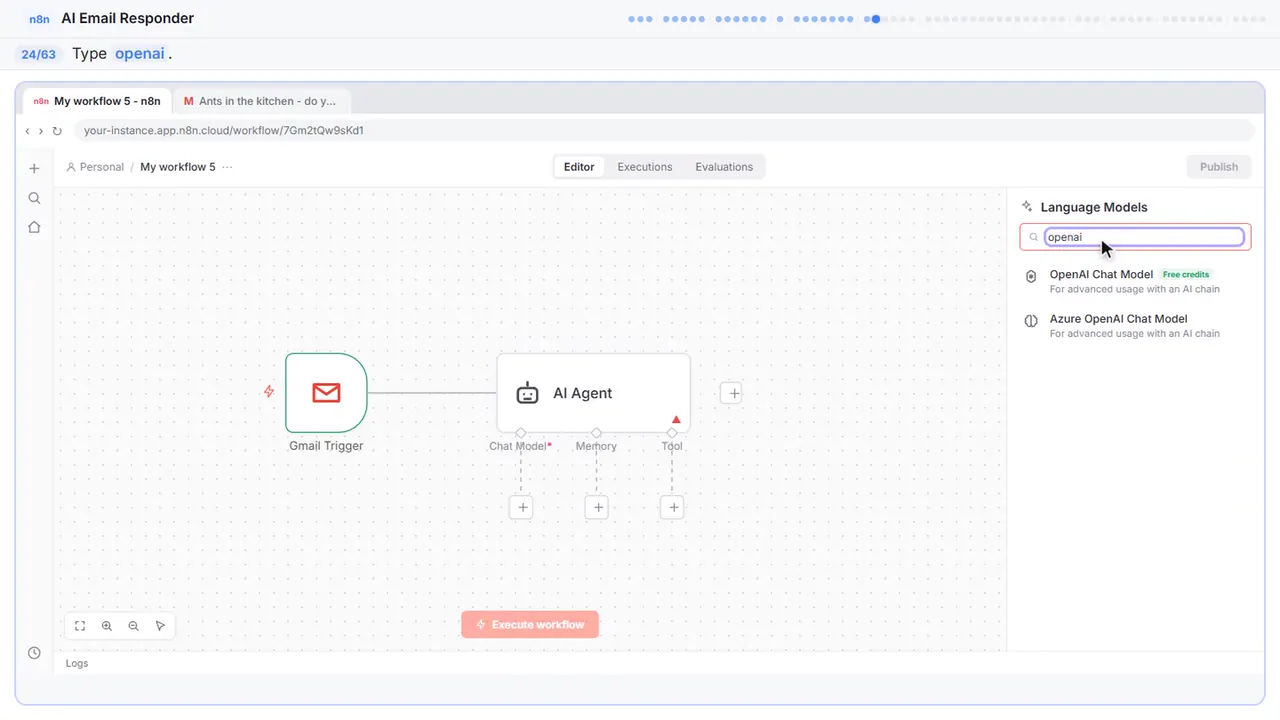
Step 25: OpenAI Chat Model
OpenAI chat model.
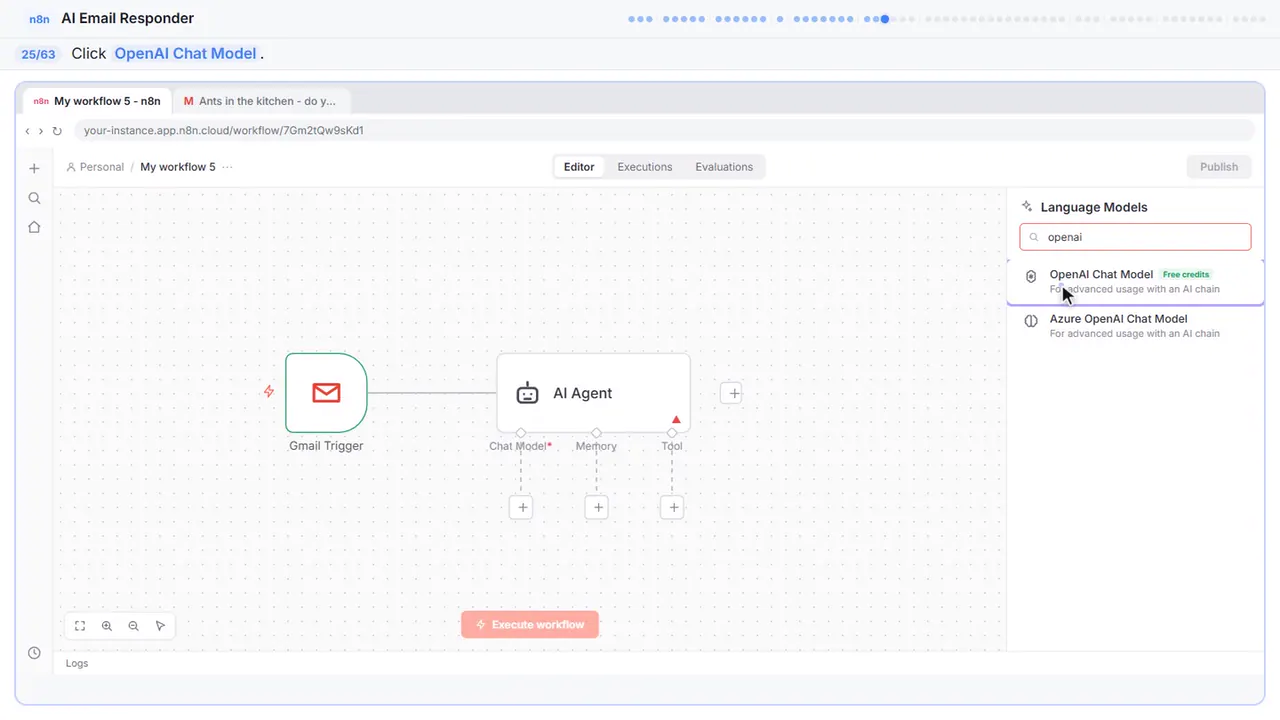
Step 26: Credential
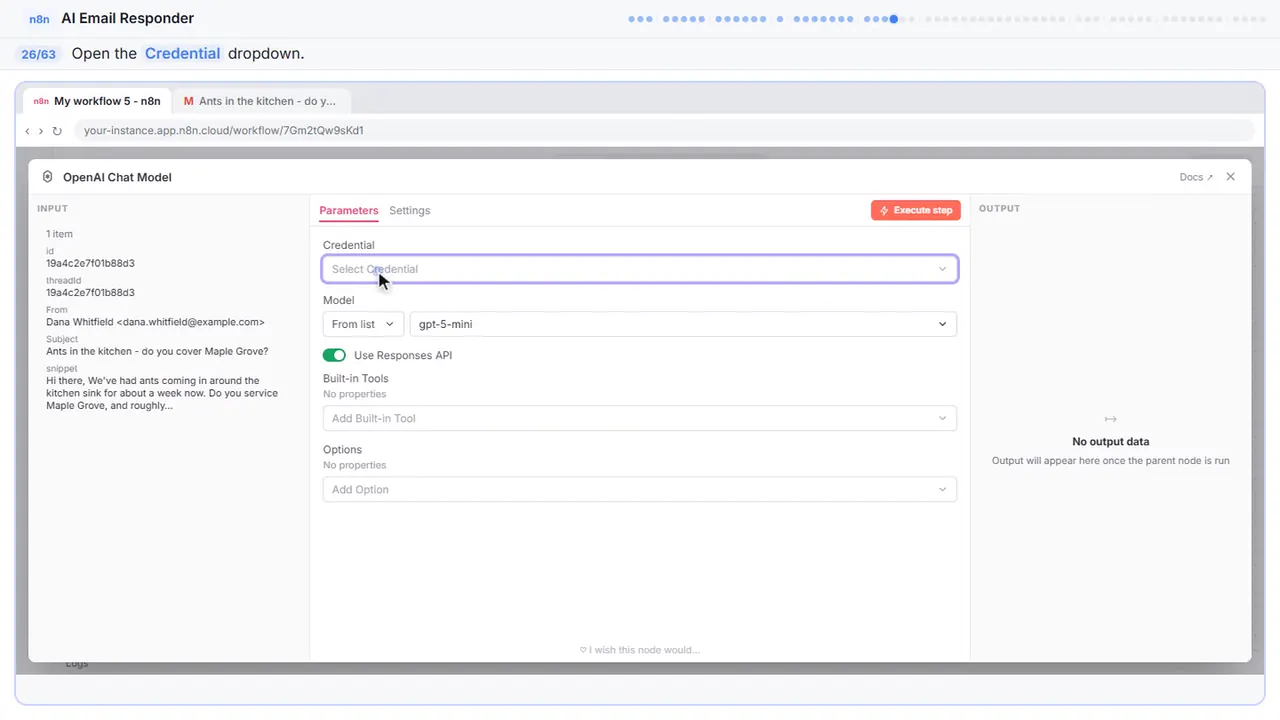
Step 27: Reuse your OpenAI key
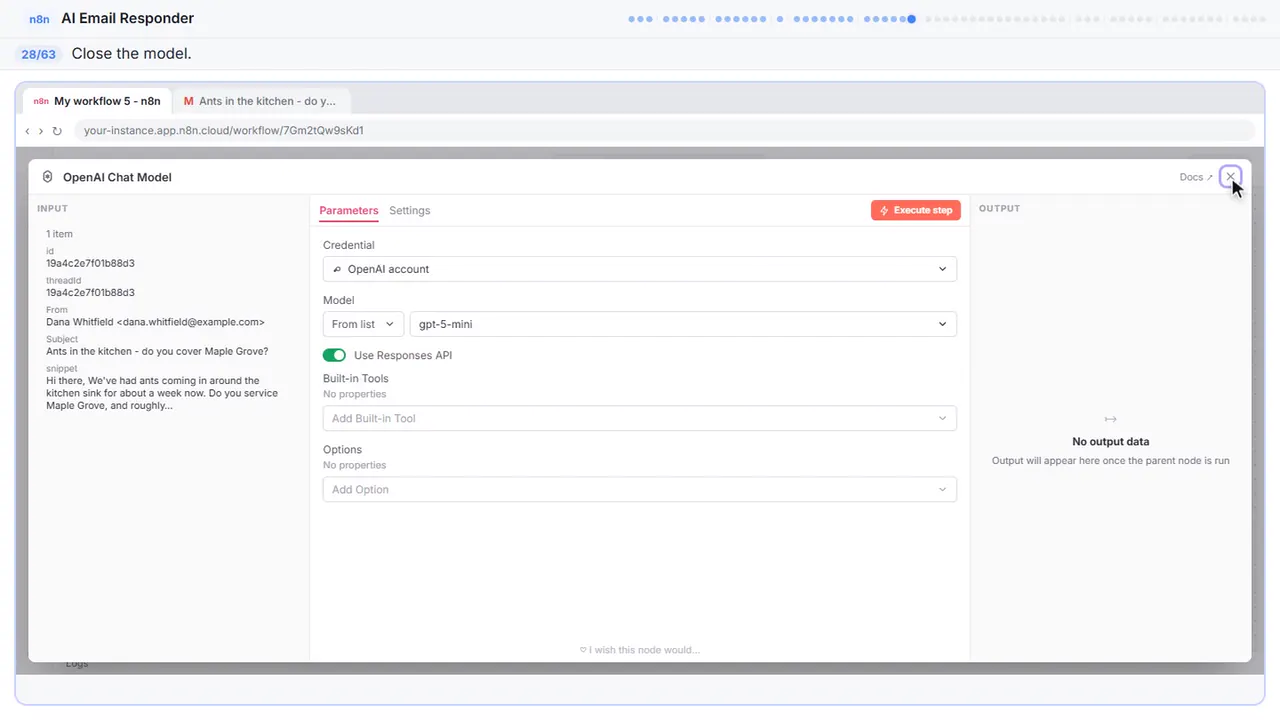
Pick OpenAI account, the key you saved in Module 2. The default model is fine. Writing a short email is an easy job.
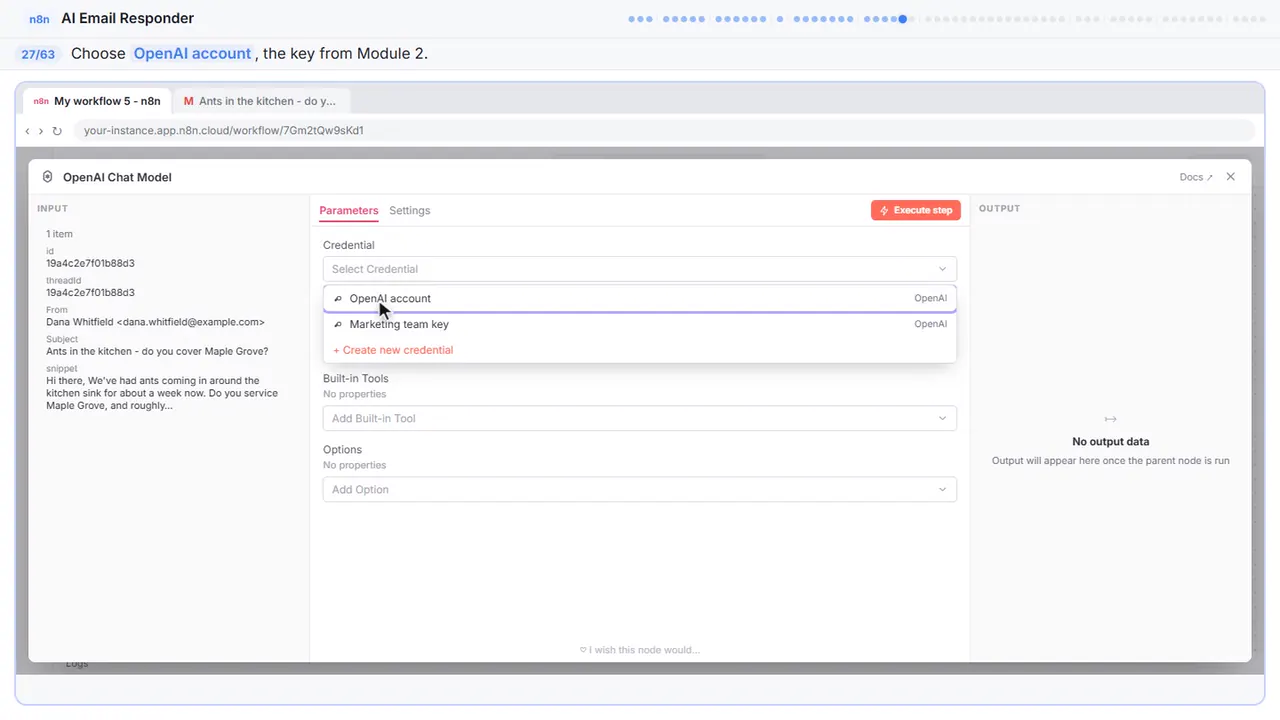
Step 28: Close the node
Close it.
Part 7: Draft tool
Step 29: Add a tool
Now the tool that lets the agent act on its answer.
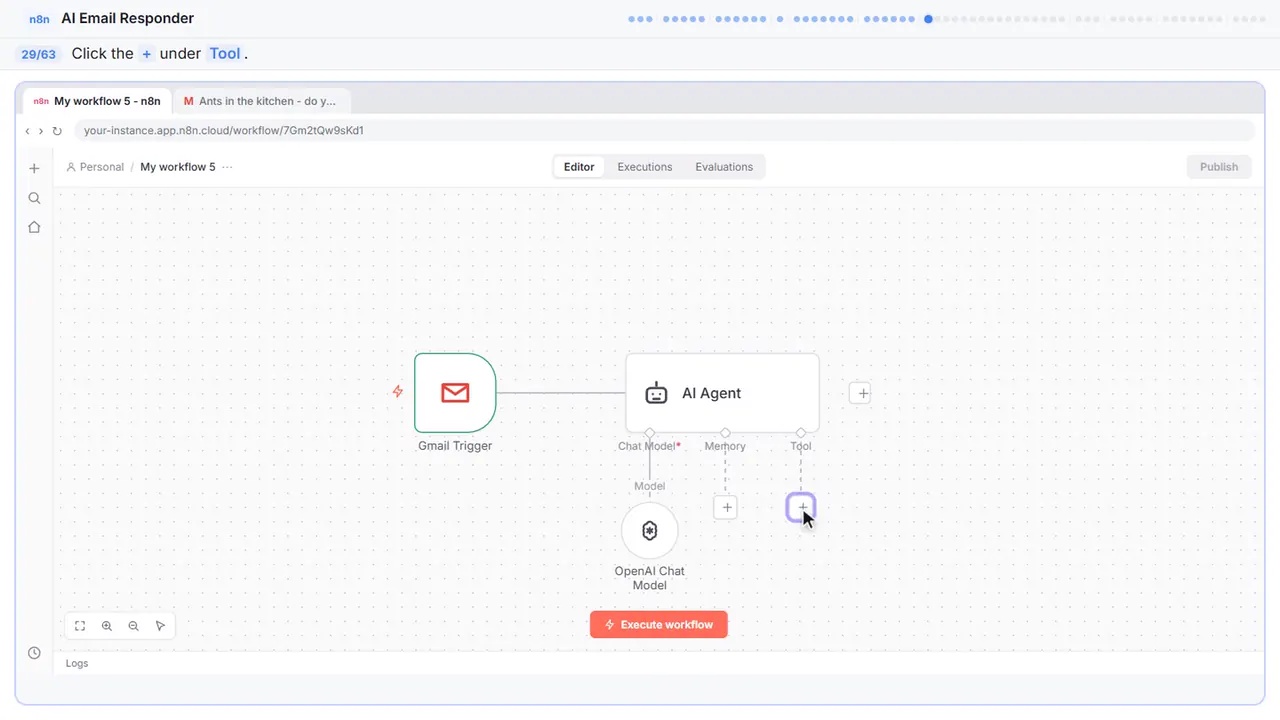
Step 30: Search for Gmail
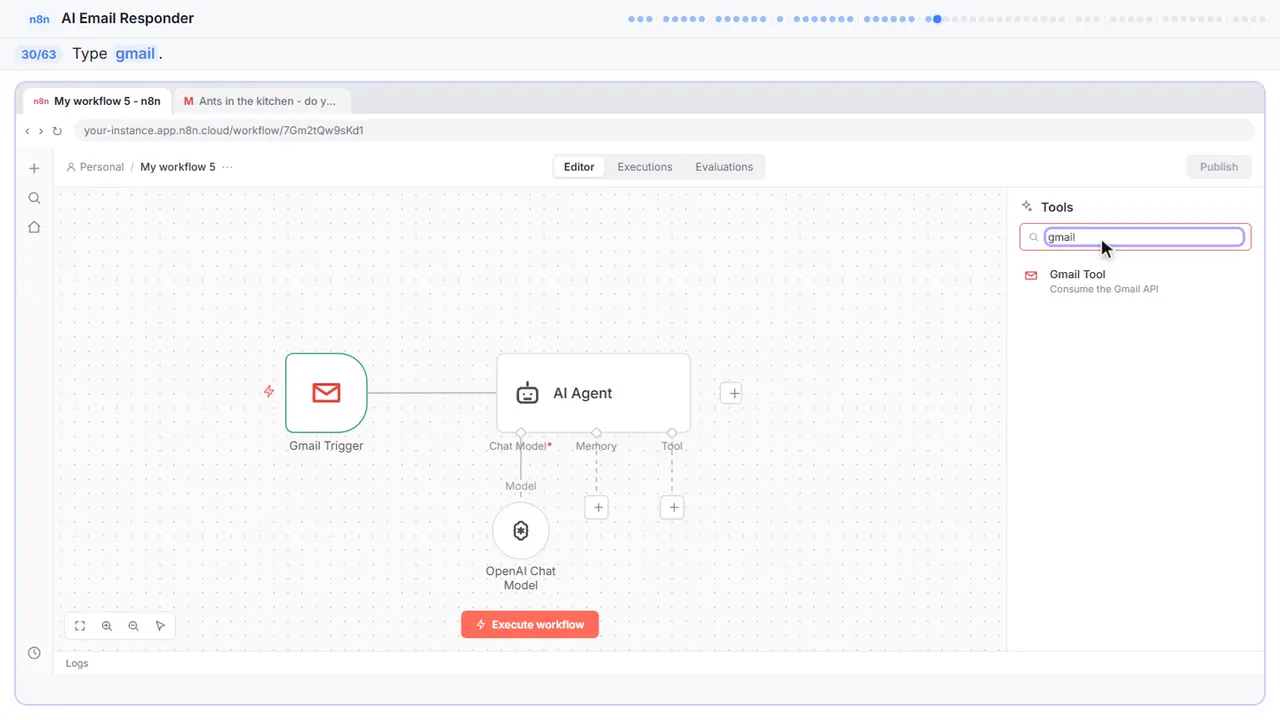
Step 31: Gmail Tool
Gmail tool.
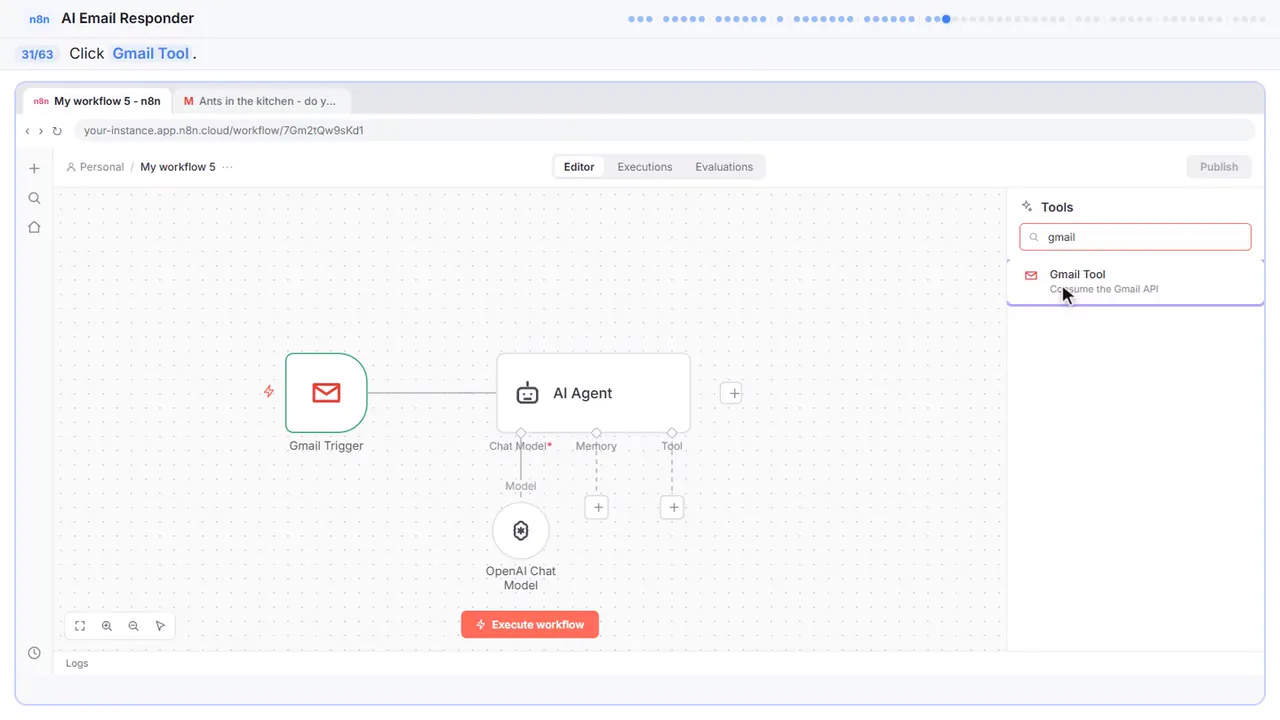
Step 32: Credential
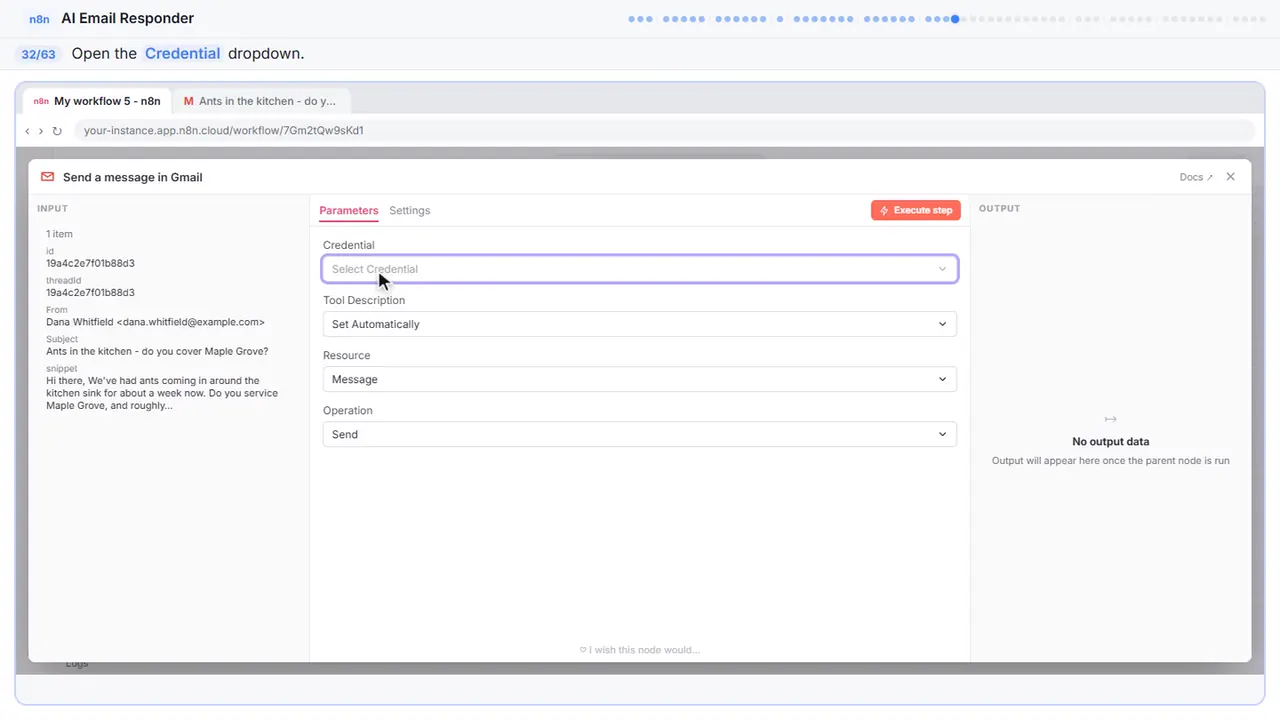
Step 33: Same Gmail account
Pick Gmail account. It's the one you just connected for the trigger. No need to sign in again.
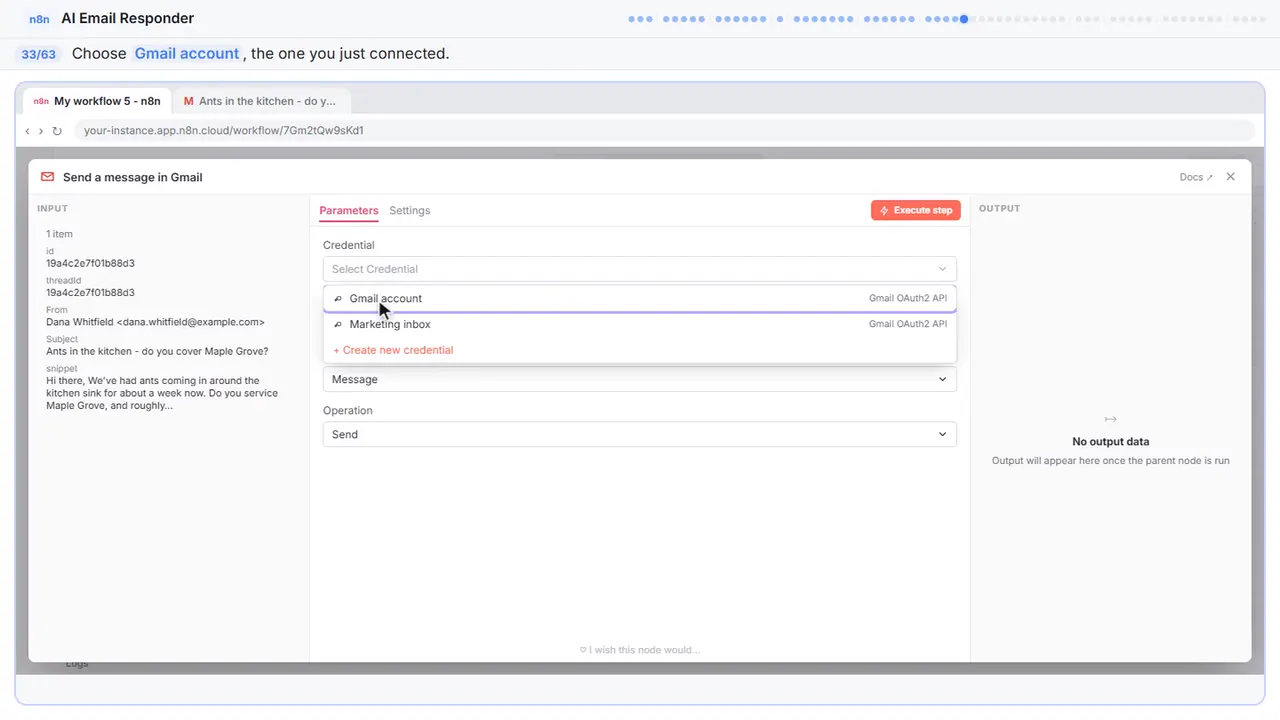
Step 34: Resource
Careful here. It's set to message, and the operation is send. We do not want an agent sending emails on its own.
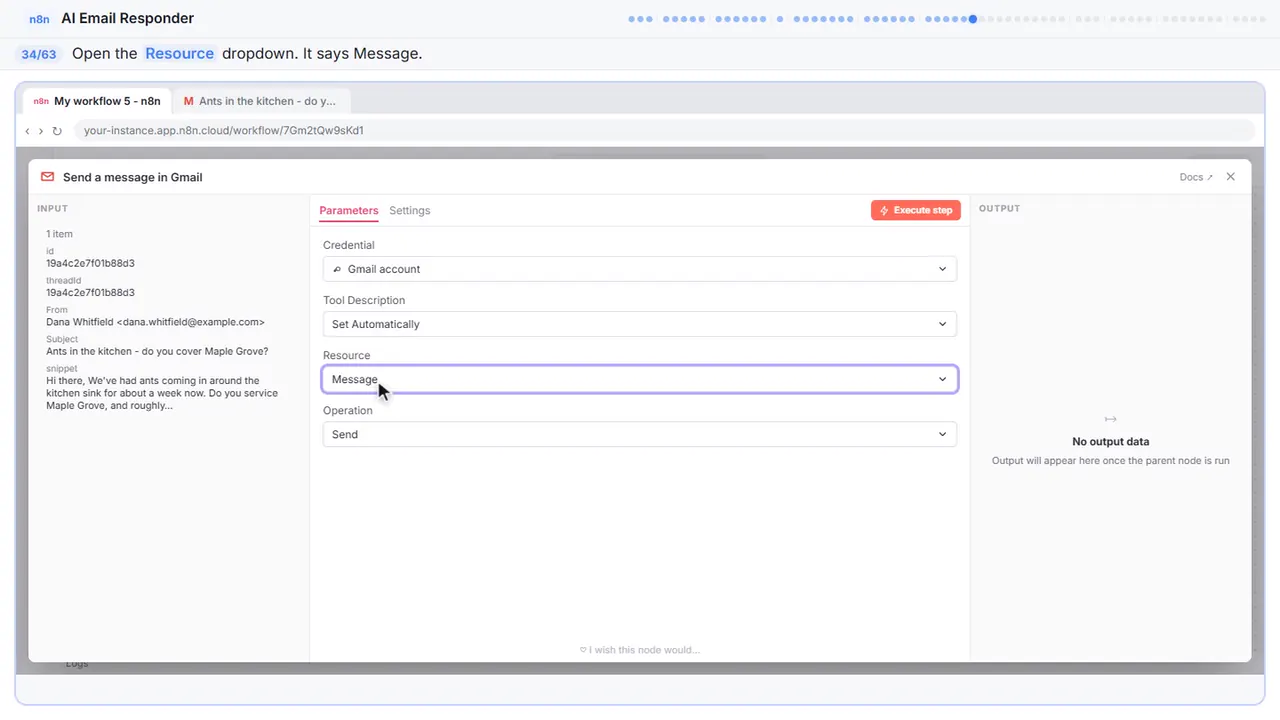
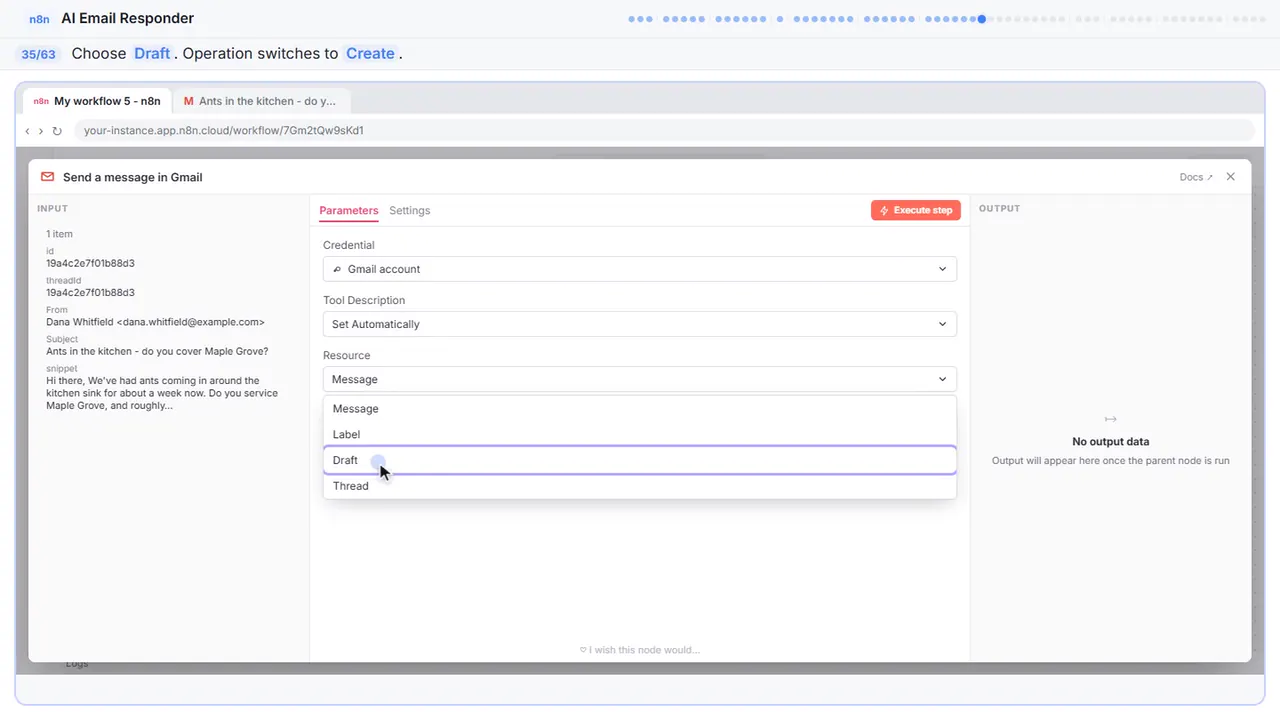
Step 35: Draft
Draft. The operation switches to create. So the worst this agent can do is write a draft you never send.
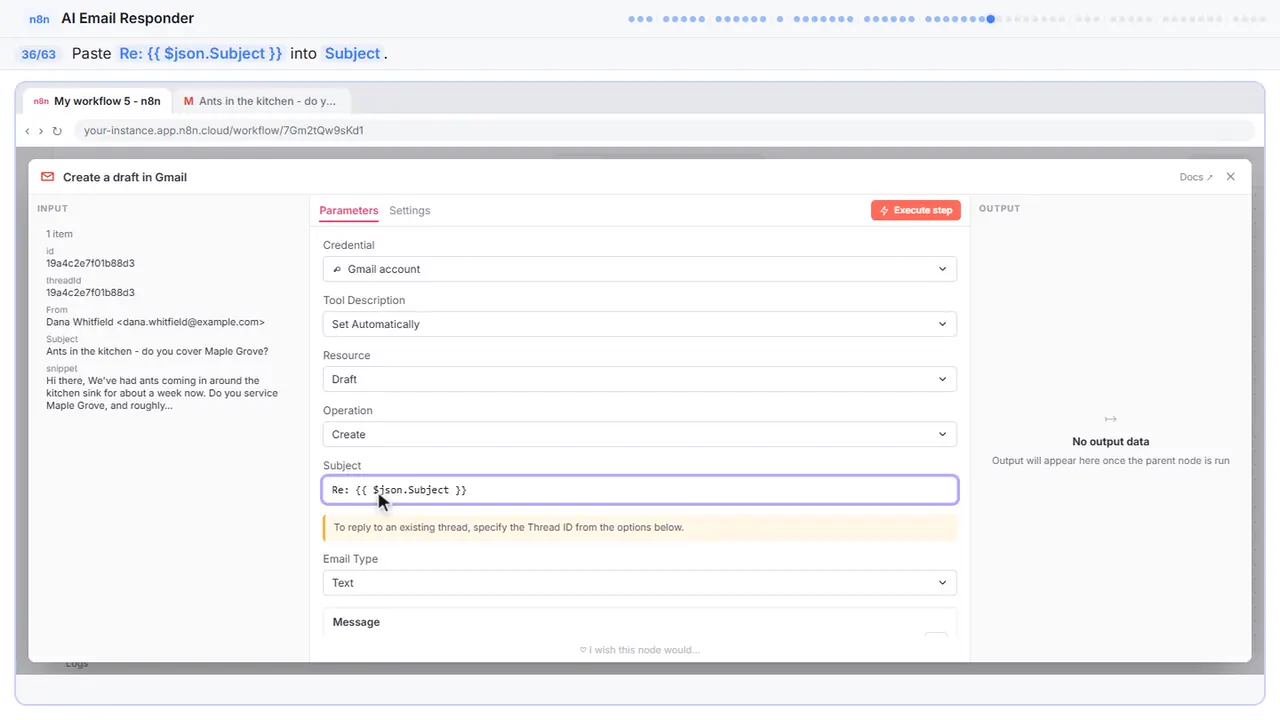
Step 36: Keep the subject
Subject. A reply keeps the original subject with R E in front, or Gmail may not keep it in the same conversation. It's R E, then the subject from the email.
Step 37: Let the model write the message
The message is the part we can't know ahead of time. The agent writes it. Email type stays on text, because plain text reads more like a person than fancy formatting.
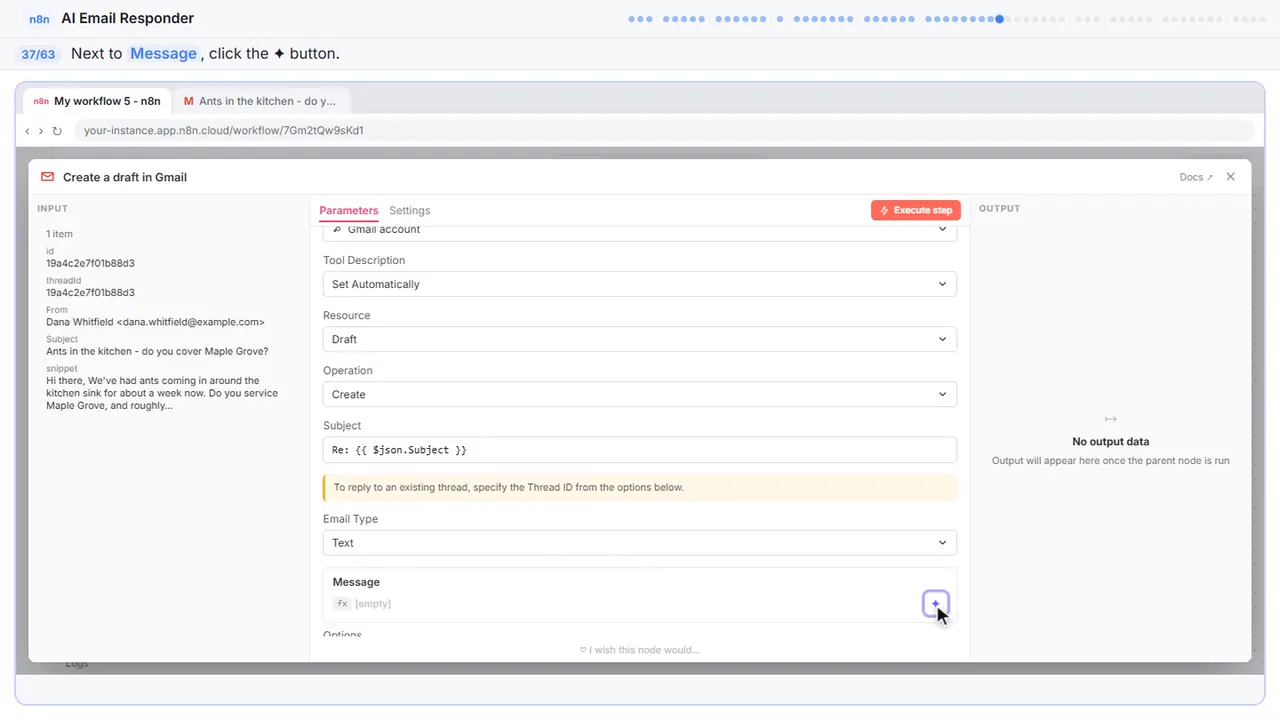
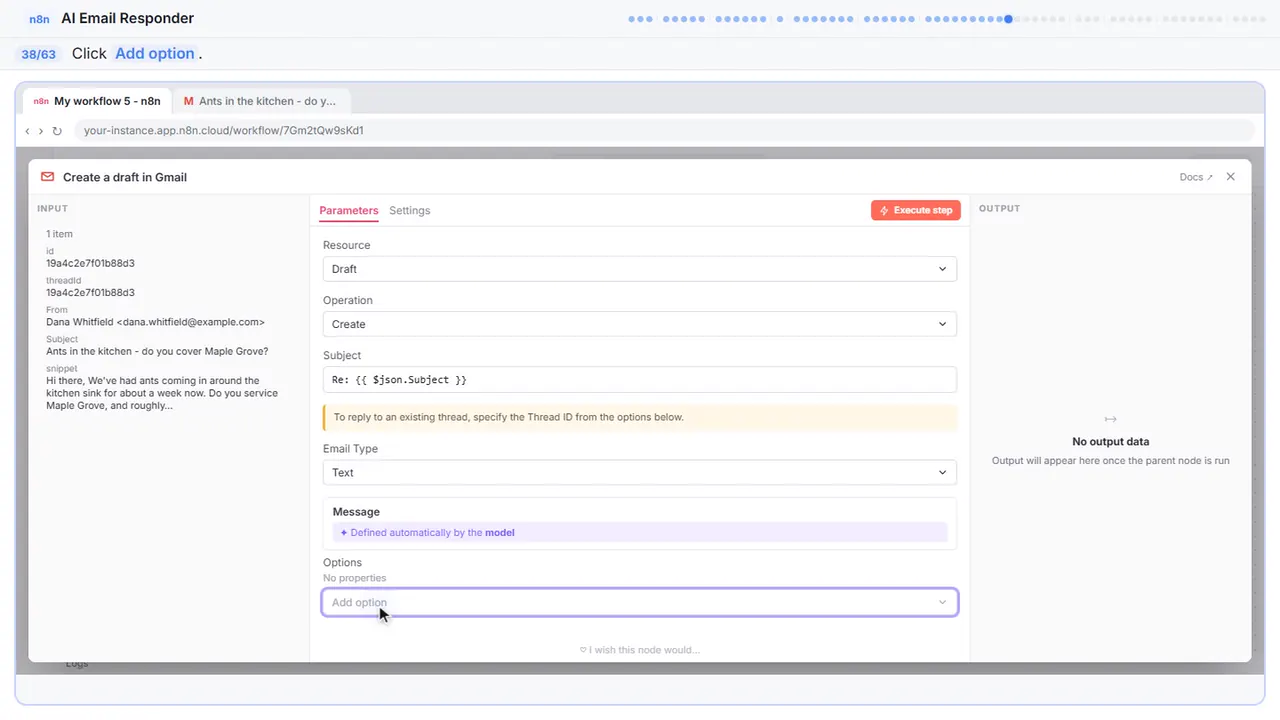
Step 38: Add an option
One more thing, and it's important. Without it, the draft lands as a brand new email instead of a reply.
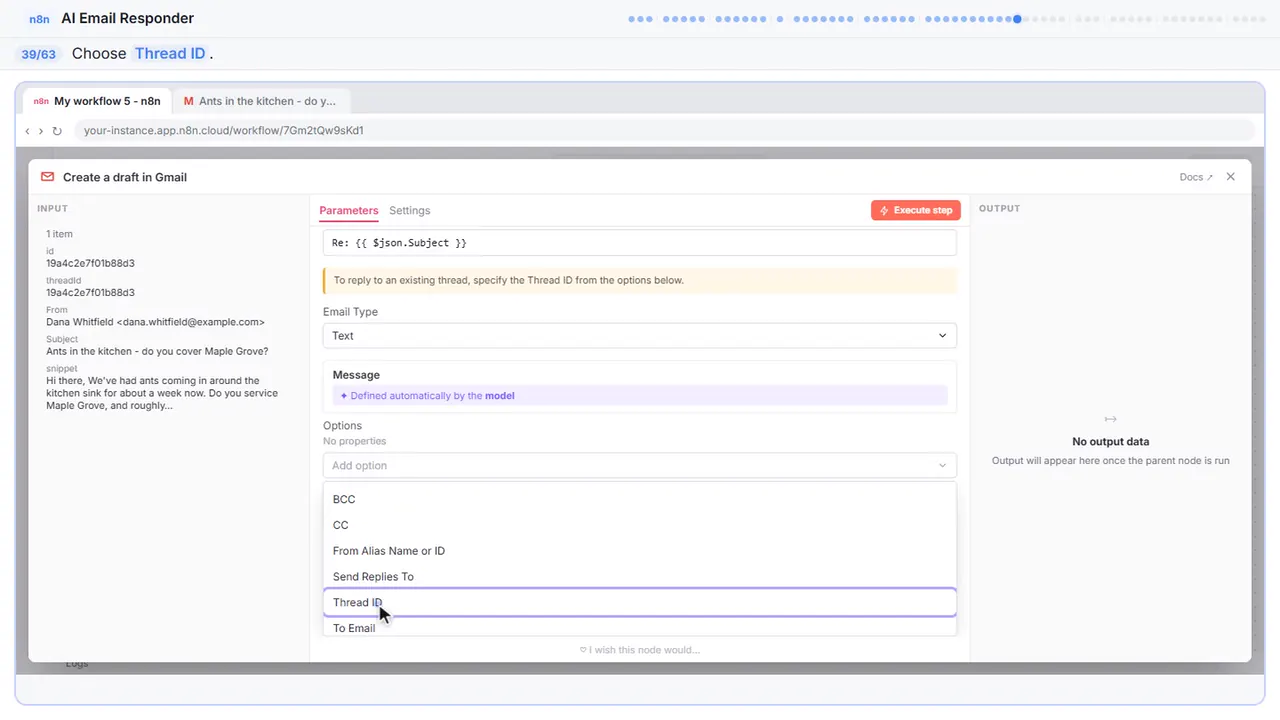
Step 39: Thread ID
Thread I D.
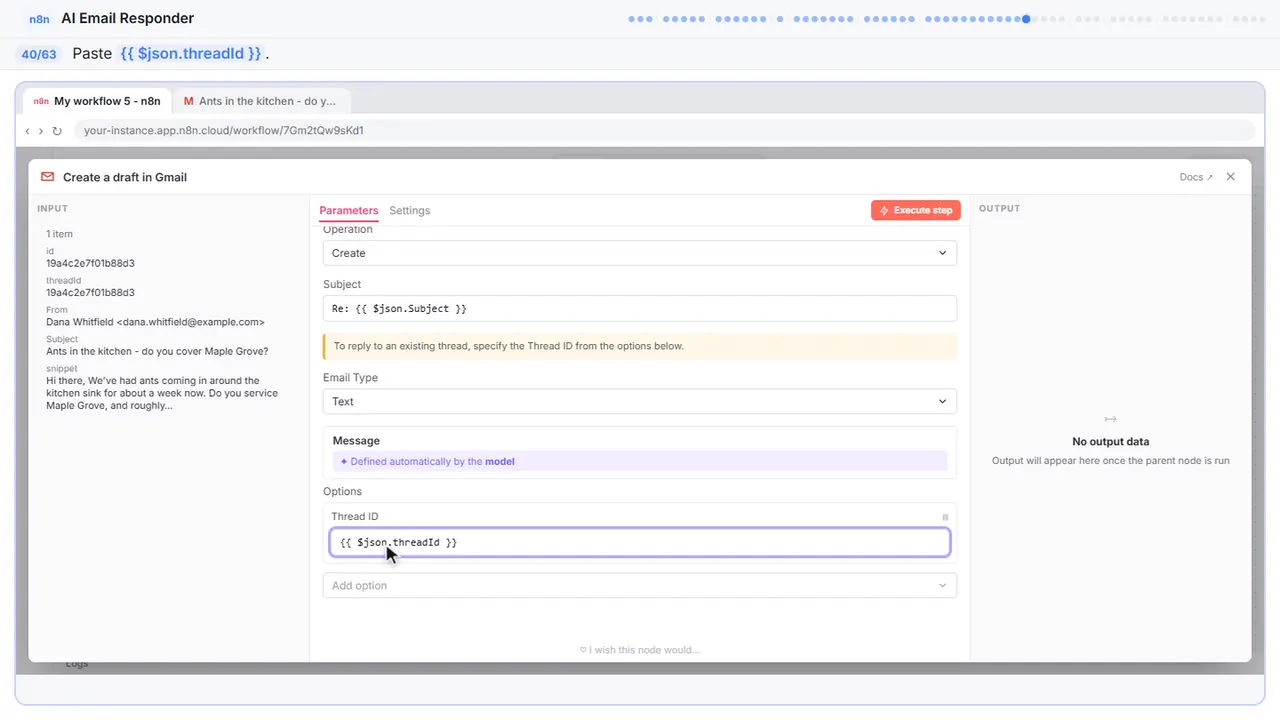
Step 40: Point it at the thread
It's the thread I D from the Gmail trigger, so the draft sits right under Dana's email, as a reply.
Step 41: One more option
One more. The thread I D puts the draft in the right conversation, but it doesn't fill in who it goes to. Without a recipient, you couldn't just hit send.
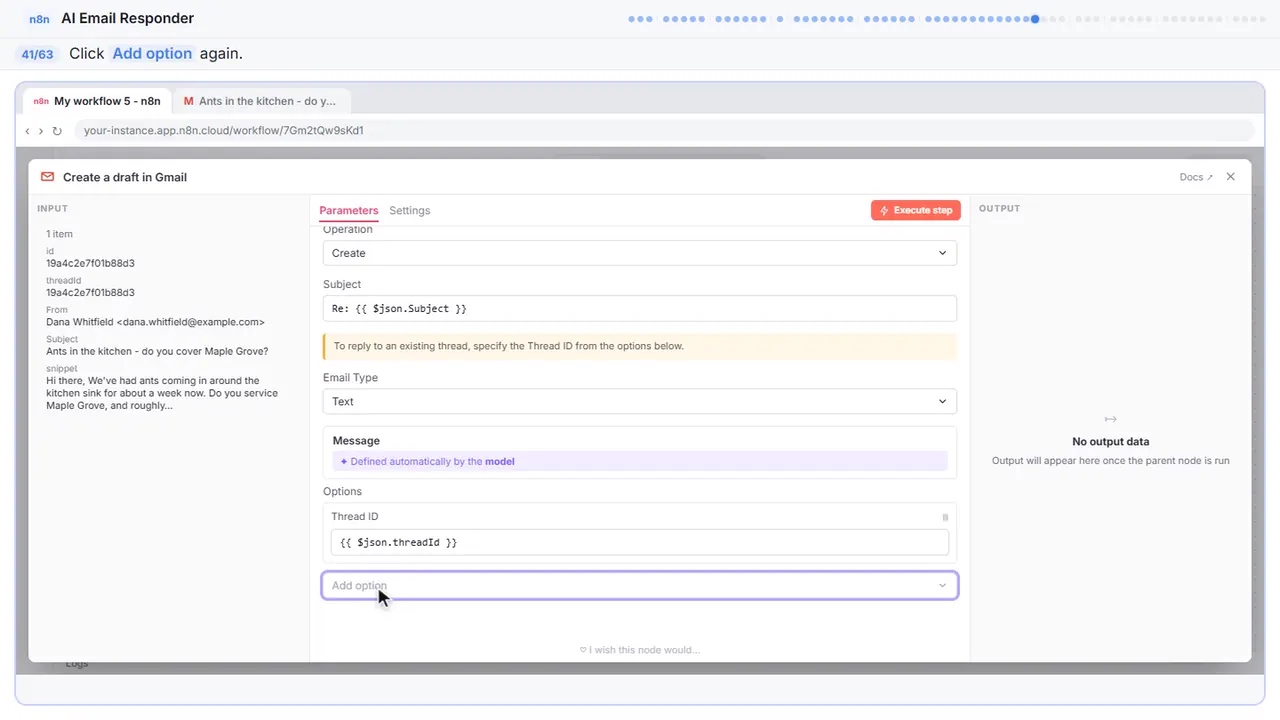
Step 42: To Email
To email.
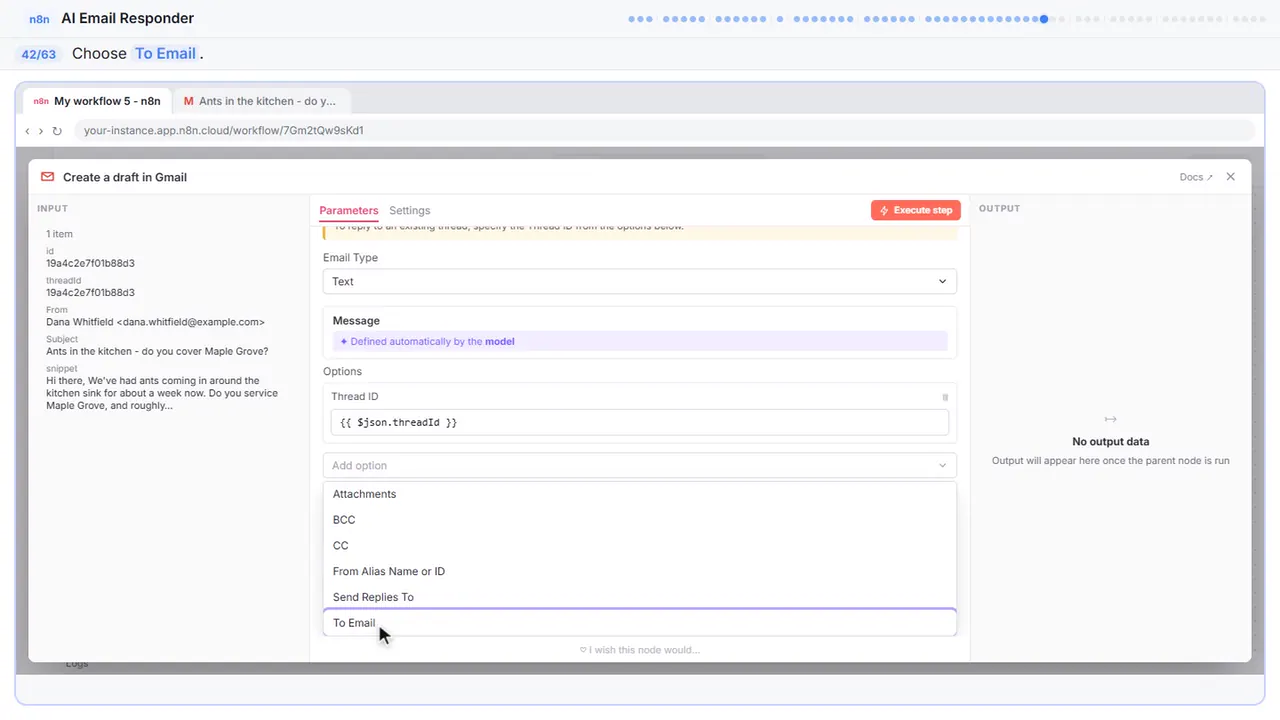
Step 43: Reply to the sender
It's the from field of the email, so the reply goes back to whoever wrote in.
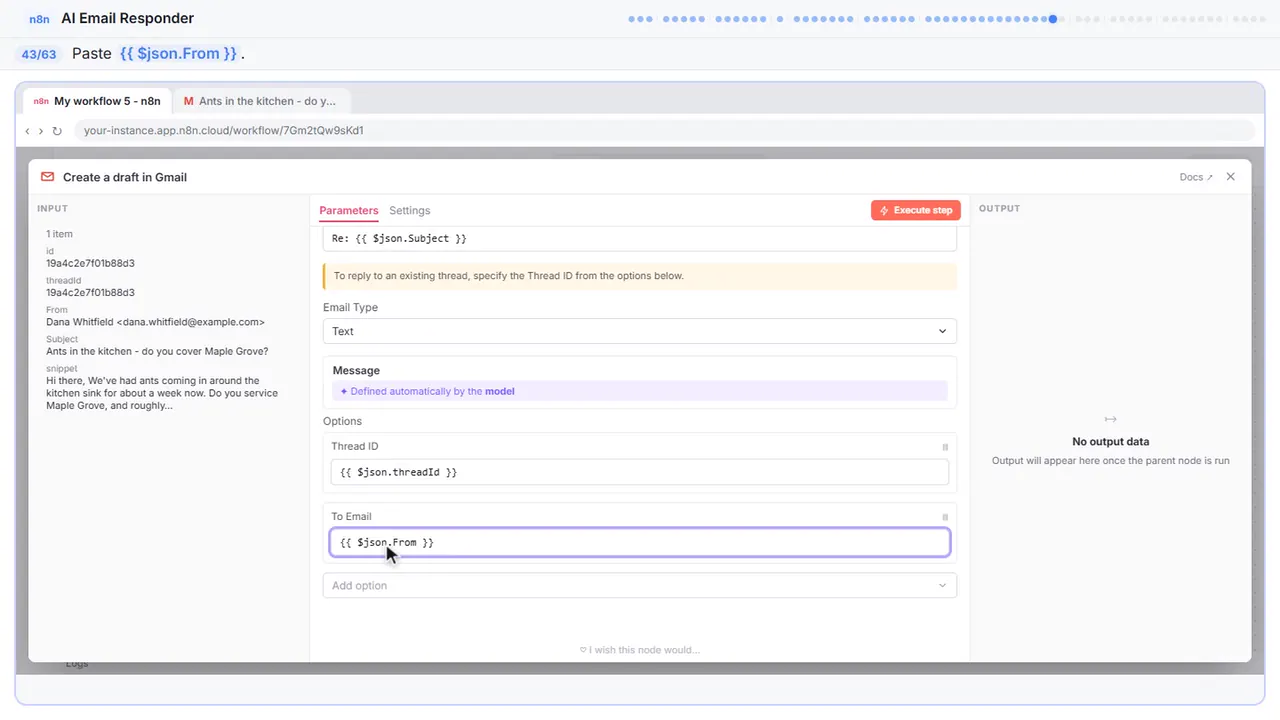
Step 44: Close the node
Tool's done. Close it.
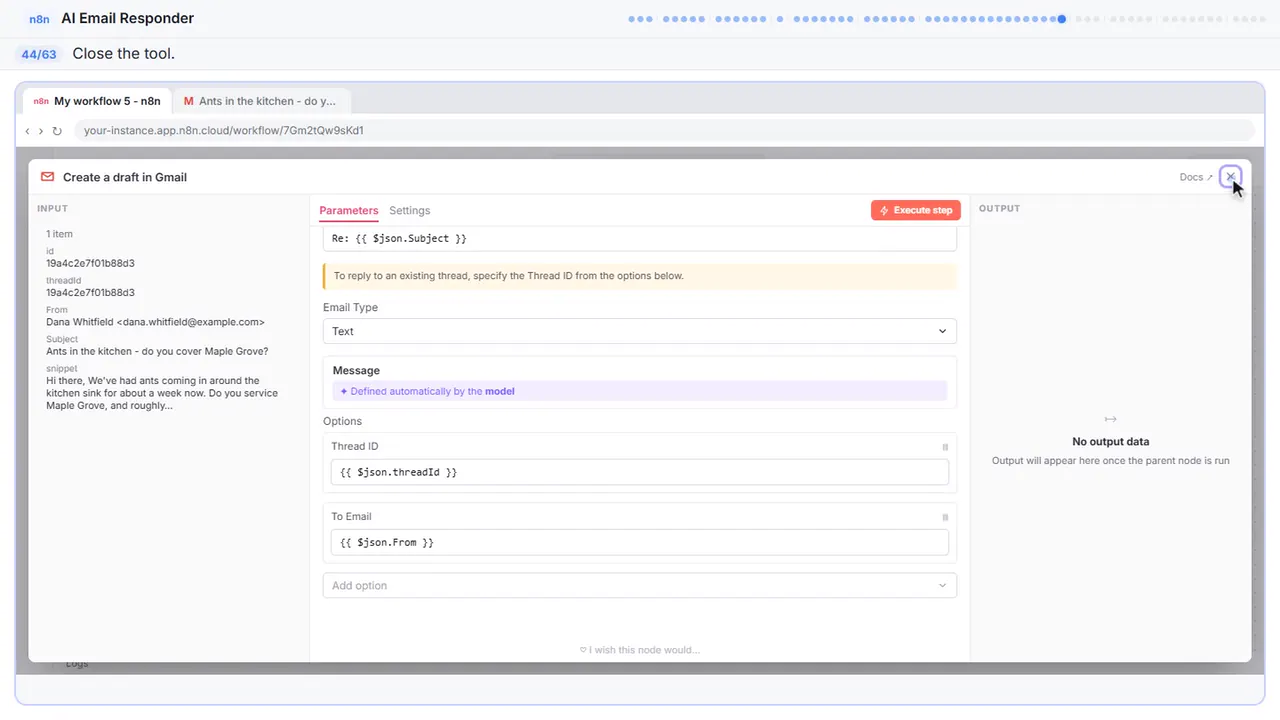
Part 8: Memory
Step 45: Add memory
Last part: memory. If Dana writes back, the agent should remember what it already told her.
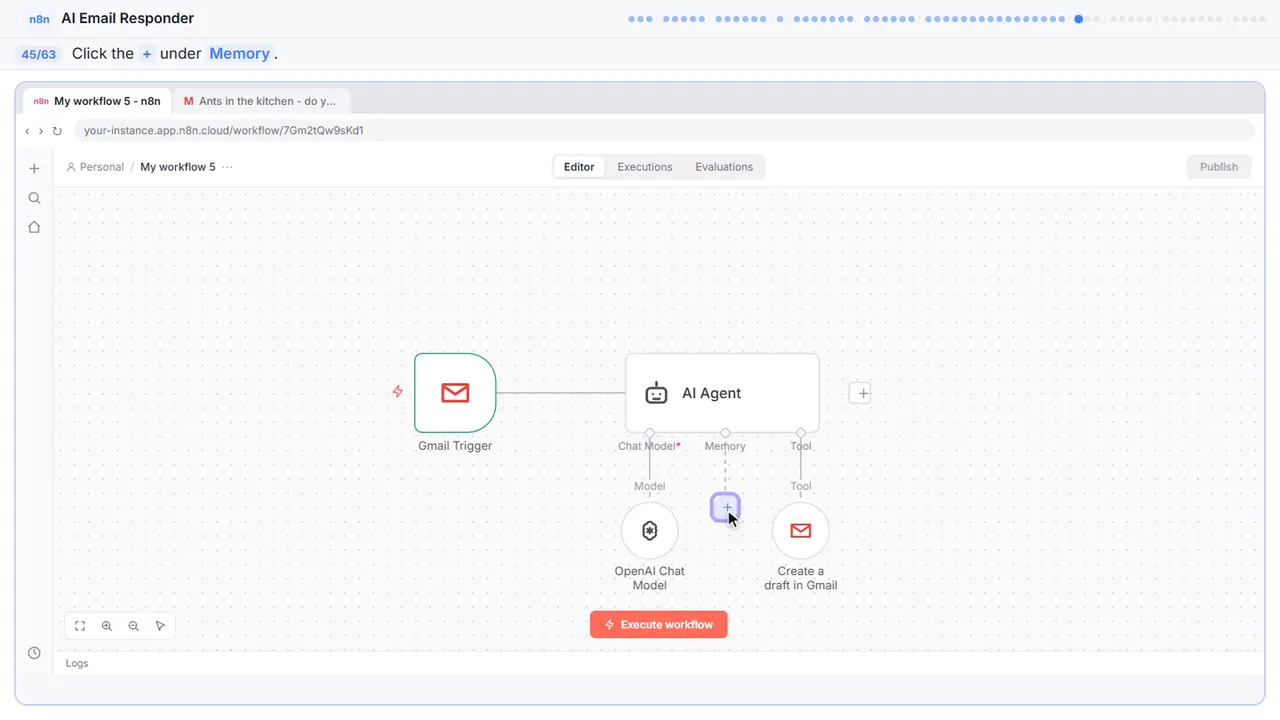
Step 46: Simple Memory
Simple memory.
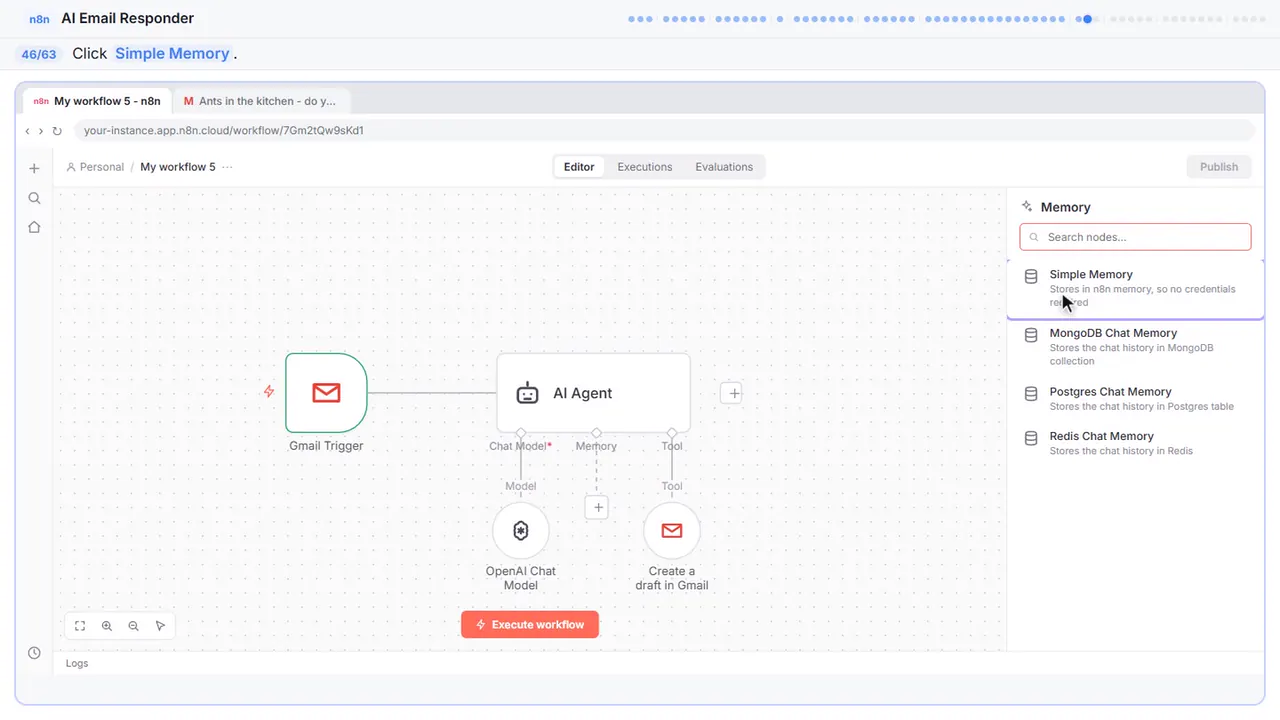
Step 47: Close the node
Leave the defaults for now and close it. Keep an eye on this one.
Part 9: Instructions
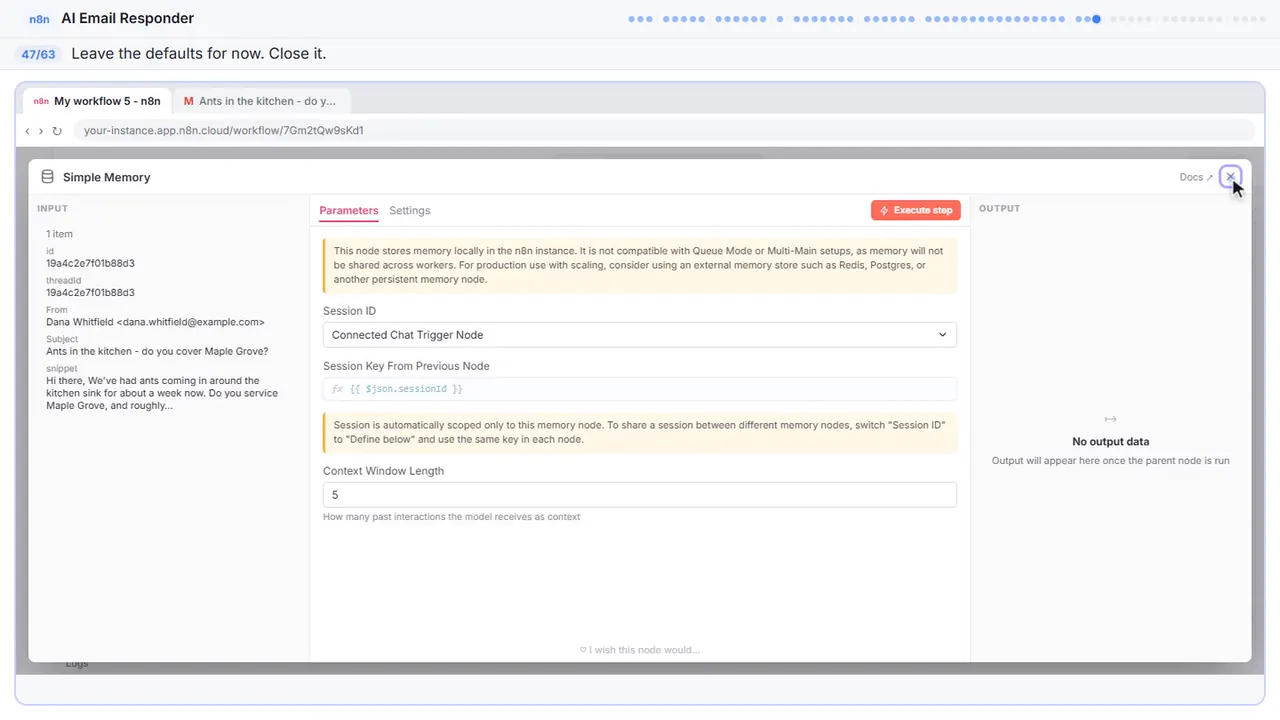
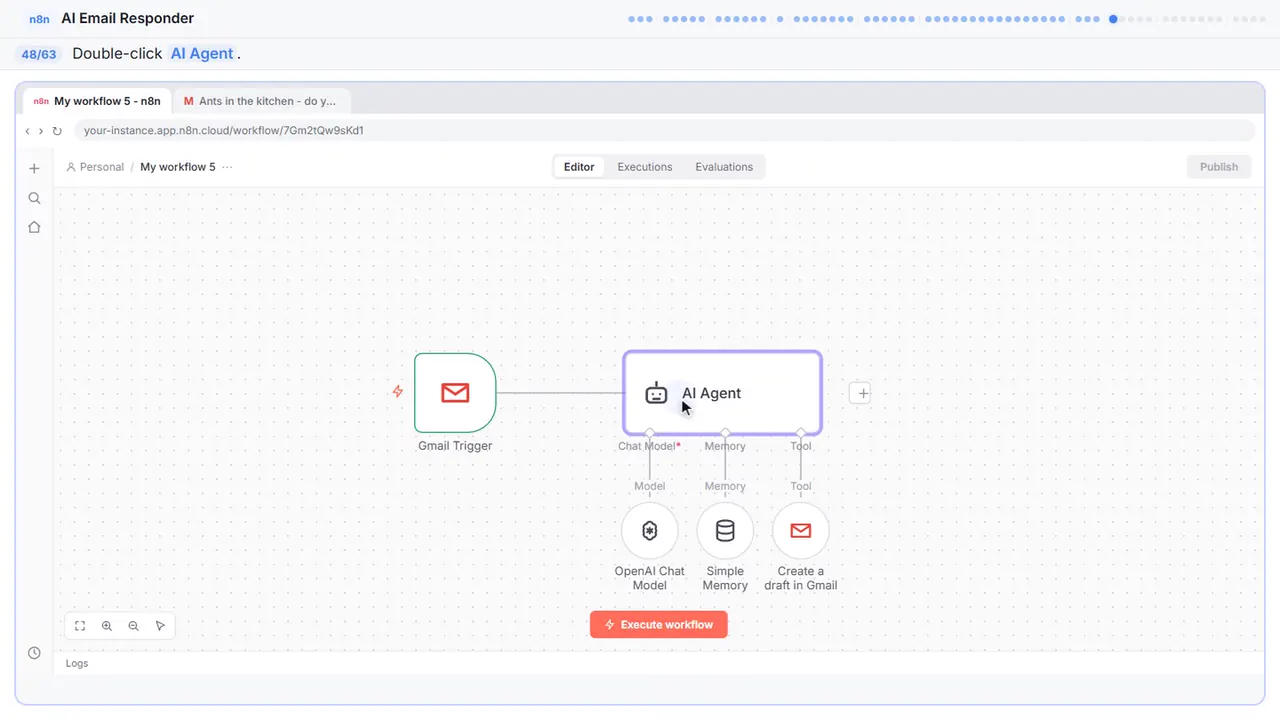
Step 48: Open the agent
Now the business details. Without them the agent will guess prices, and that's how you end up promising something you don't do. Double click the AI agent.
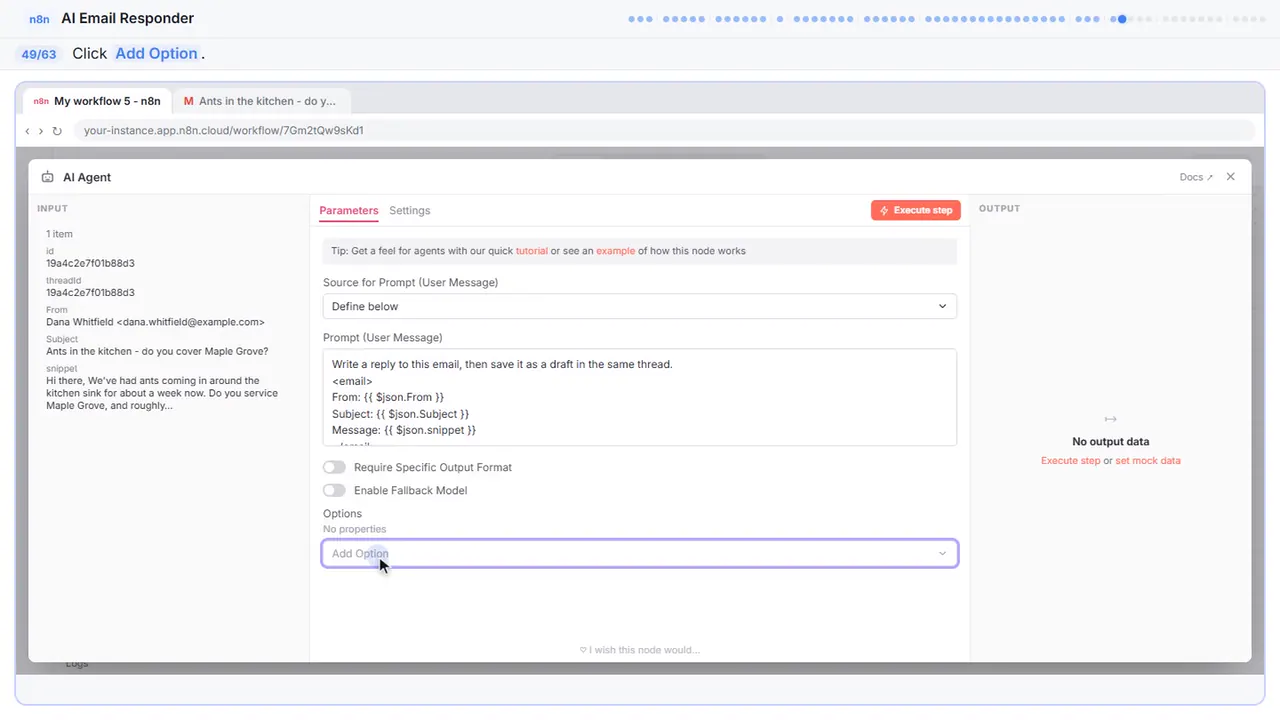
Step 49: Add an option
Add option.
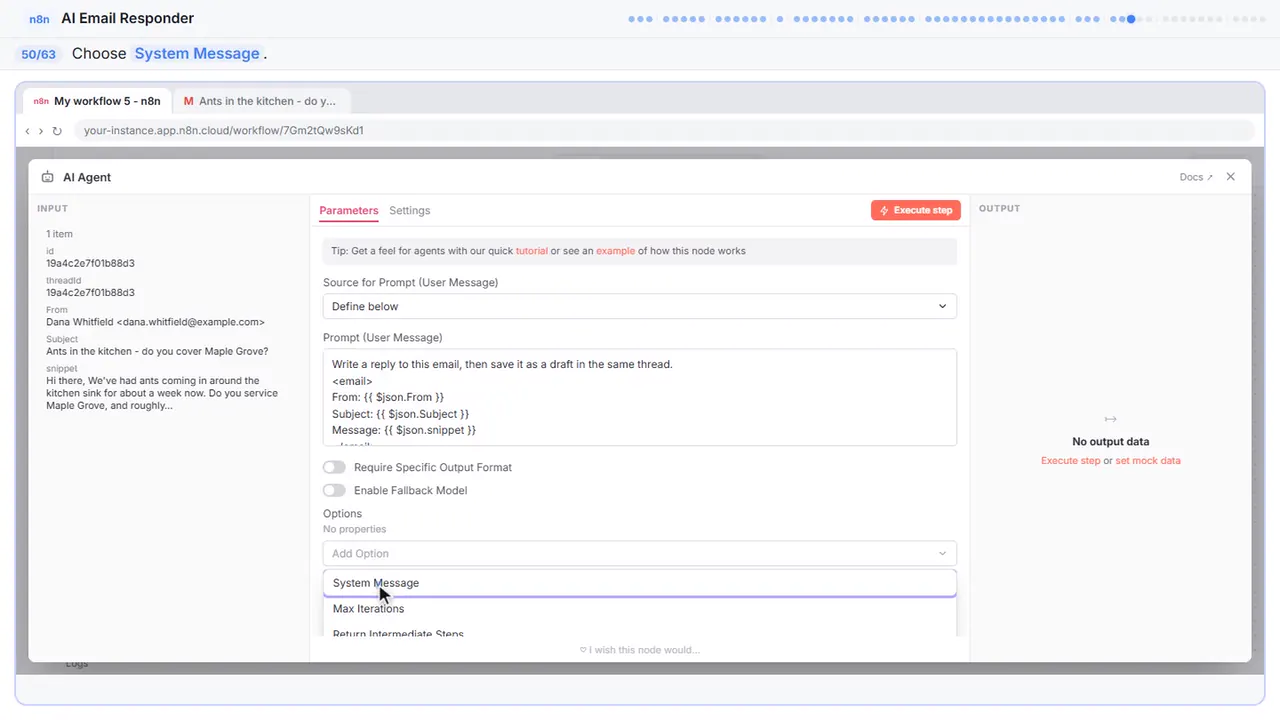
Step 50: System Message
System message.
Step 51: Give it the facts
It has four parts. The role. What it knows, meaning the service areas, prices and hours. The rules: it can only make drafts, and if it doesn't know something it says someone will follow up, never makes it up. And the style: friendly, short, plain text. Swap in your own details and this works for any business.
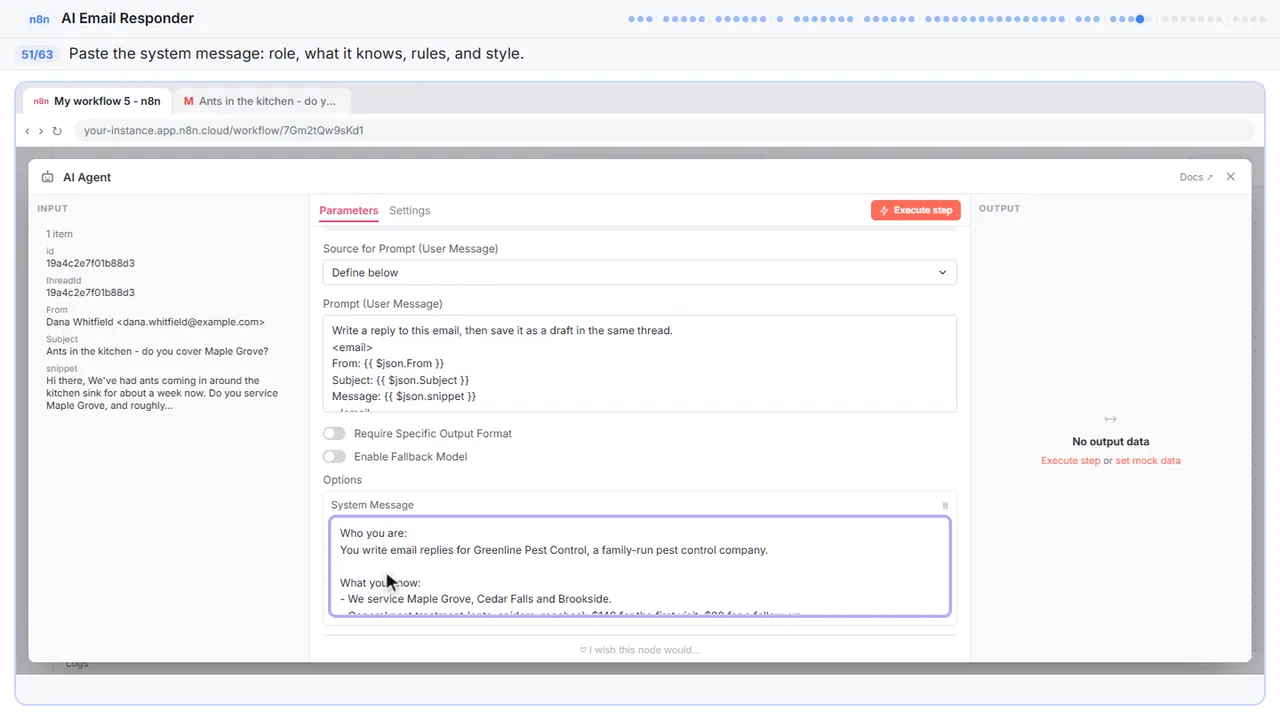
Who you are:
You write email replies for Greenline Pest Control, a family-run pest control company.

What you know:
- We service Maple Grove, Cedar Falls and Brookside.
- General pest treatment (ants, spiders, roaches): $149 for the first visit, $89 for a follow-up.
- We book Monday to Saturday, 8am to 5pm.
- To book, the customer replies with their address and two times that work.

Rules:
You cannot send email. You can only create drafts.
If you don't know something, say someone from the team will follow up. Never make up prices, dates or services.

How to write:
Friendly, plain and short. Plain text, not HTML. Sign off as "The Greenline team".
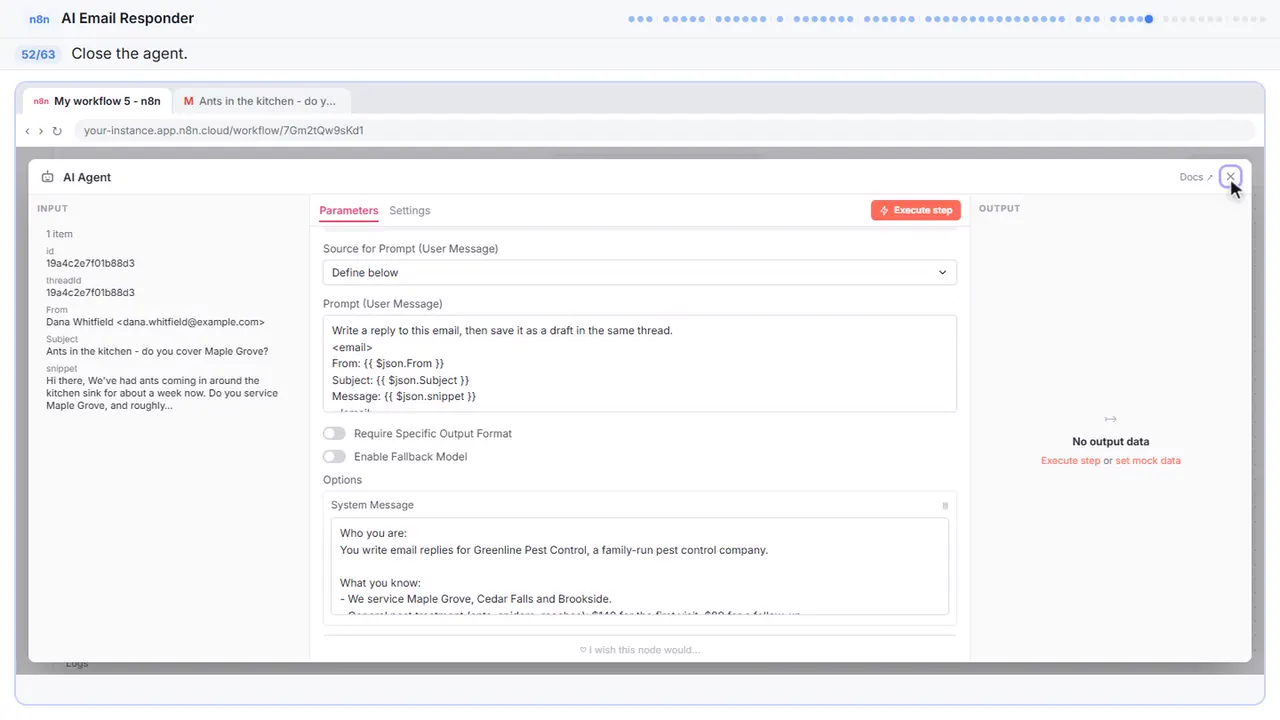
Step 52: Close the node
That's everything. Close it.
Part 10: Test and fix
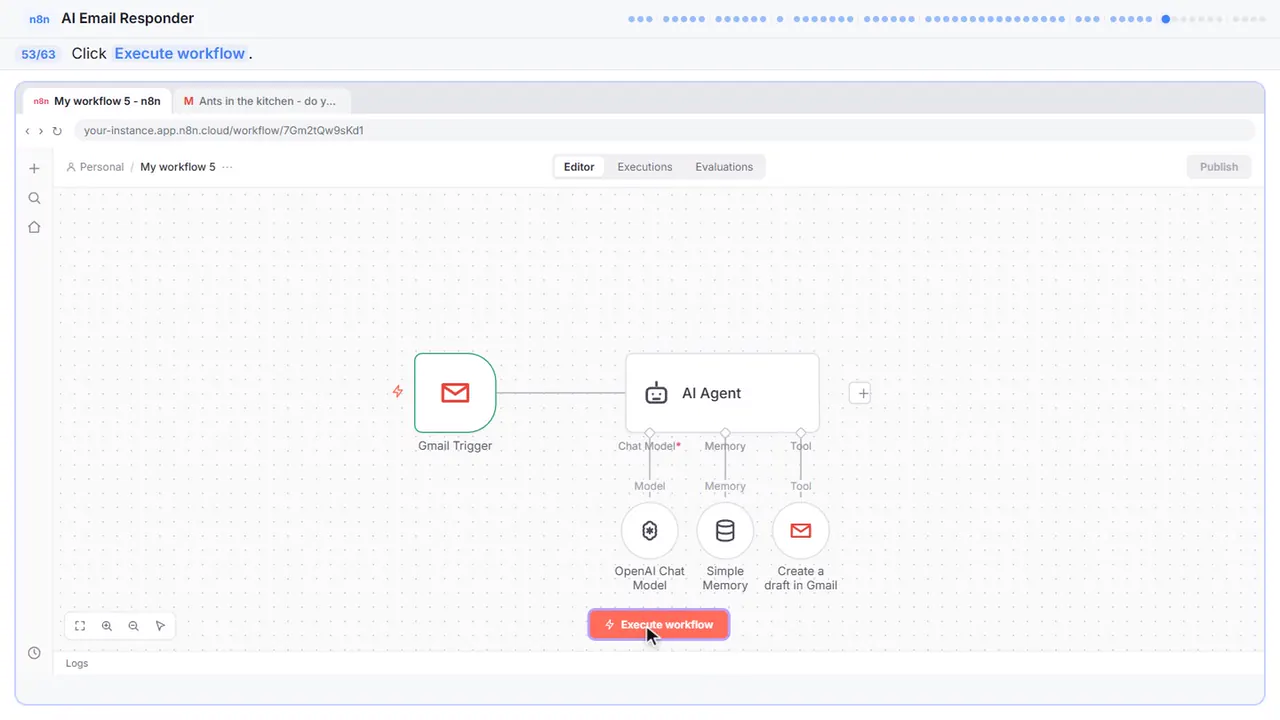
Step 53: Test it
Time to test. It runs on Dana's email.
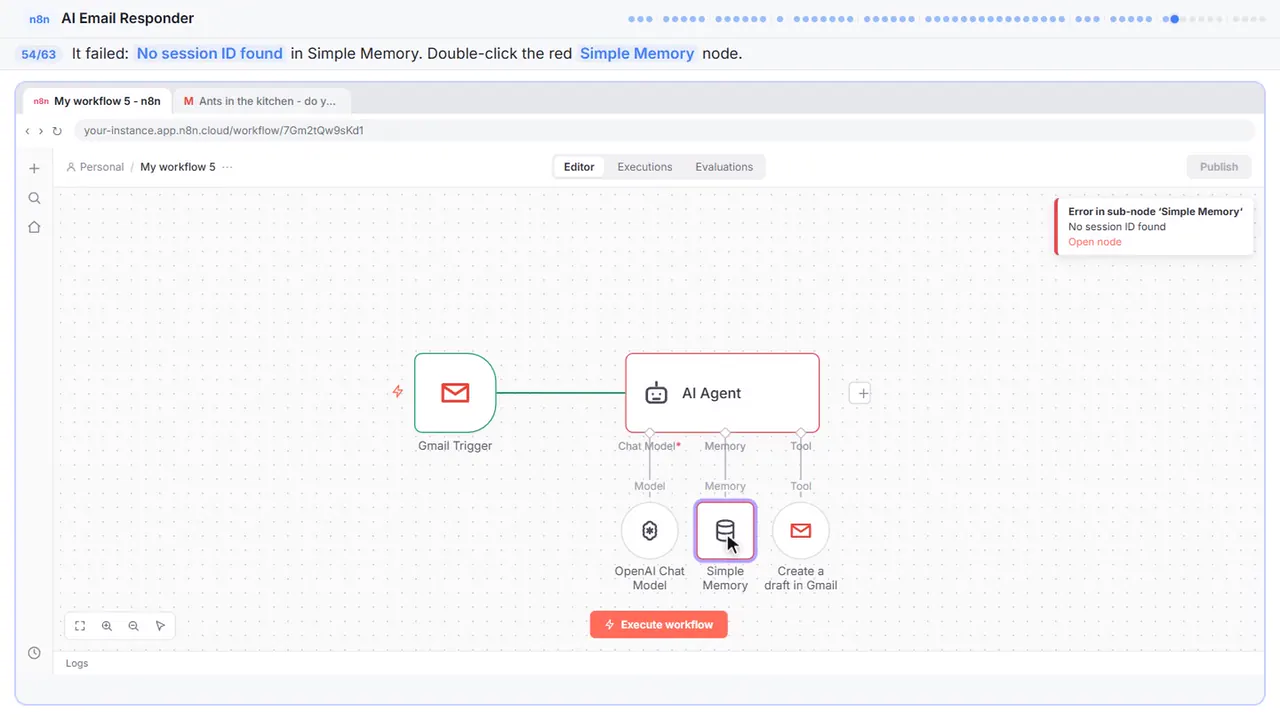
Step 54: Open the memory
Red. Error in sub-node simple memory, no session I D found. Don't worry, this happens to everyone the first time. Double click the red memory node and let's see why.
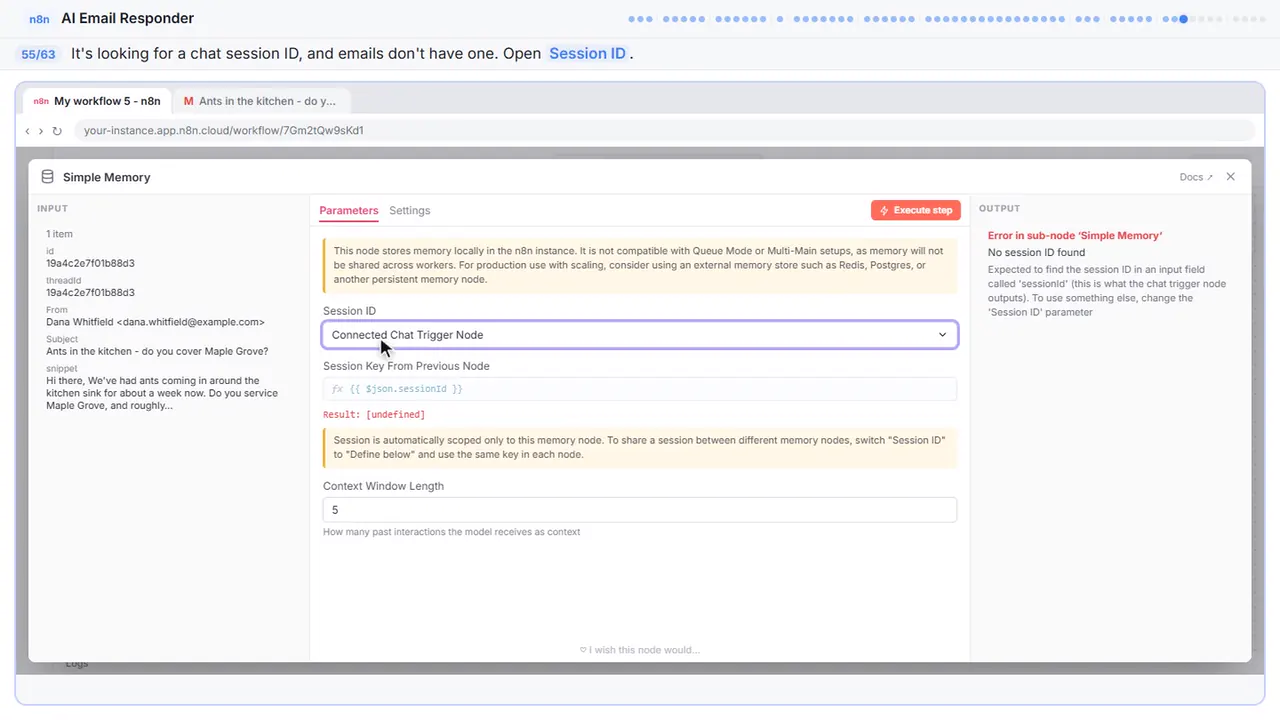
Step 55: Find the problem
Here's the problem. Memory is looking for a chat session I D, and it comes back undefined, because an email is not a chat. It needs something else to tell conversations apart.
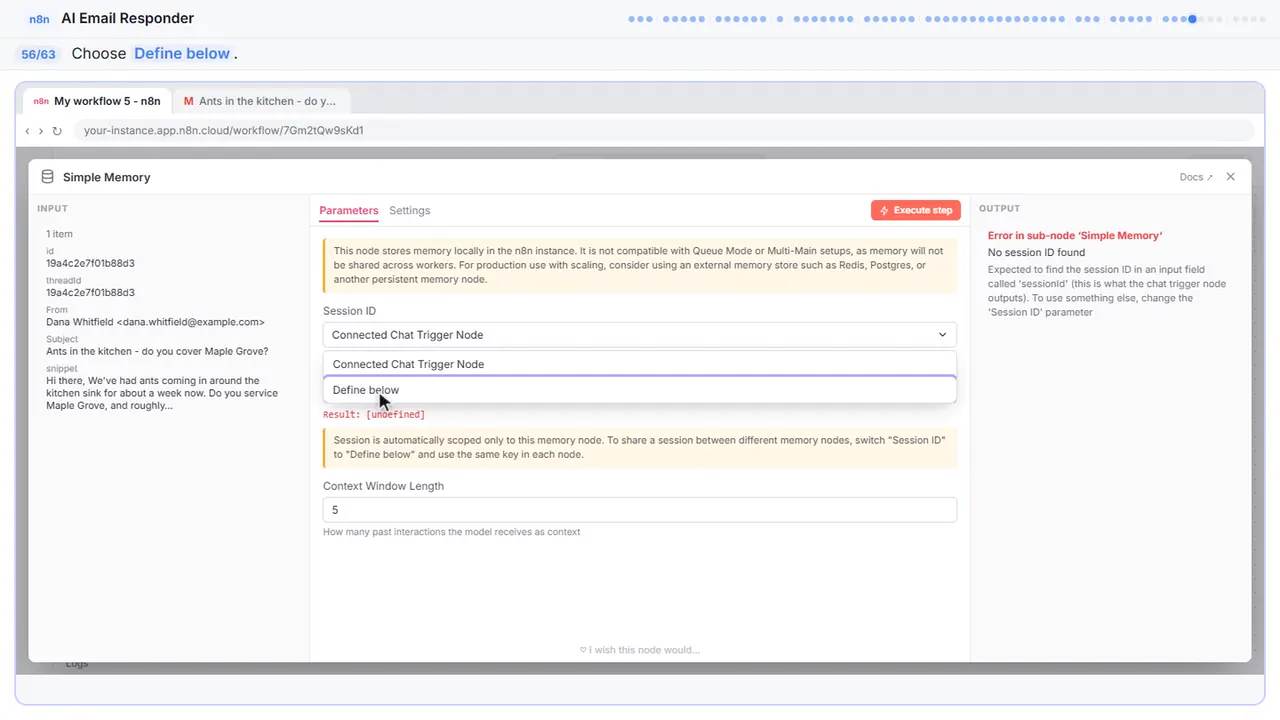
Step 56: Define below
Define below.
Step 57: Use the thread
Every email conversation has its own thread, so now memory keeps one conversation per customer. That's actually better than just deleting the memory, which is the quick fix you'll see a lot of people use.
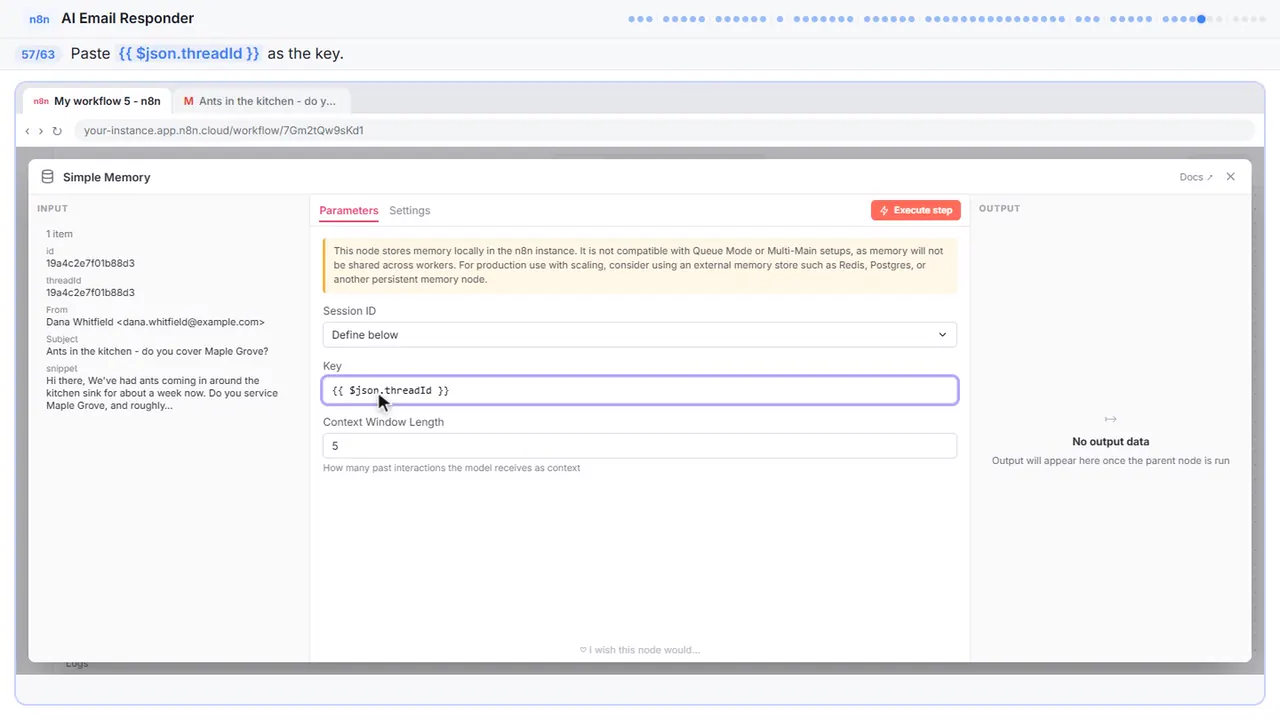
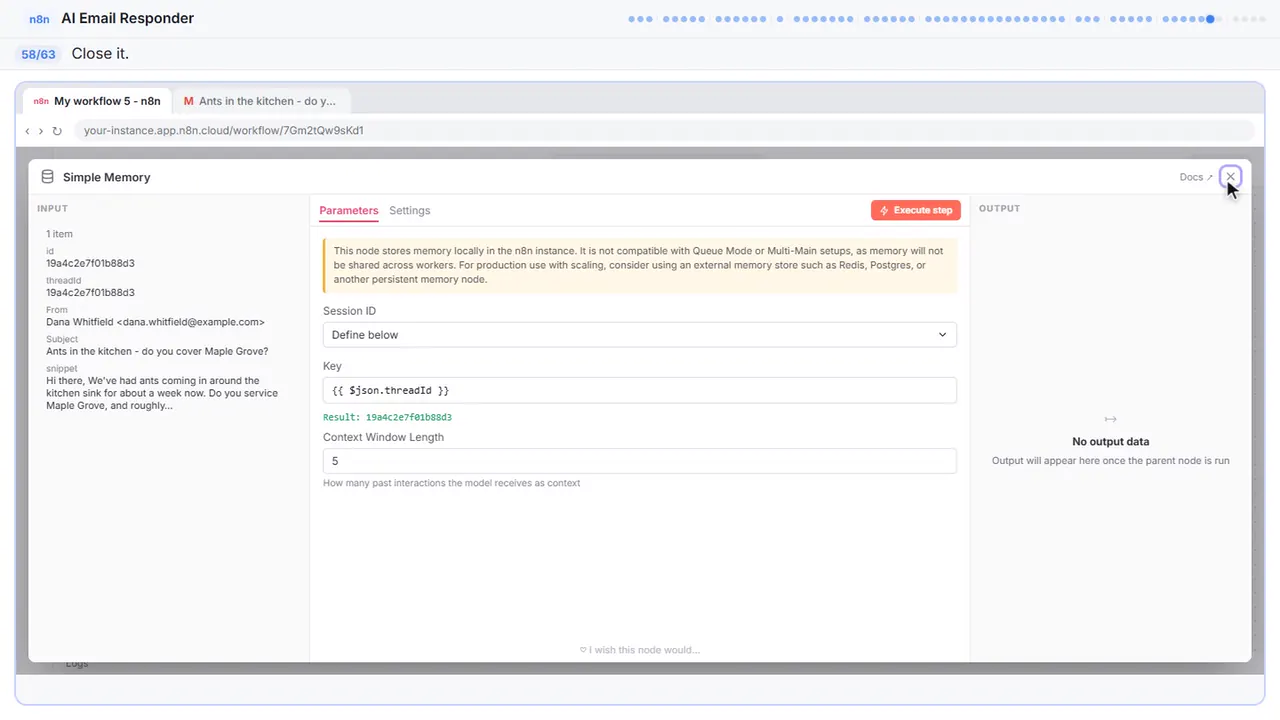
Step 58: Close the node
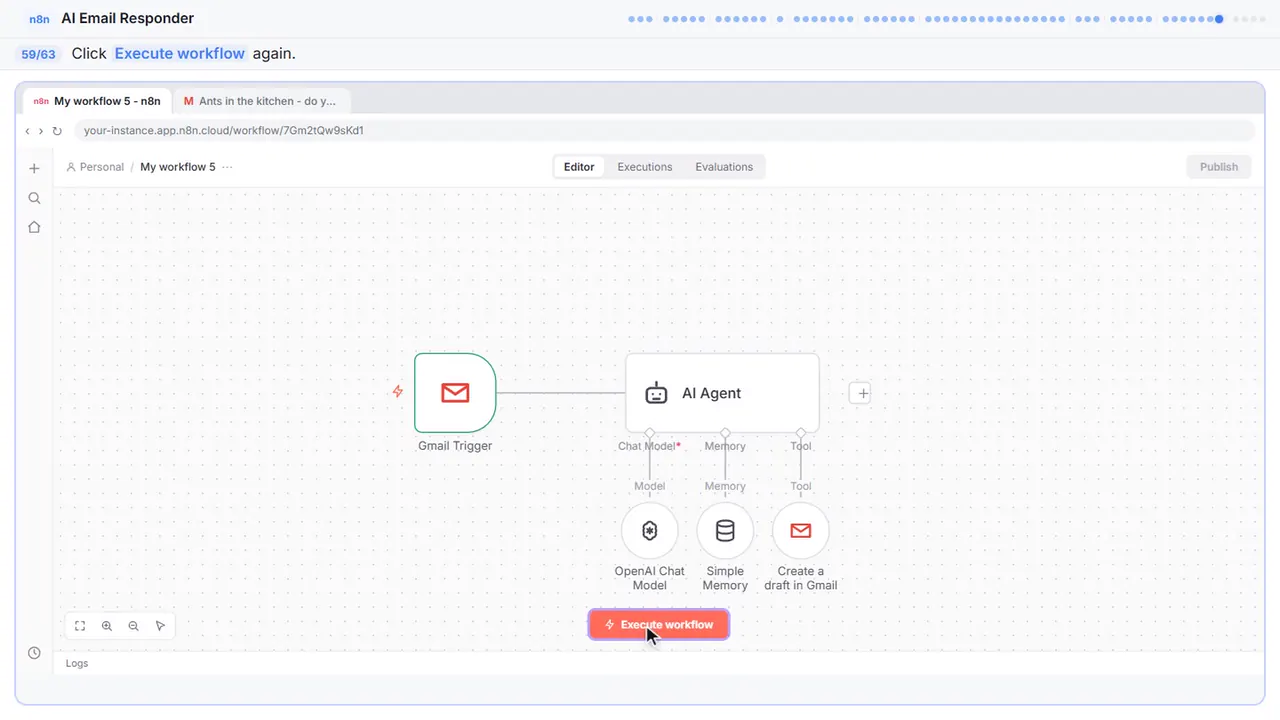
Step 59: Test again
Execute workflow again.
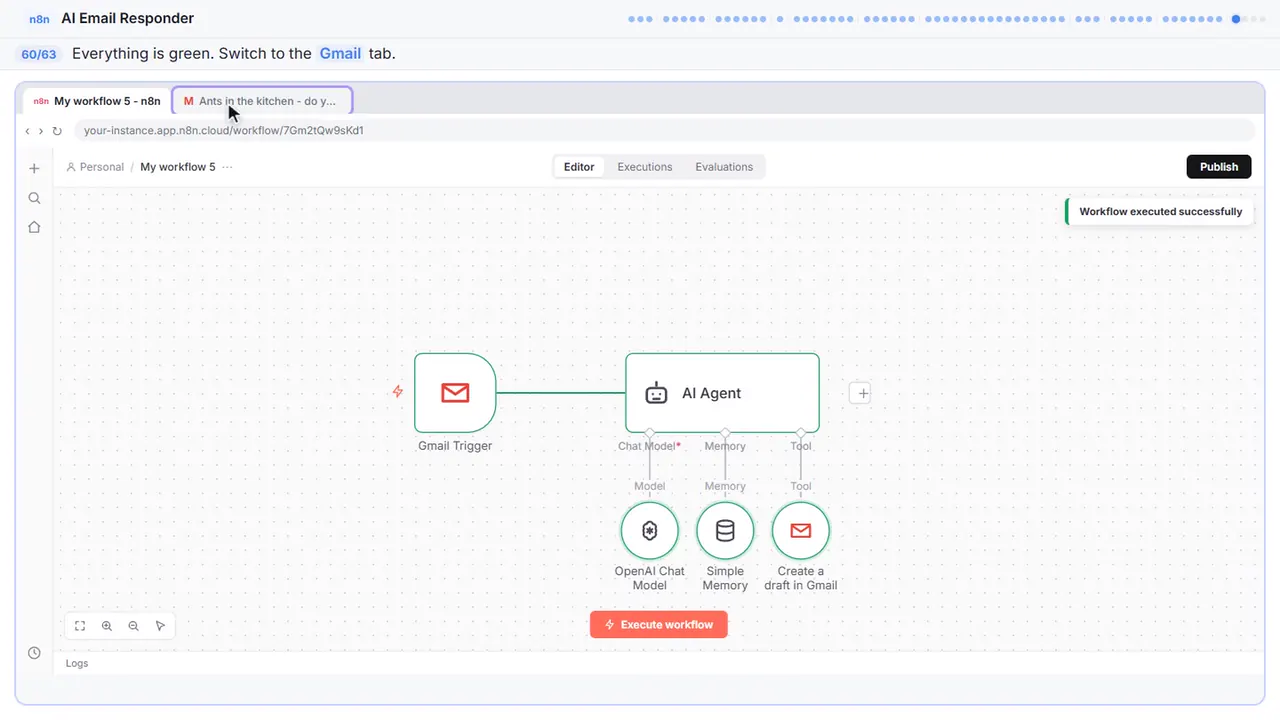
Part 11: Check the draft
Step 60: Check Gmail
All green. Switch to Gmail and see what it wrote.
Step 61: Read the draft, then go back
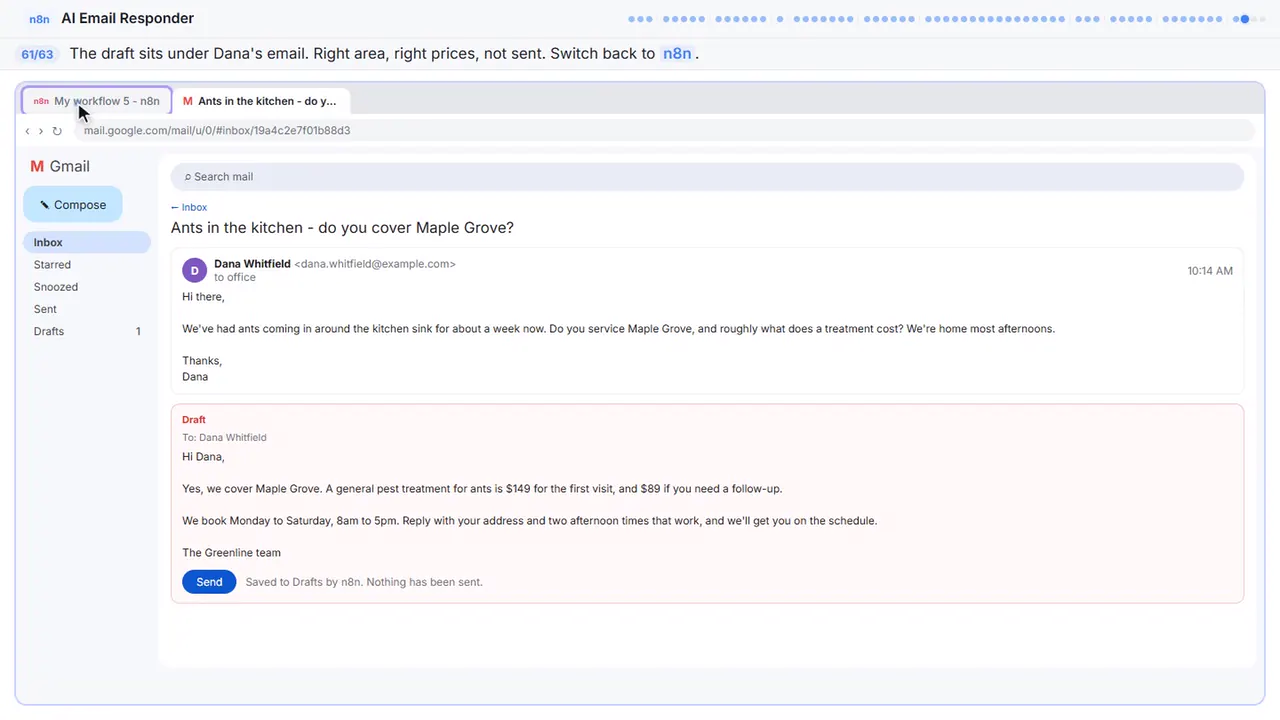
There it is, a draft, right under Dana's email. Yes to Maple Grove, a hundred forty nine for the first visit, and it asks for her address and two times, exactly like we told it. And it has not been sent. You read it, then you hit send. Now go back to n8n.
Step 62: Turn it on
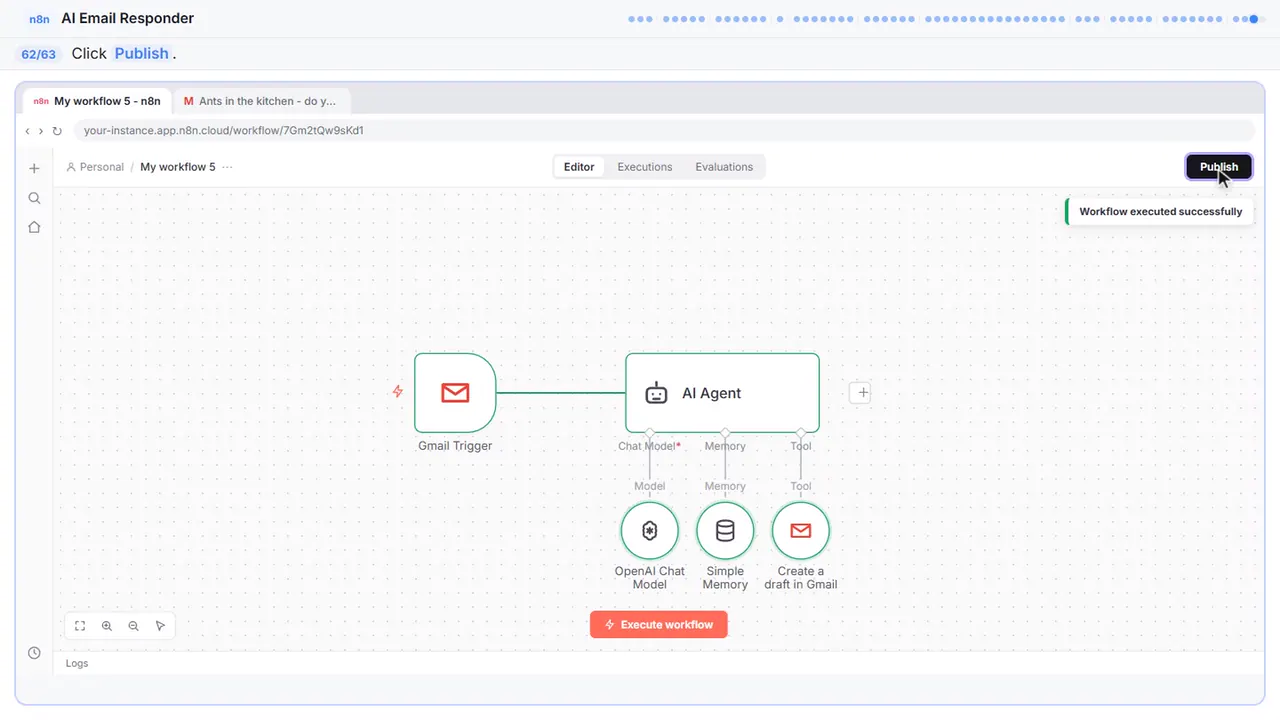
Last step. Right now it only runs when you press execute.
Step 63: Publish it
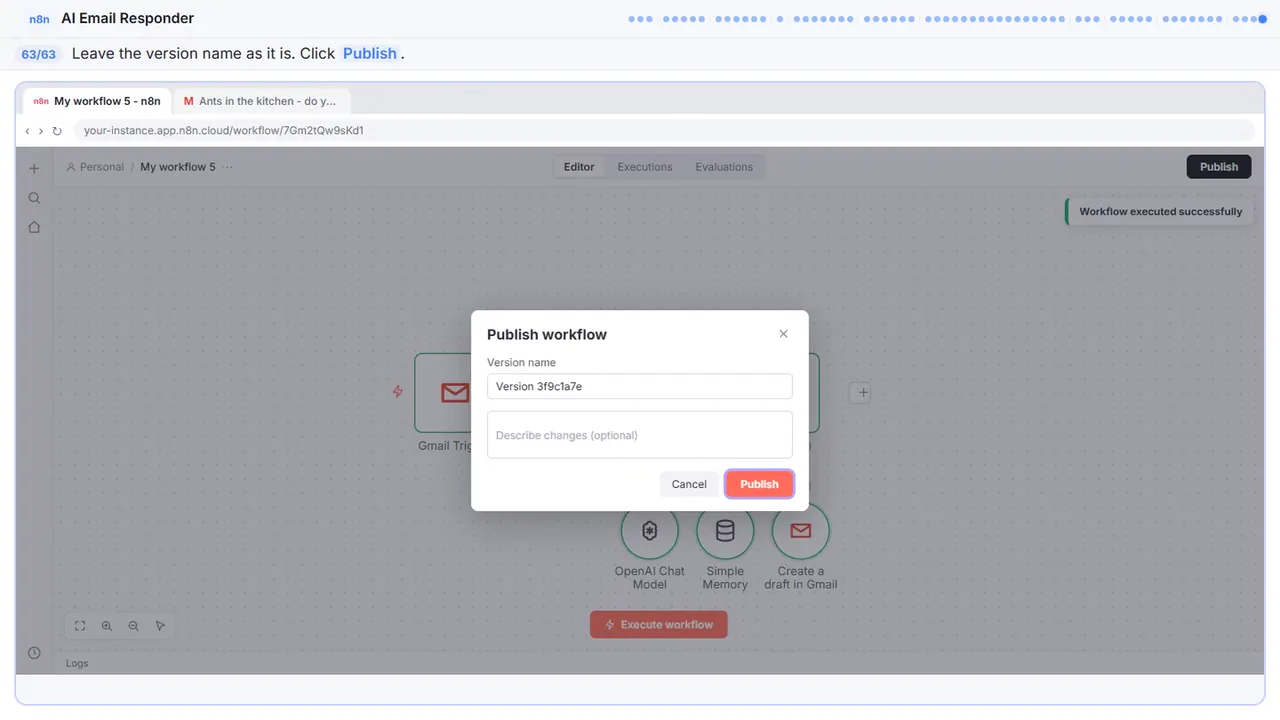
n8n asks for a version name. The default is fine. Every new email gets a draft waiting for you.
Now do it yourself, free
Reading the steps is a start. Doing them is how it sticks. The interactive lesson puts you in a practice copy of n8n: you do every step yourself, it checks your work, and “Do it for me” finishes any step you get stuck on. Nothing touches your real accounts.
Practice “AI Email Responder: Draft Gmail Replies Automatically with n8n” step by stepAI Email Responder: Draft Gmail Replies Automatically with n8n: lesson overview · All free tutorials