Daily Job Alerts: Email Each Tech Their Jobs from Google Sheets with n8n: step-by-step guide with screenshots
Updated
Every morning at 7, n8n reads a plumbing company's jobs sheet, skips anything not assigned yet, and emails each job to the tech it's assigned to — customer, address, time and what's wrong. No AI, just a clean first automation.
About the screenshots. They come from Stepthrough’s simulated practice environment (a practice copy of n8n), not the live tool, so no real account appears. The buttons and labels match the real screens the lesson was built against. Practice it yourself free at learn.ynteractive.com.
- Tools: n8n
- Time: about 10 minutes, 56 steps in 8 parts
- Level: beginner, no coding needed
Part 1: The sheet
Step 1: Look at the sheet
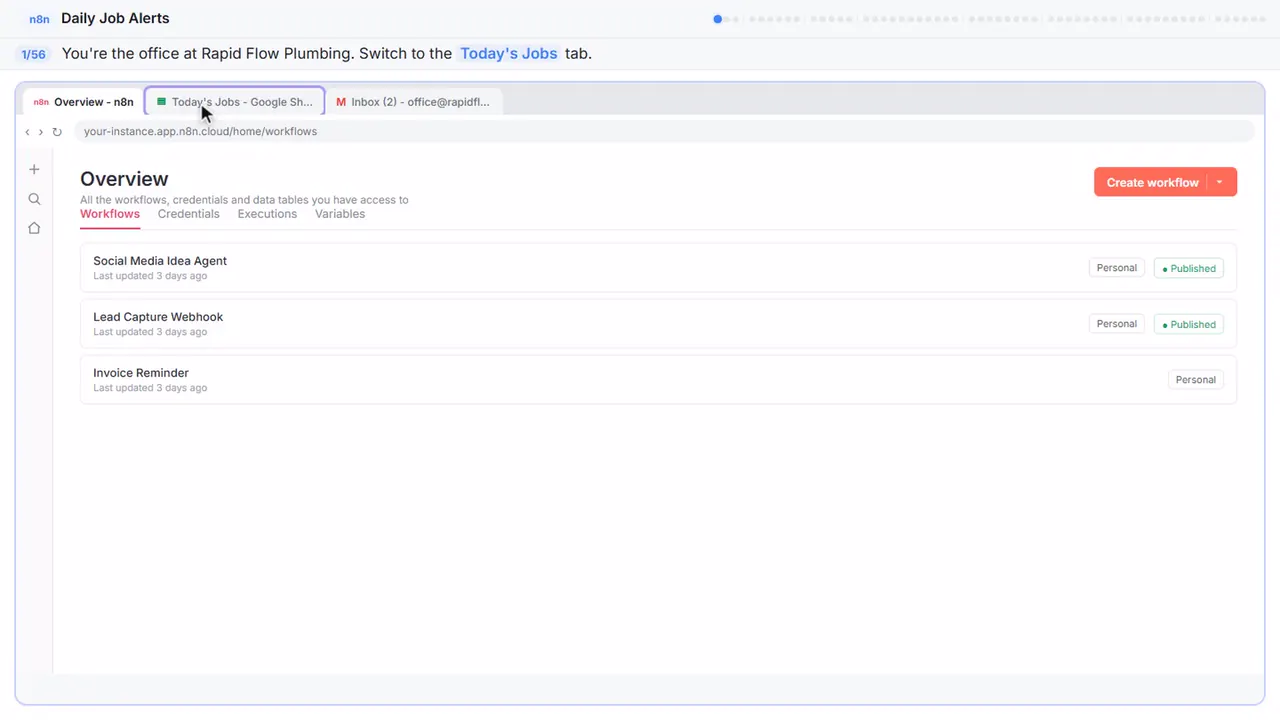
In this module you're the office at Rapid Flow Plumbing. They've got a few techs, and every morning someone copies the day's jobs into emails, one tech at a time. Let's make n8n do it at seven, on its own. First, look at the sheet. Switch to the today's jobs tab.
Step 2: Meet the techs
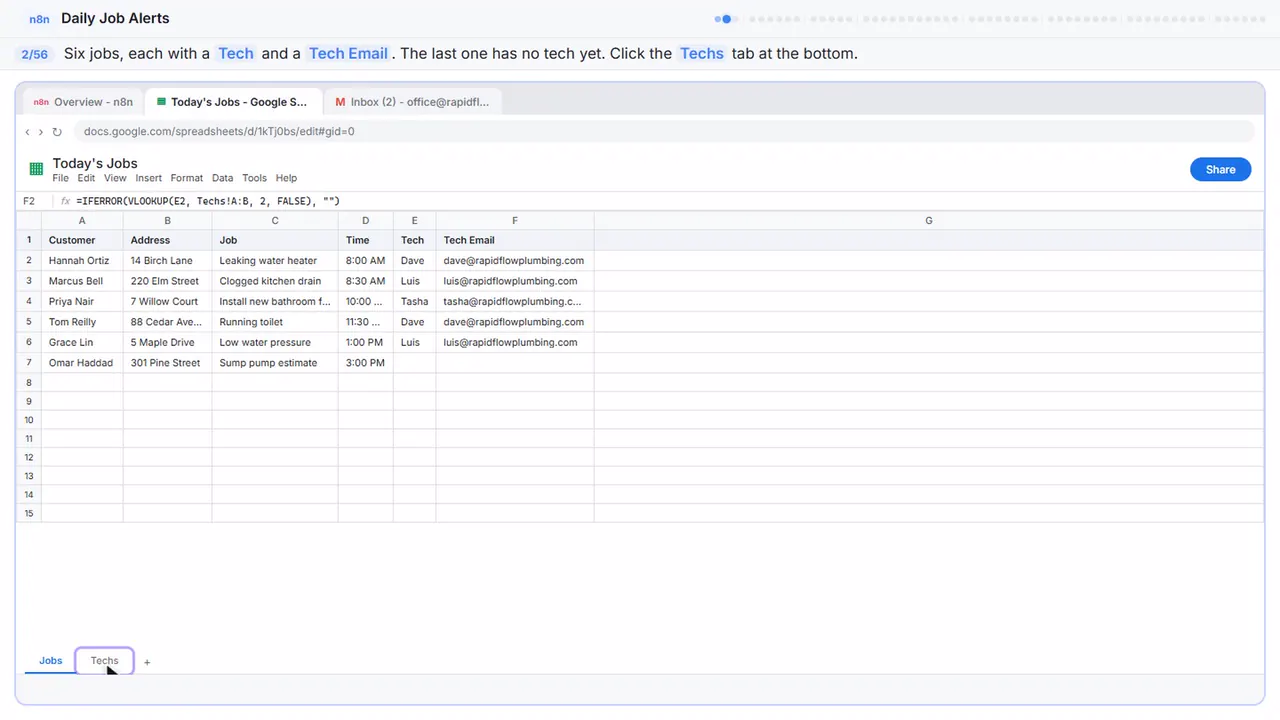
Six jobs today. Customer, address, job and time, plus two new columns: tech, and tech email. Remember those column names, we'll use them. Notice the last job, the sump pump estimate, has no tech yet.
Step 3: Back to n8n
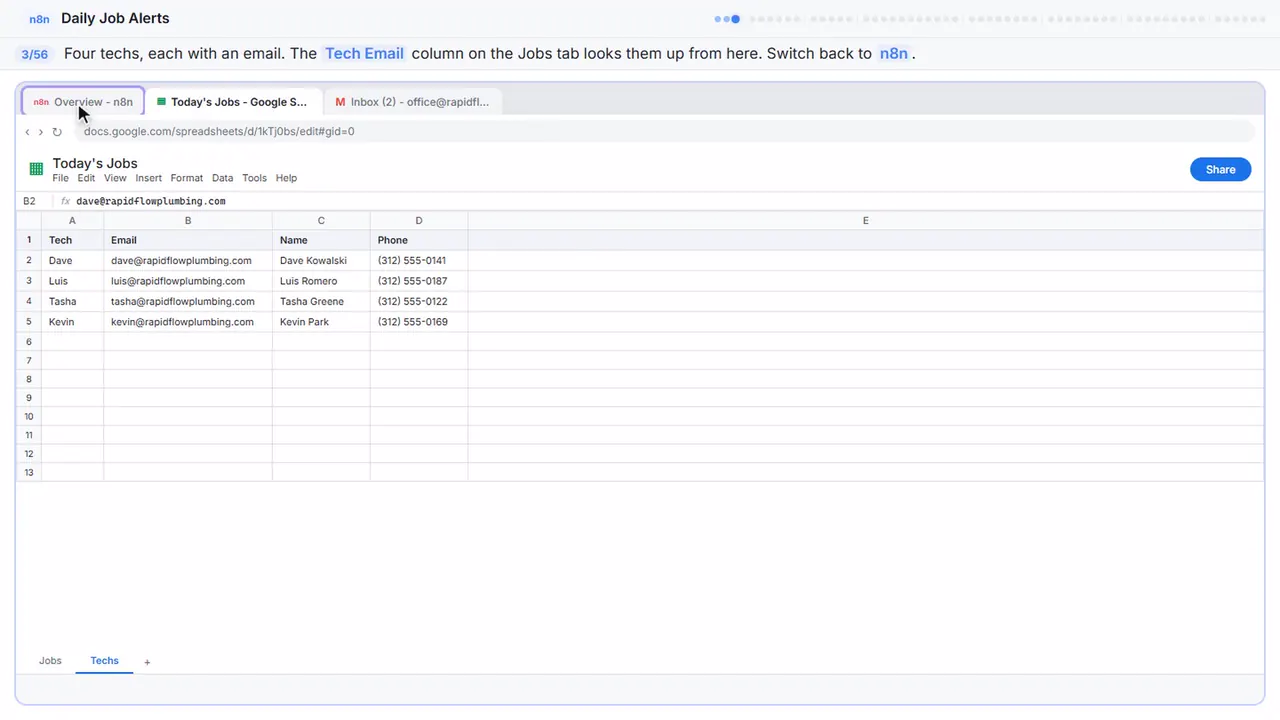
Four techs, each with their own email. The tech email column on the jobs tab just looks it up from here, so the office only types a first name. Back to n8n.
Part 2: Timezone
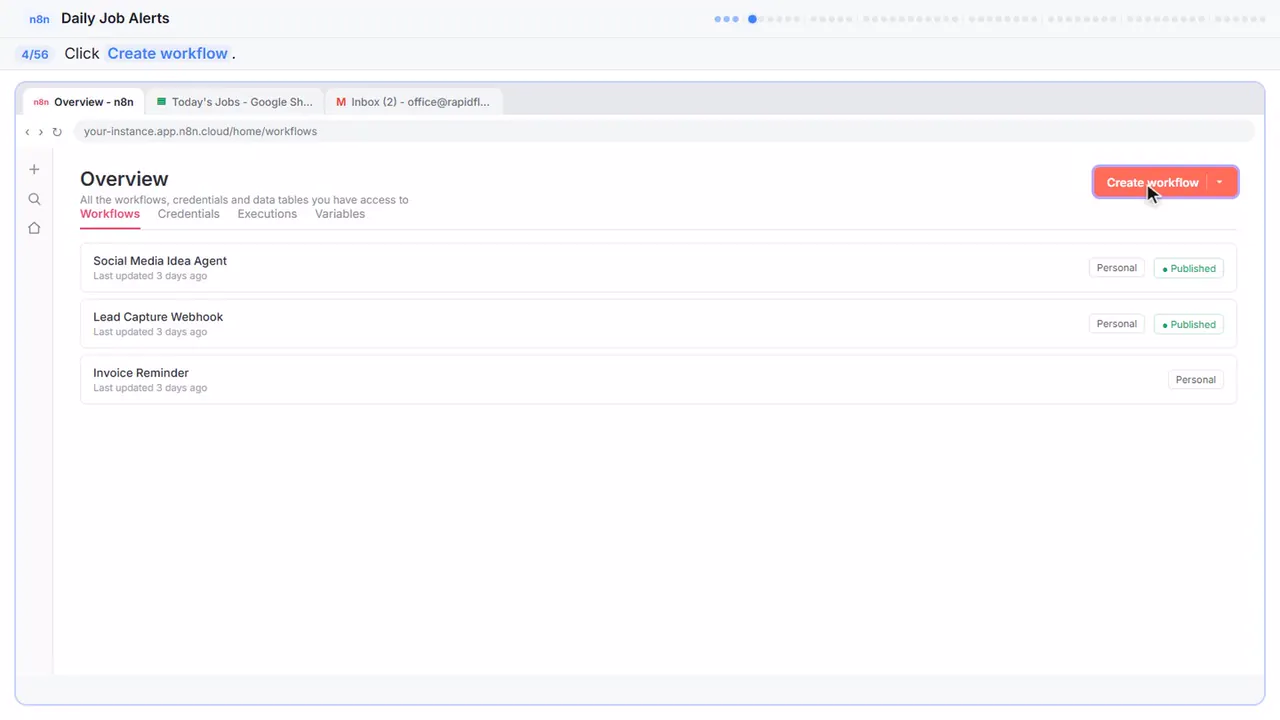
Step 4: Create a workflow
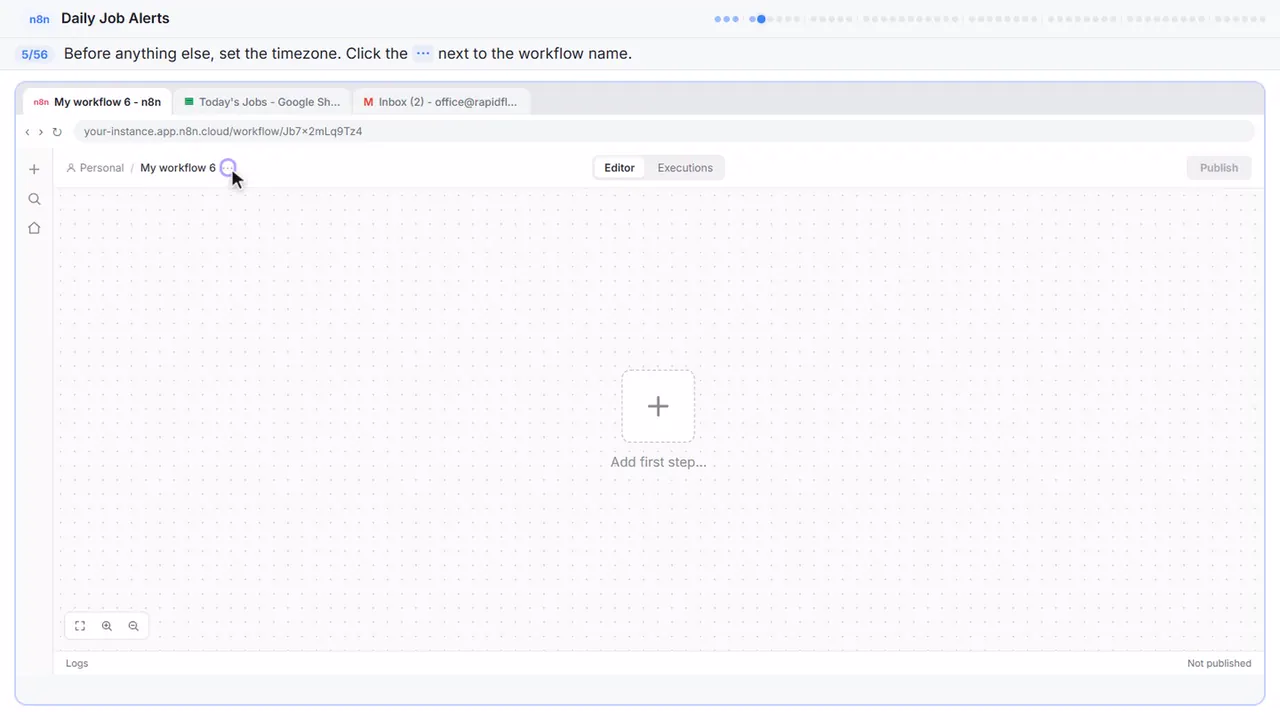
Step 5: Open the workflow menu
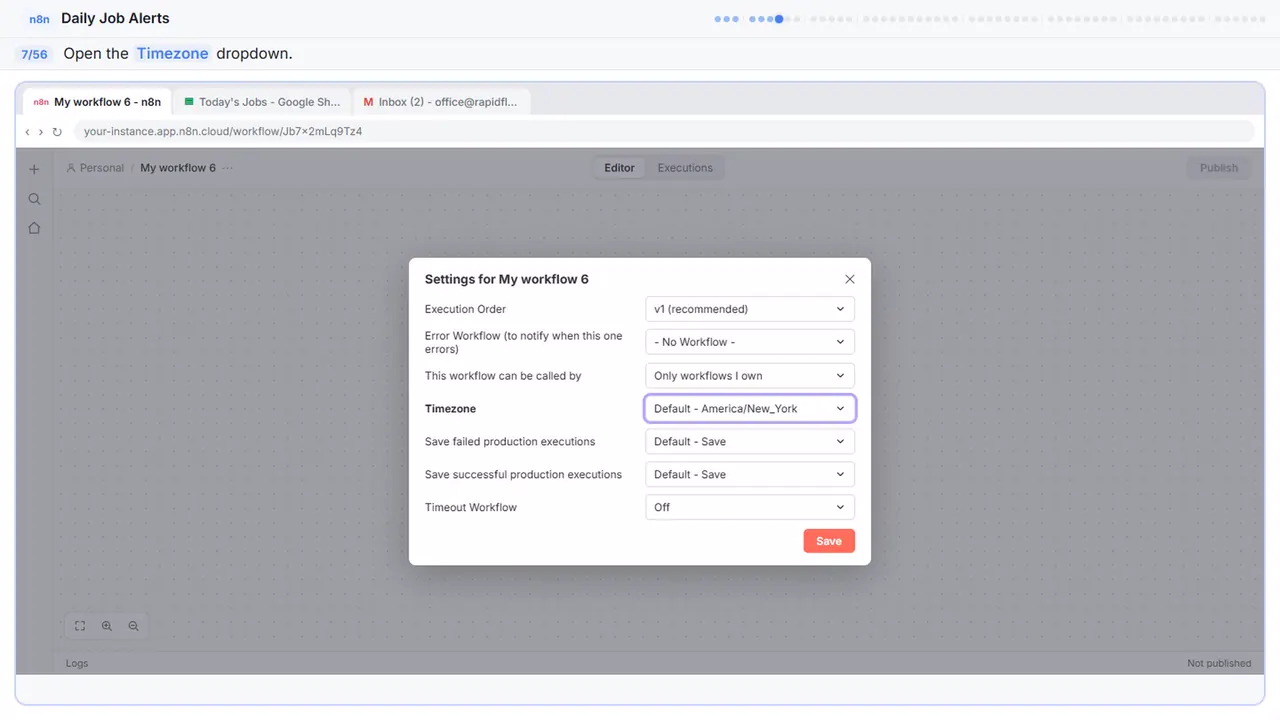
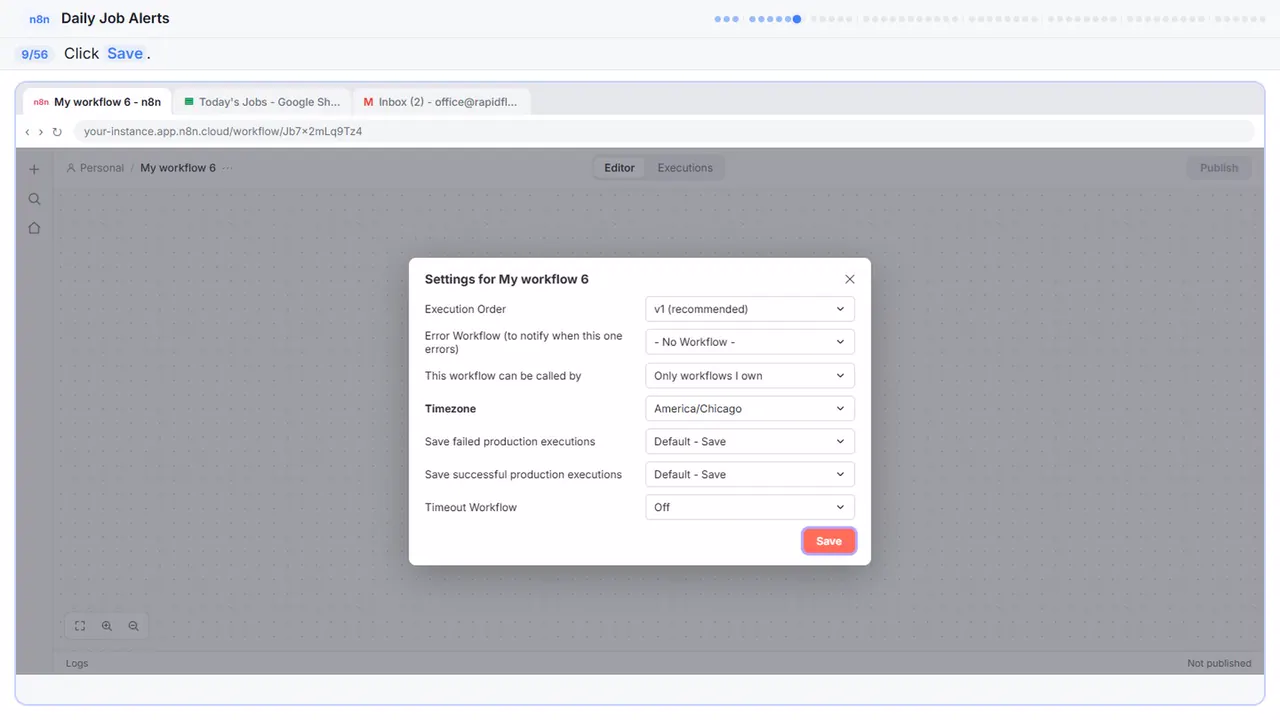
Before we build anything, one setting that trips everyone up. A schedule runs on the workflow's timezone, and it defaults to New York. If you're not on Eastern time, seven a m will be the wrong seven a m.
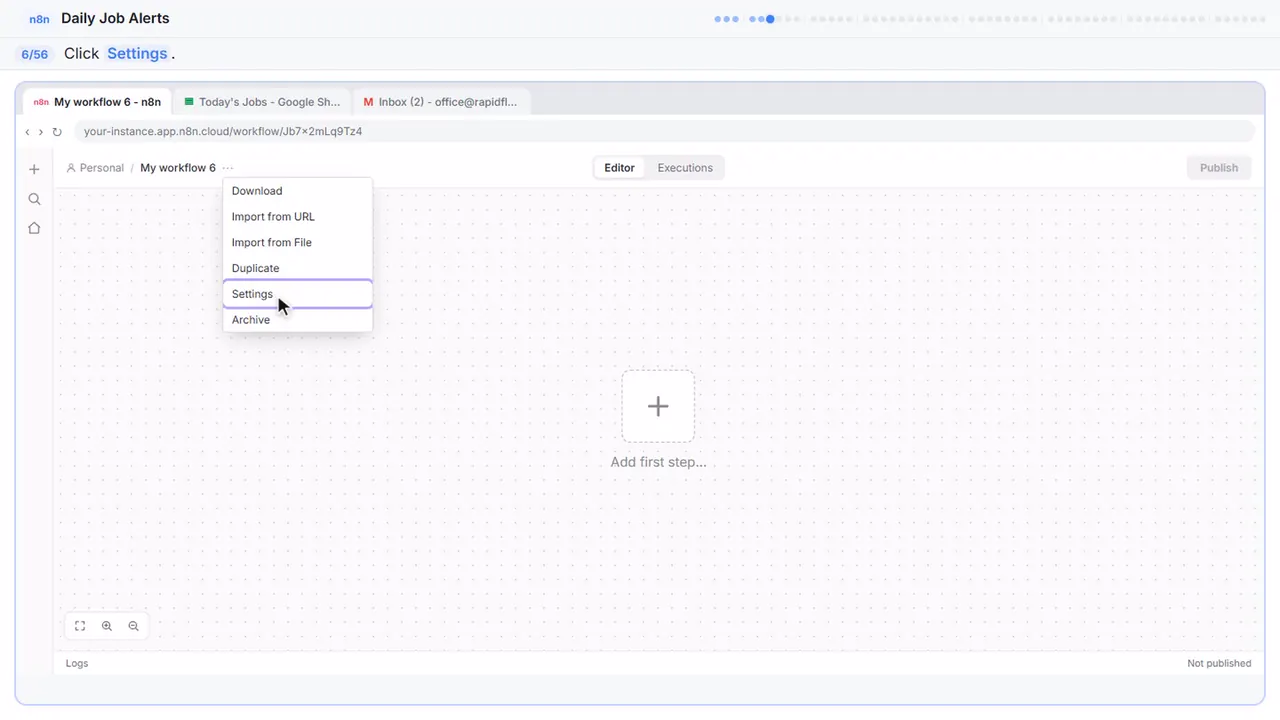
Step 6: Settings
Settings.
Step 7: Timezone
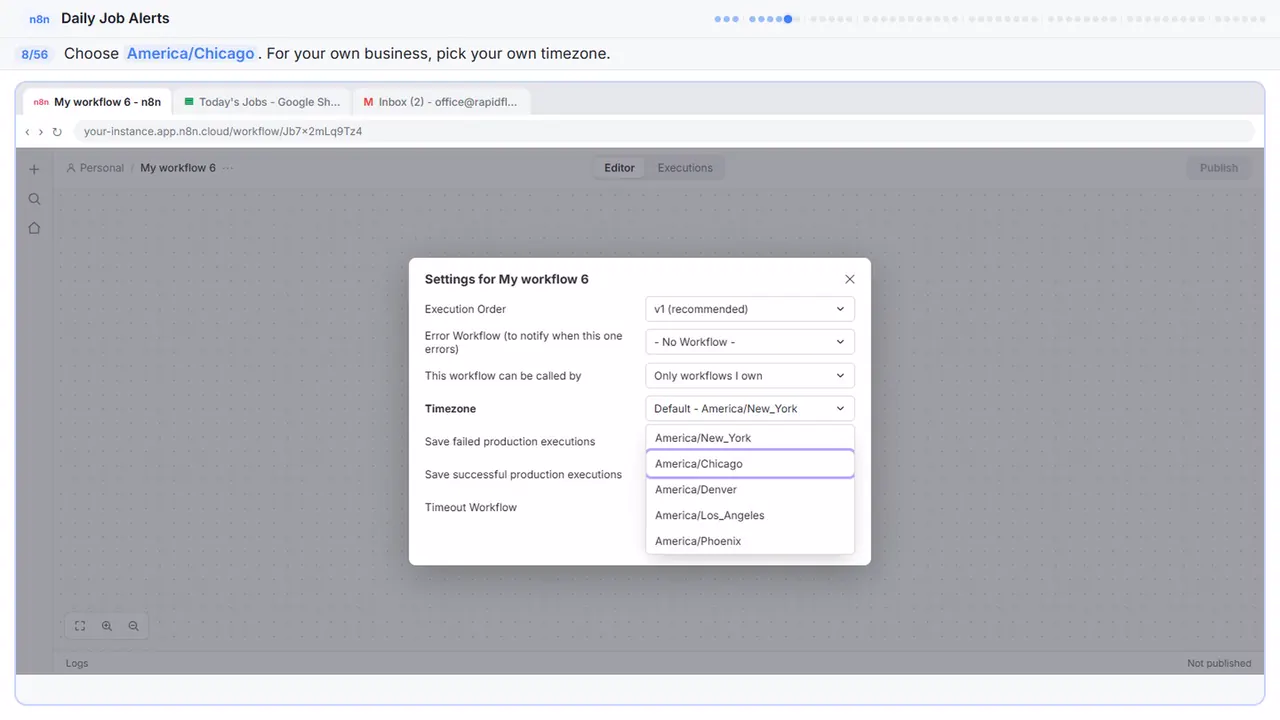
Step 8: Pick your timezone
Rapid Flow is on Central time, so pick America Chicago. When you build yours, pick your own.
Step 9: Save settings
Save.
Part 3: Schedule
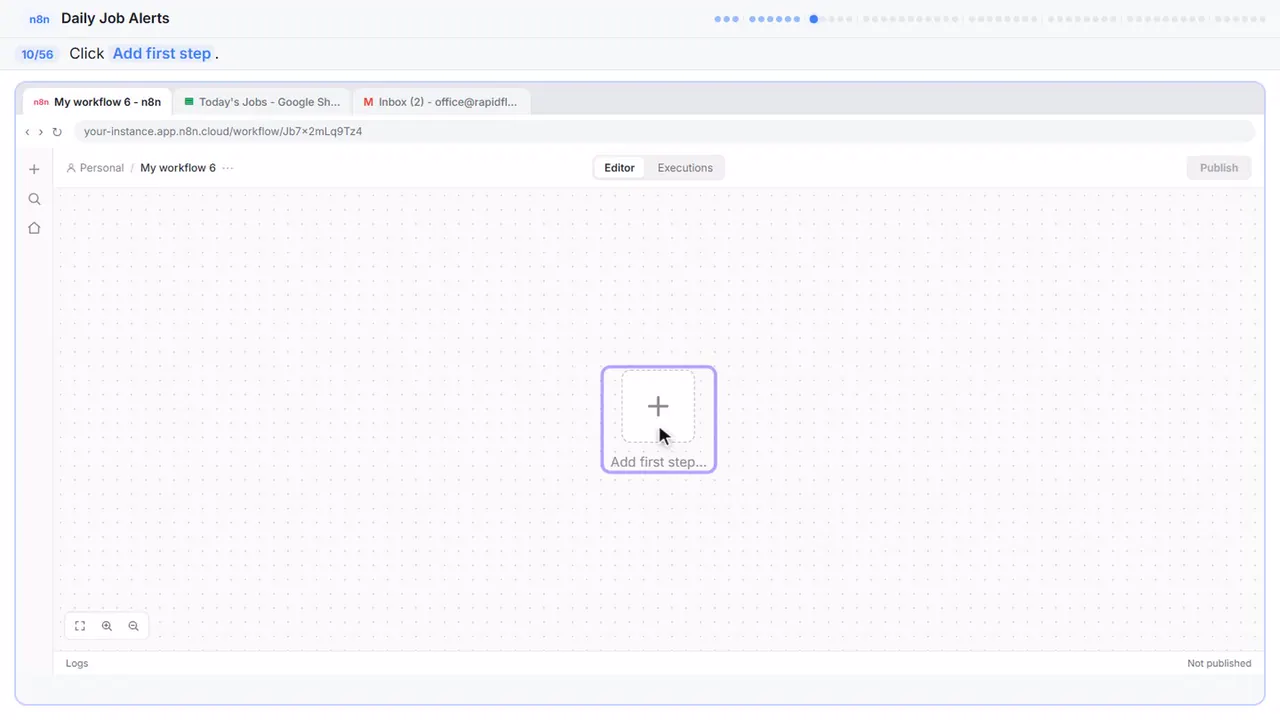
Step 10: Add the trigger
Now the trigger.
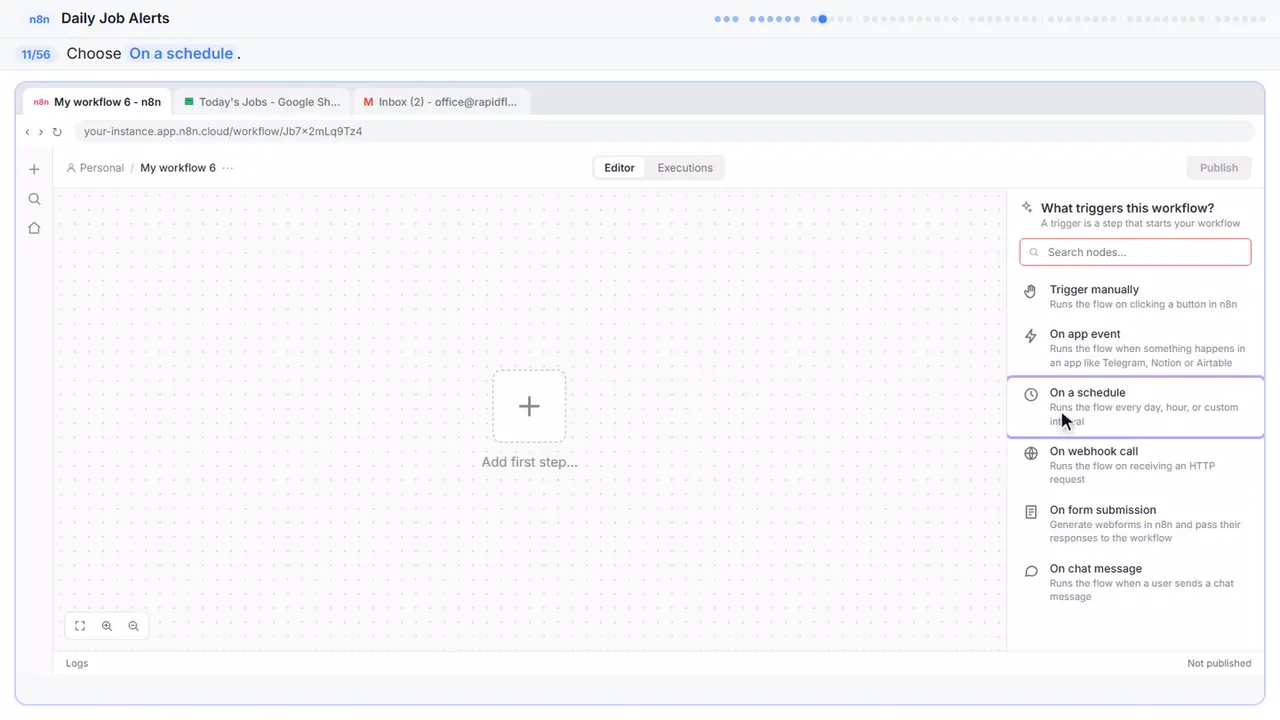
Step 11: On a schedule
On a schedule. No one has to press anything, the clock starts it.
Step 12: Pick the hour
It's already set to every one day, which is what we want. But it fires at midnight. Nobody reads job emails at midnight.
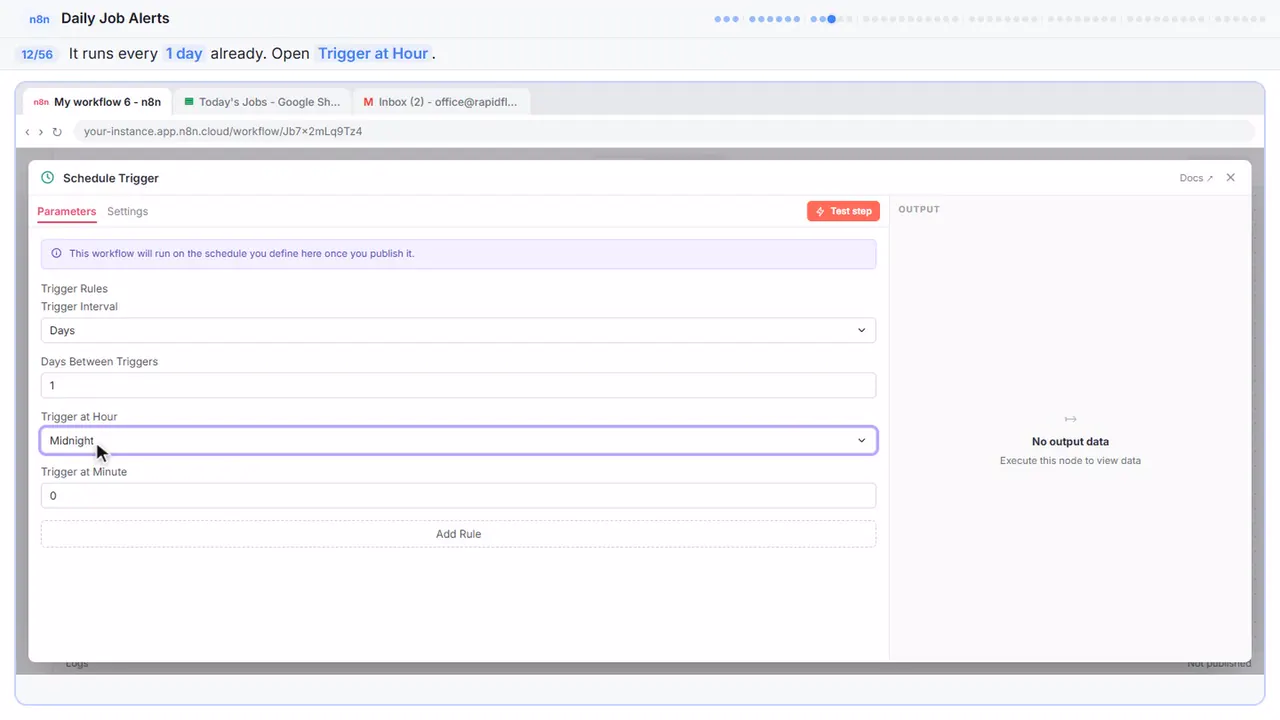
Step 13: 7am
Seven a m, in the Central timezone we just set.
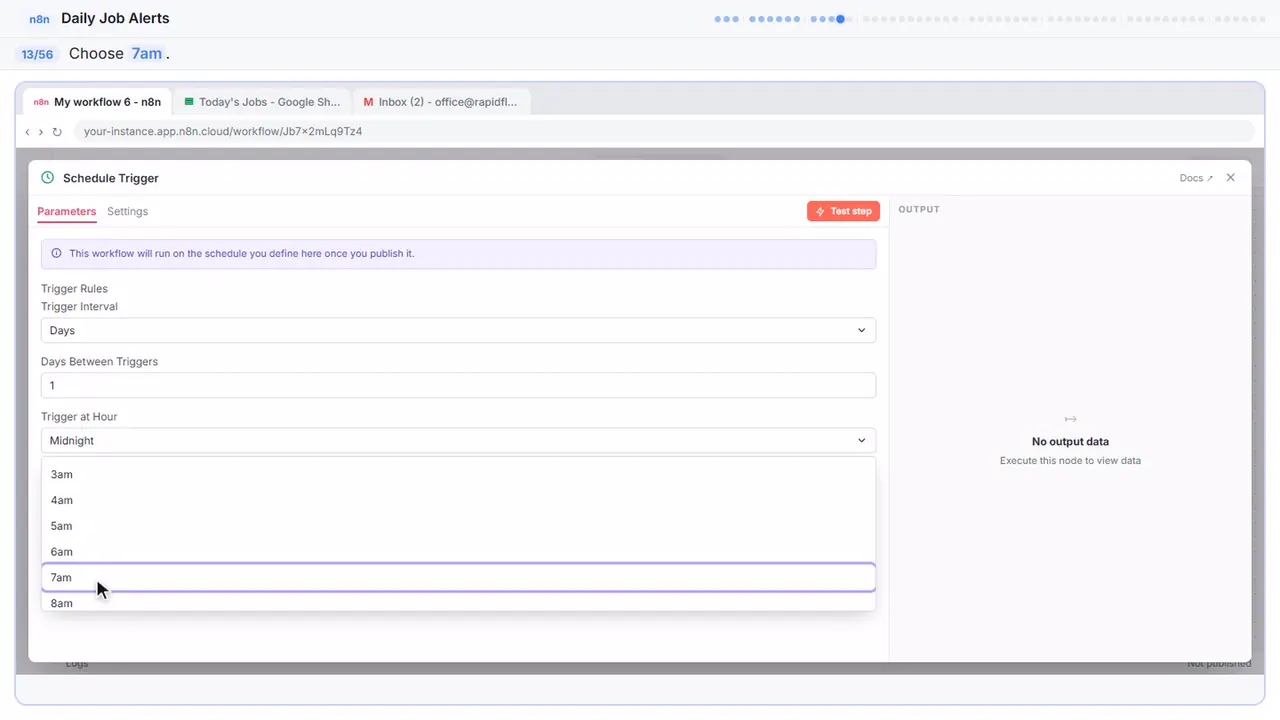
Step 14: Close the node
Close it.
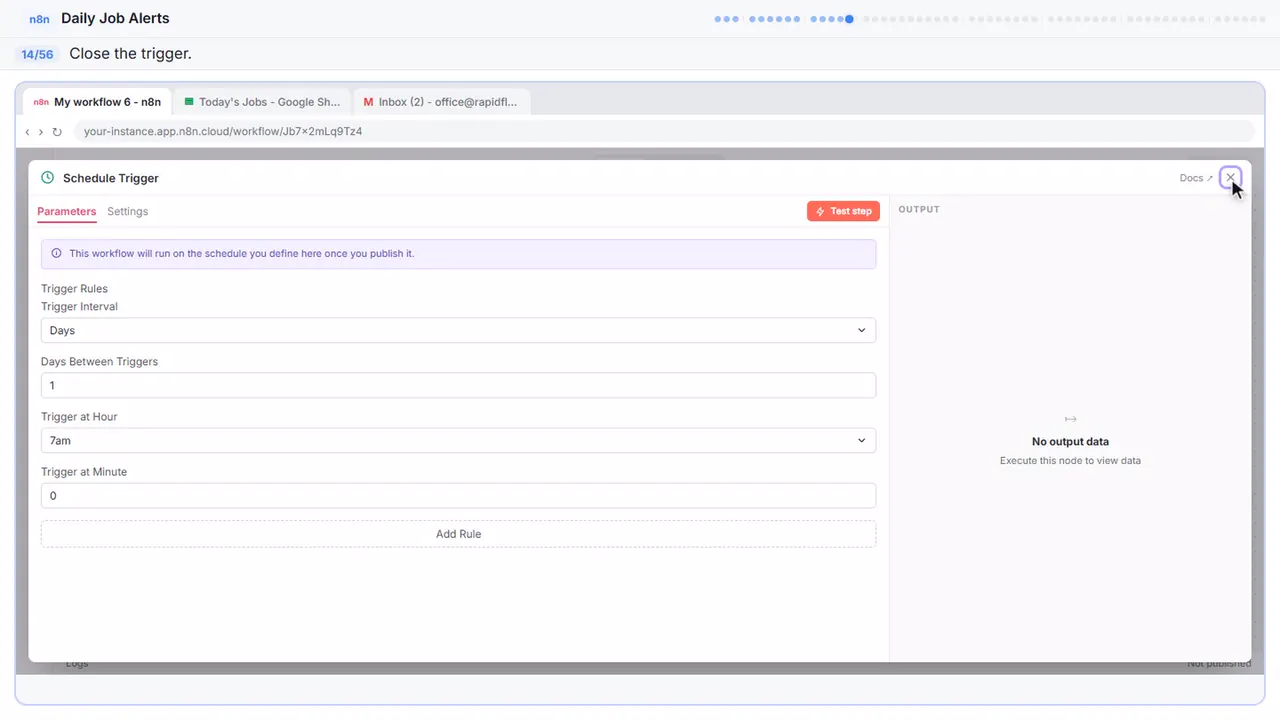
Part 4: Read the sheet
Step 15: Add the next step
At seven, the first thing to do is read the sheet.
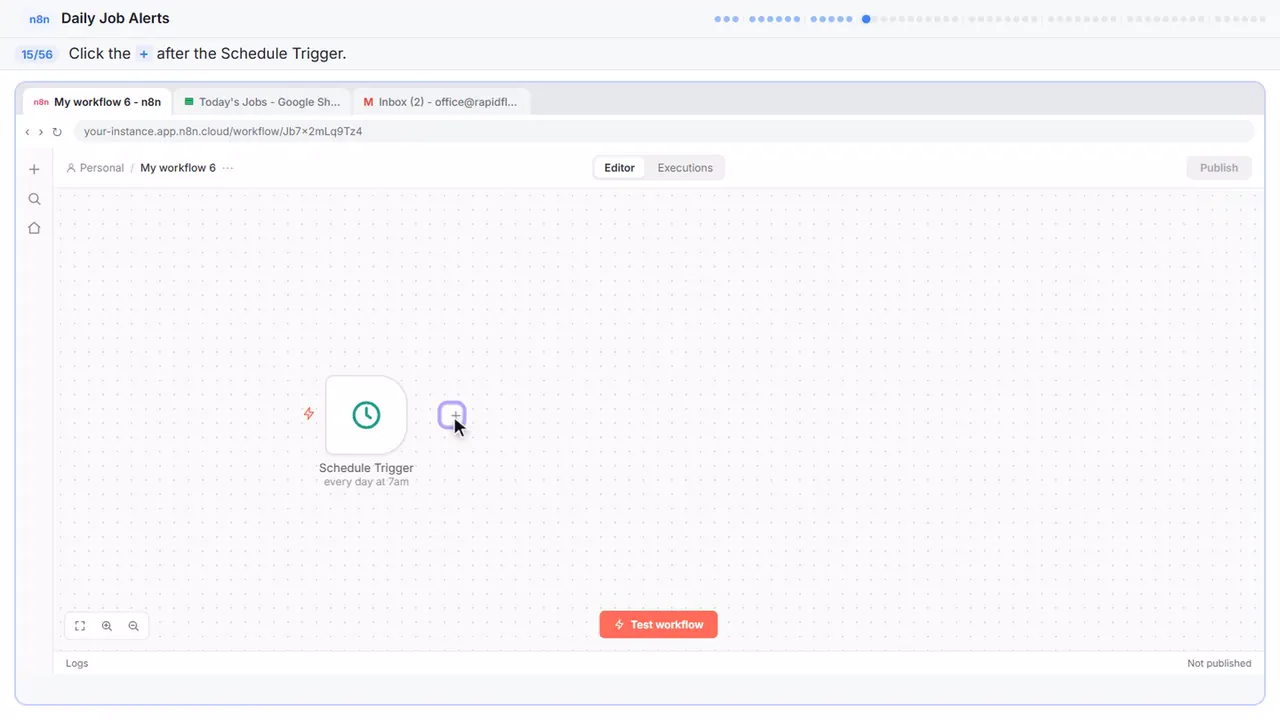
Step 16: Search for Sheets
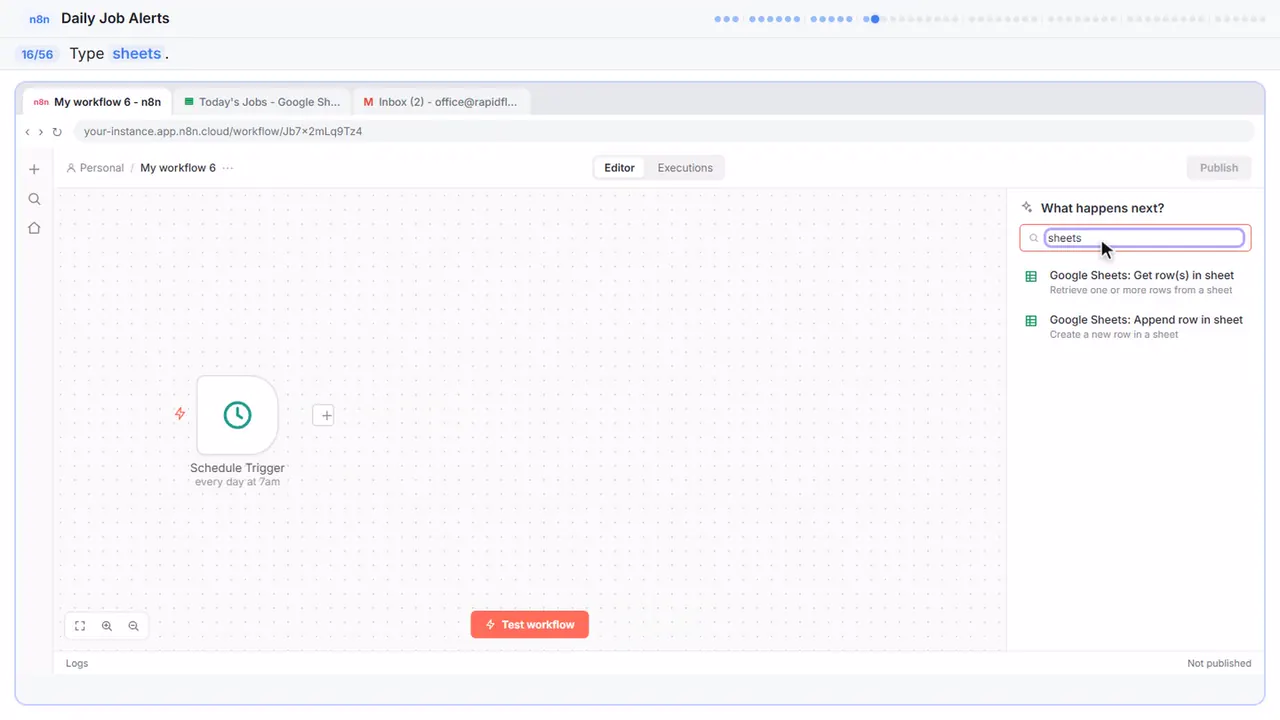
Step 17: Get row(s) in sheet
Get rows in sheet. That reads rows. Append would add rows, which is not what we want here.
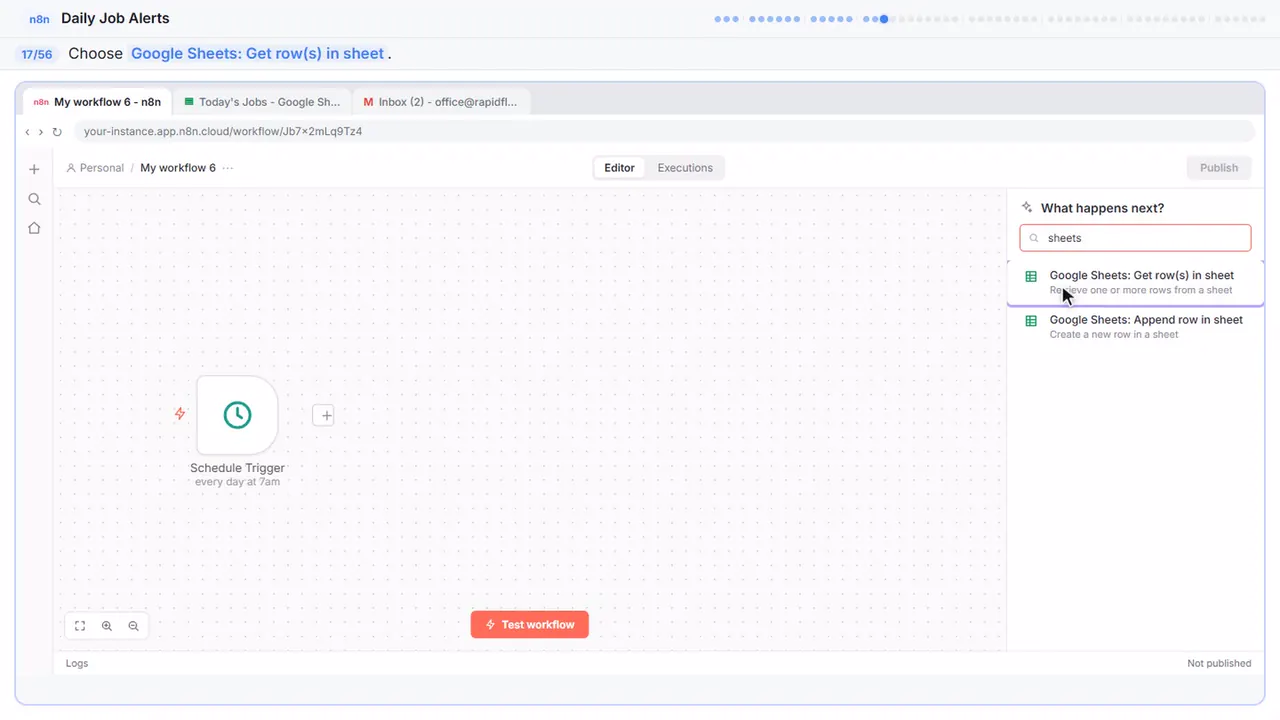
Step 18: Credential
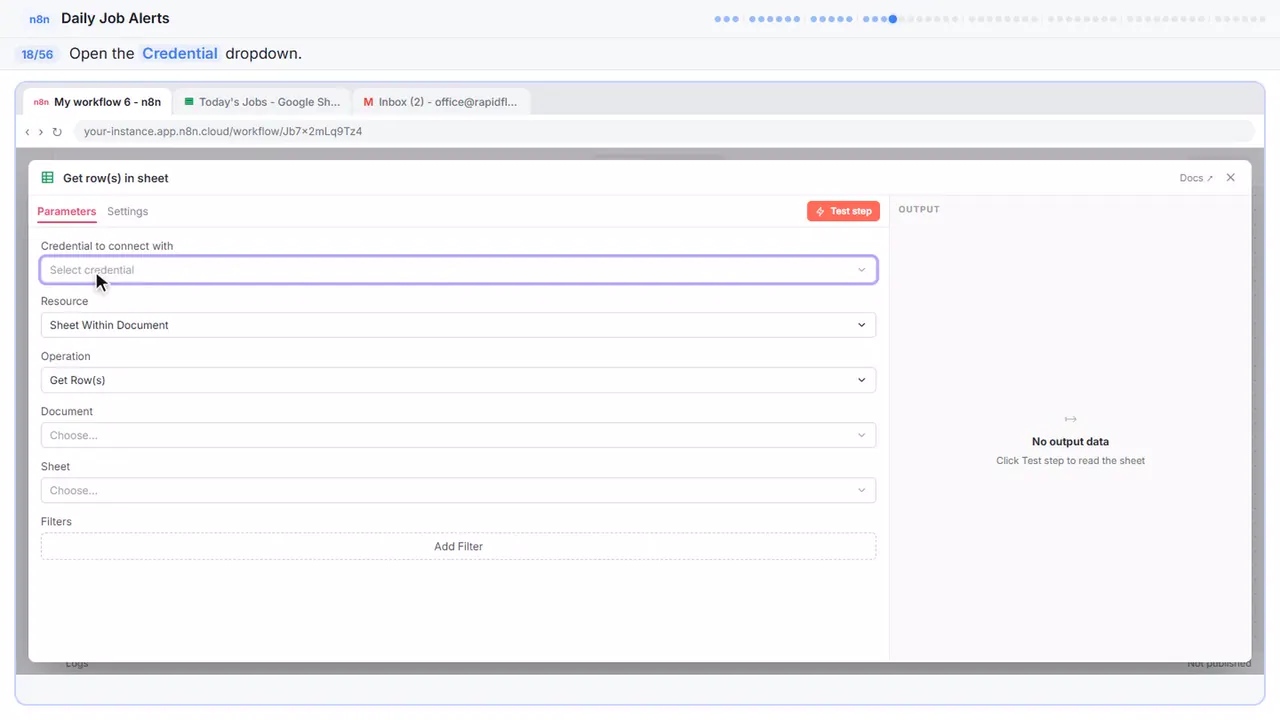
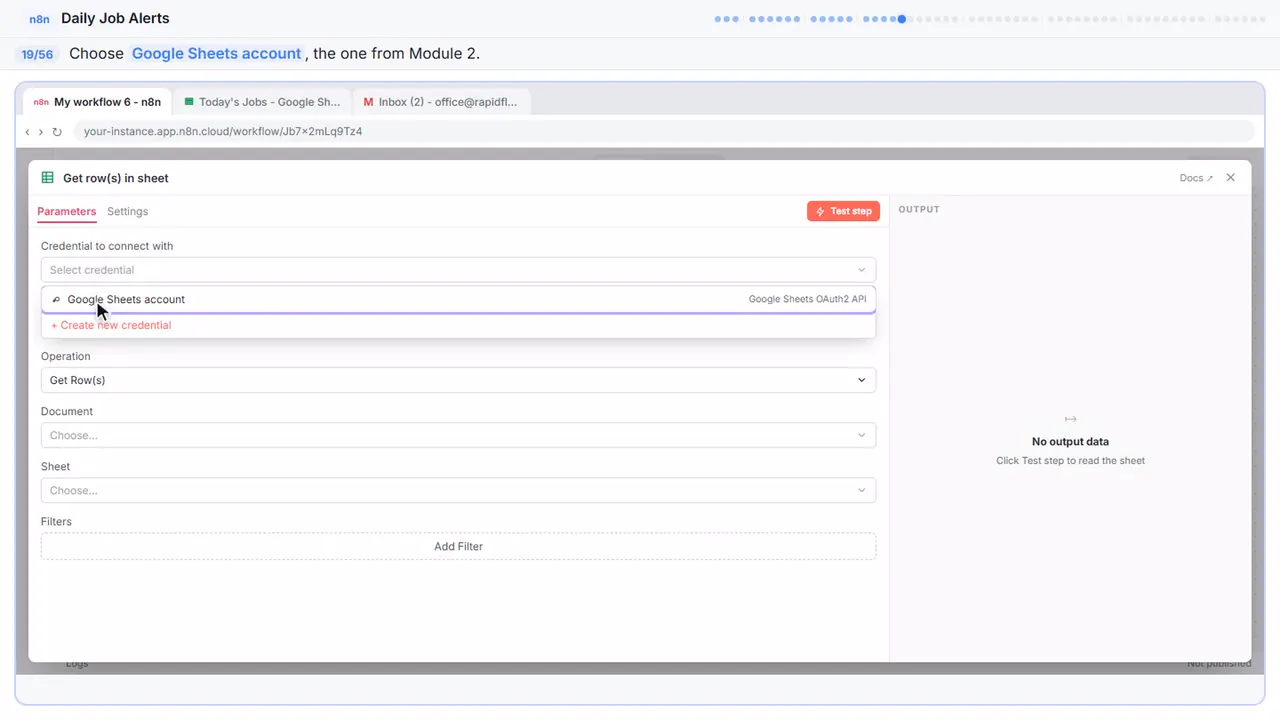
Step 19: Reuse your Google login
Pick google sheets account. You connected it back in Module 2, so n8n already has permission. If you skipped that, create a new one and sign in with Google.
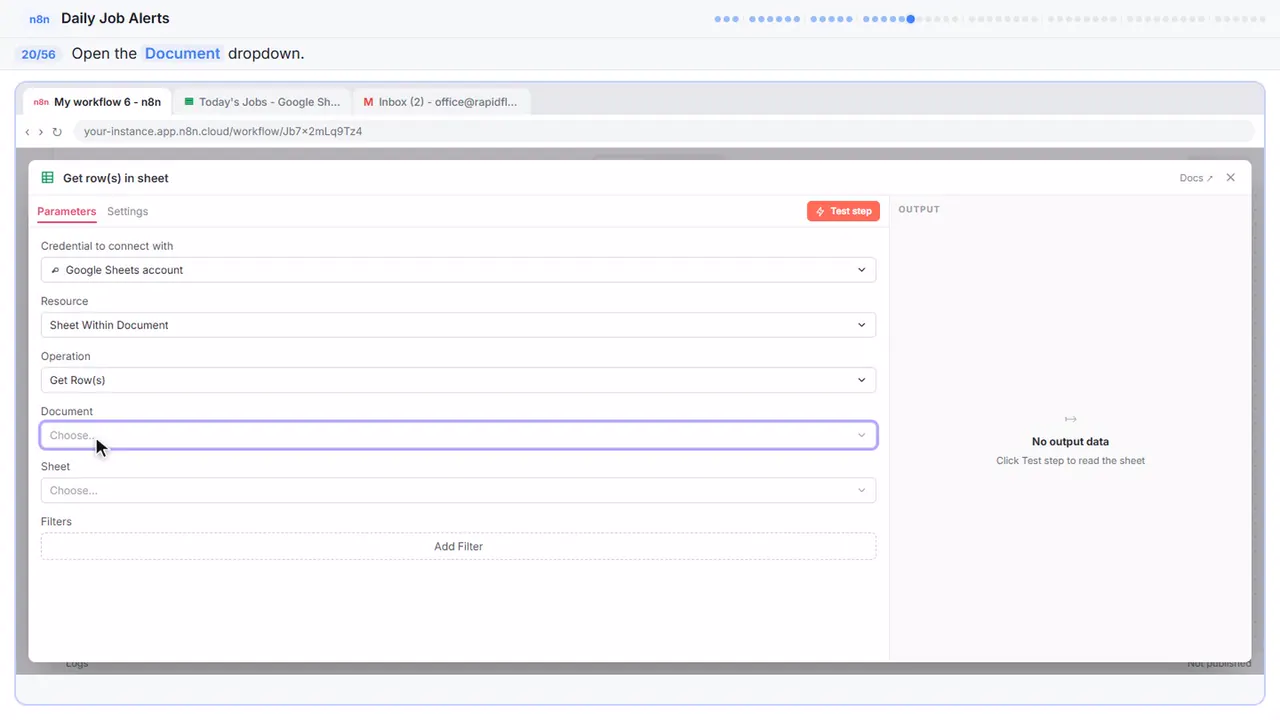
Step 20: Pick the document
Now which spreadsheet.
Step 21: Today's Jobs
Today's jobs.
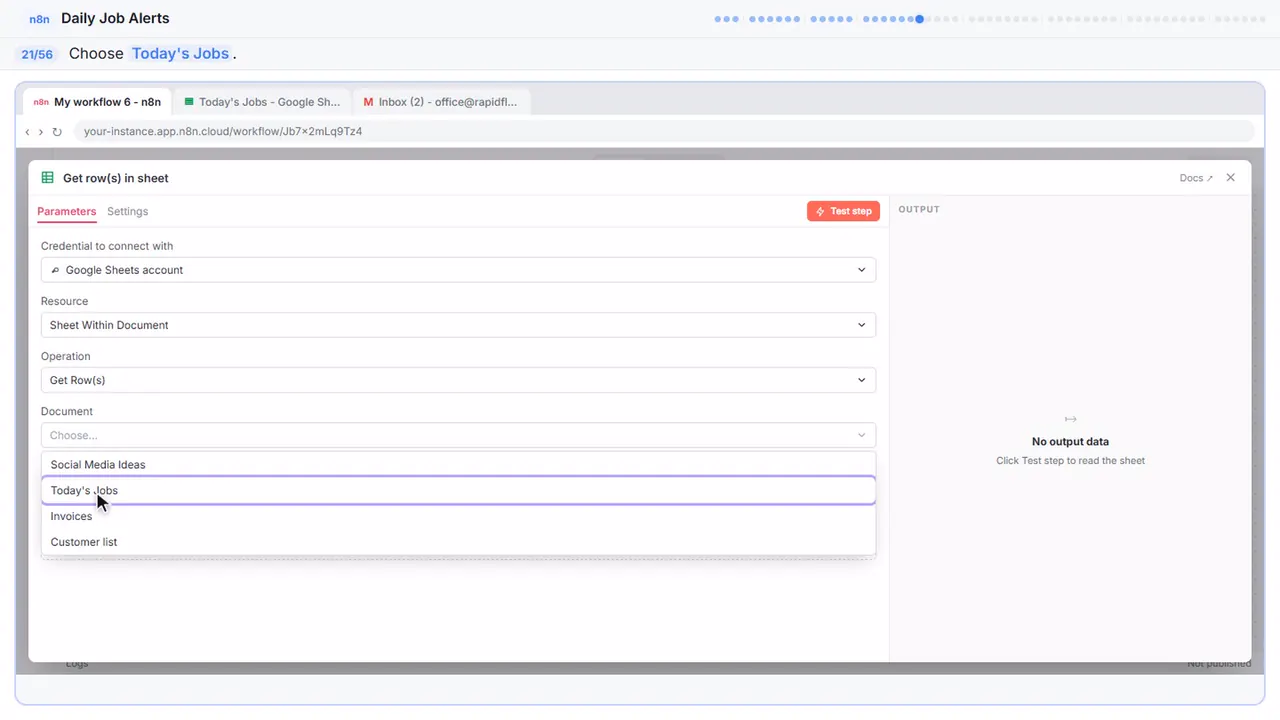
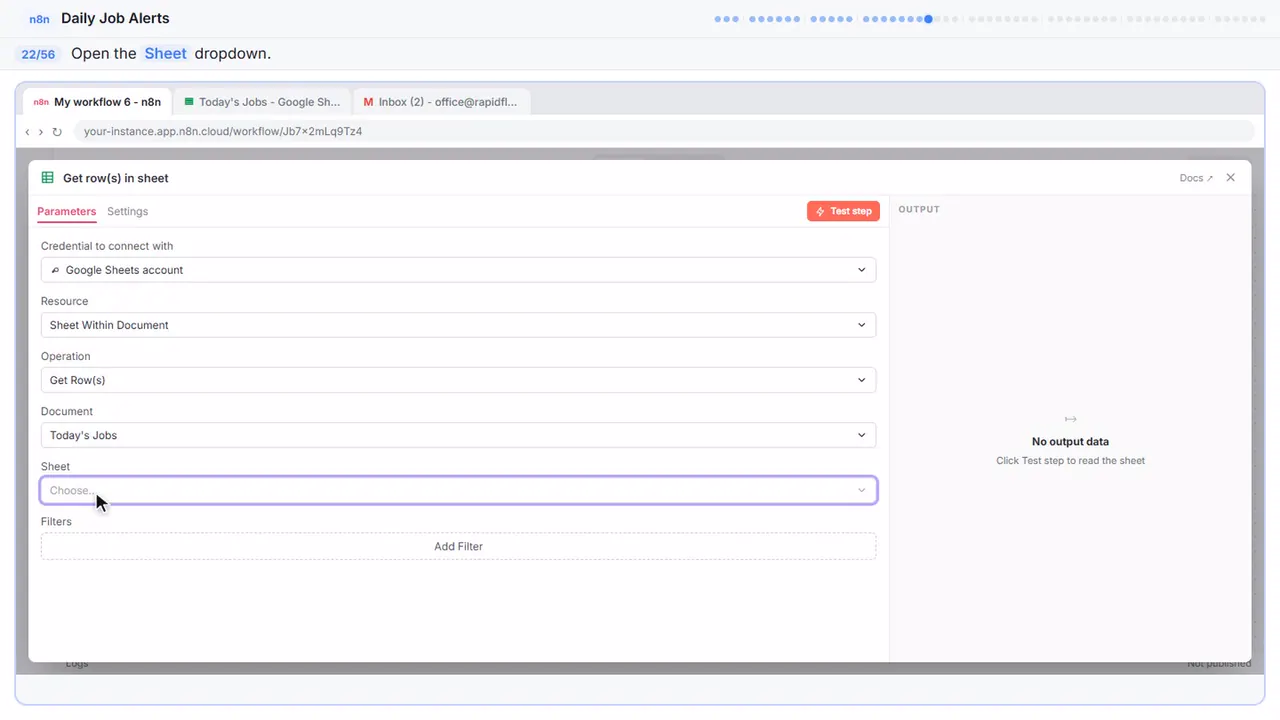
Step 22: Pick the tab
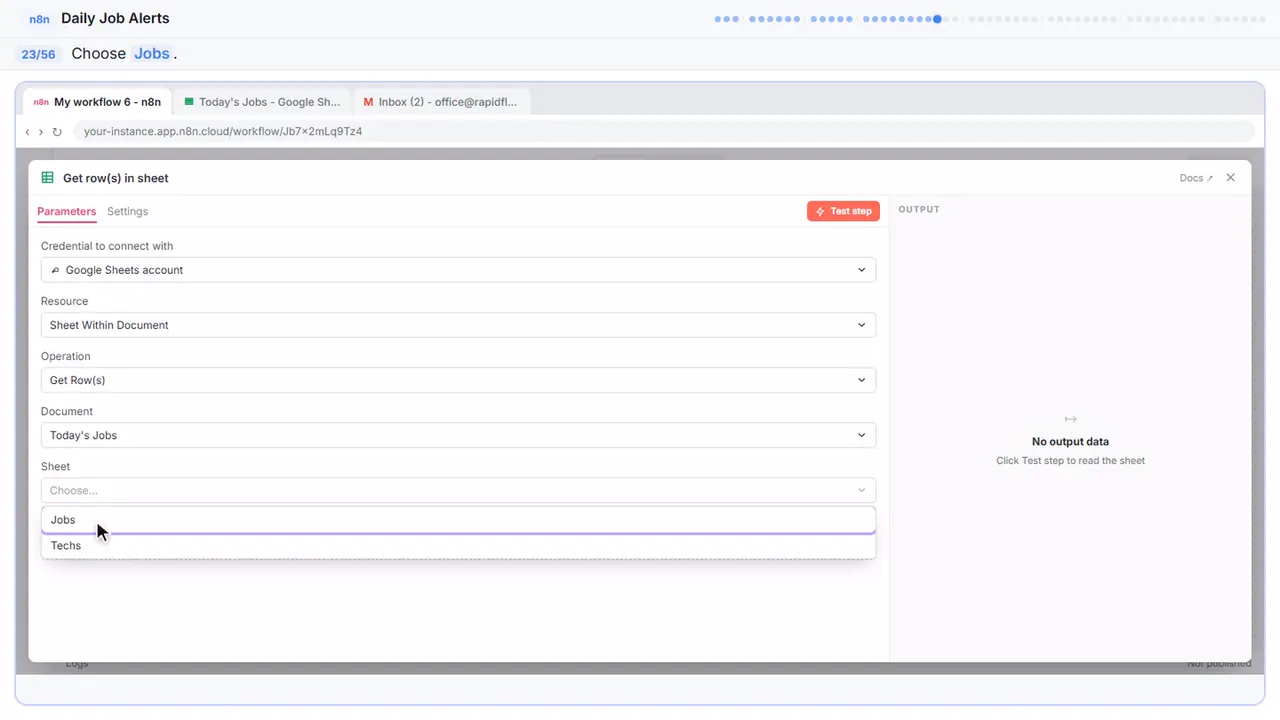
Step 23: Jobs
Jobs. Not techs, we already have the email on every job.
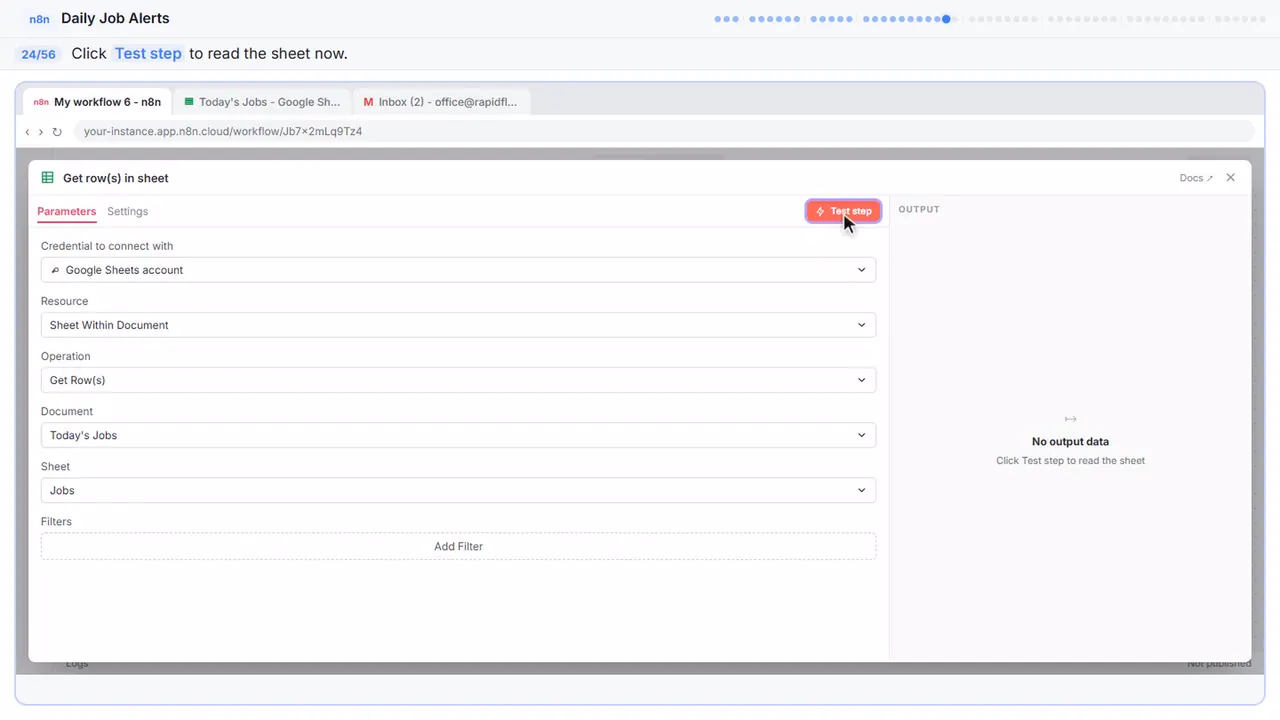
Step 24: Test the step
Don't wait for seven a m to find out if it works.
Step 25: Close the node
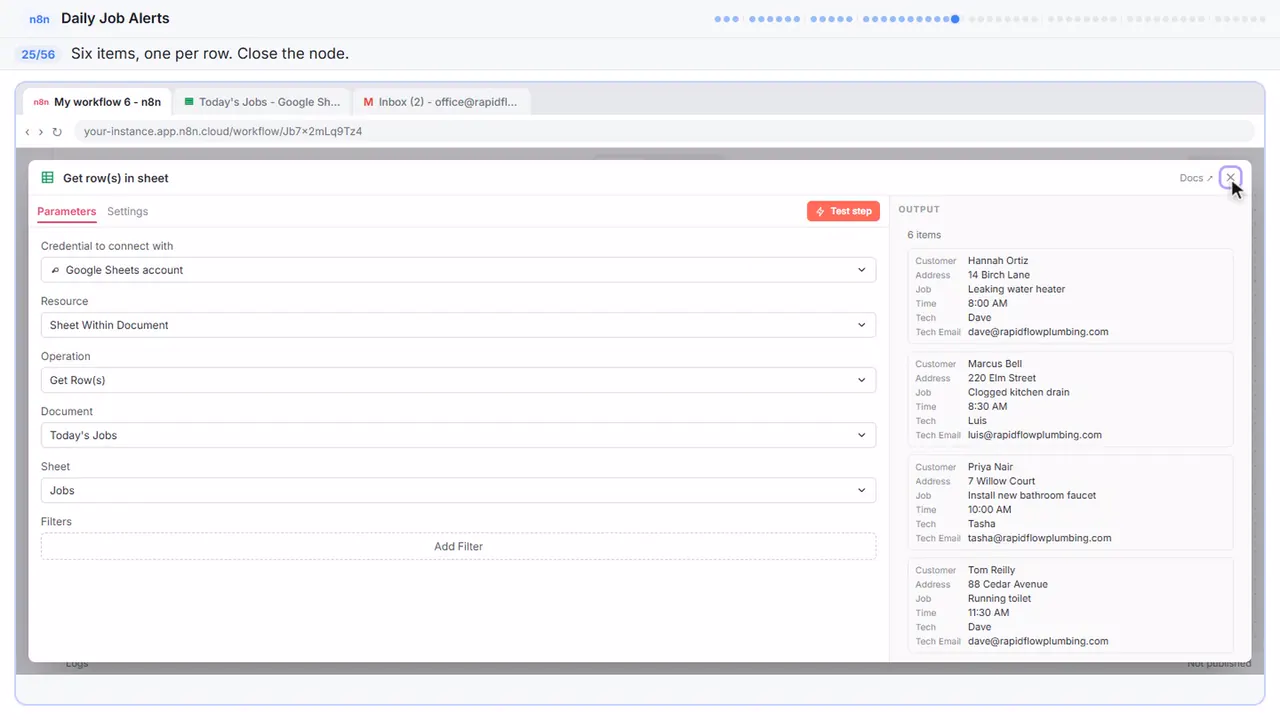
Six items, one for each row, with the column names as labels. Close it.
Part 5: Skip unassigned jobs
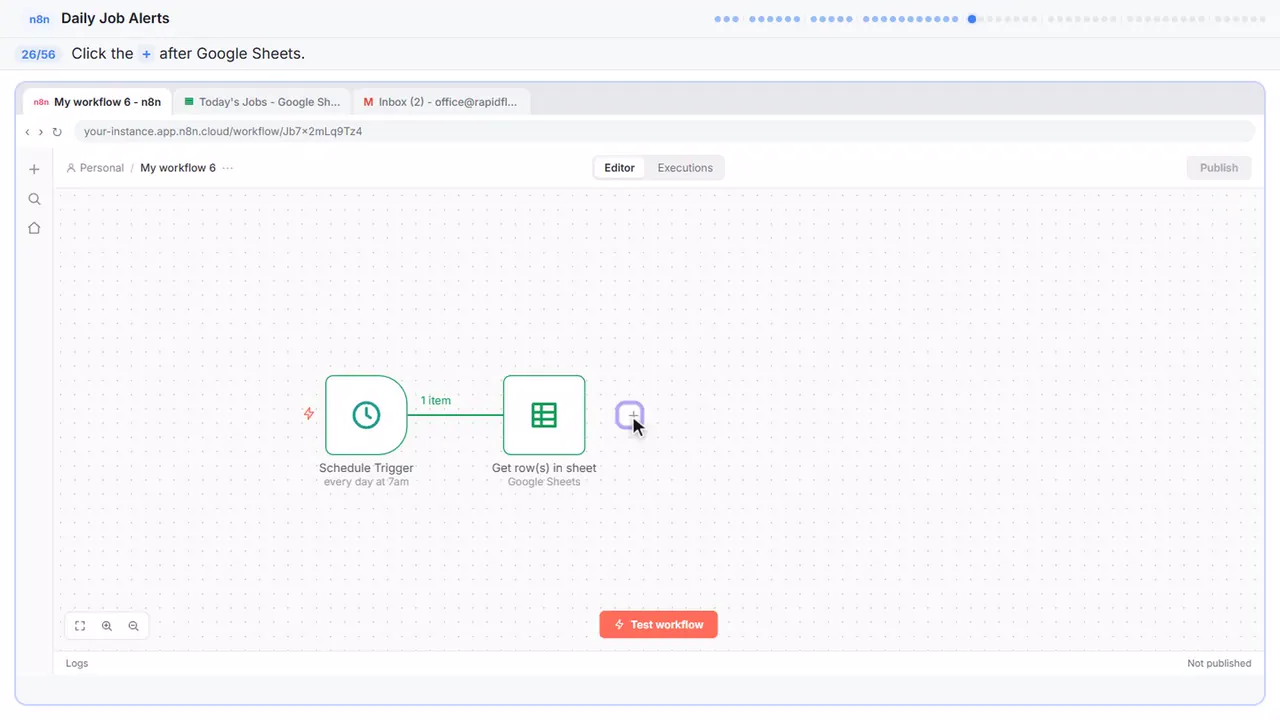
Step 26: Add a filter
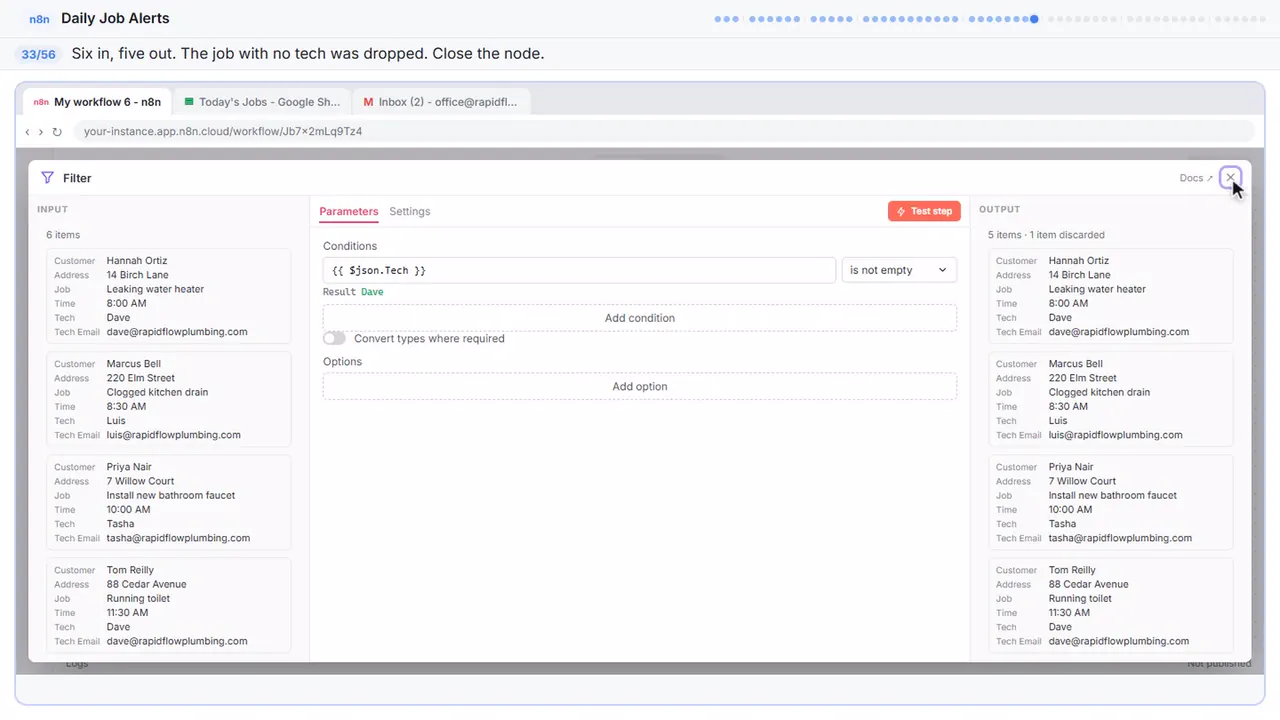
Before we send anything, remember that sump pump job with no tech? If we email it, there's nobody to send it to. So we'll drop any job without a tech.
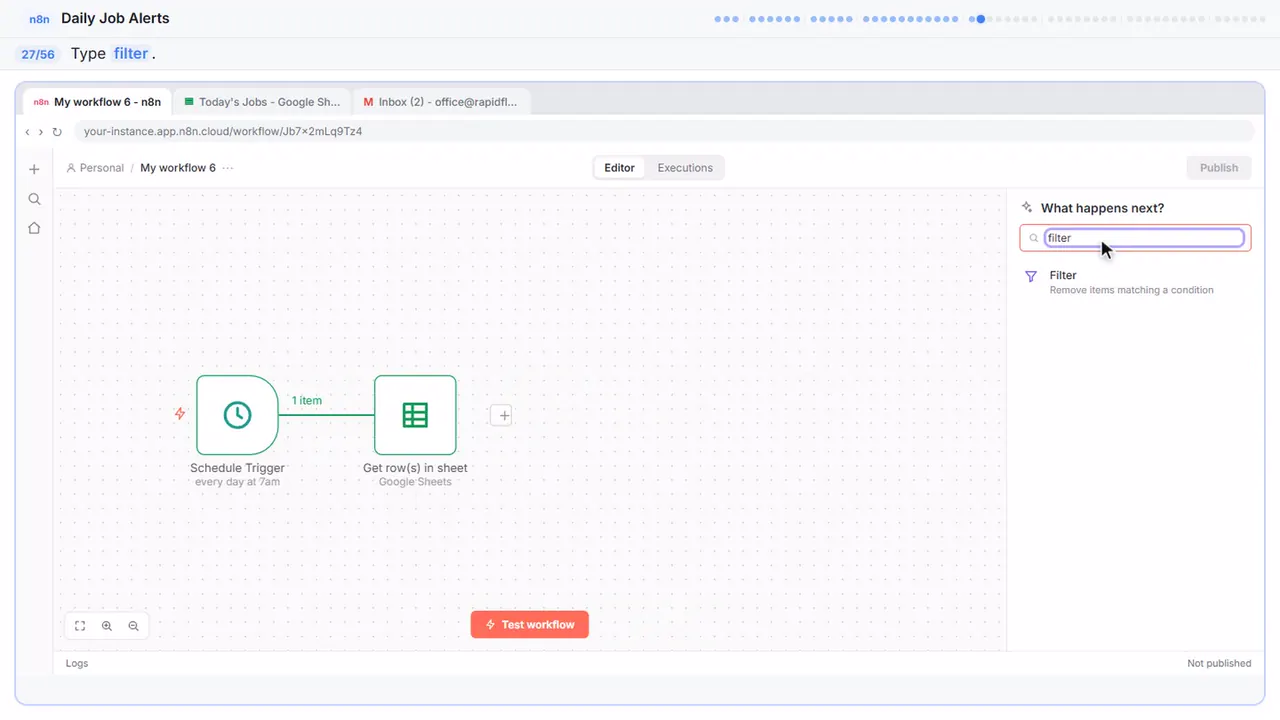
Step 27: Search for Filter
Step 28: Filter
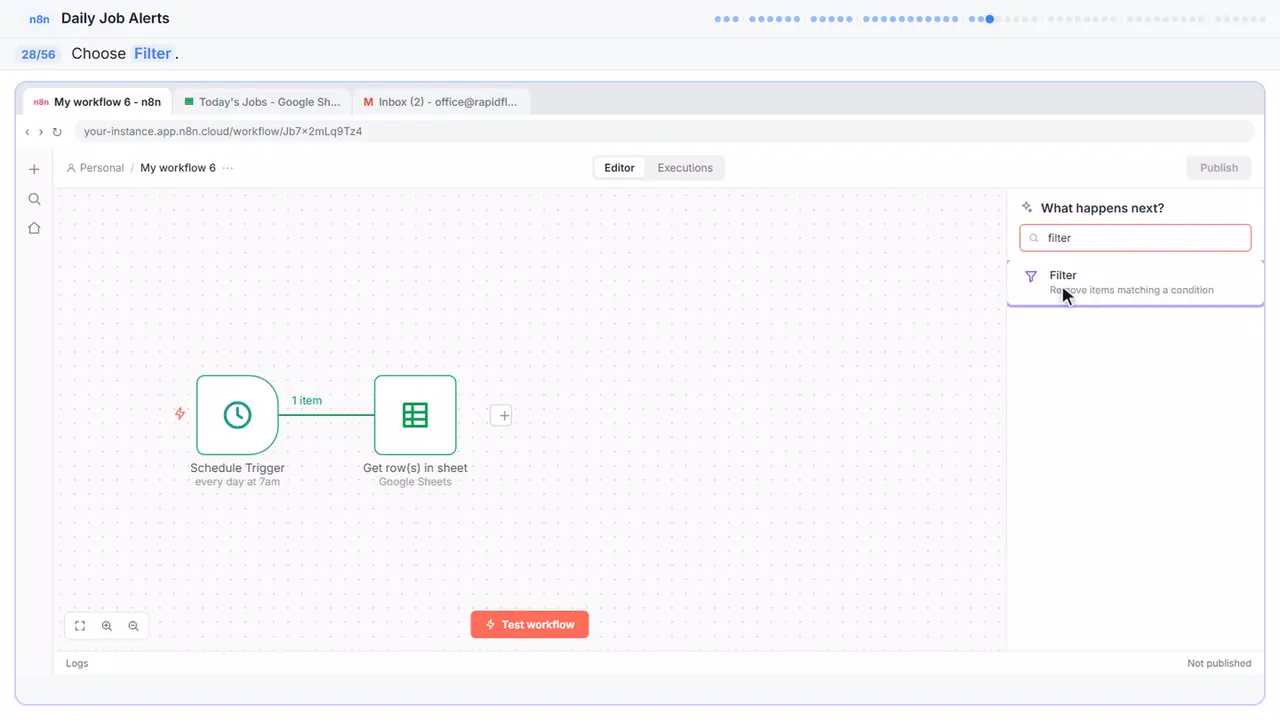
Filter. It keeps the items that match a condition and drops the rest.
Step 29: What to check
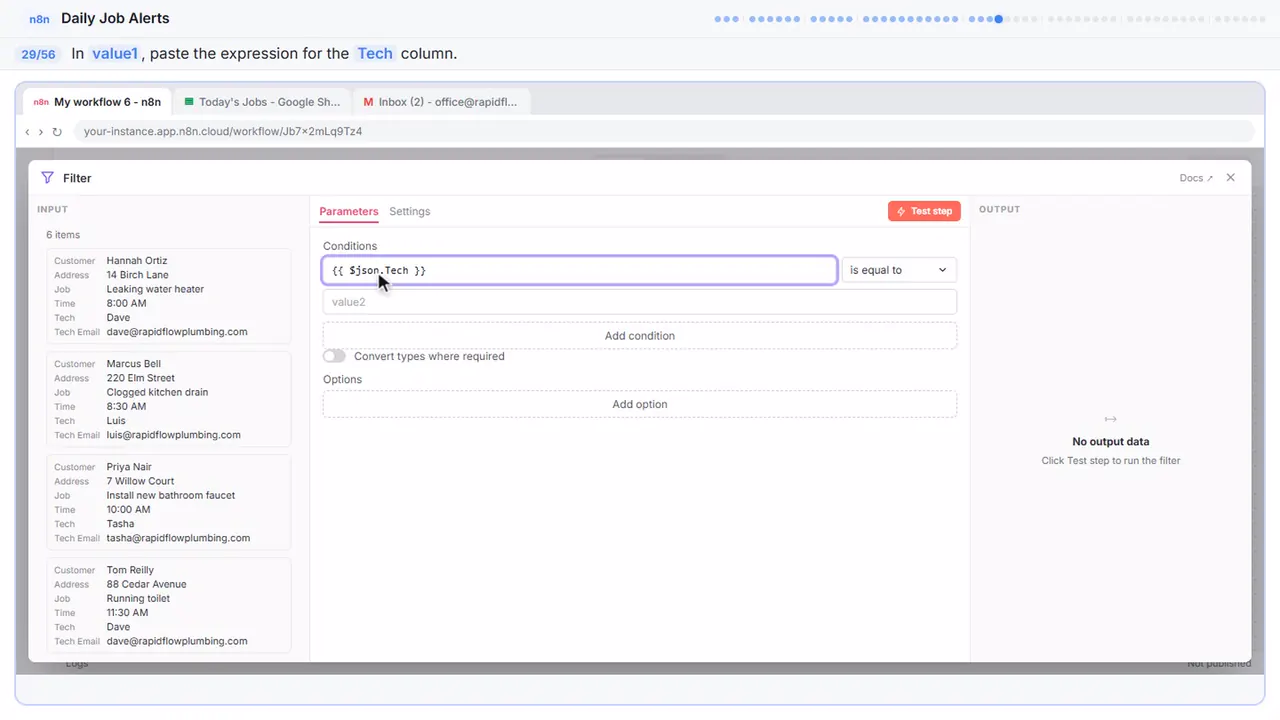
The condition has three parts: a value, a test, and something to compare it to. For the value, paste this. It's an expression, in double curly brackets, that points at the tech column. Underneath you can see what it gives for the first row: Dave.
Step 30: The test
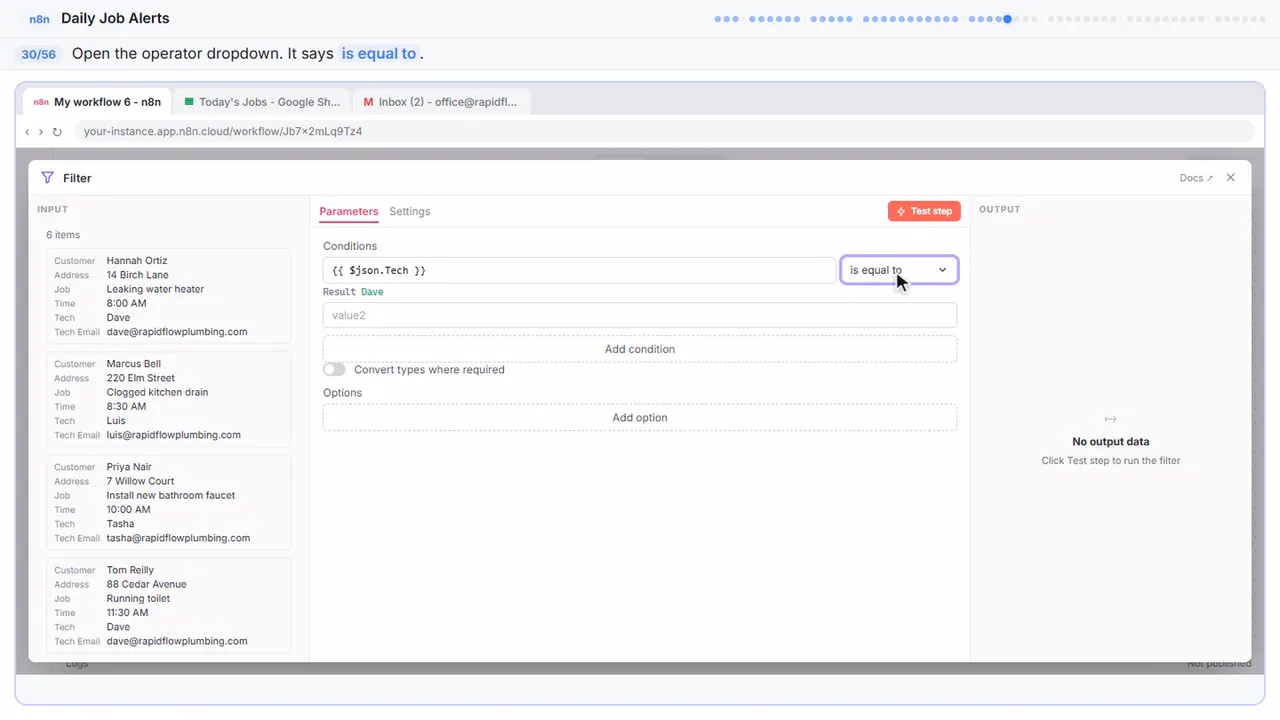
Now the test. It says is equal to.
Step 31: is not empty
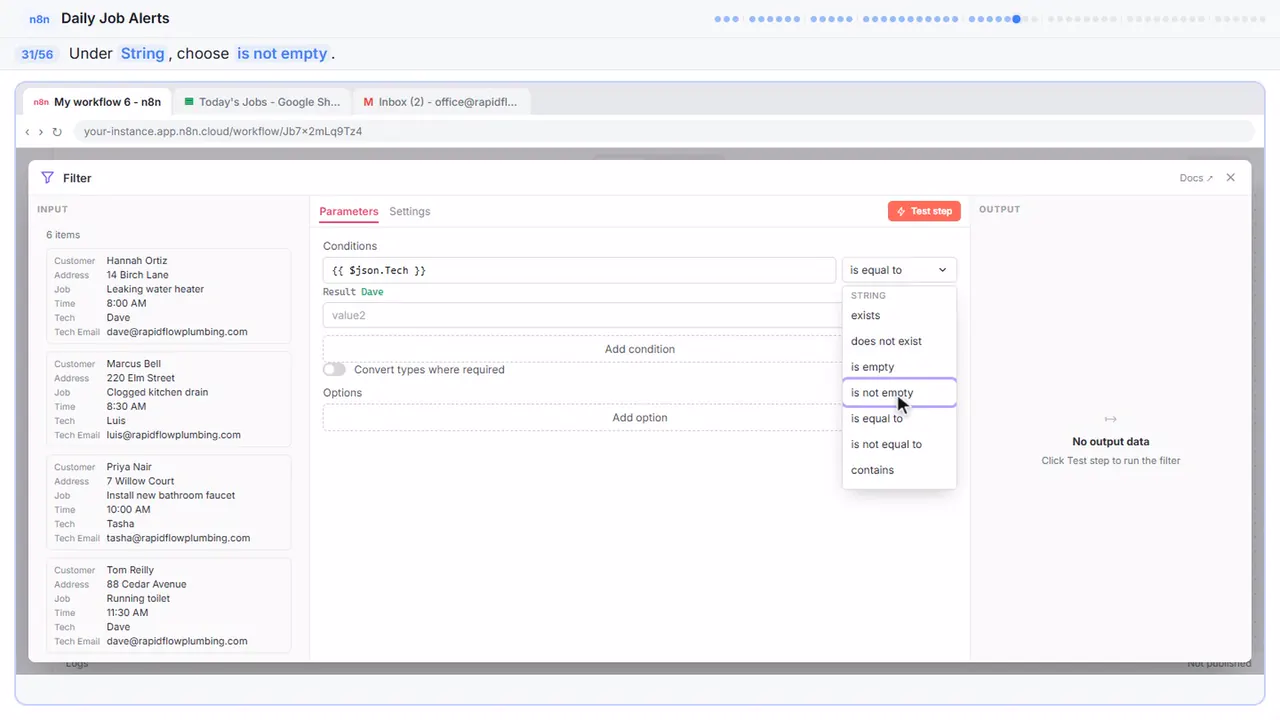
Under string, pick is not empty. So, keep the job if the tech isn't blank. There's nothing to compare to, so the second box goes away.
Step 32: Test the filter
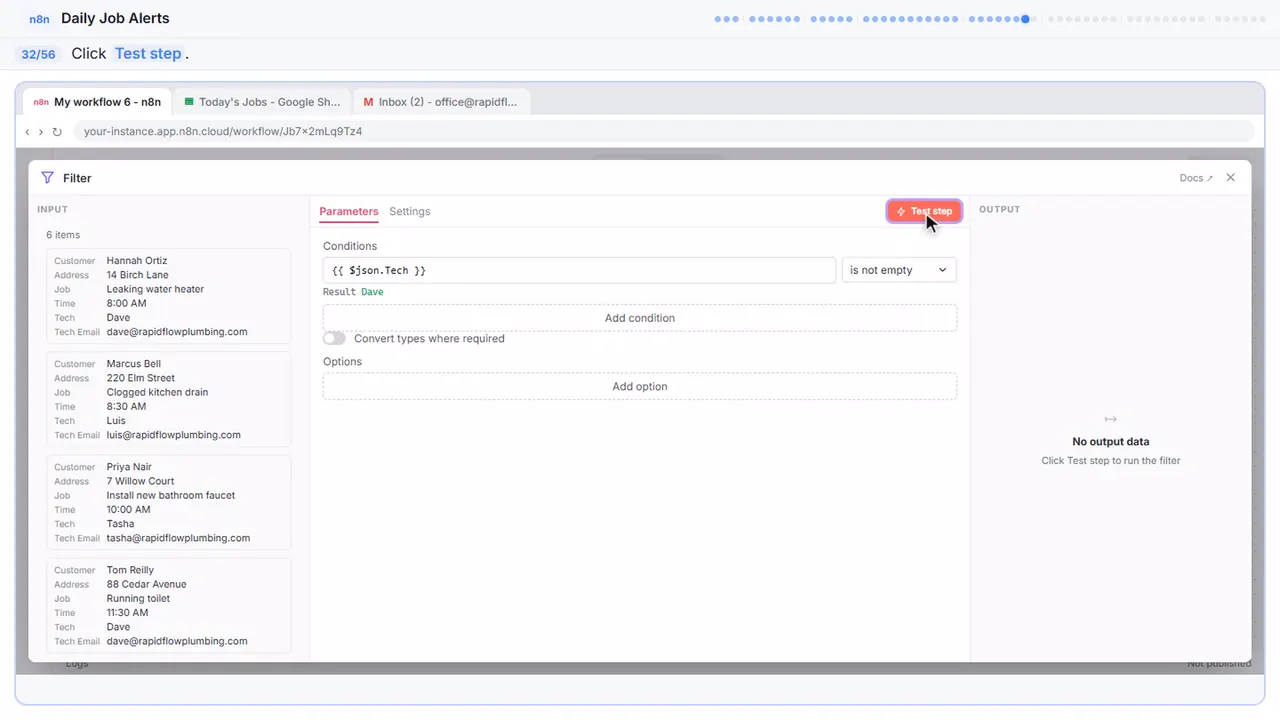
Test step.
Step 33: Close the node
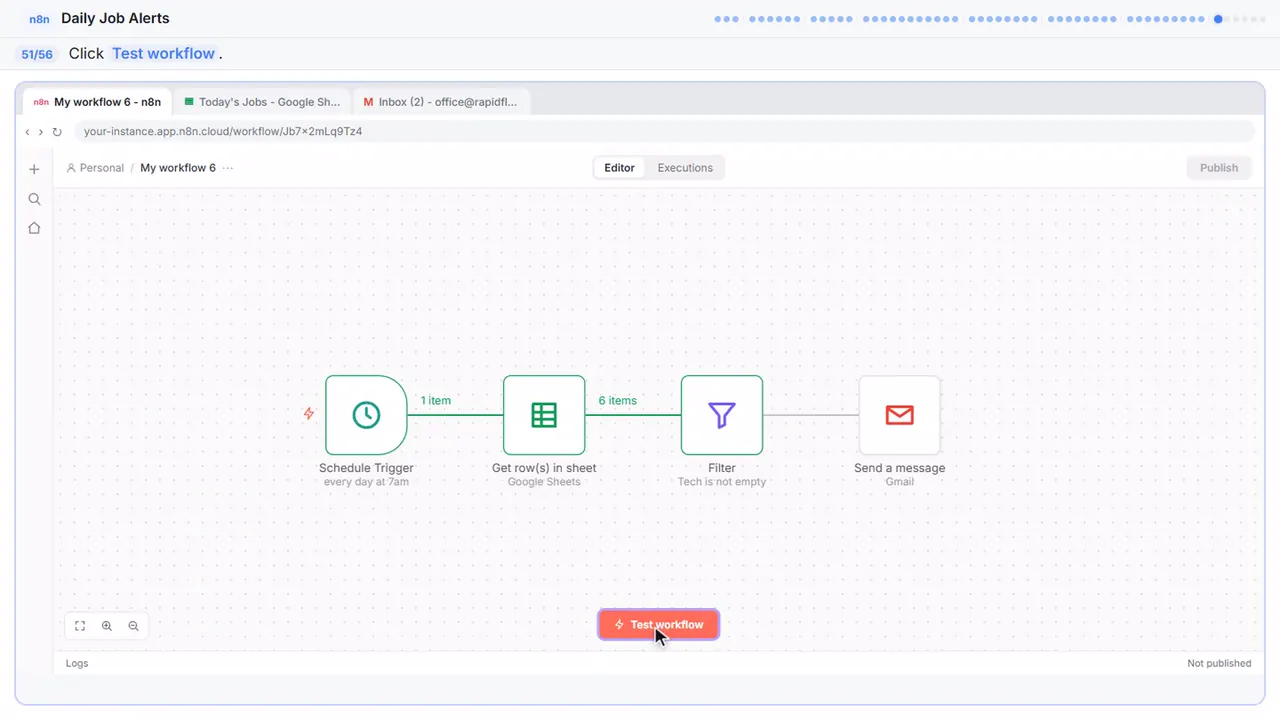
Six items in on the left, five out on the right. The sump pump job got dropped. Close it.
Part 6: Connect Gmail
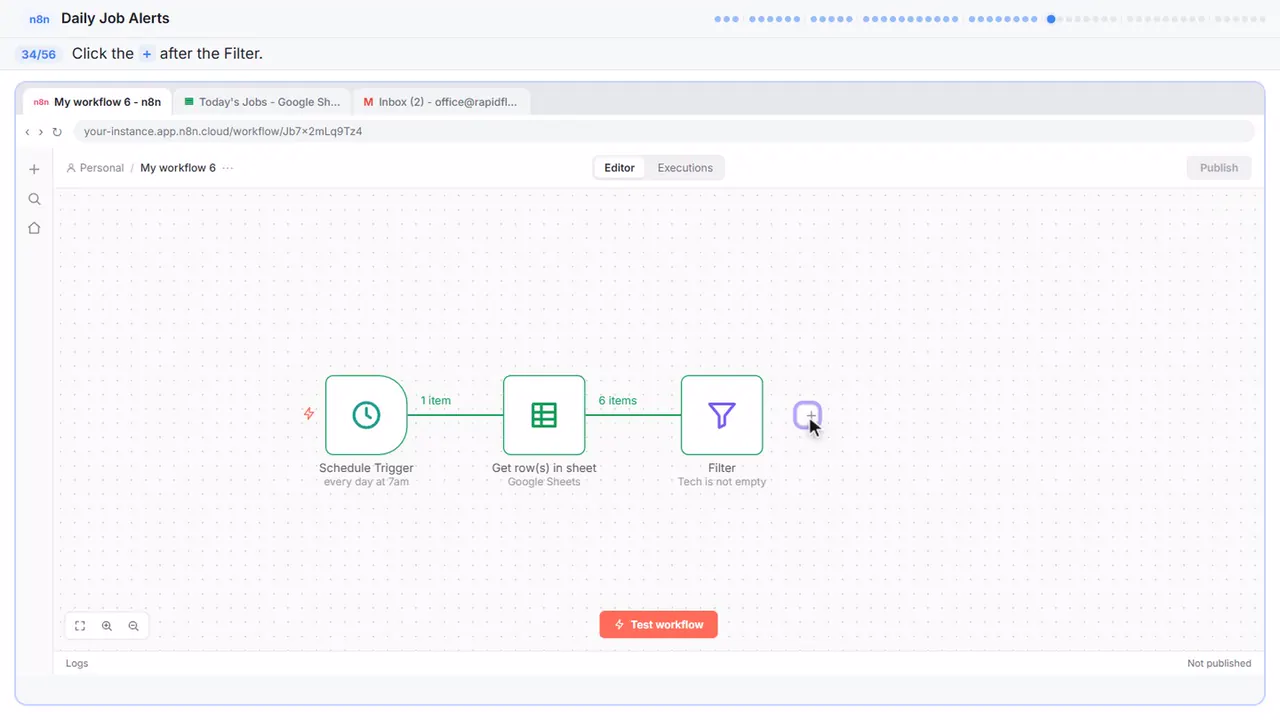
Step 34: Add the email step
Now send them.
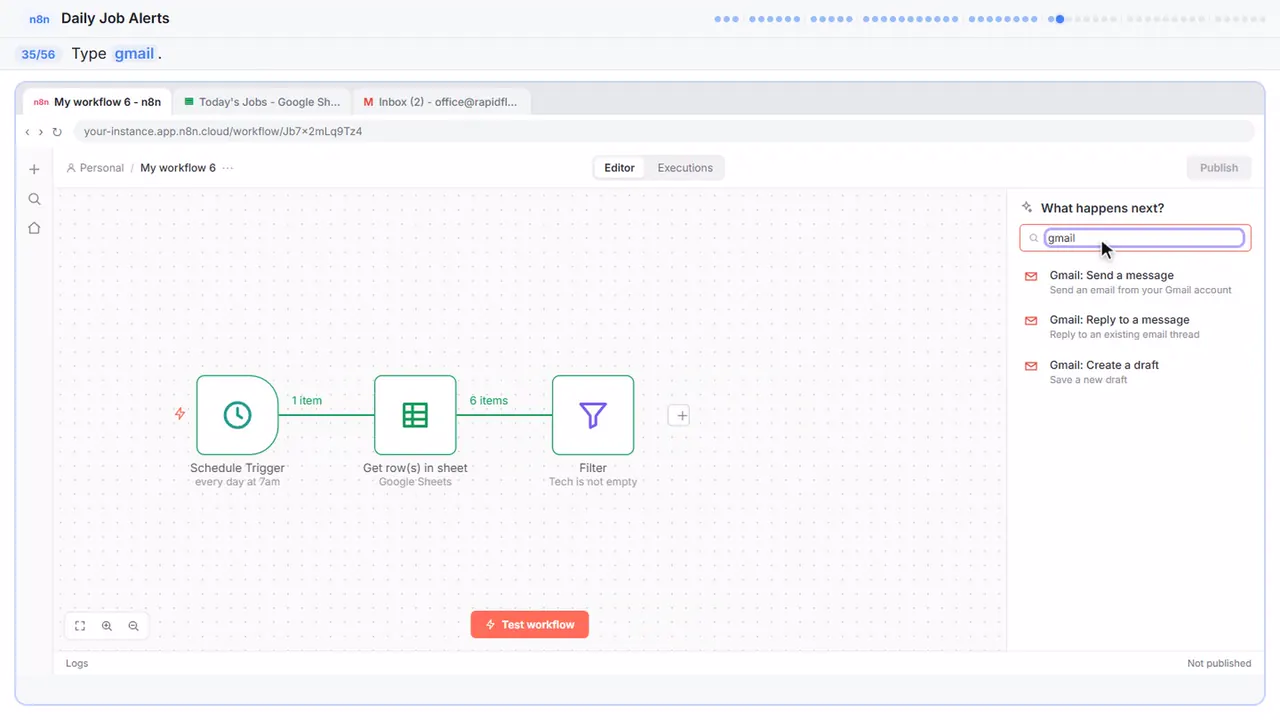
Step 35: Search for Gmail
Step 36: Send a message
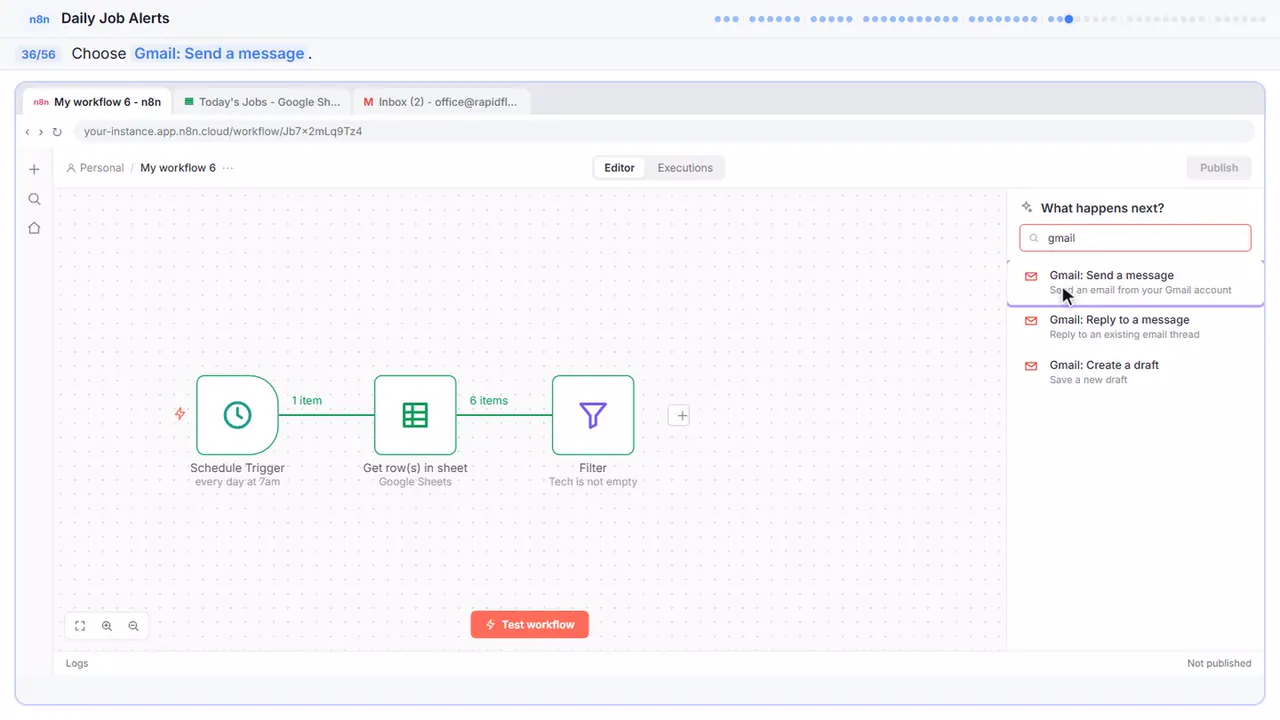
Gmail, send a message.
Step 37: Credential
Gmail needs its own permission.
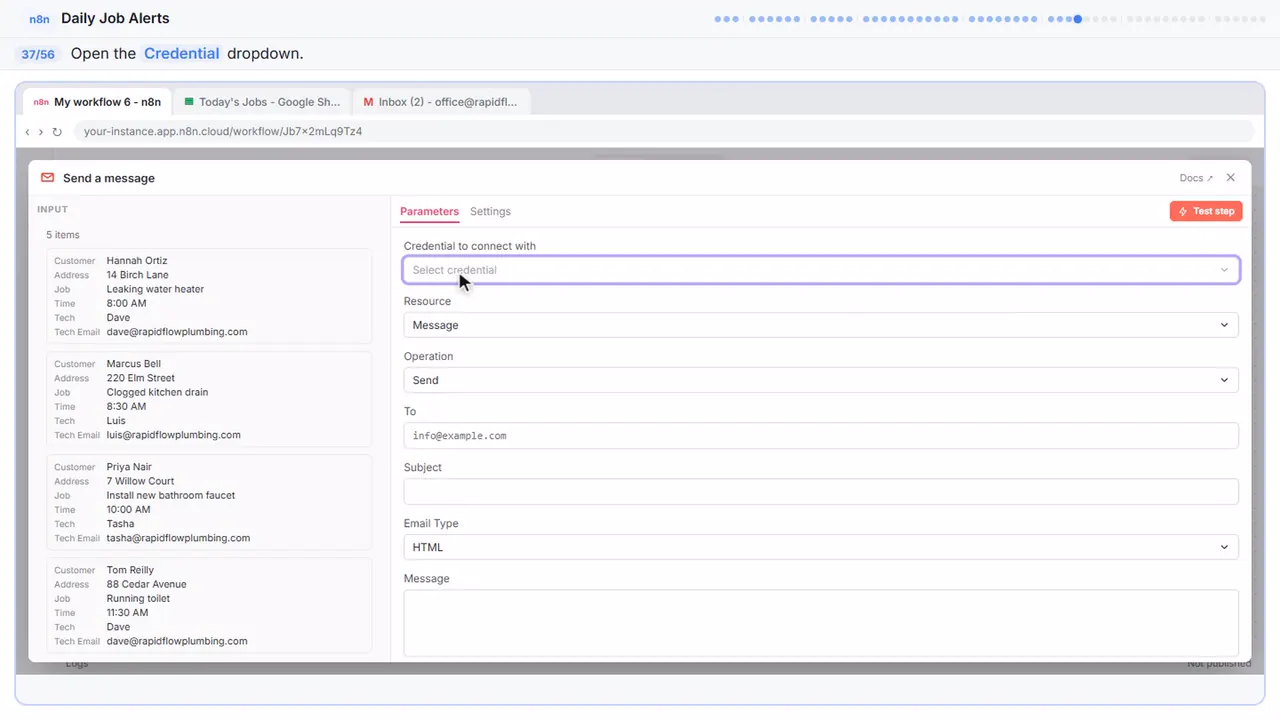
Step 38: New credential
Create new credential.
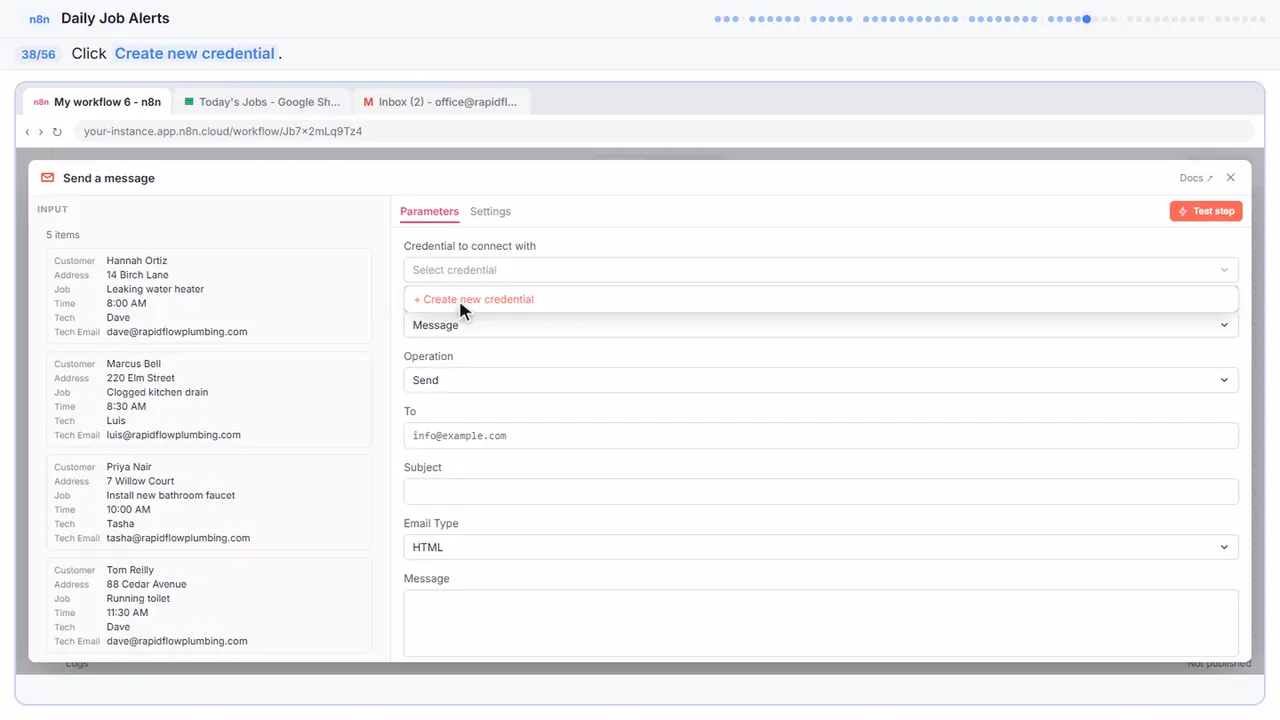
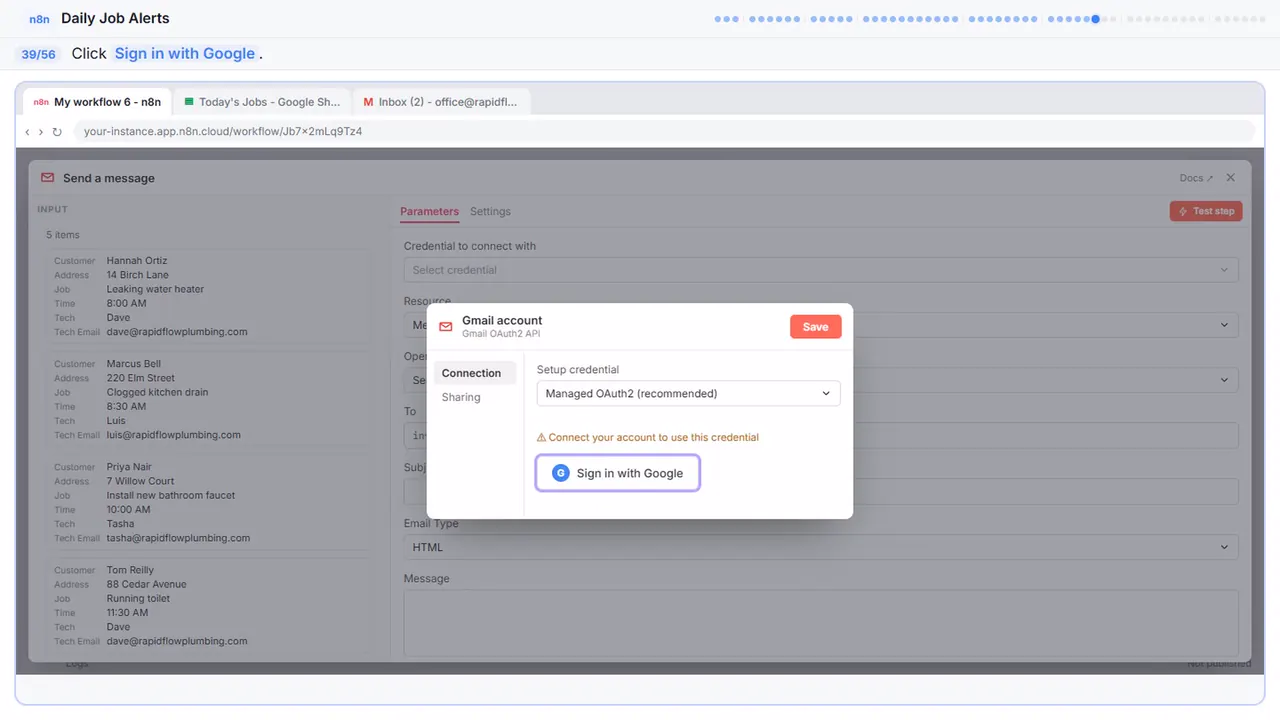
Step 39: Sign in with Google
Sign in with Google.
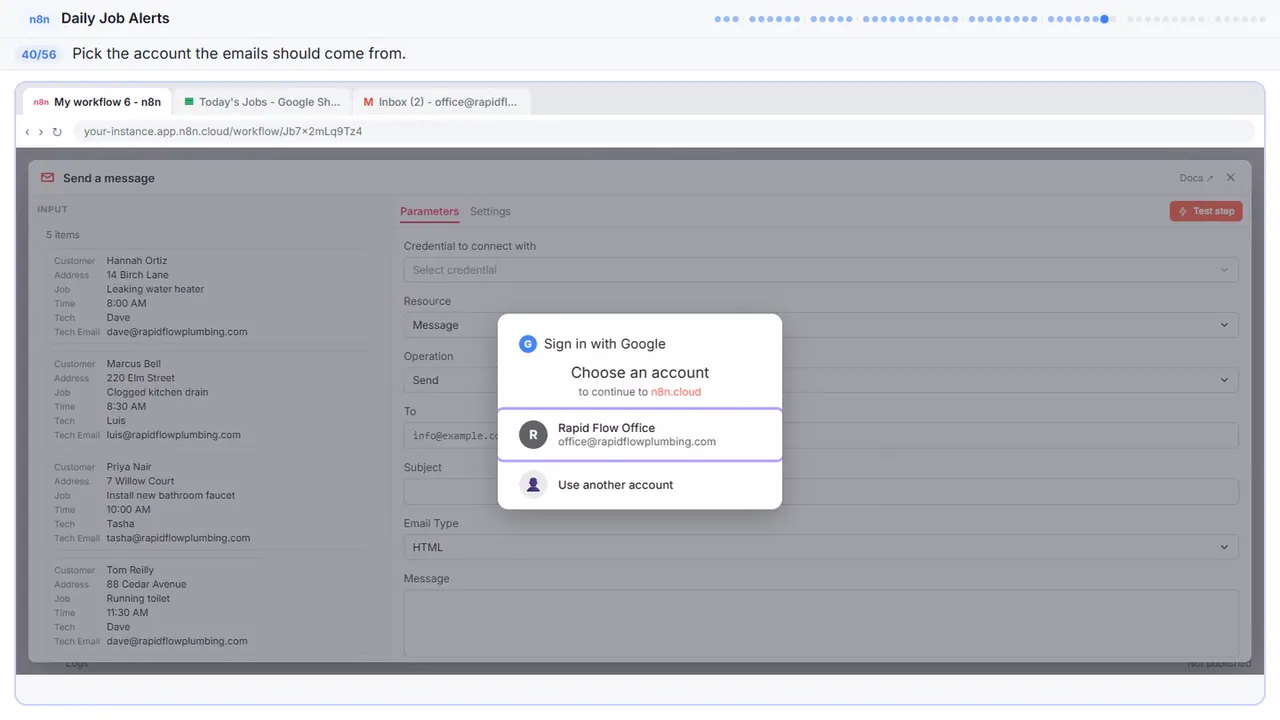
Step 40: Pick the office account
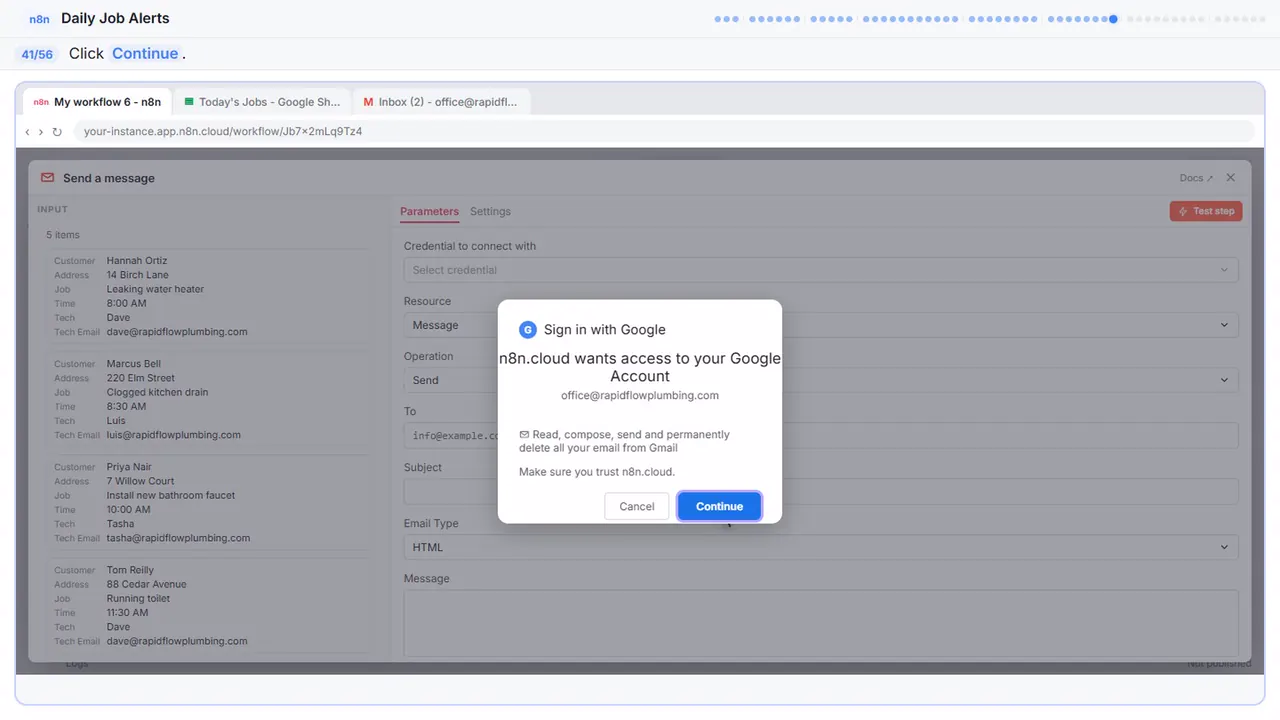
Pick the account the emails should come from. For Rapid Flow, that is the office.
Step 41: Allow access
Continue.
Part 7: Write the email
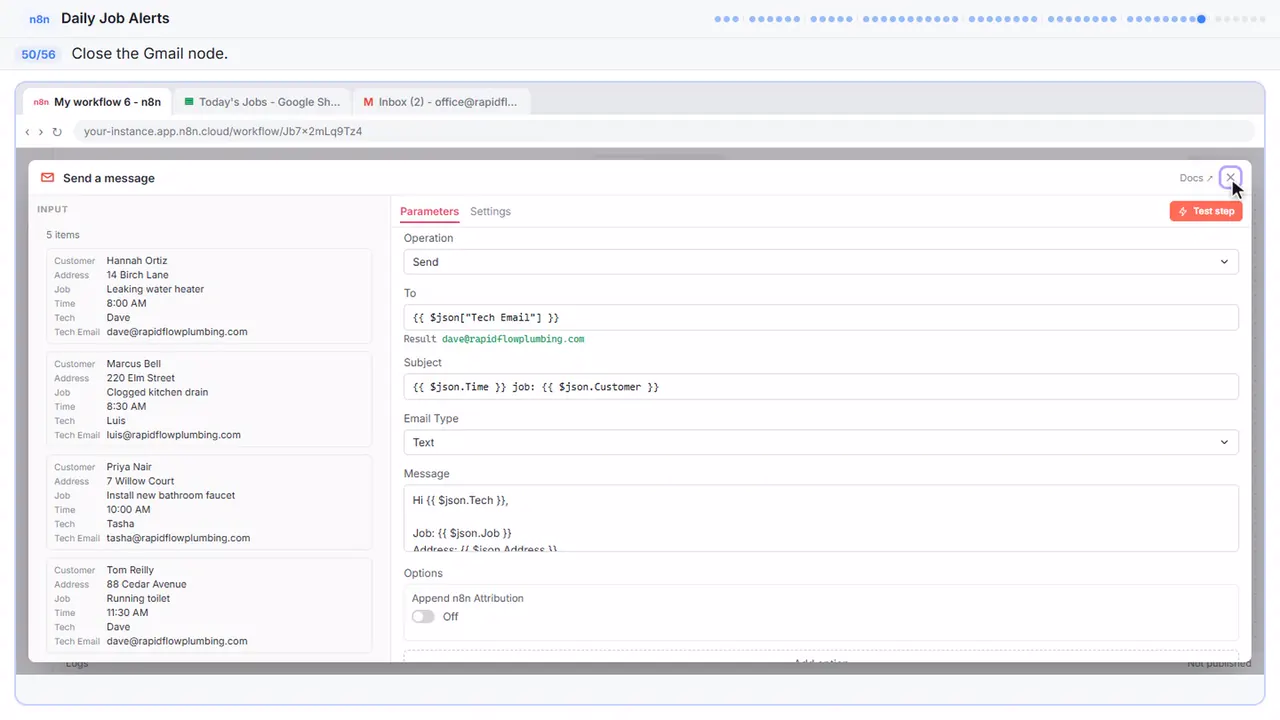
Step 42: Send it to the assigned tech
Who gets it. Don't type one address here, or every job goes to the same person. It points at the tech email column, so each job goes to its own tech. The column name has a space in it, so it goes in square brackets and quotes. Underneath, the first one comes out as Dave's address.
![An n8n node’s settings window in Stepthrough’s practice copy, step 42 of 56 (Send it to the assigned tech): the expression is filled in (“{{ $json["Tech Email"] }}”).](/content/guide/job-alerts/step-42.webp)
Step 43: Subject with data in it
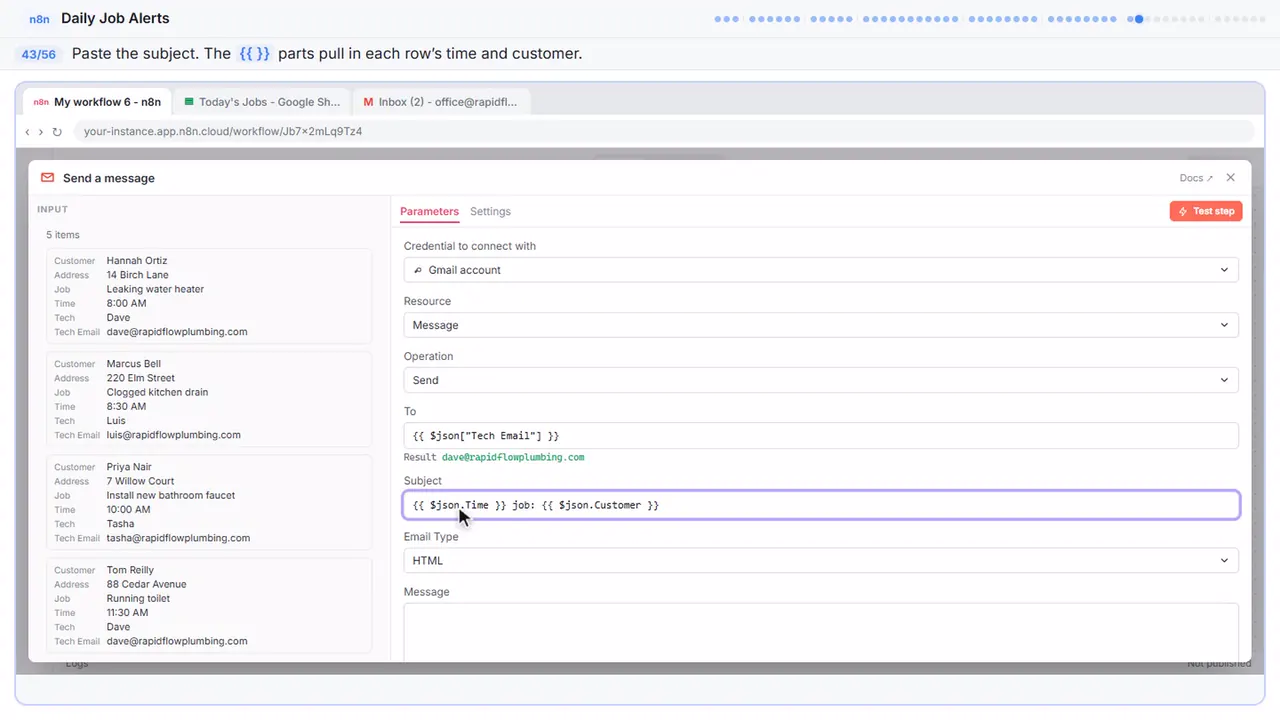
Now the subject. Look at the input on the left, those are the rows from the sheet. The parts in double curly brackets are expressions. Instead of typing a name, you point at a column.
Step 44: Email type
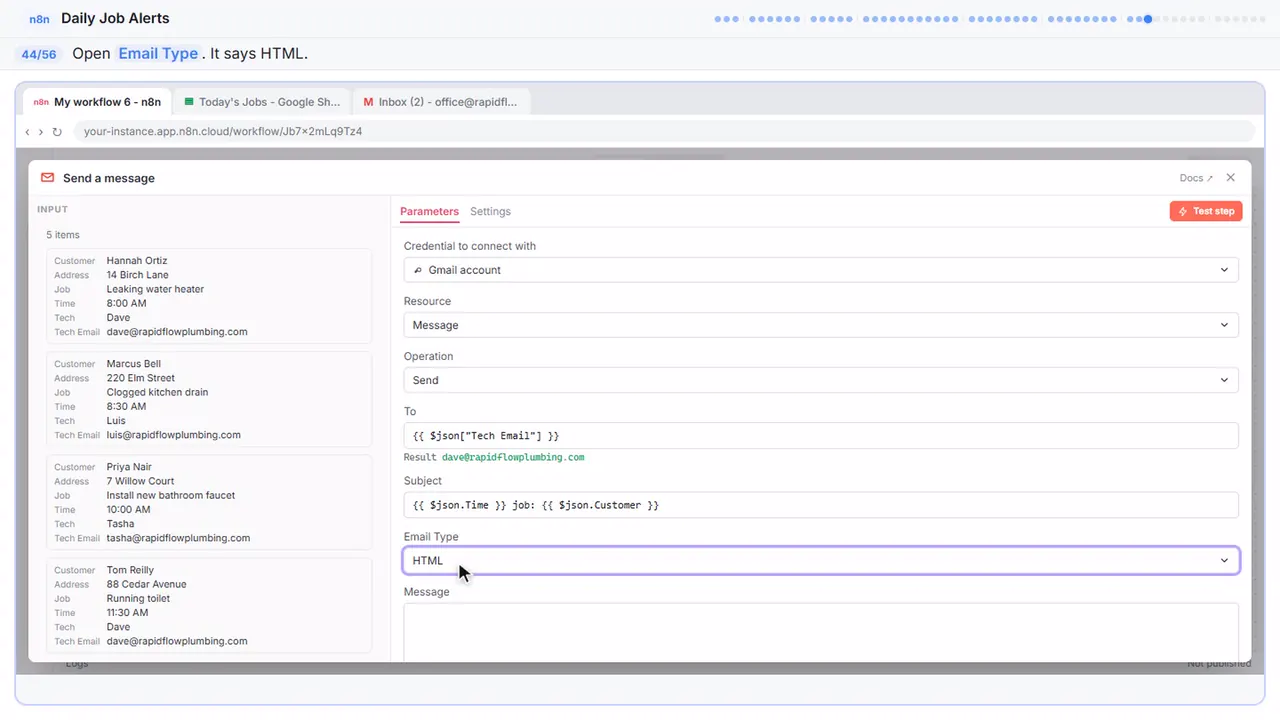
Email type is HTML. For a quick job note, plain text is simpler and reads fine on a phone.
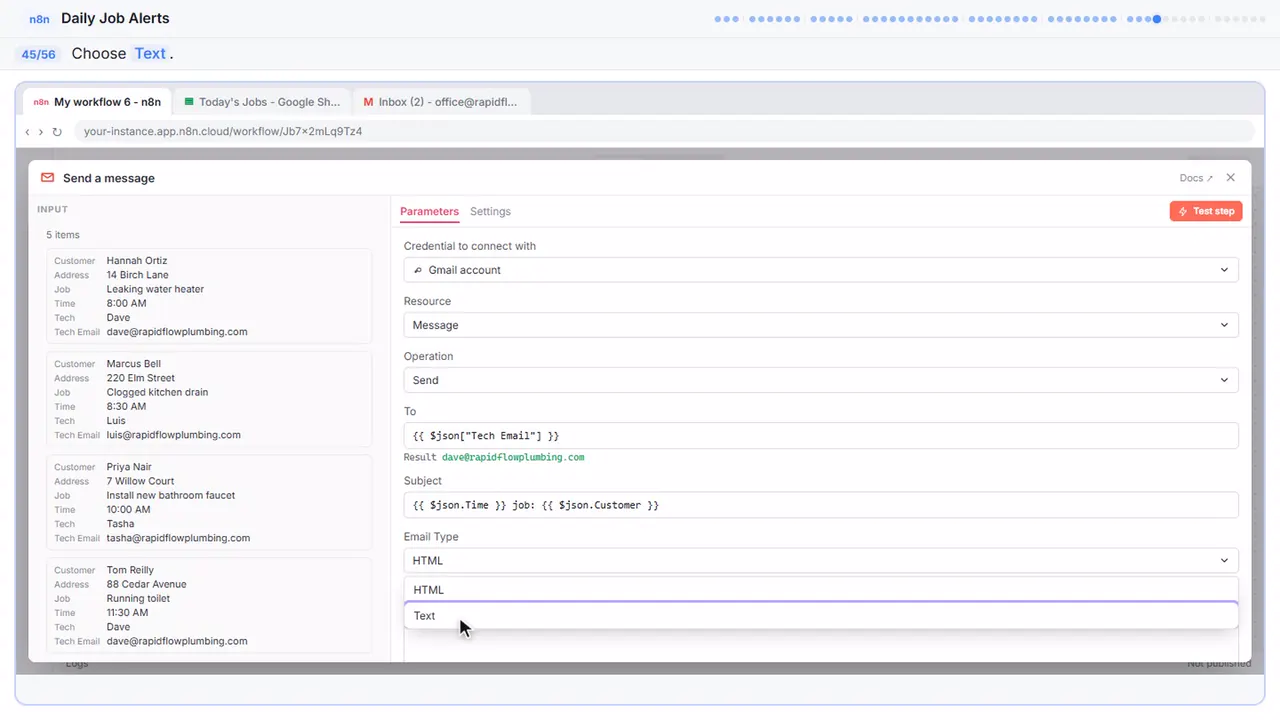
Step 45: Text
Text.
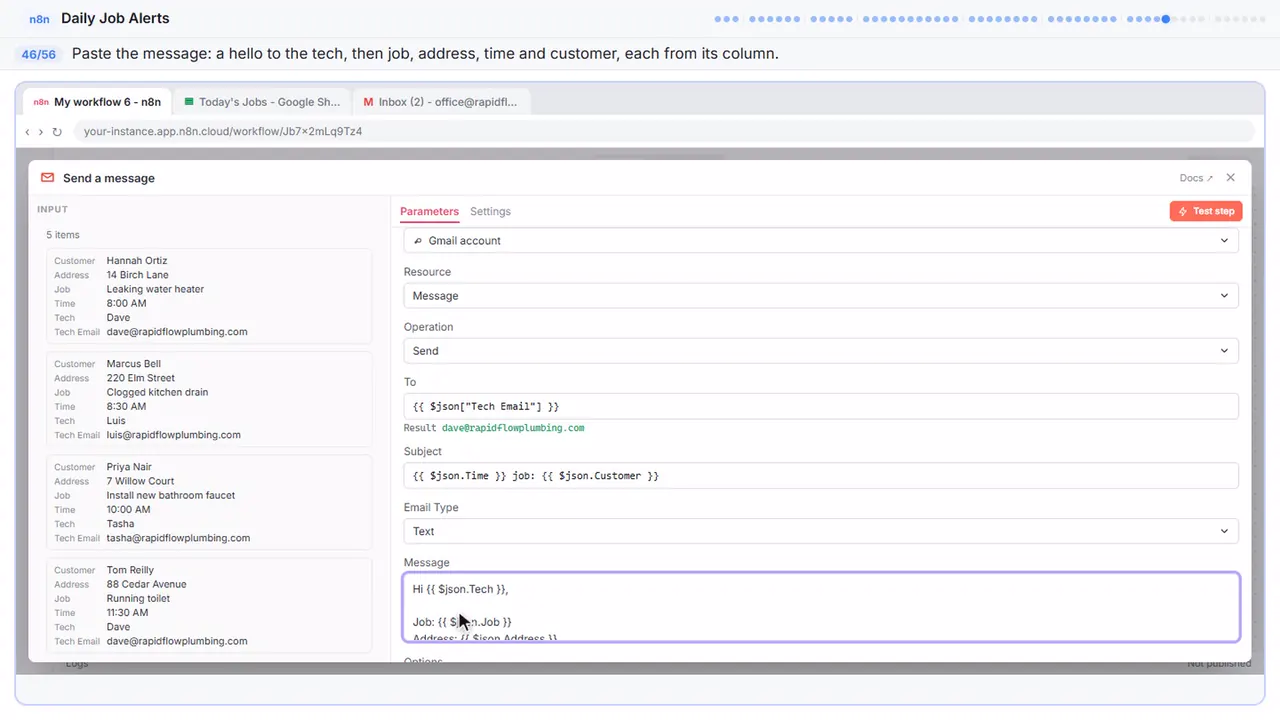
Step 46: The message
And the message. It says hi to the tech by name, then the job, address, time and customer, each one pulled from its own column.
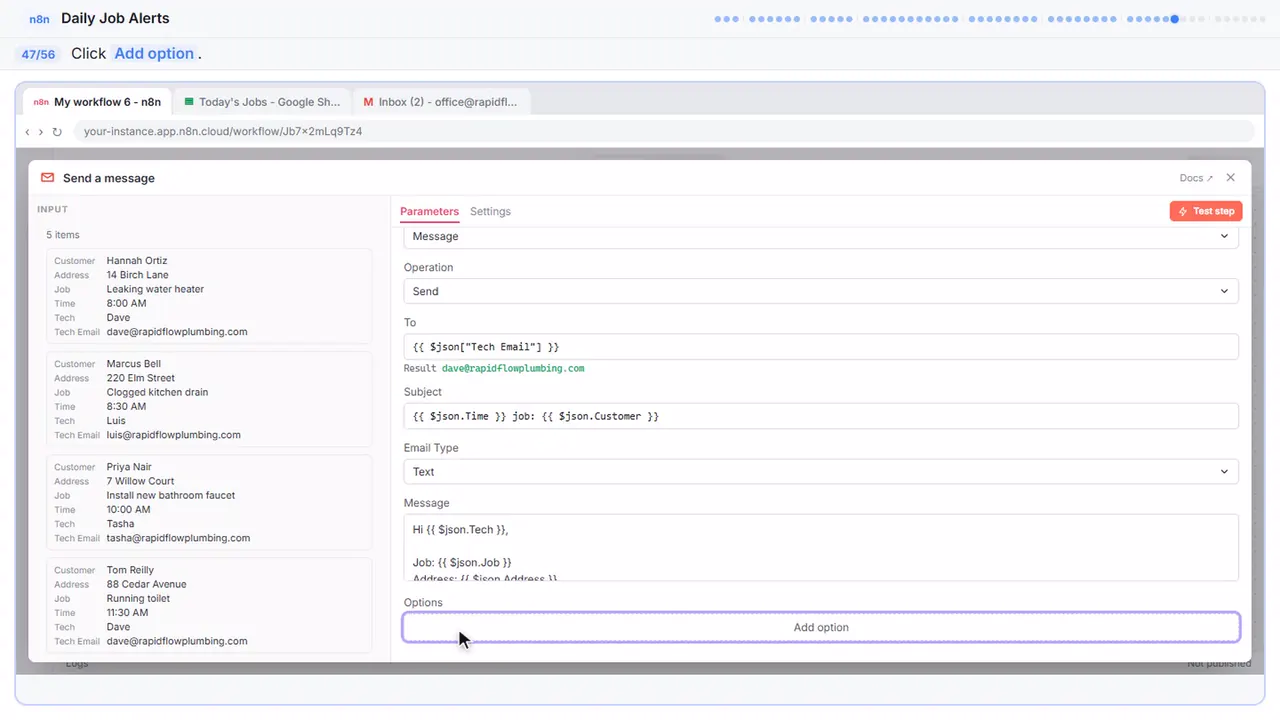
Step 47: Add an option
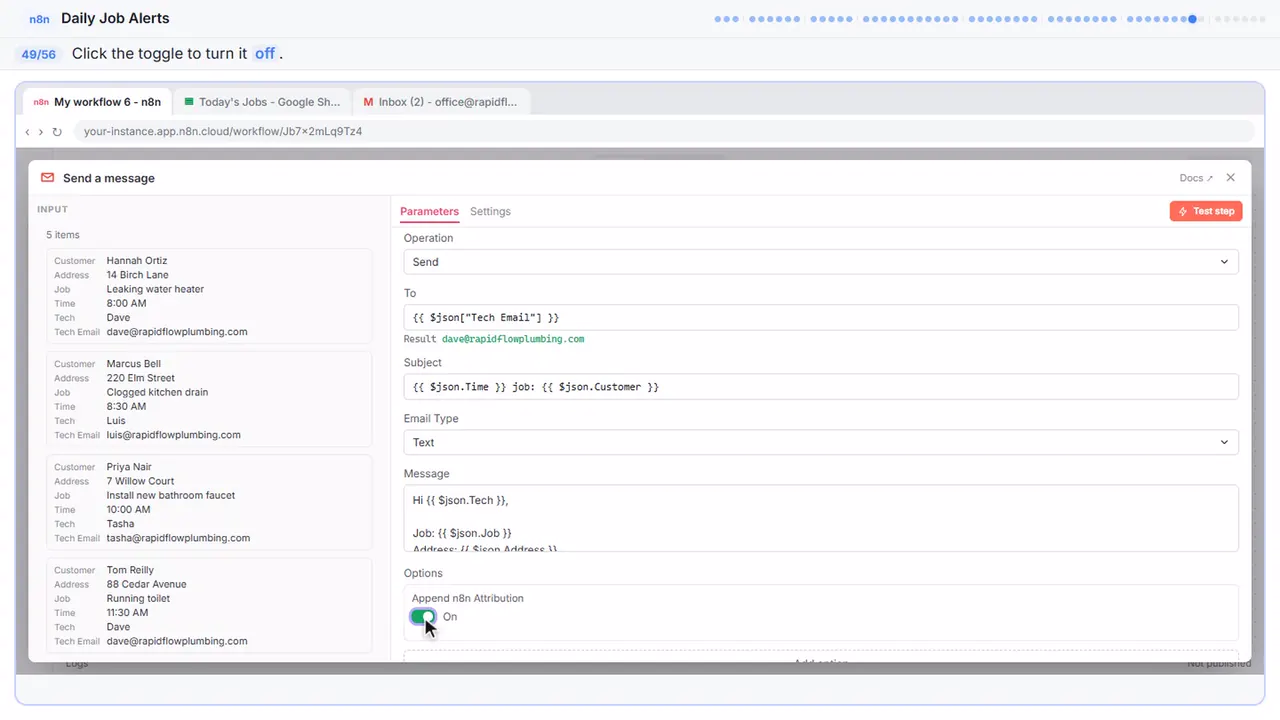
One small thing. By default n8n adds a line at the bottom saying the email was sent with n8n. The tech doesn't need that.
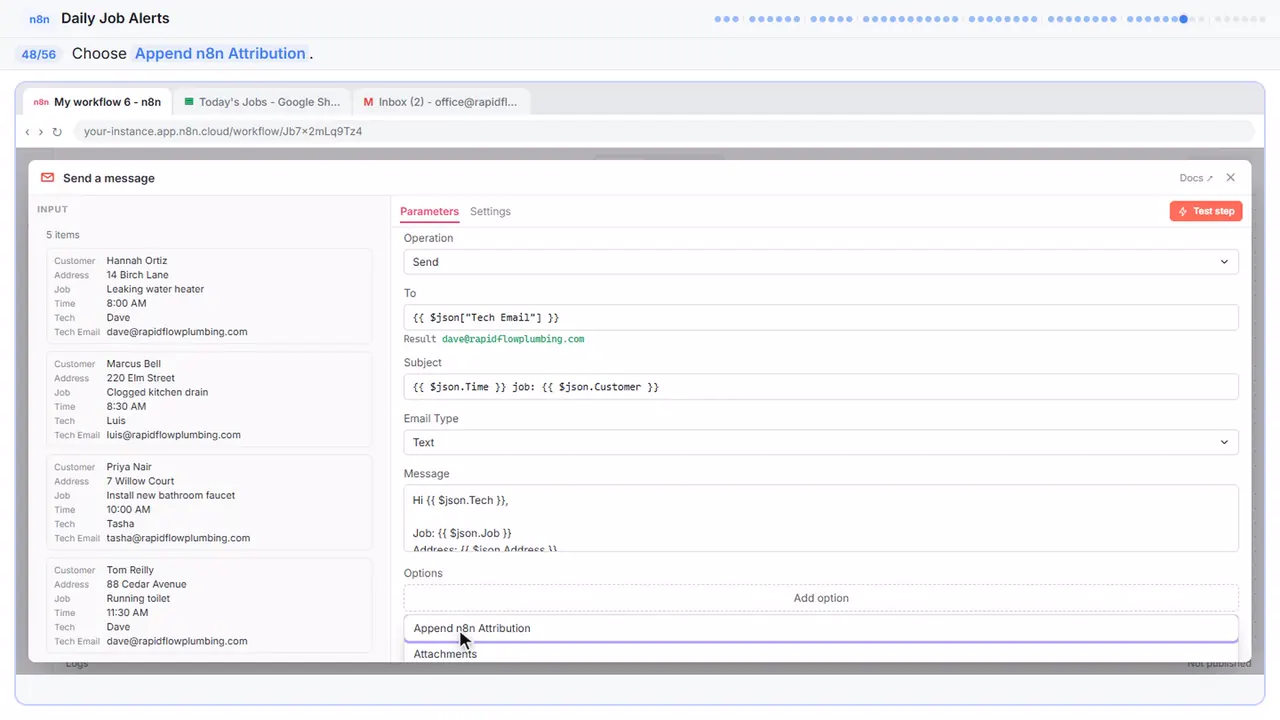
Step 48: Append n8n Attribution
Append n8n attribution.
Step 49: Turn it off
Switch it off.
Step 50: Close the node
That's the email. Close it.
Part 8: Test and publish
Step 51: Test the whole thing
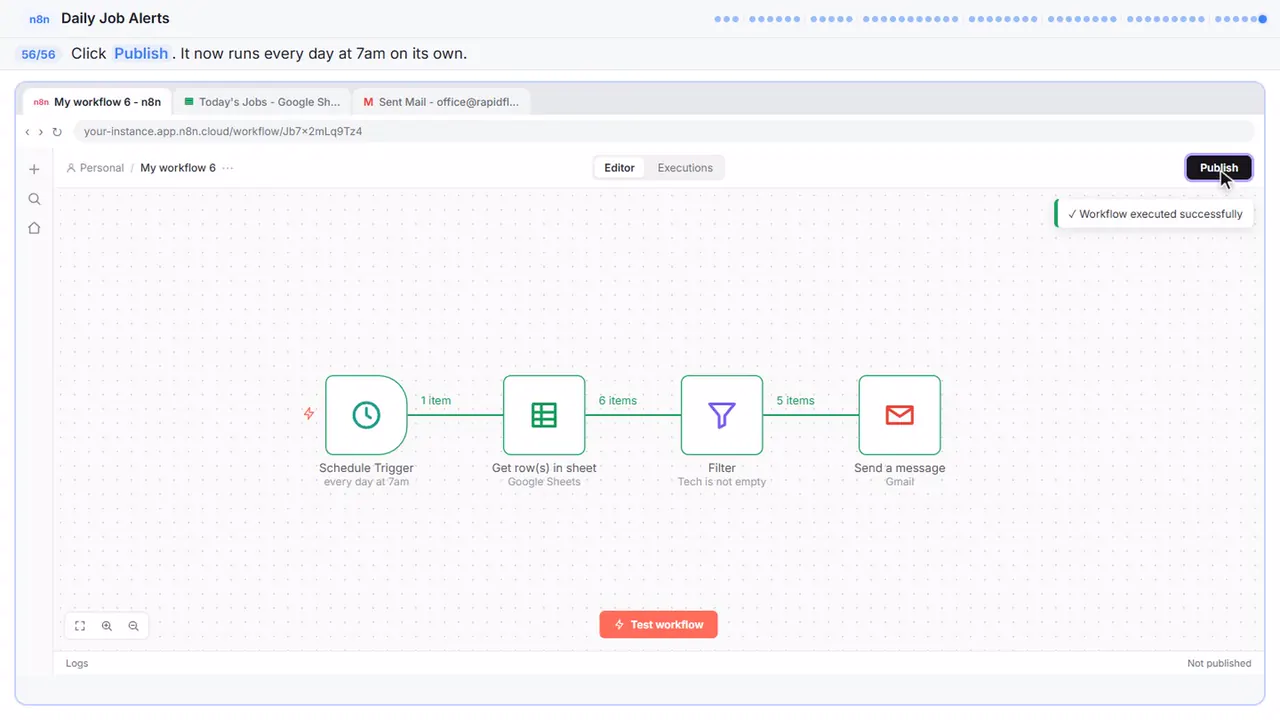
Test the whole workflow. Watch the numbers on the lines between the steps.
Step 52: Check the mail
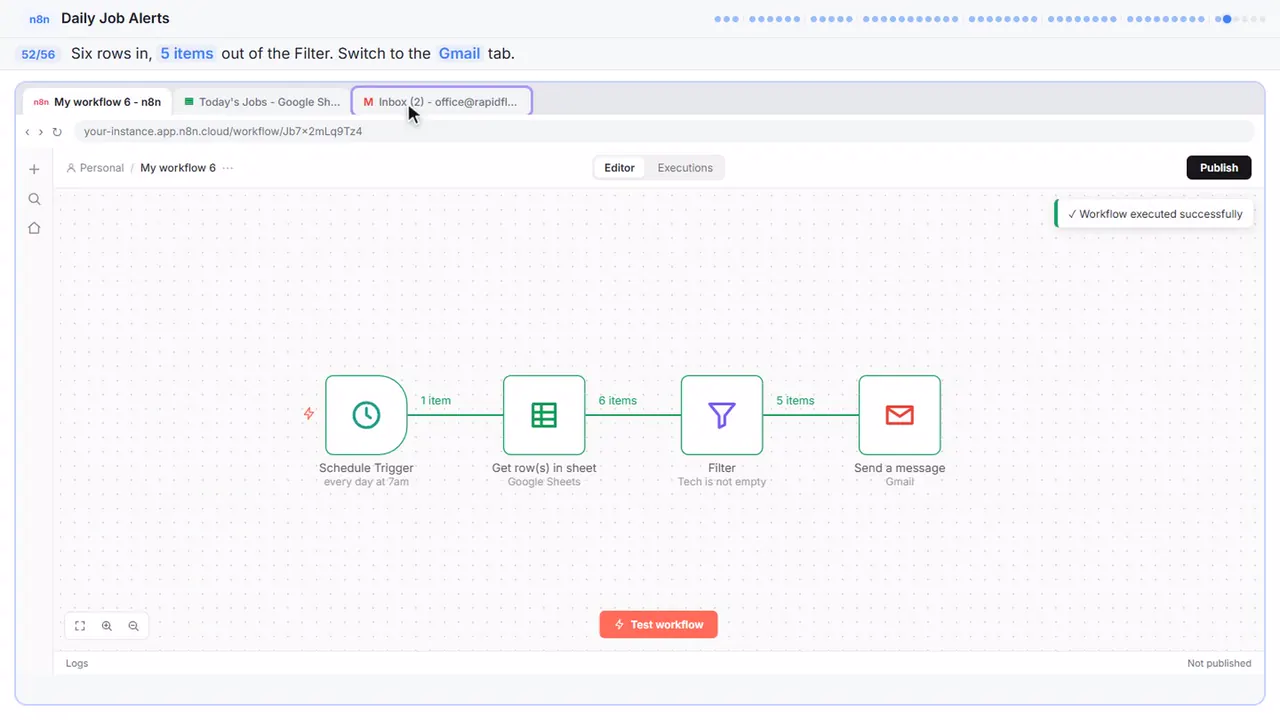
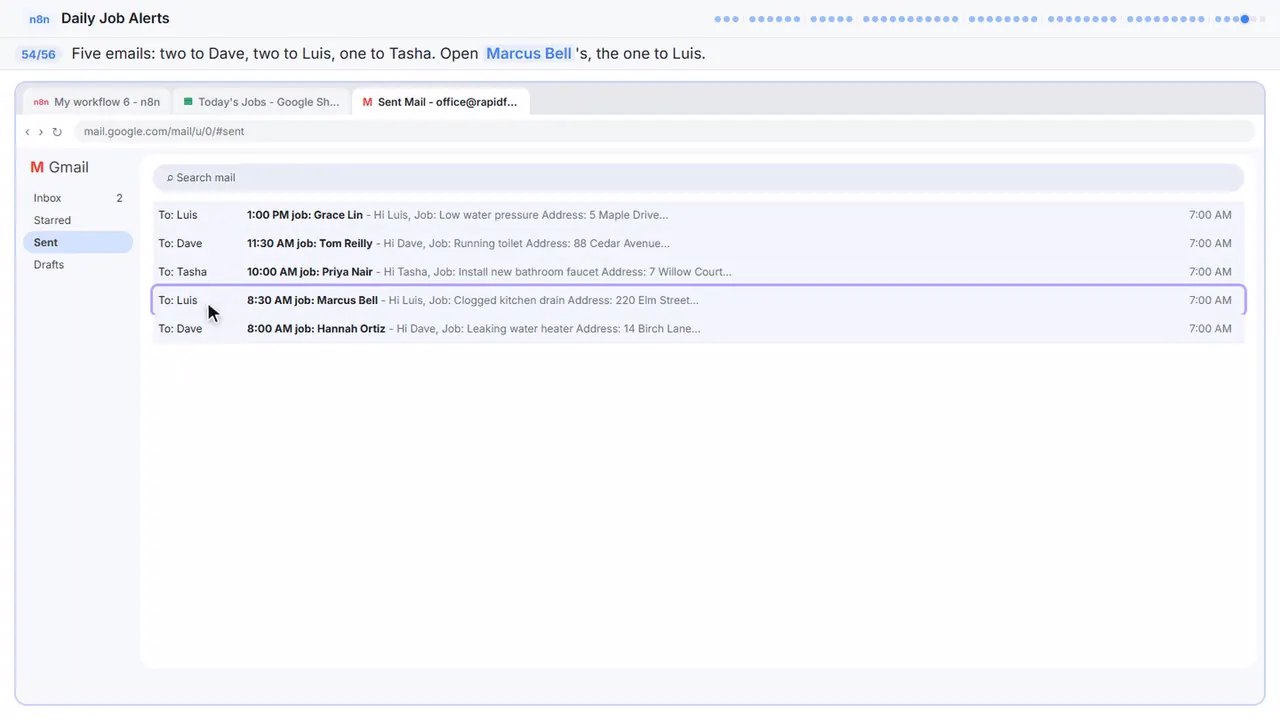
Six rows came out of the sheet, and five made it past the filter. Here's the idea that makes n8n click: we built one Gmail step, but it ran five times, once for every item it was given, each time with that row's tech email. You never write a loop. Switch to Gmail.
Step 53: Sent mail
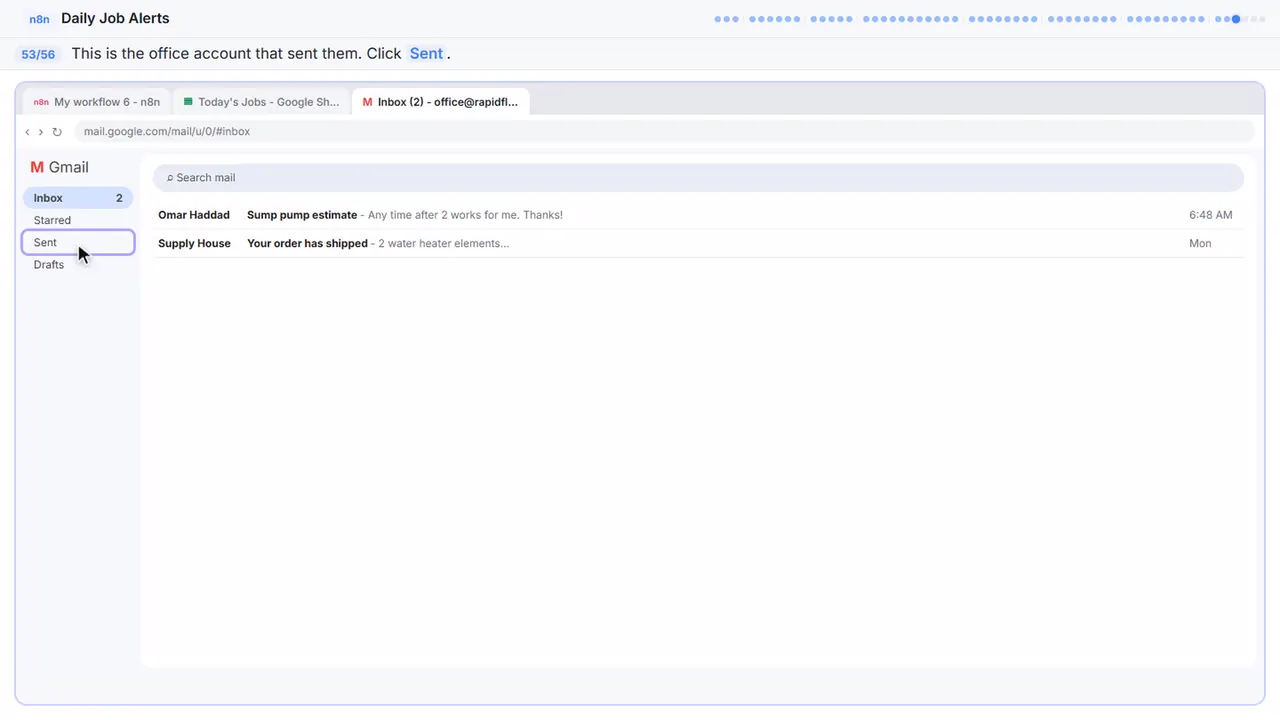
This is the office's Gmail, the account that sent them.
Step 54: Open one
Five emails. Two to Dave, two to Luis, one to Tasha, and none for Kevin, because he's got no jobs today.
Step 55: Back to n8n
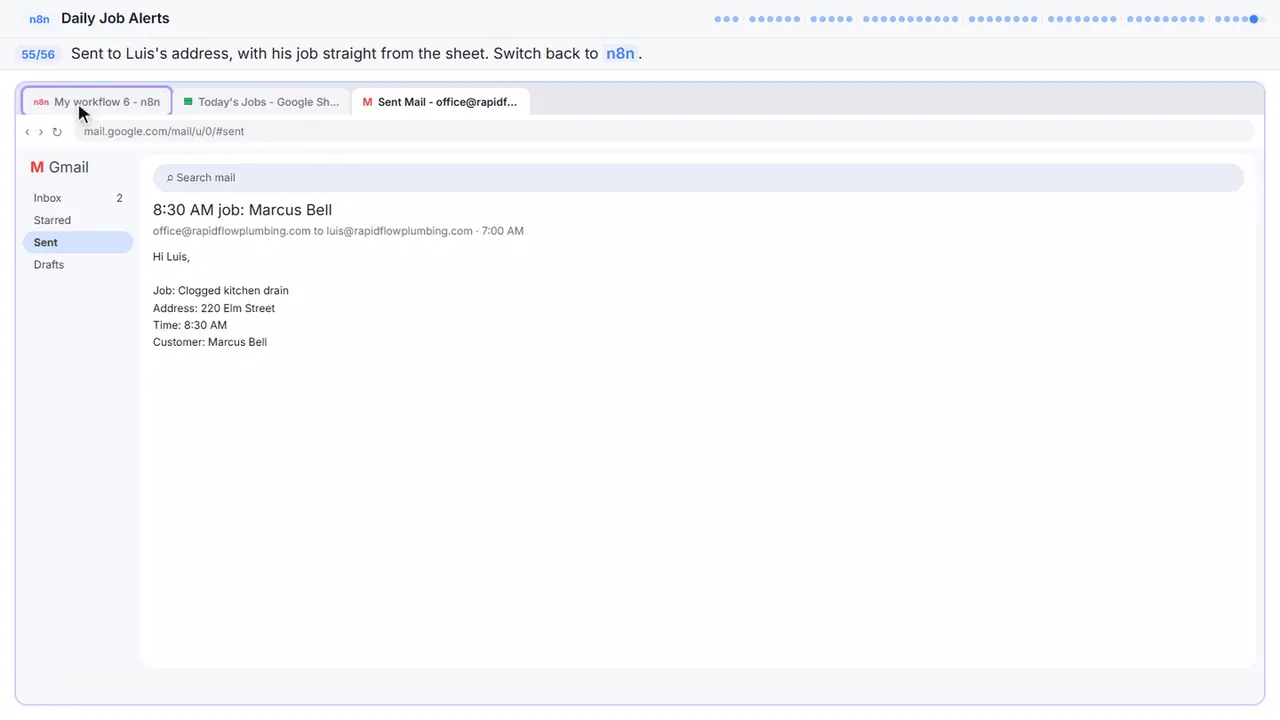
Sent to Luis's address. Hi Luis, clogged kitchen drain, two twenty Elm Street, eight thirty. Straight from the sheet, no copying. Back to n8n.
Step 56: Publish
From now on it runs every morning at seven, whether you're at your desk or not. If the office moves a job to a different tech, they just change the name in the sheet, and tomorrow's email goes to the right person. One thing to know: it sends every assigned row, every day, so the office keeps that sheet to today's jobs.
Now do it yourself, free
Reading the steps is a start. Doing them is how it sticks. The interactive lesson puts you in a practice copy of n8n: you do every step yourself, it checks your work, and “Do it for me” finishes any step you get stuck on. Nothing touches your real accounts.
Practice “Daily Job Alerts: Email Each Tech Their Jobs from Google Sheets with n8n” step by stepWatch the 5:10 video walkthrough · Daily Job Alerts: Email Each Tech Their Jobs from Google Sheets with n8n: lesson overview · All free tutorials