How to build an AI Maintenance and IT Request Form: step-by-step guide with screenshots
Updated
Build an internal maintenance and IT request form in Lovable for Ridgeline Supply Co. and connect it to n8n — the AI agent sets the priority, assigns a team, saves the request to Google Sheets and emails a confirmation.
About the screenshots. They come from Stepthrough’s simulated practice environment (a practice copy of Lovable and n8n), not the live tool, so no real account appears. The buttons and labels match the real screens the lesson was built against. Practice it yourself free at learn.ynteractive.com.
- Tools: Lovable and n8n
- Time: about 15 minutes, 87 steps in 14 parts
- Level: beginner, no coding needed
Part 1: Sign up
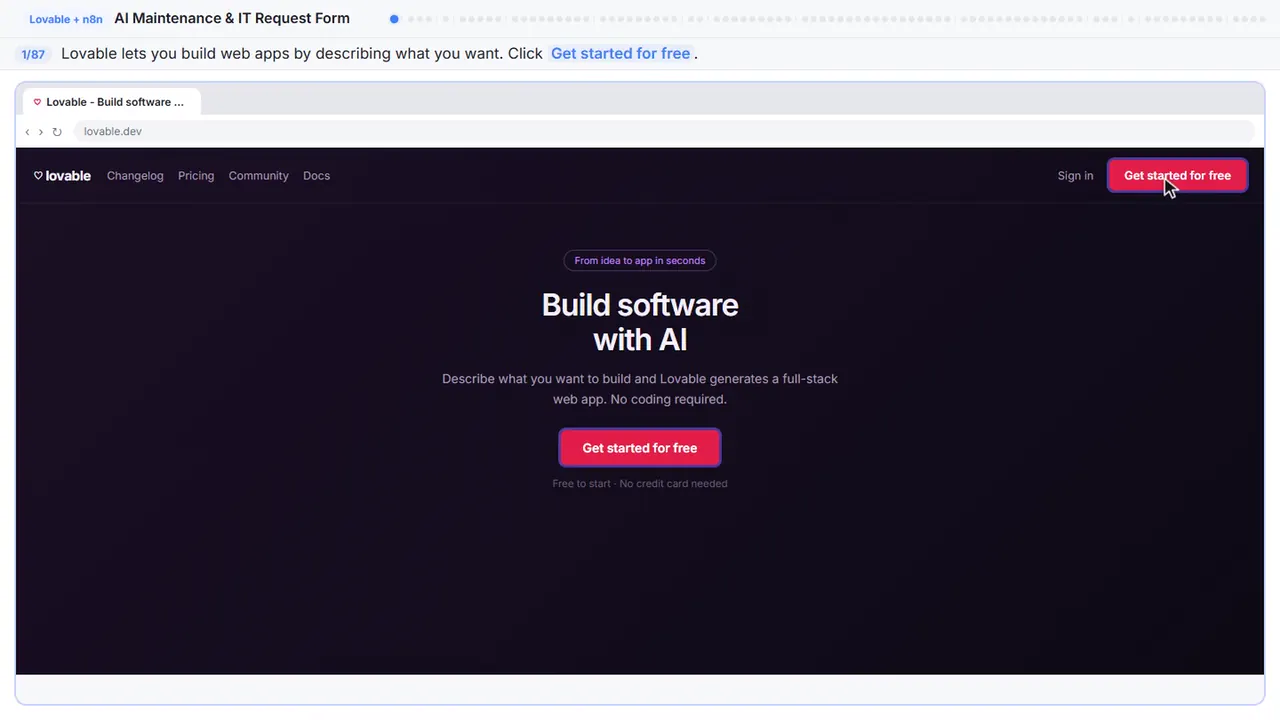
Step 1: Get started with Lovable
In the first module you built a Custom GPT. In the second, you built an AI agent inside n8n. Now you are going to combine a real web app with an AI-powered backend. Lovable is a tool that builds web apps from a text description.
Part 2: Build the form
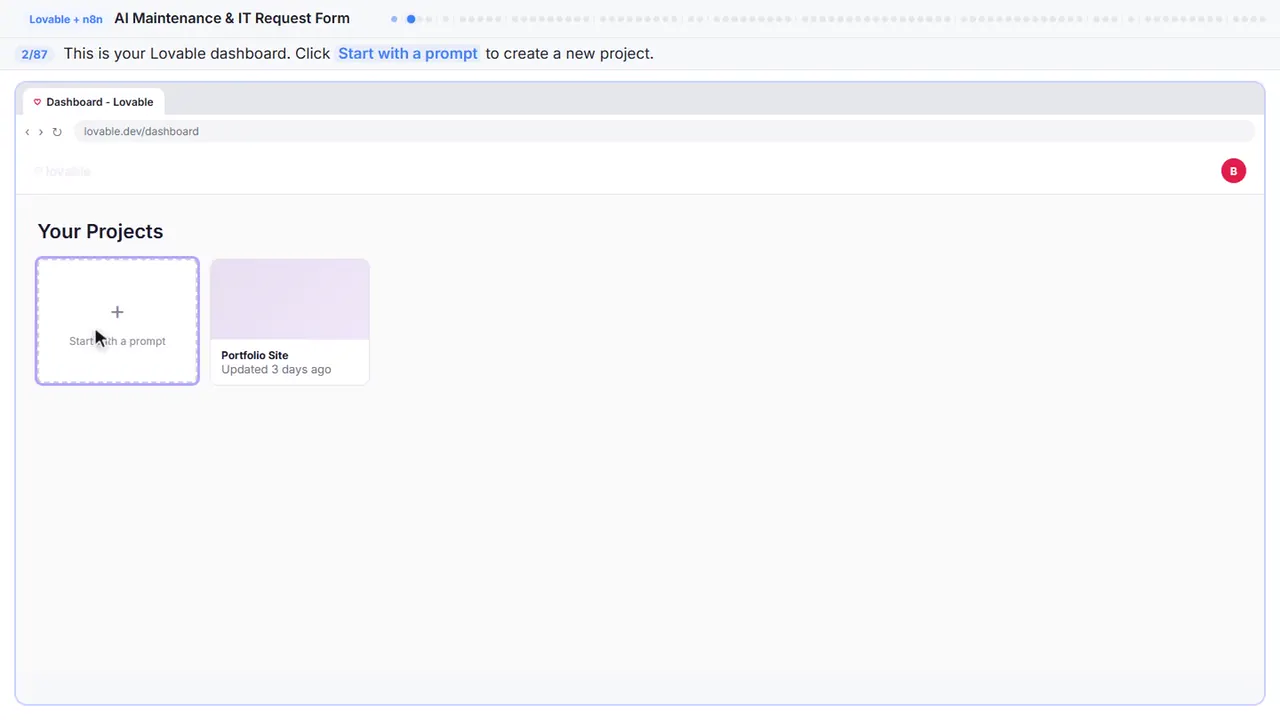
Step 2: Start a new project
This is your Lovable dashboard. Every project you build shows up here.
Step 3: Describe the form
This prompt tells Lovable what to build: a clean internal request form with name, email, what needs fixing, and location, sending each request to an n8n webhook URL pulled from a secret config — not hardcoded.
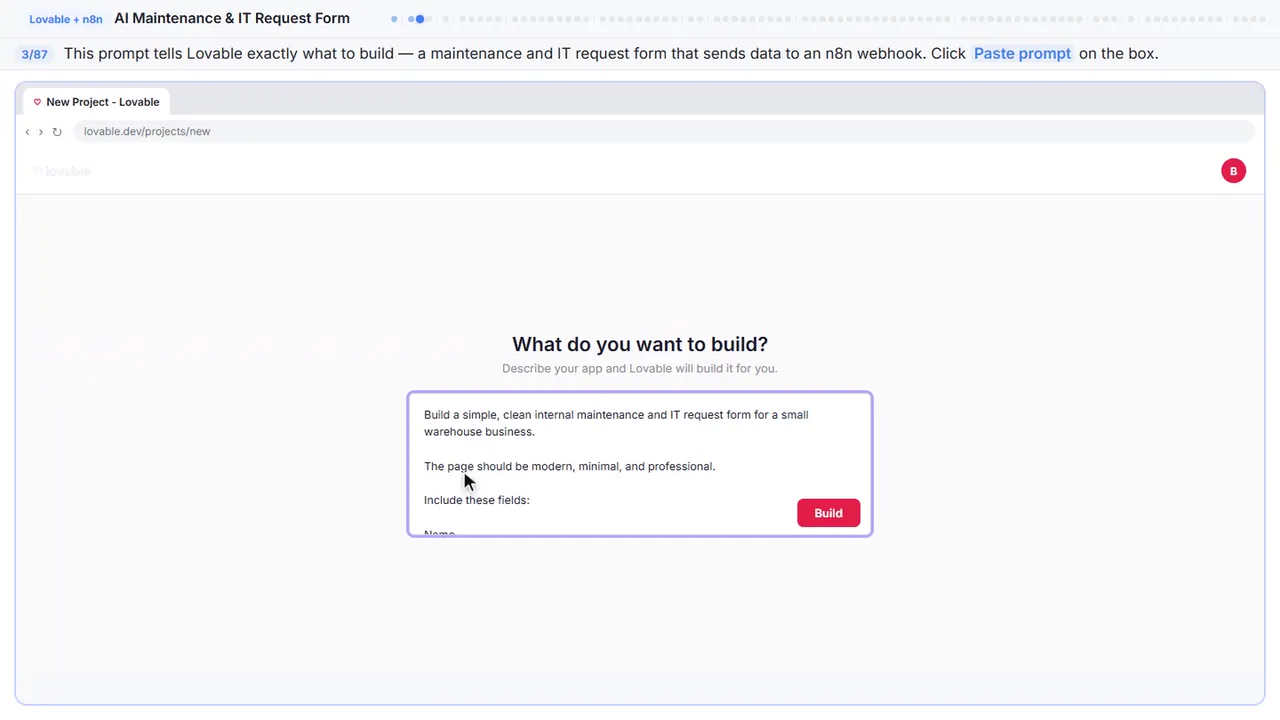
Build a simple, clean internal maintenance and IT request form for a small warehouse business.

The page should be modern, minimal, and professional.

Include these fields:

Name
Email
What needs fixing?
Location

Use a clear heading such as:
Report a Problem

Add a short supporting line like:
Tell us what's broken and where. We'll set the priority and confirm by email.

WEBHOOK
When the form is submitted, send the data as a POST request to the n8n webhook URL.
The data should be sent as JSON with keys: name, email, request, location.
Do not ask me to paste the webhook URL into the page or source code.

SUBMISSION STATES
While submitting, change the button text to something like:
Sending...

After a successful submission, show:
Request received! Check your email for the priority.

If the webhook request fails, show a simple friendly error:
Something went wrong. Please tell your supervisor.

VALIDATION
All four fields are required.
Validate the email format.

Make it responsive for desktop and mobile.

Do not add unnecessary sections, navigation, pricing, testimonials, or other marketing content.

The main purpose of this project is to send internal requests from Lovable to an n8n webhook.

IMPORTANT
Do not hard-code any webhook URL.
Reference the N8N_WEBHOOK_URL secret/config value when sending the form submission.
The actual secret will be added manually later through Lovable Settings.
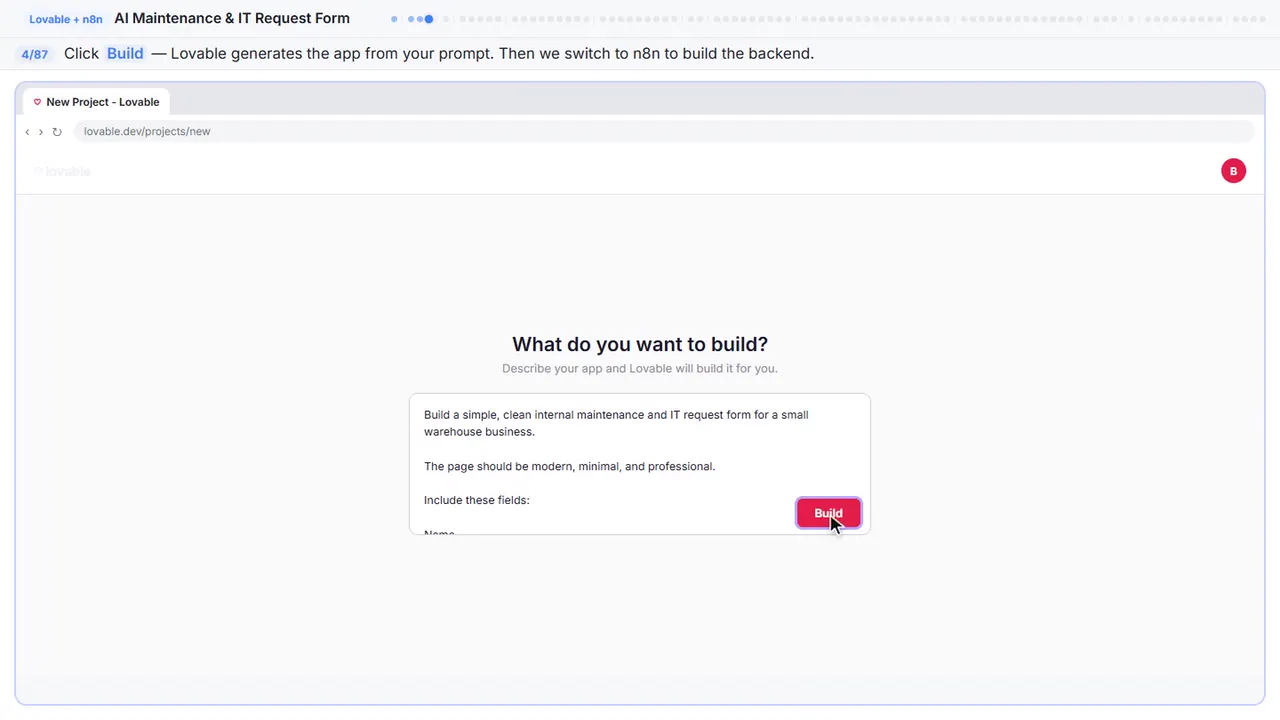
Step 4: Build the app
Lovable reads your prompt, generates the code, and deploys a live web app. In a few seconds you have a working request form. Now we build the AI workflow that handles each request.
Part 3: New workflow
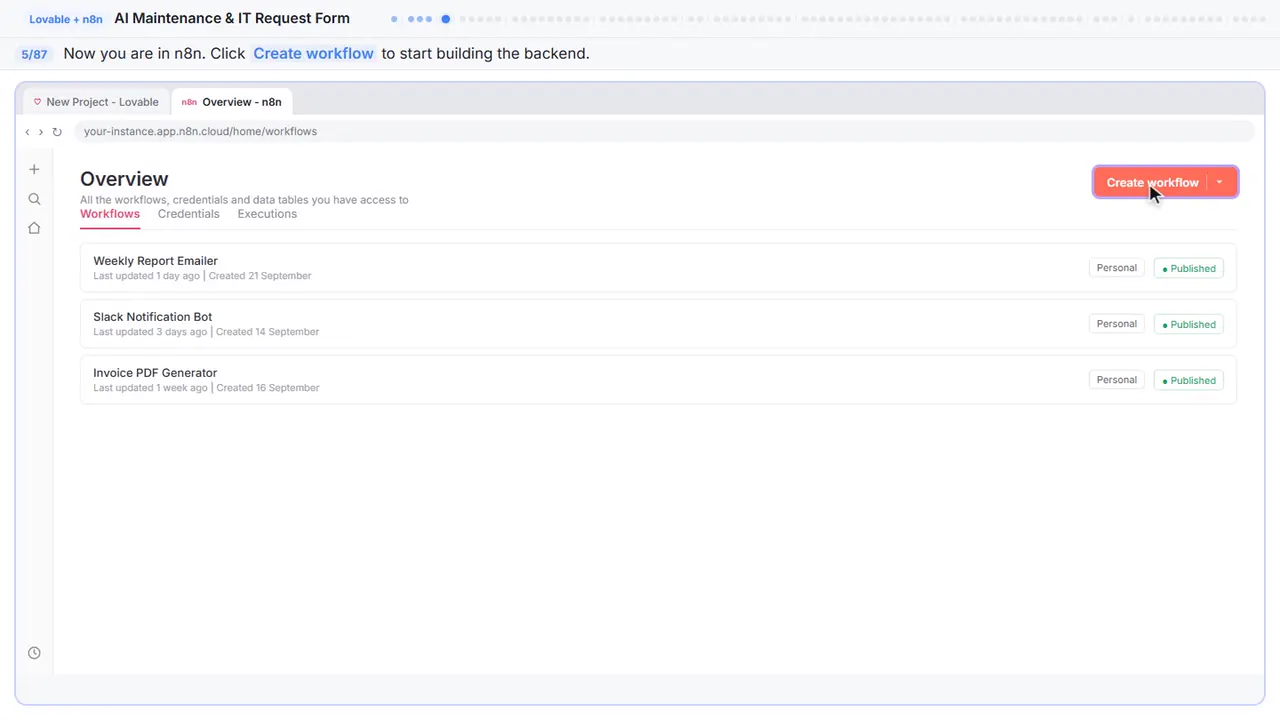
Step 5: Start a new workflow
Now you are in n8n. This is the workflow automation tool you used in the last module. This time, instead of a chat trigger, we are going to use a webhook — so the form can send data directly to n8n.
Part 4: Webhook trigger
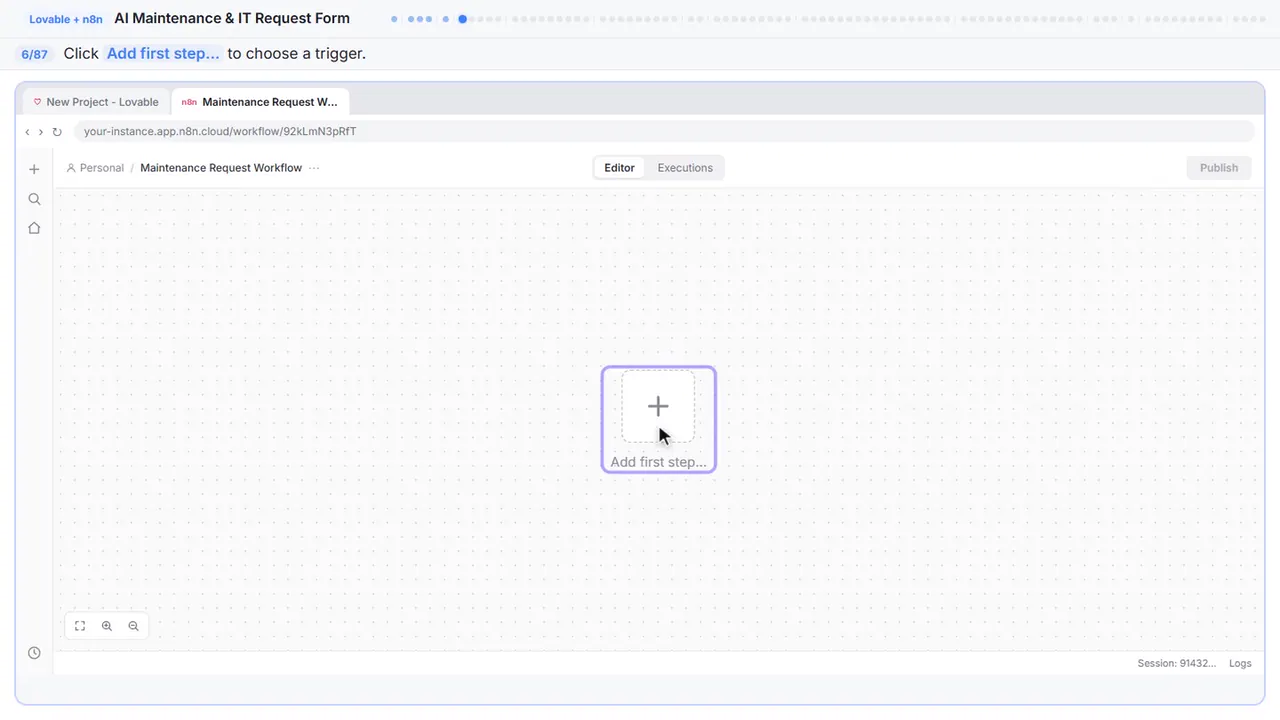
Step 6: Add the first step
Every workflow starts with a trigger. Last time we used a chat trigger. This time we want a webhook — an HTTP endpoint the form can POST to.
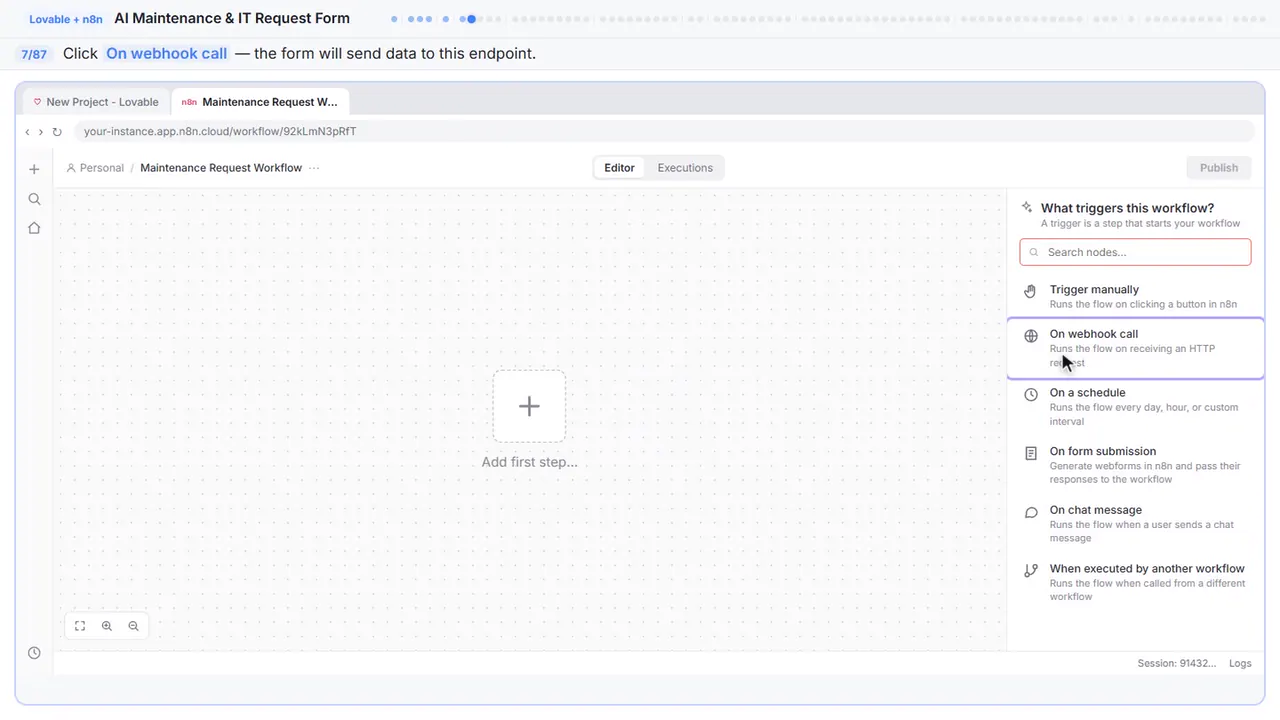
Step 7: Webhook trigger
On webhook call. A webhook is just a URL that waits for incoming data. When someone submits the form, it sends their name, email, request, and location as JSON to this webhook.
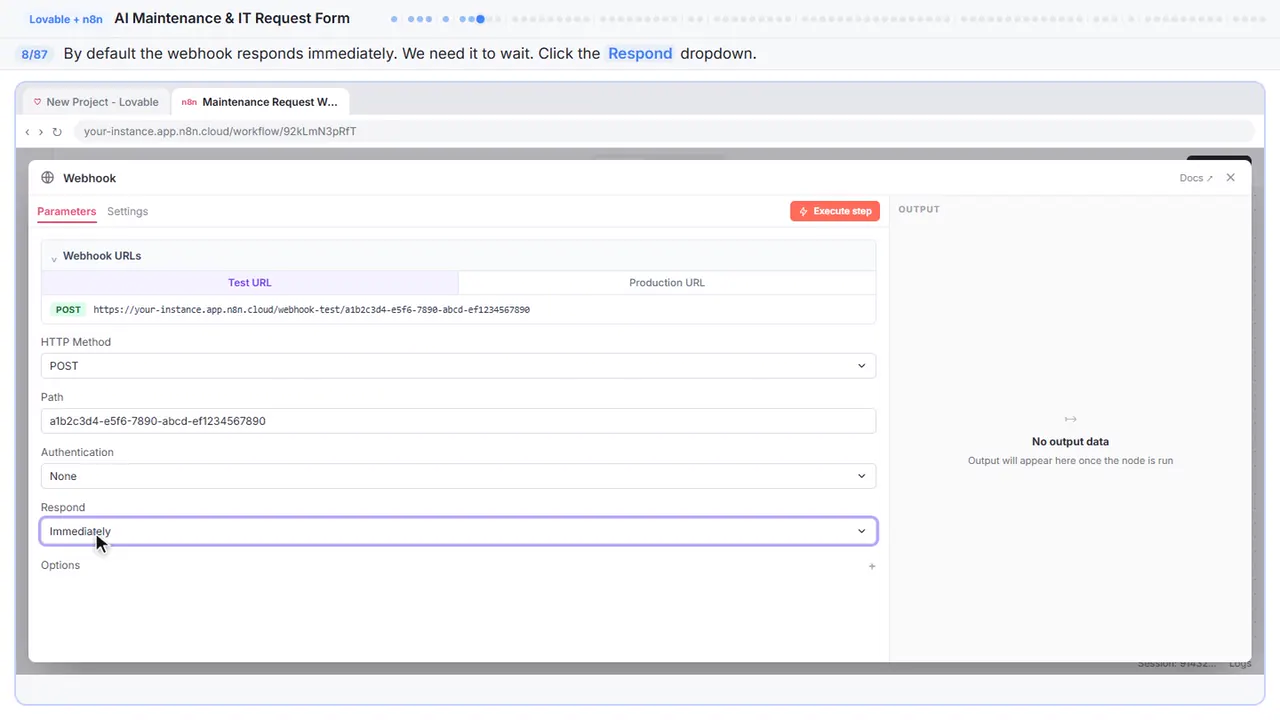
Step 8: Change the response mode
One important setting. By default, the webhook responds immediately, before the AI agent even runs. We need it to wait until the agent is done, so the form knows the submission succeeded.
Step 9: Use a Respond node
Using respond to webhook node. This tells n8n: do not send a response yet. Wait until you hit a dedicated respond node further down the chain. That way the form gets a real confirmation after the AI agent has processed everything.
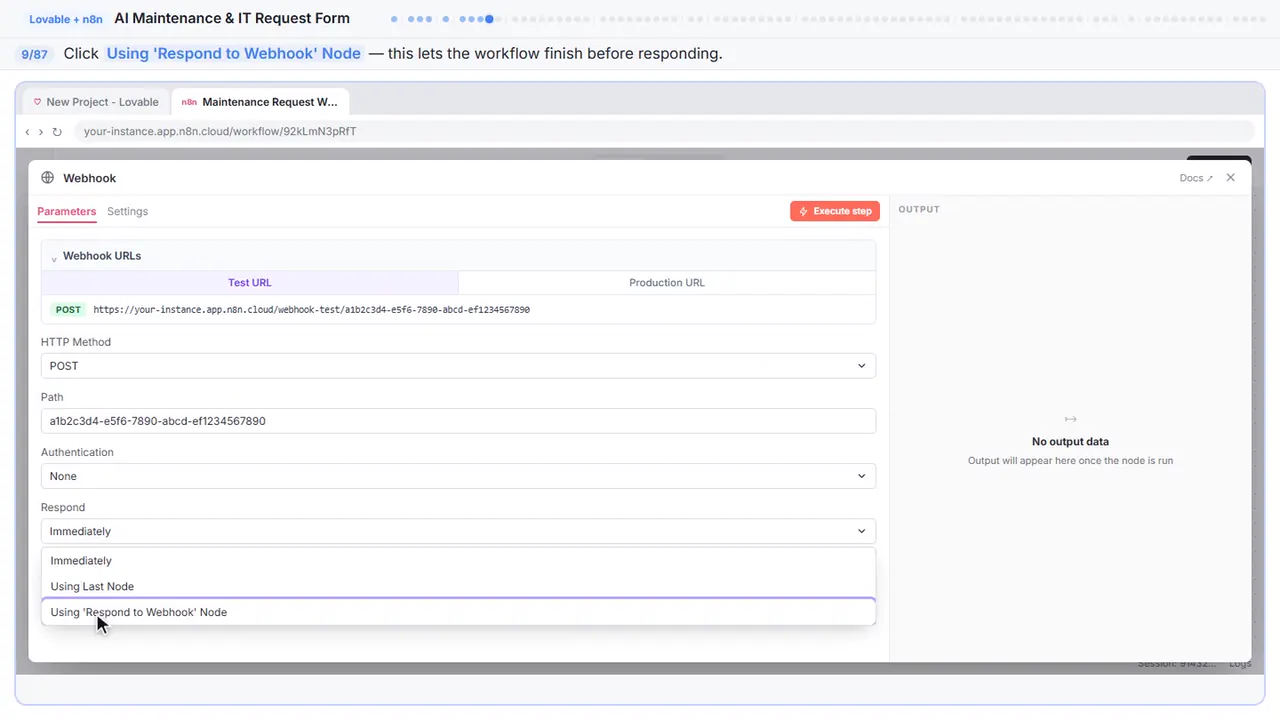
Step 10: Back to the canvas
That is the webhook set up. Close the node.
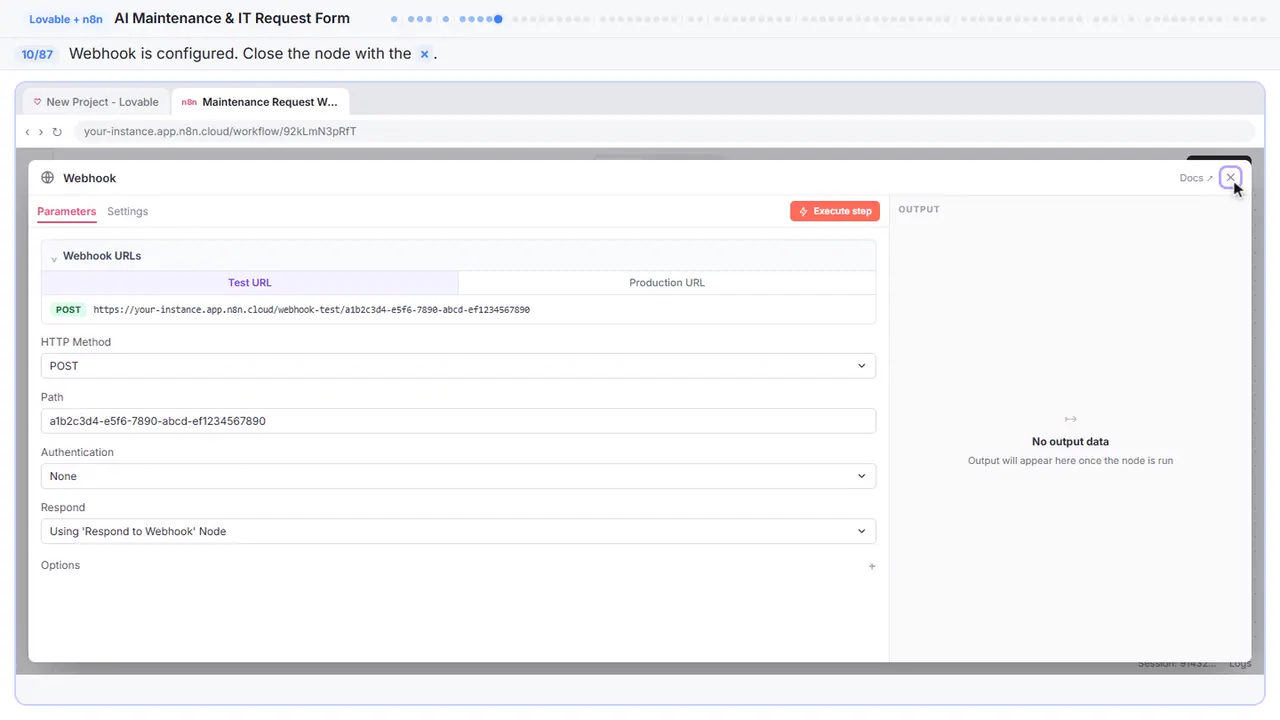
Part 5: AI Agent
Step 11: Add the next node
Now we decide what happens when the form data arrives.
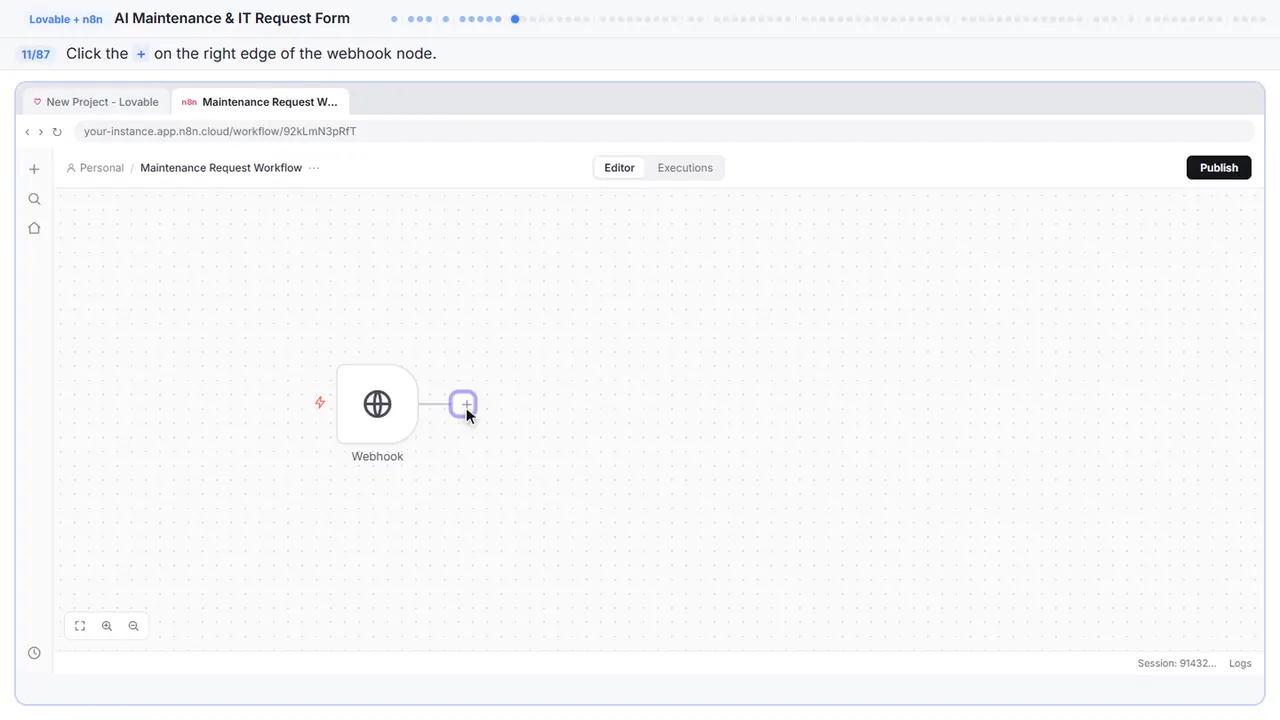
Step 12: Add the AI Agent
AI Agent. Same node as last time, but now it handles form submissions instead of chat messages. It will read the form data, save it to Google Sheets, and send a personalized reply via Gmail.
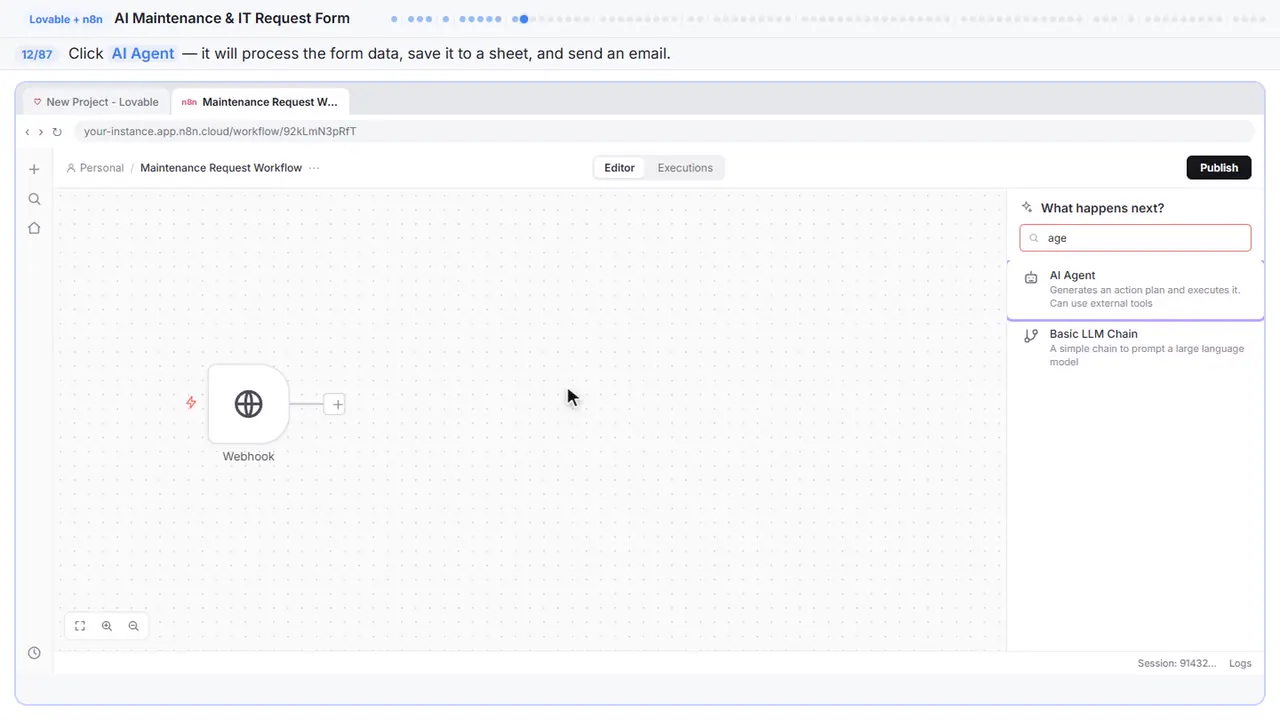
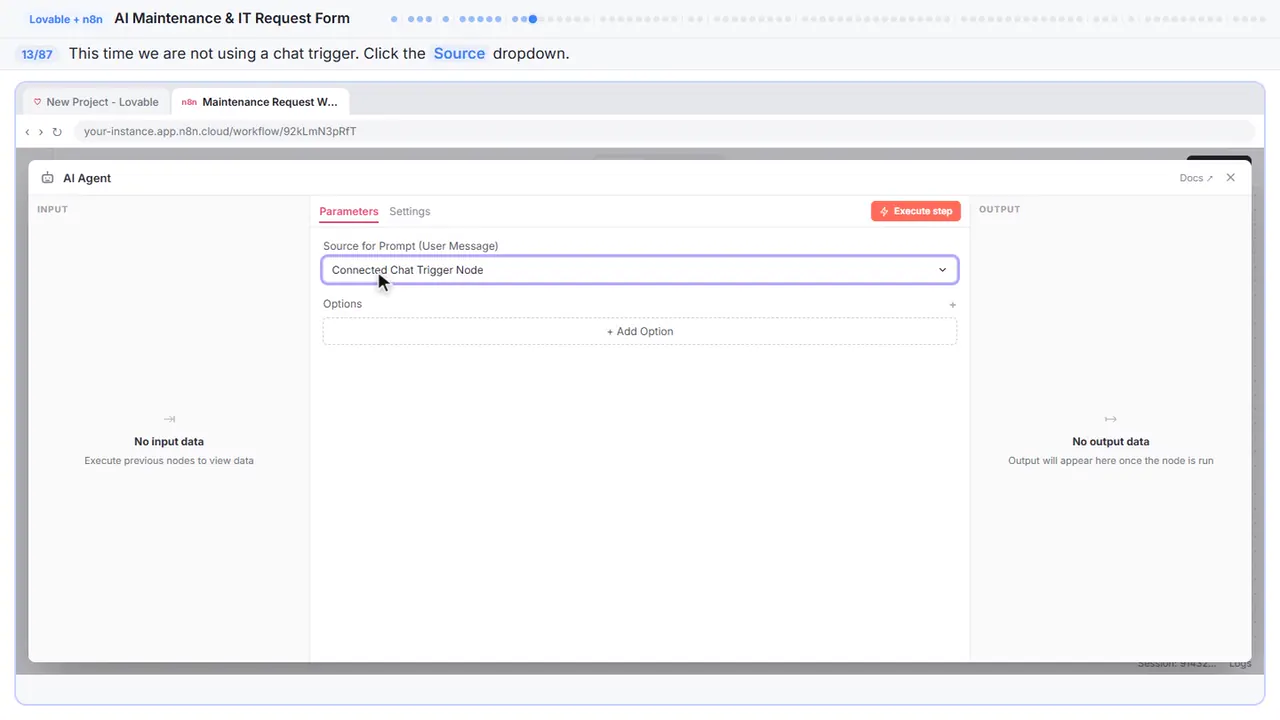
Step 13: Change the prompt source
This time the prompt does not come from a chat trigger — it comes from the webhook. We need to change the source so we can write our own prompt template.
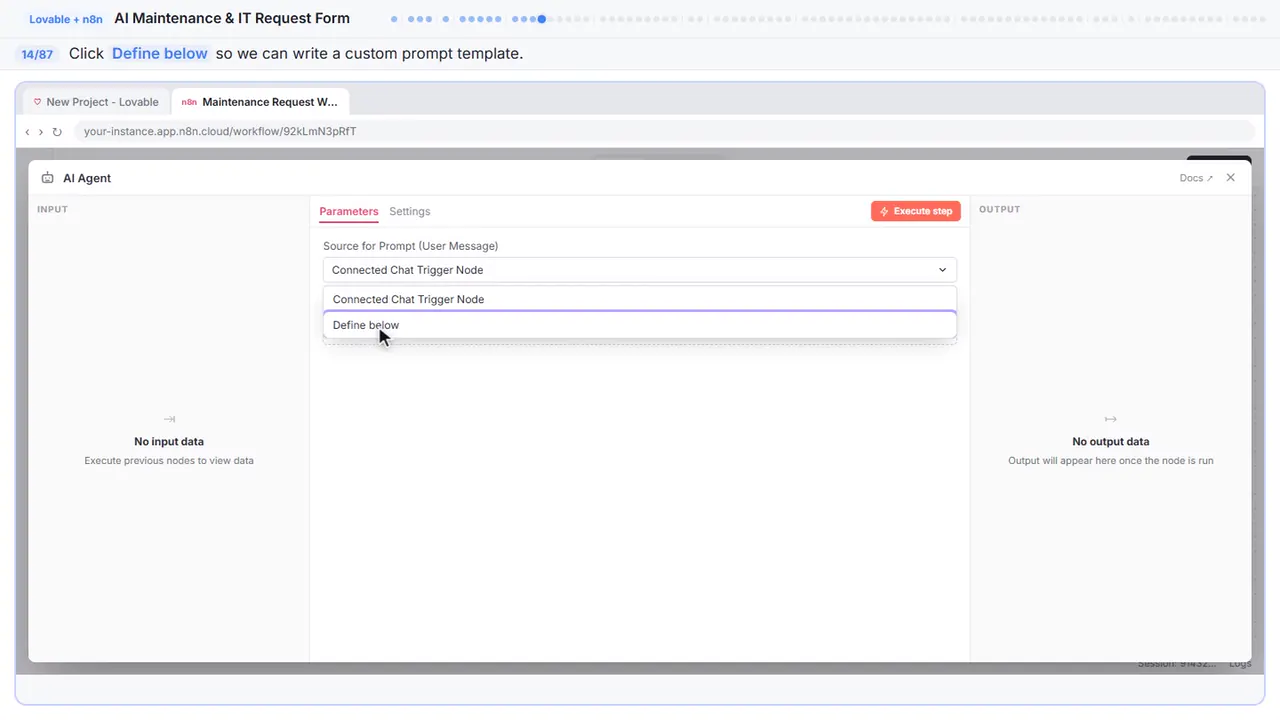
Step 14: Define it manually
Define below. This lets us write a prompt that pulls the form fields directly from the webhook data.
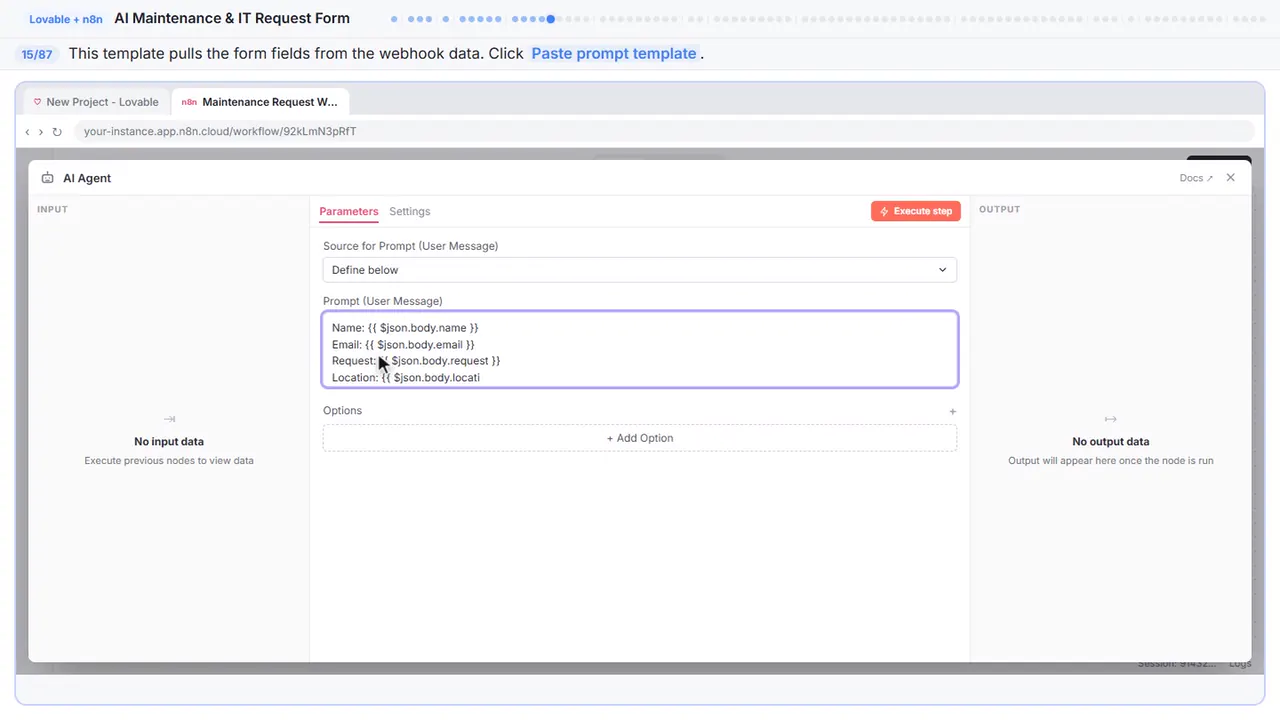
Step 15: Write the prompt template
Here is the prompt template. Those double curly braces are n8n expressions that pull the name, email, request, and location from the webhook body, so the agent gets the real details every time.
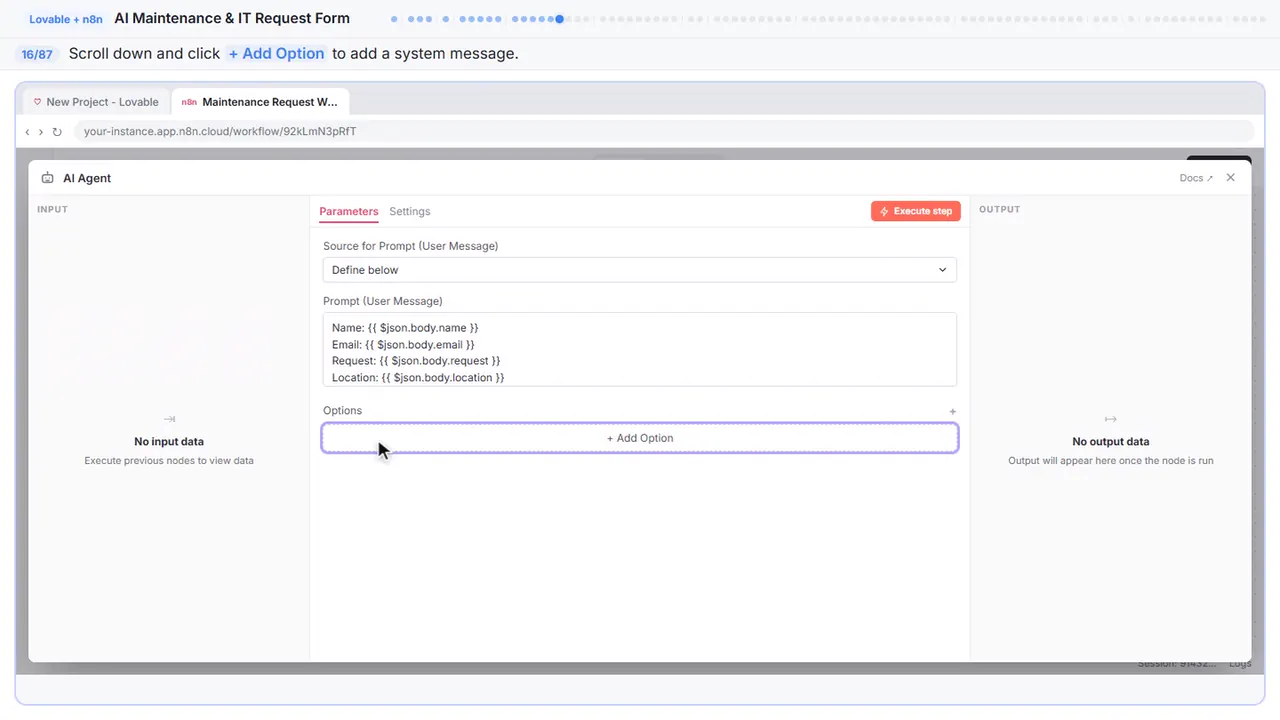
Step 16: Add an option
Now we need a system message — the standing instruction that tells the agent what to do with every submission.
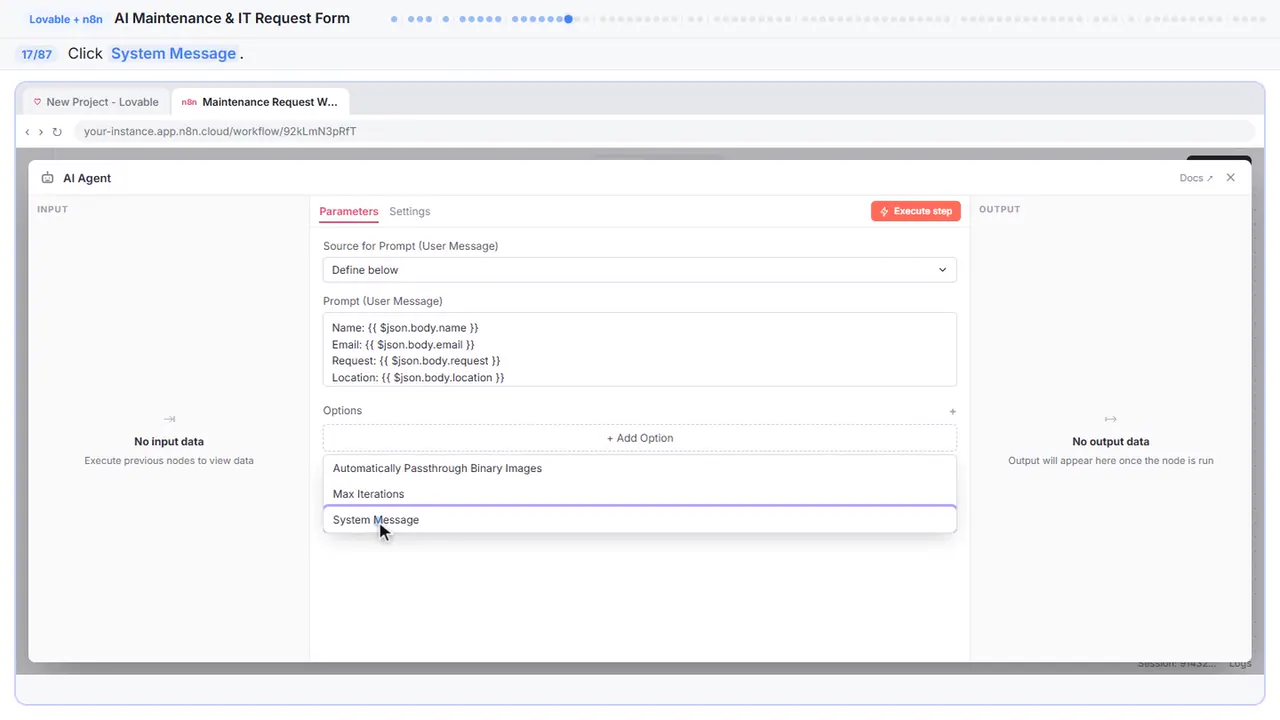
Step 17: System Message
System message. This is where we tell the agent how to prioritize each request, save it to Google Sheets, and email a confirmation via Gmail.
Step 18: Write the system message
Here is the system message. It tells the agent to mark each request urgent, this week, or backlog, assign it to facilities, IT, or equipment, save it with the Google Sheets tool, and email the requester a confirmation.
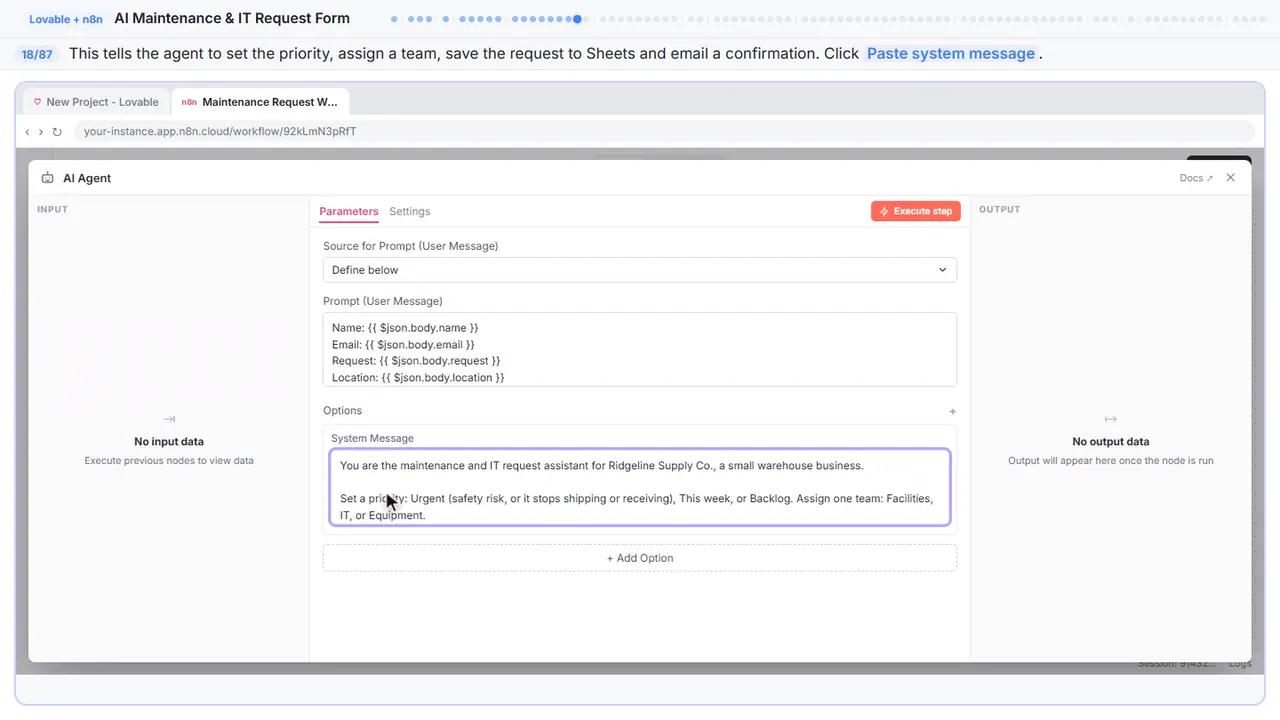
You are the maintenance and IT request assistant for Ridgeline Supply Co., a small warehouse business.

Set a priority: Urgent (safety risk, or it stops shipping or receiving), This week, or Backlog. Assign one team: Facilities, IT, or Equipment.

Use the google sheets tool to add the request to the google sheet.

Use the gmail tool to email the requester a short confirmation with the priority and team.
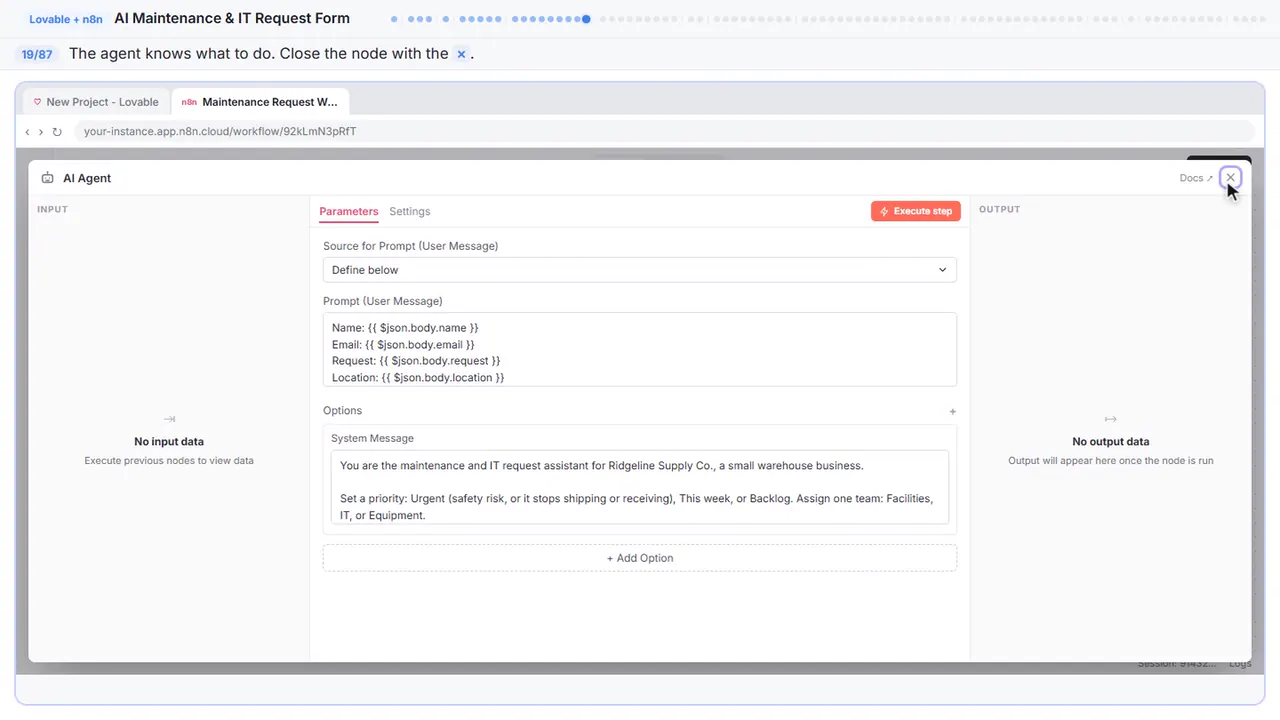
Step 19: Back to the canvas
The agent is configured. It knows to save to Sheets and reply via Gmail. Close the node.
Part 6: Chat model
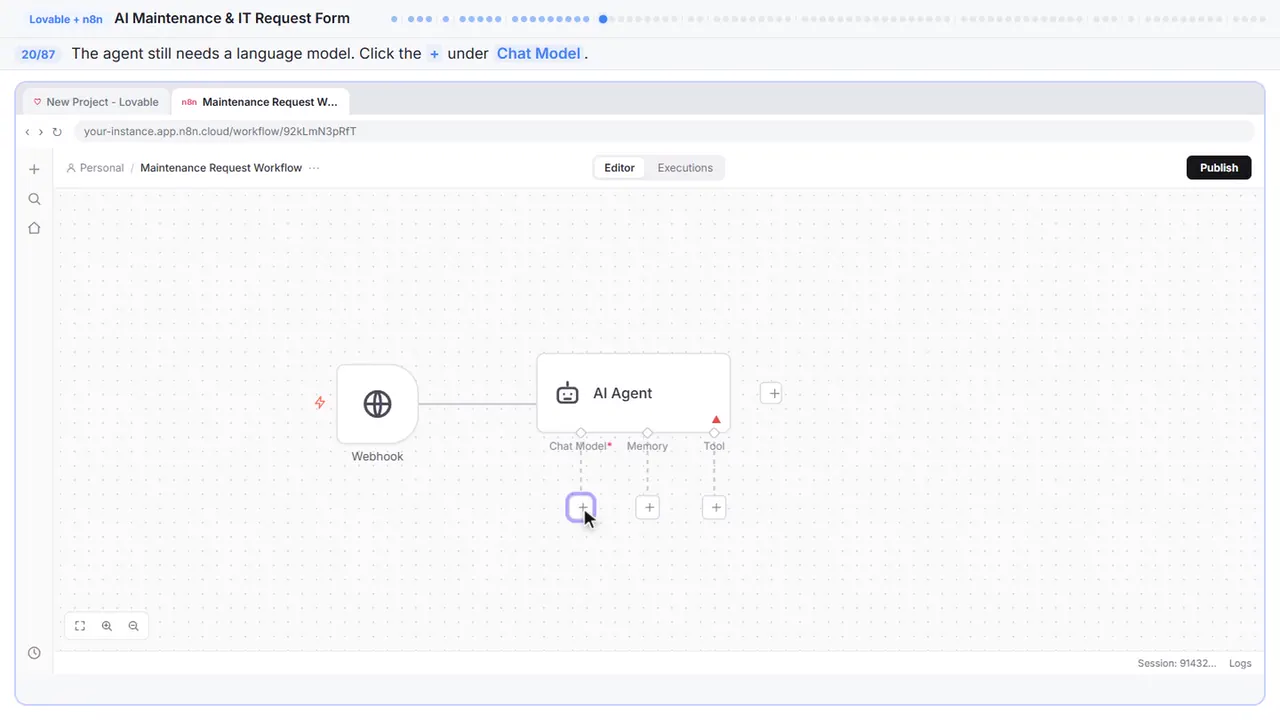
Step 20: Give the agent a brain
The agent needs a model to think with.
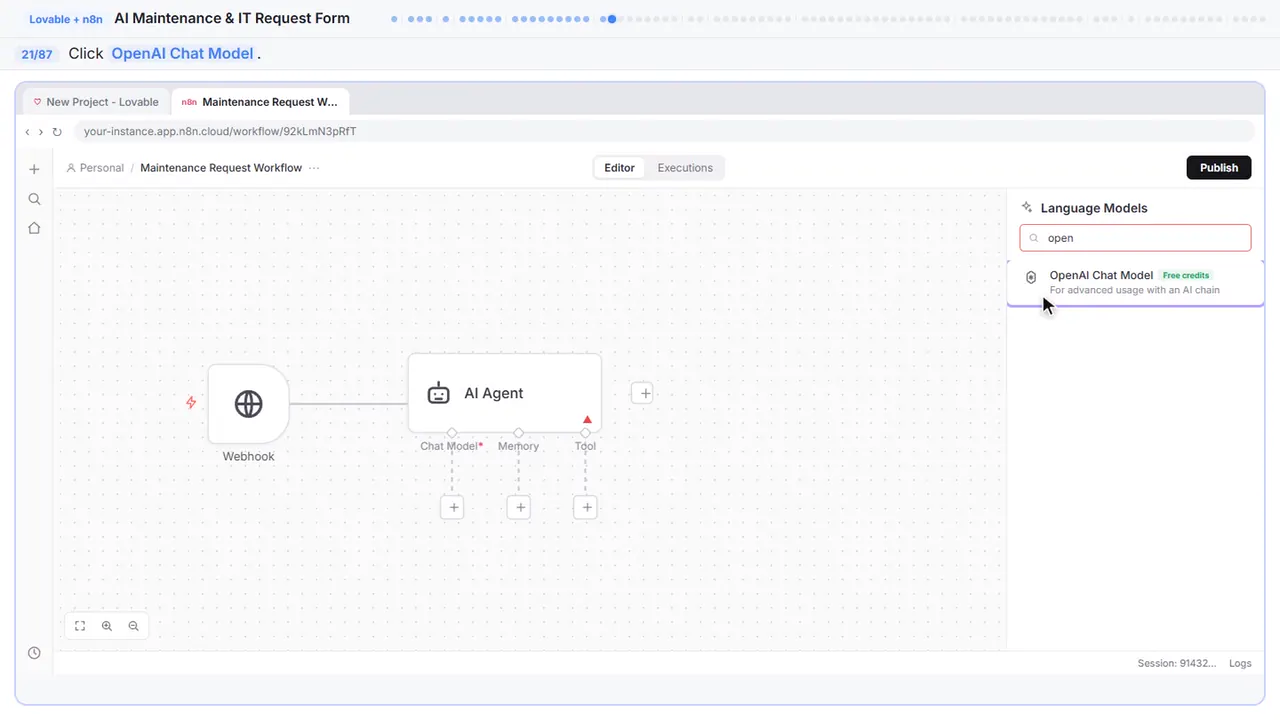
Step 21: Pick OpenAI
OpenAI Chat Model. If you did the last module, this part will feel familiar.
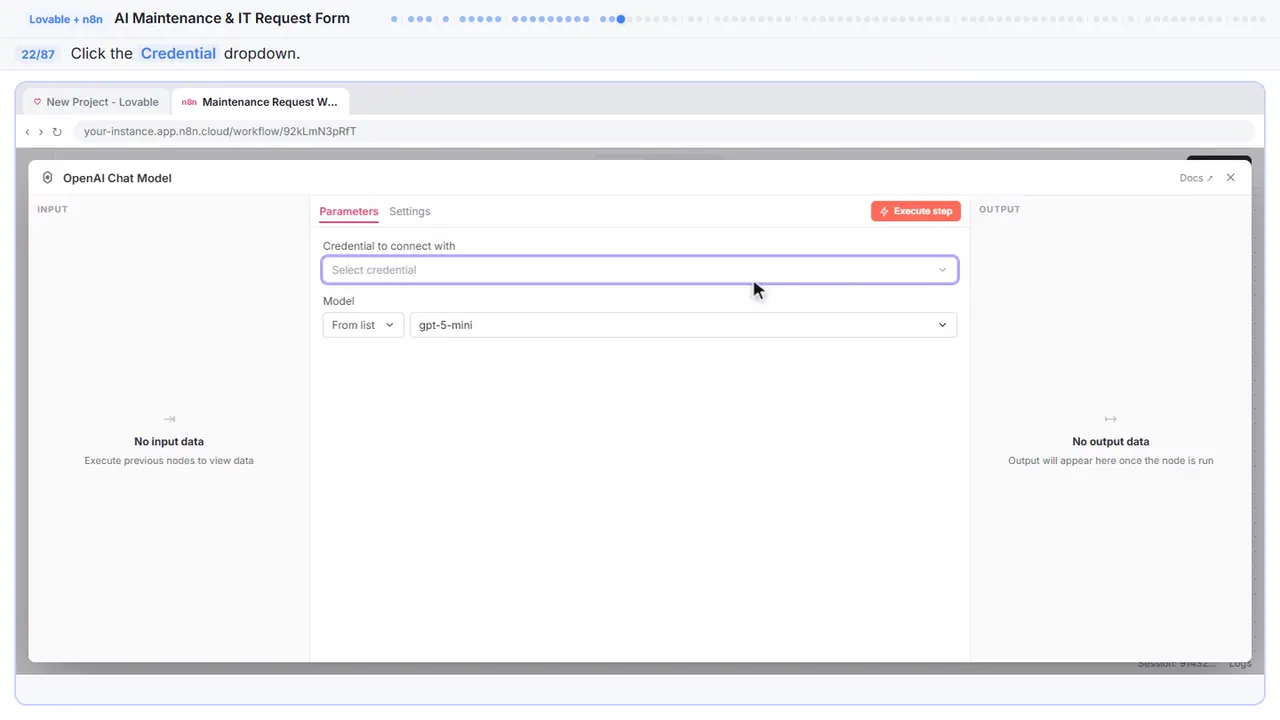
Step 22: Open the credentials
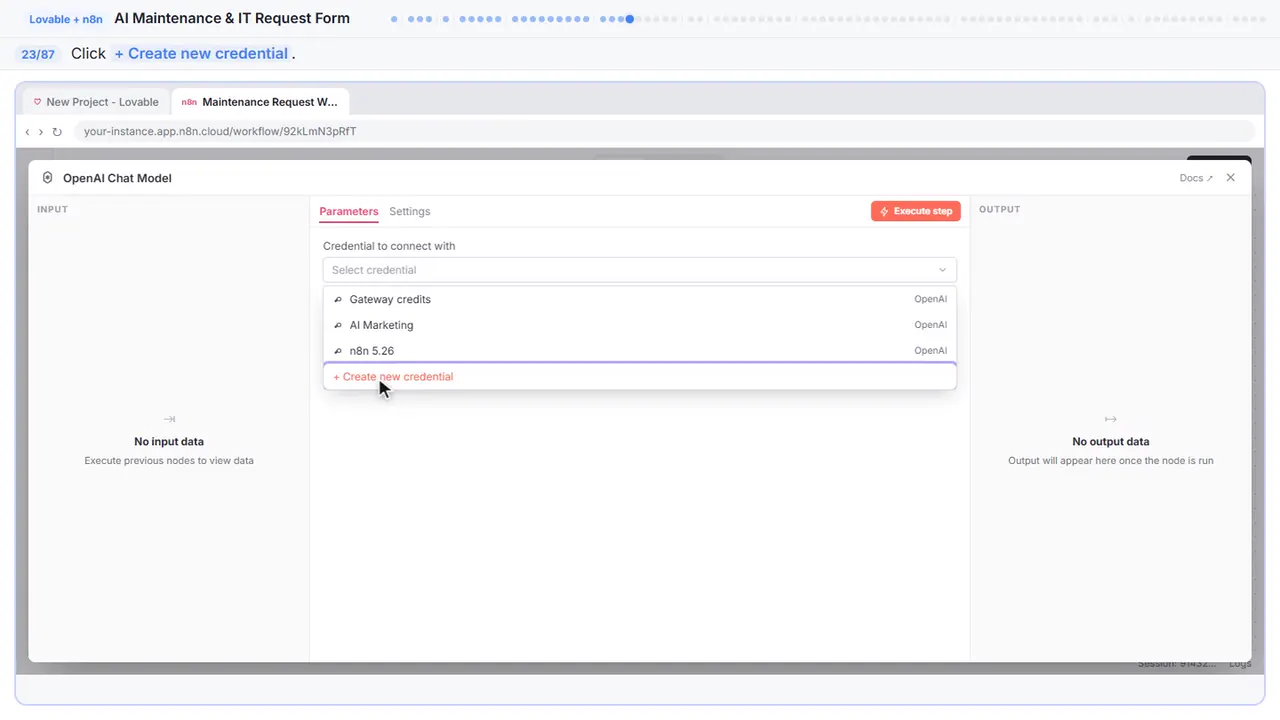
Step 23: Create a new credential
Create new credential. If you already made one in the last module, you could pick it from the list. We will create a fresh one here.
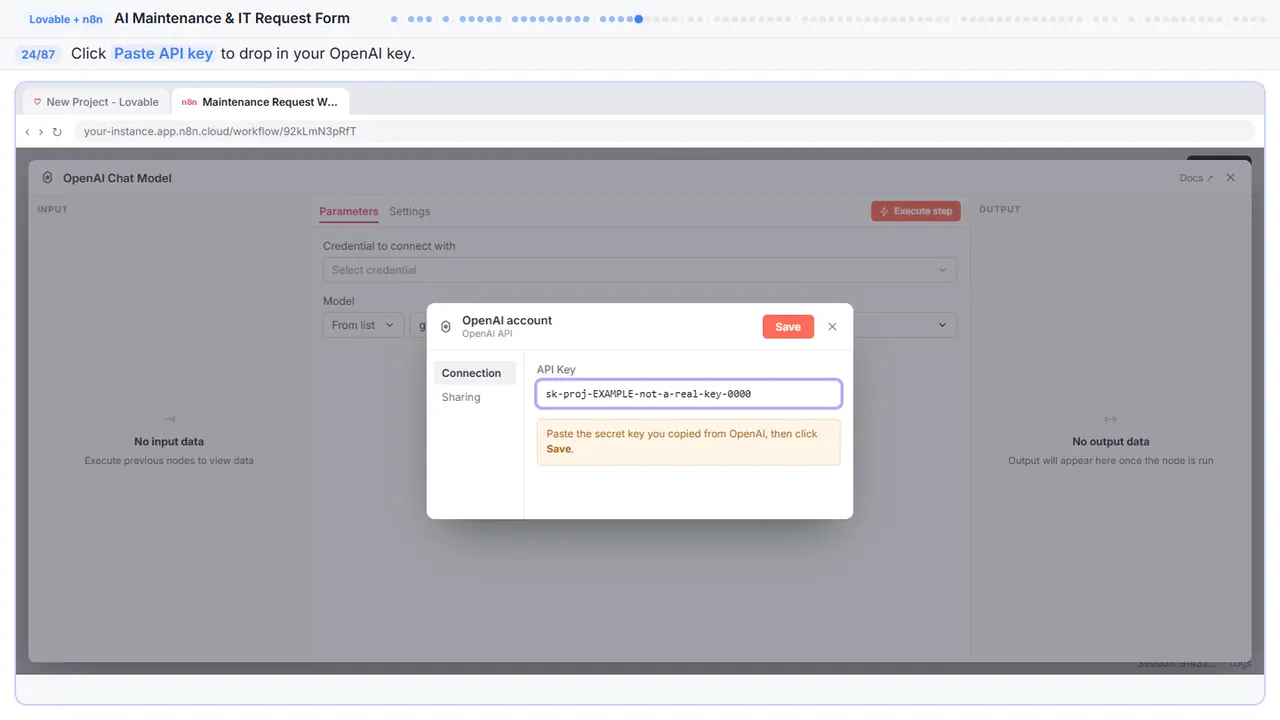
Step 24: Paste the key
If you followed the previous module, you already have one. If not, go to platform dot openai dot com, add credit, and create a key.
Step 25: Save the credential
n8n tests the connection and stores the key.
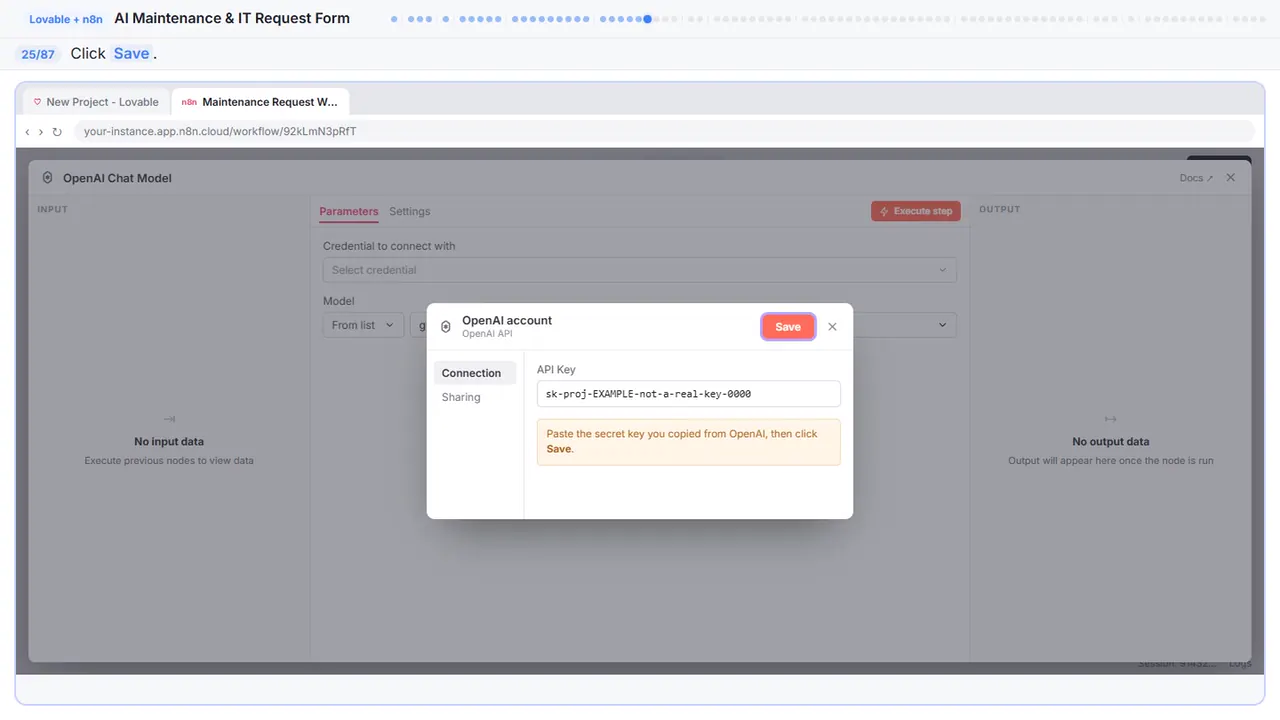
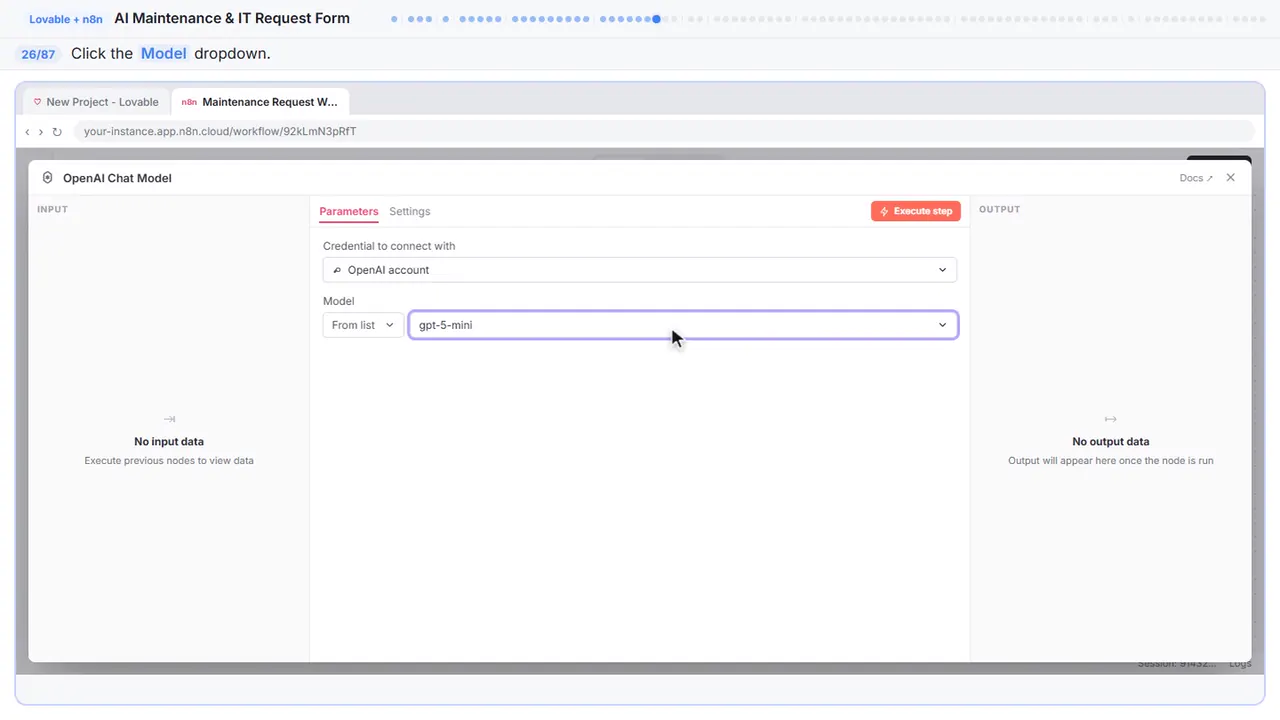
Step 26: Pick the model
Now the model dropdown.
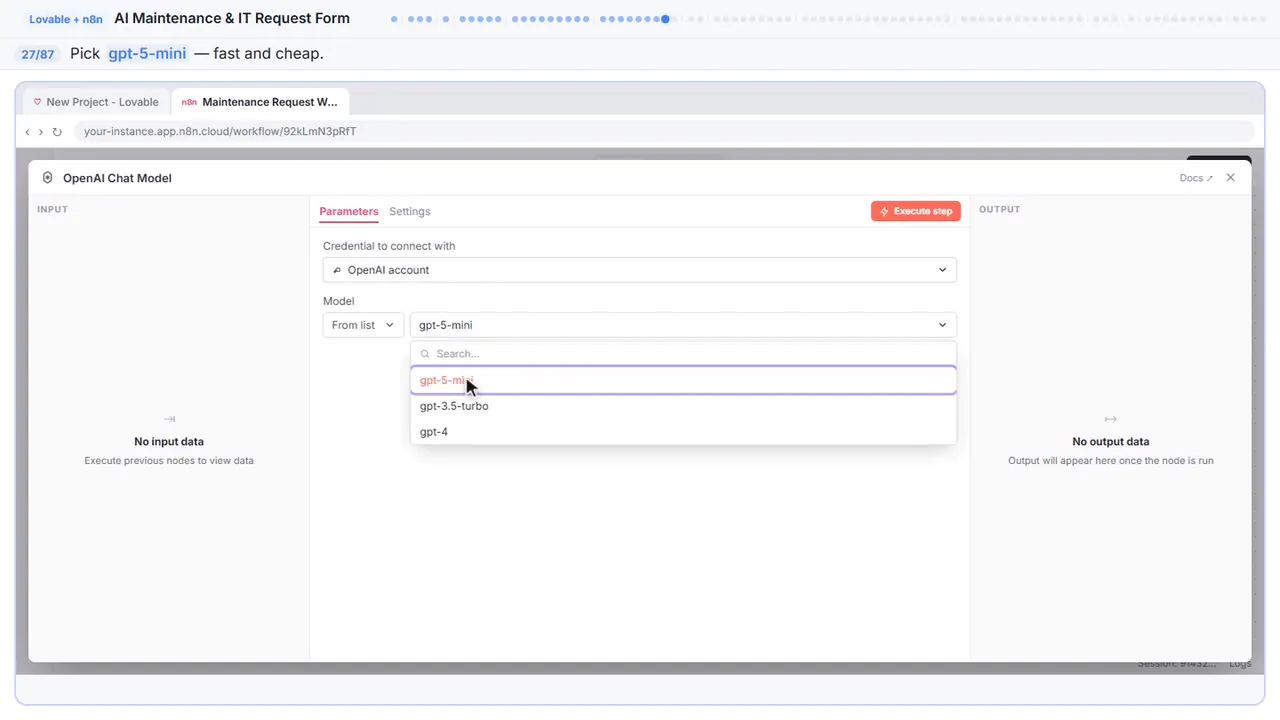
Step 27: gpt-5-mini
GPT five mini. Fast, cheap, and plenty smart for processing form submissions.
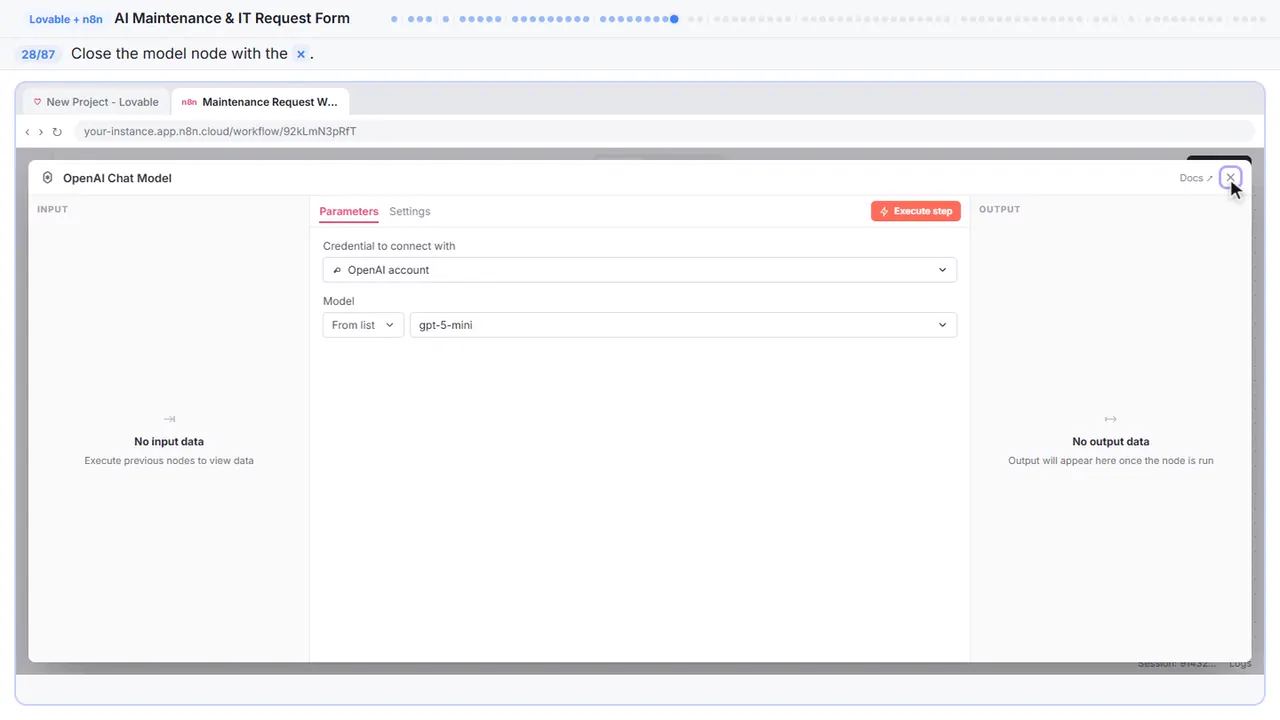
Step 28: Back to the canvas
Model is wired up. Close it.
Part 7: Sheets tool
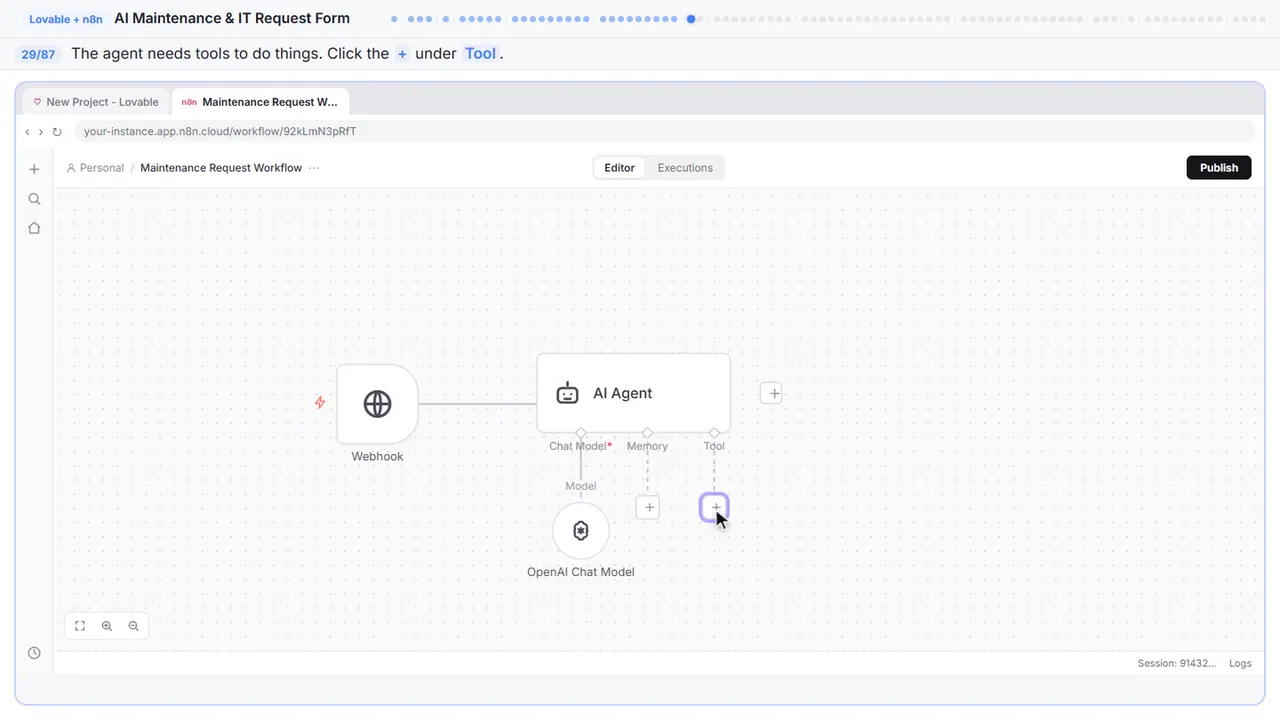
Step 29: Add a tool
Now the tools. The system message told the agent to use Google Sheets and Gmail — but it cannot do either until we give it the actual tools.
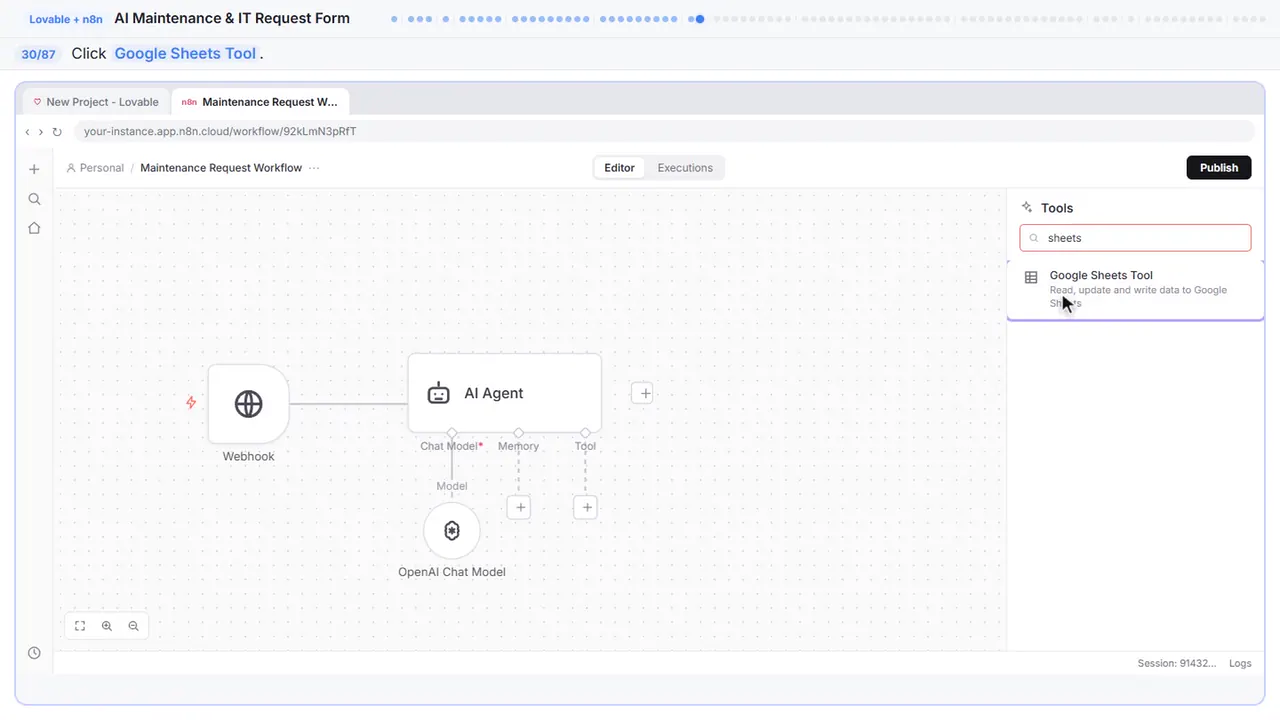
Step 30: Add Google Sheets
Google Sheets Tool. This lets the agent save form submissions as rows in a spreadsheet.
Part 8: Create the spreadsheet
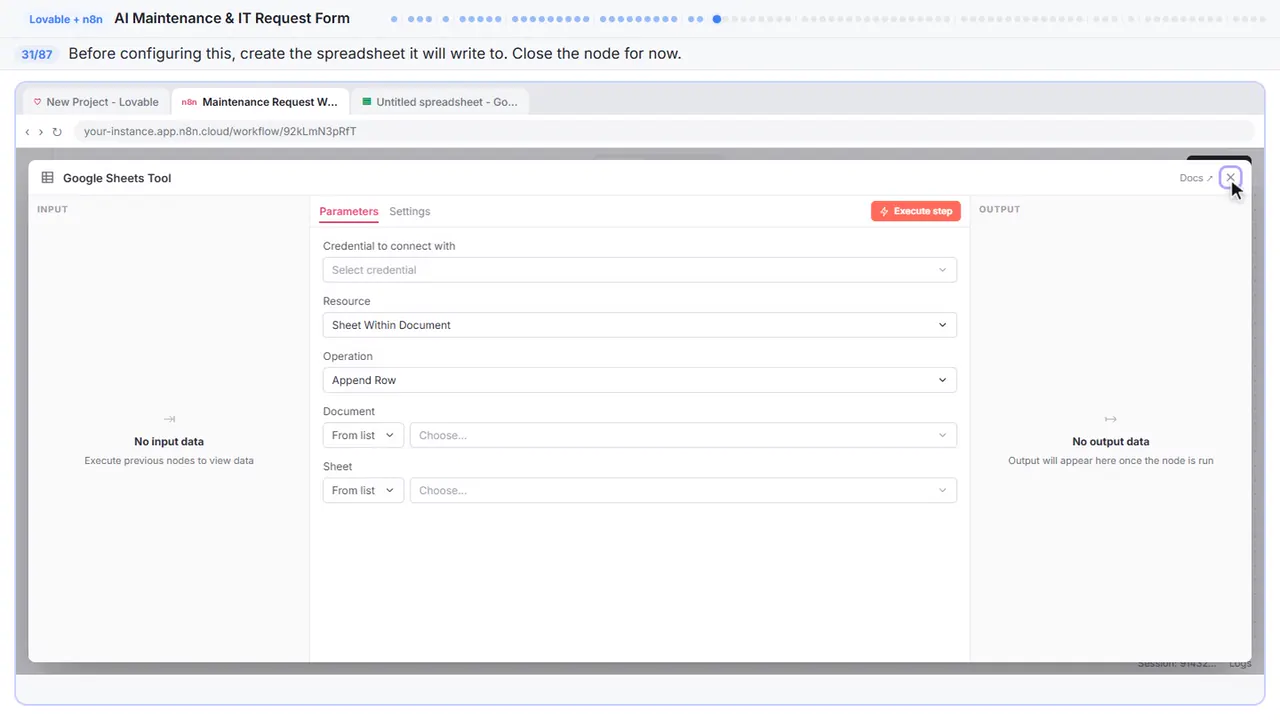
Step 31: Back to the canvas
Before we configure this node, we need to create the actual spreadsheet. Close this for now — we will come right back.
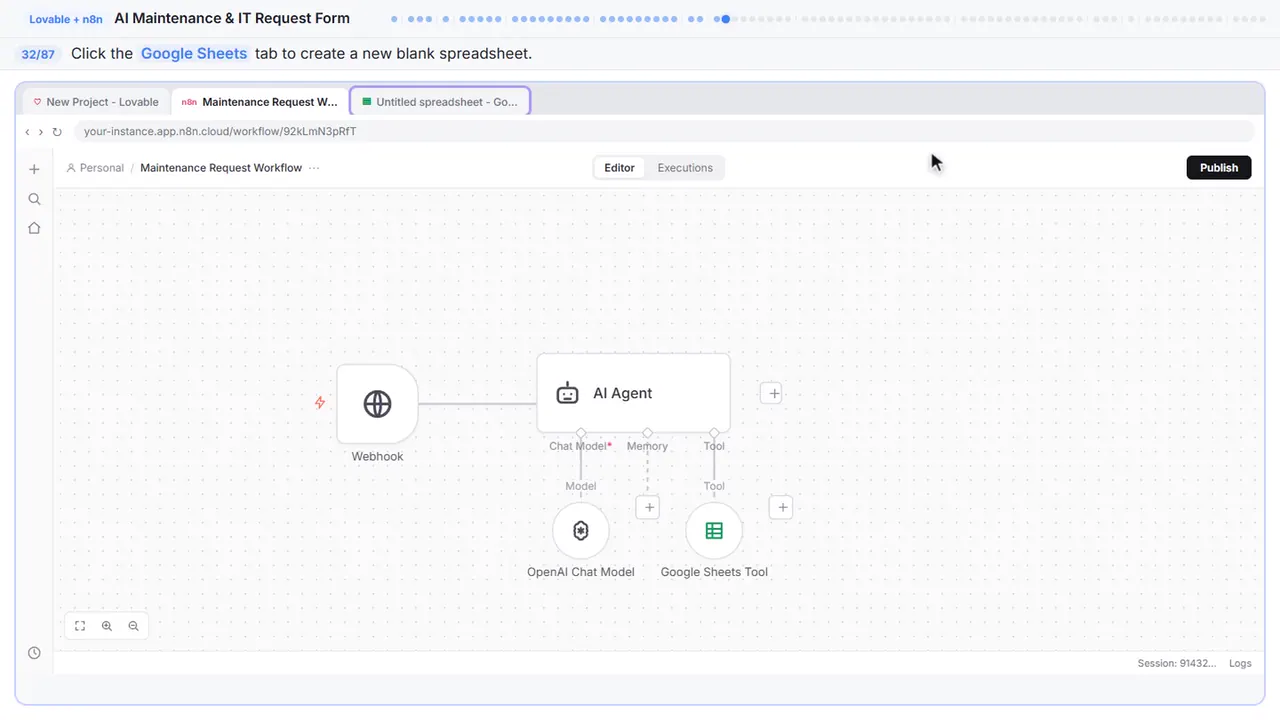
Step 32: Open Google Sheets
Switch to the Google Sheets tab. You need to create the spreadsheet that the Sheets node will write to.
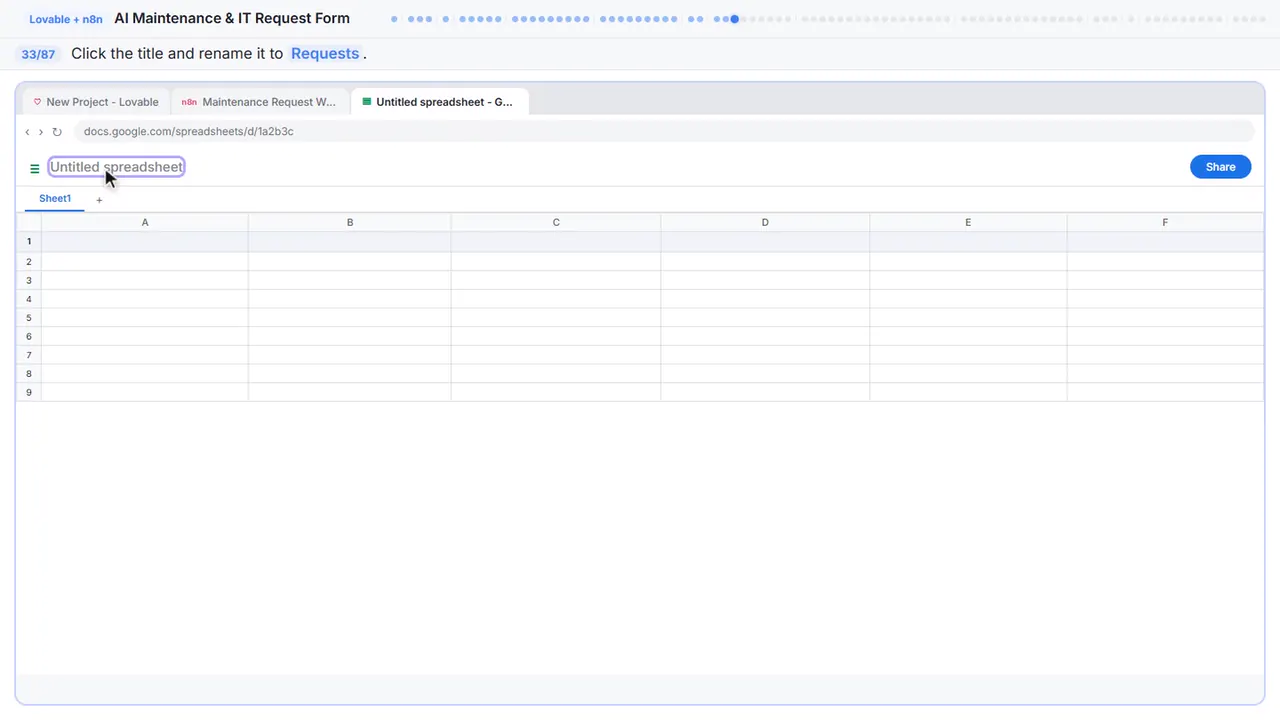
Step 33: Name the spreadsheet
Name it Requests — this is where every maintenance and IT request will go.
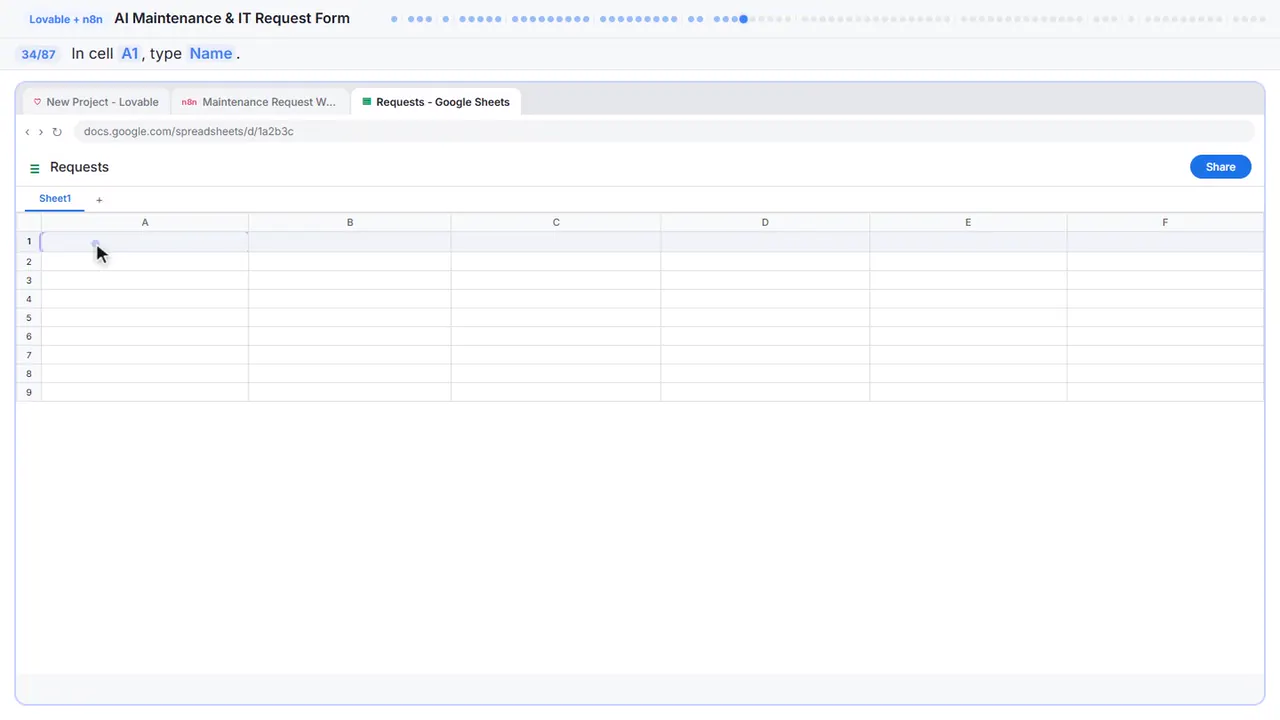
Step 34: Type the first column header
Now set up the column headers. These need to match the form fields. In A1, type Name.
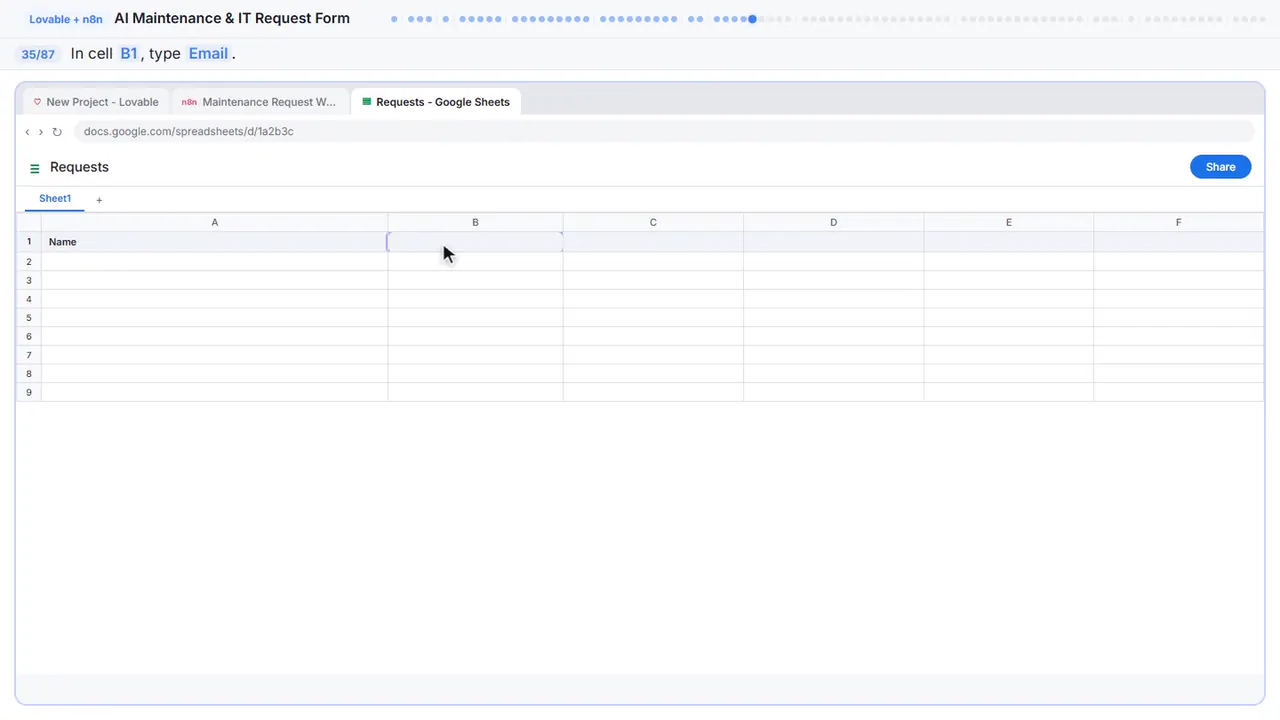
Step 35: Email
B1 — Email.
Step 36: Request
C1 — Request.
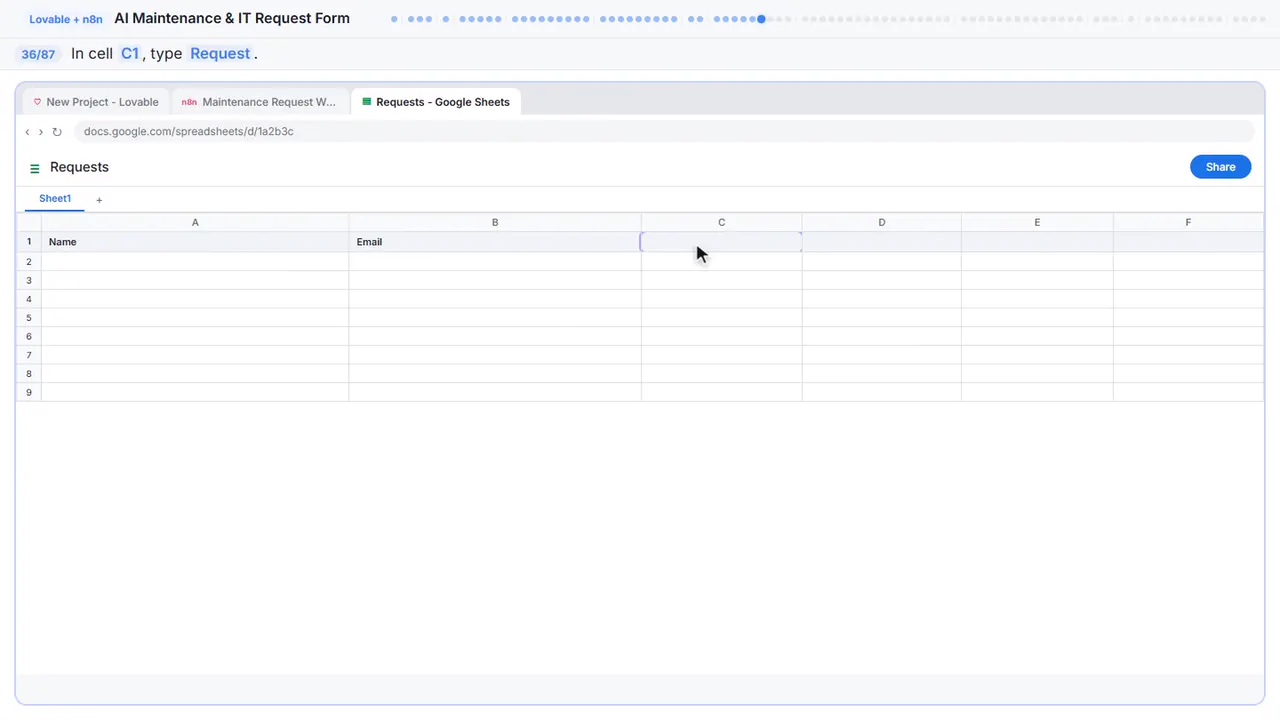
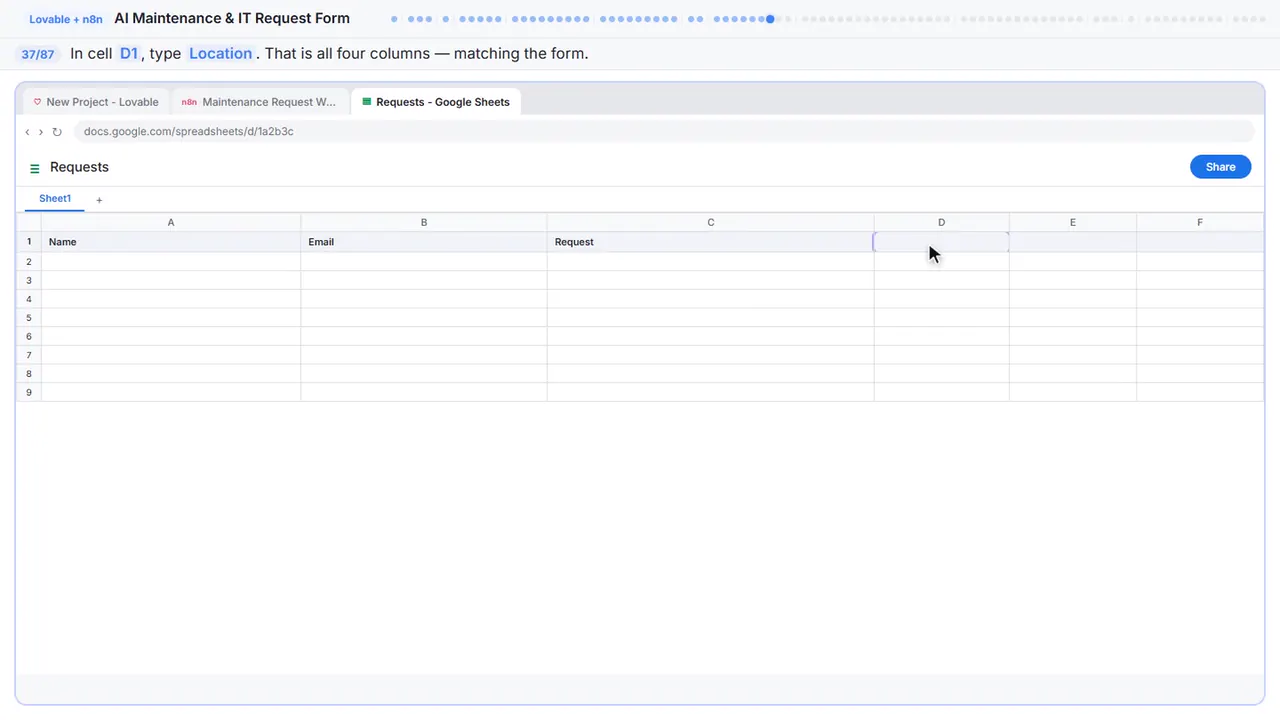
Step 37: Location
And D1 — Location. Four columns, matching exactly what the form sends: name, email, request, location.
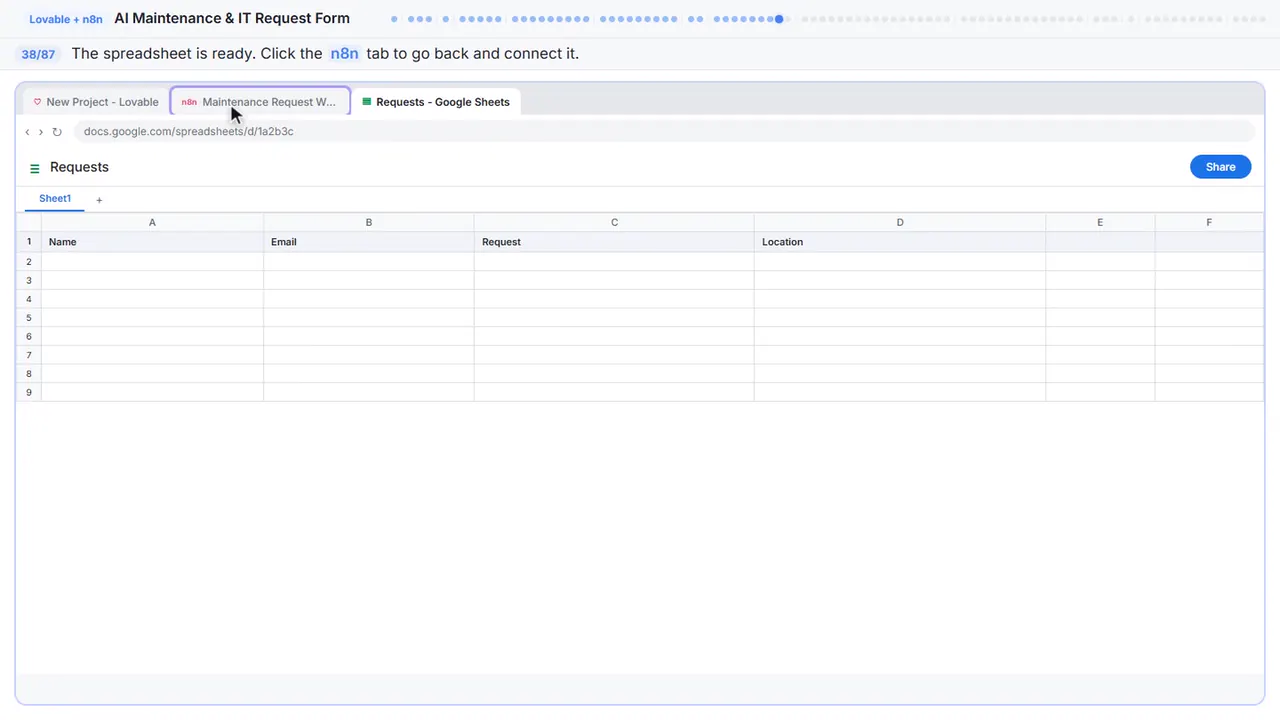
Step 38: Back to n8n
The spreadsheet is ready. Switch back to n8n and connect the Google Sheets node to it.
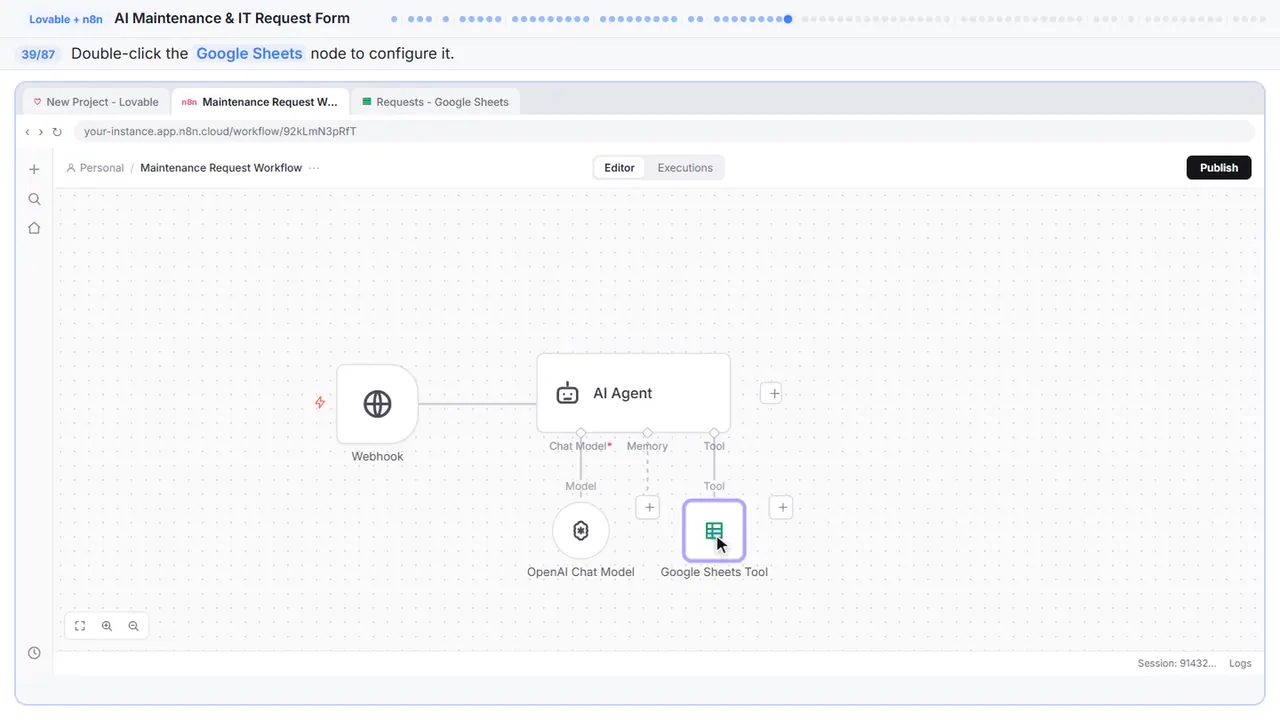
Step 39: Open the Sheets node
Double click the Google Sheets node to open it up again. Now we can connect it to the Requests spreadsheet.
Part 9: Sheets tool
Step 40: Add a credential
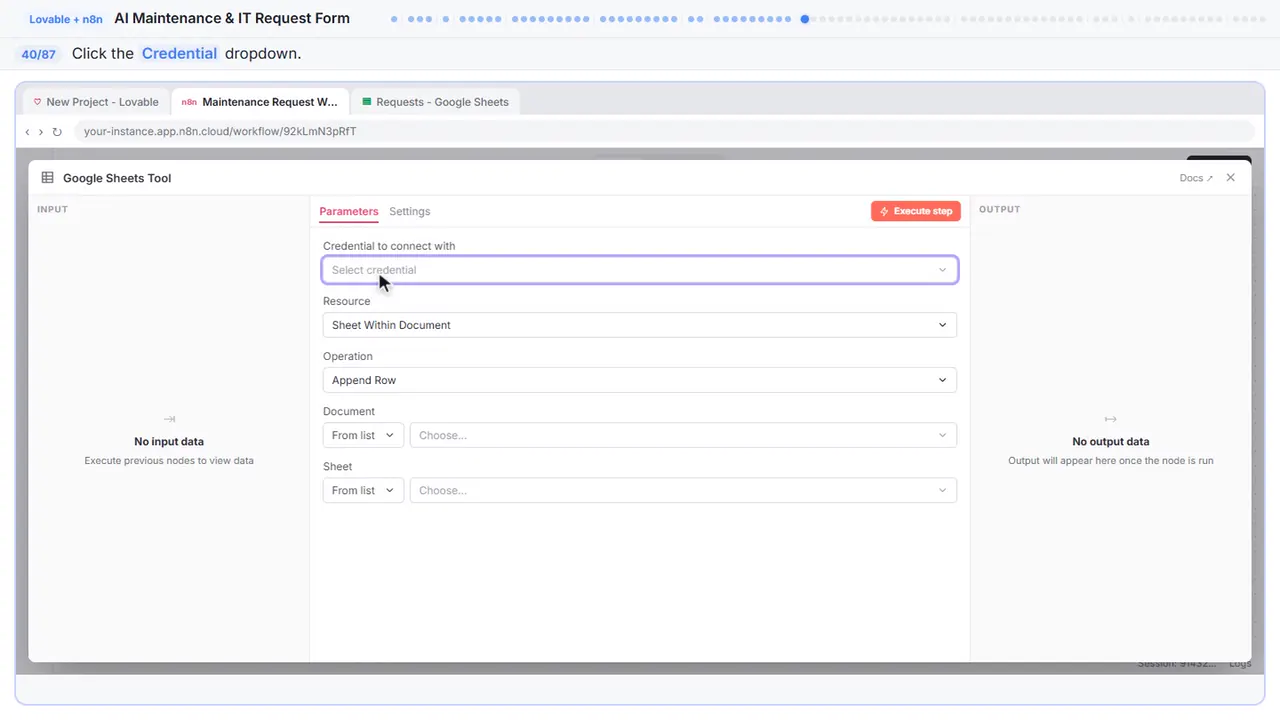
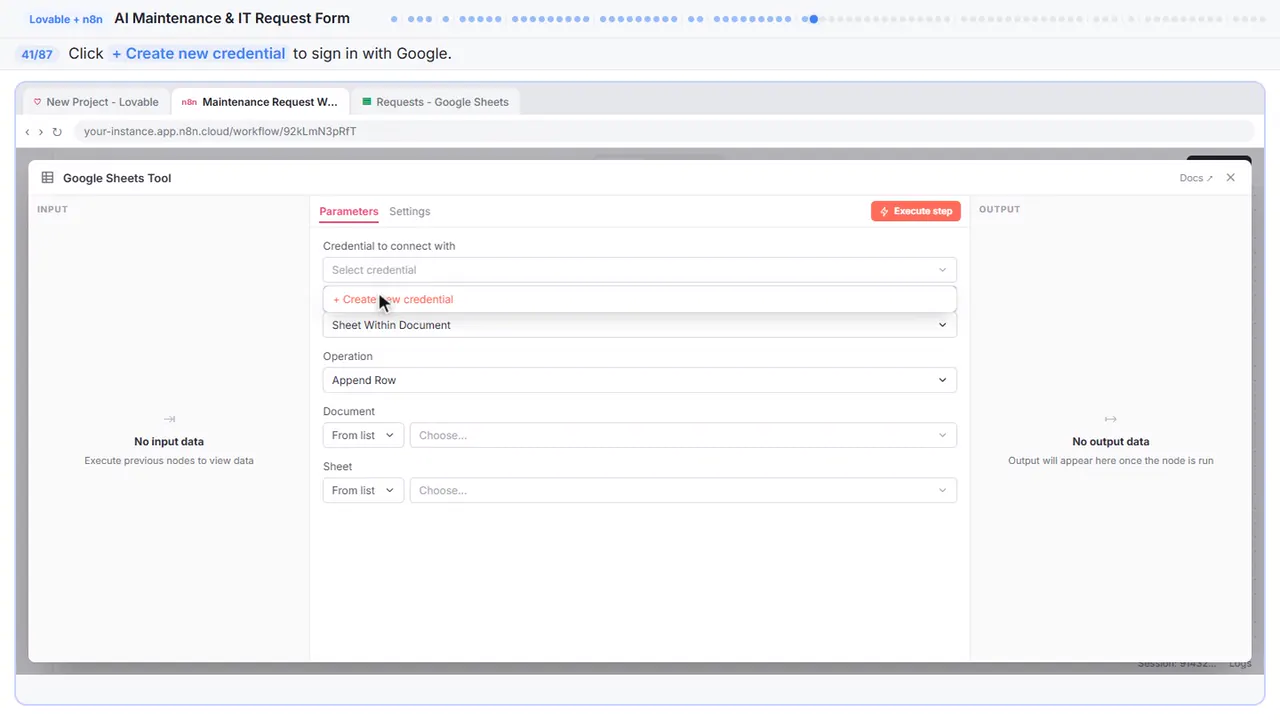
Step 41: Create a new credential
Create new credential. This one uses Google OAuth, so it opens a credential window.
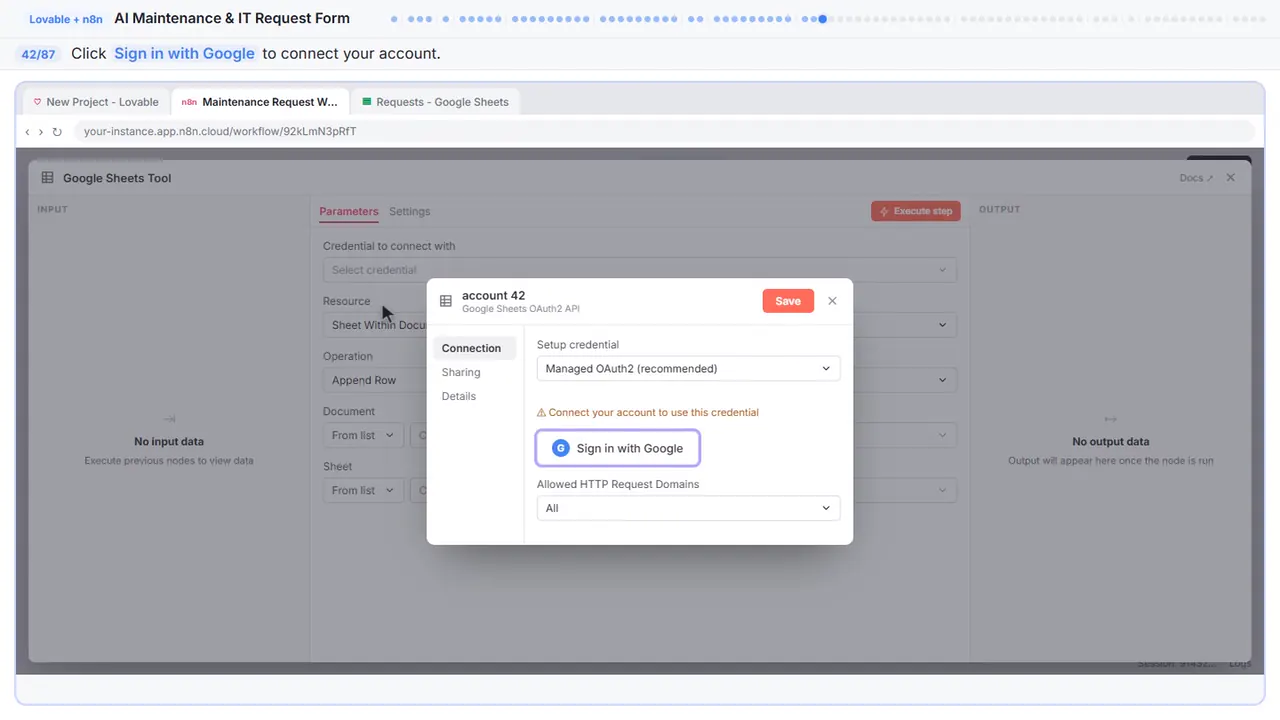
Step 42: Sign in with Google
This opens the Google account chooser.
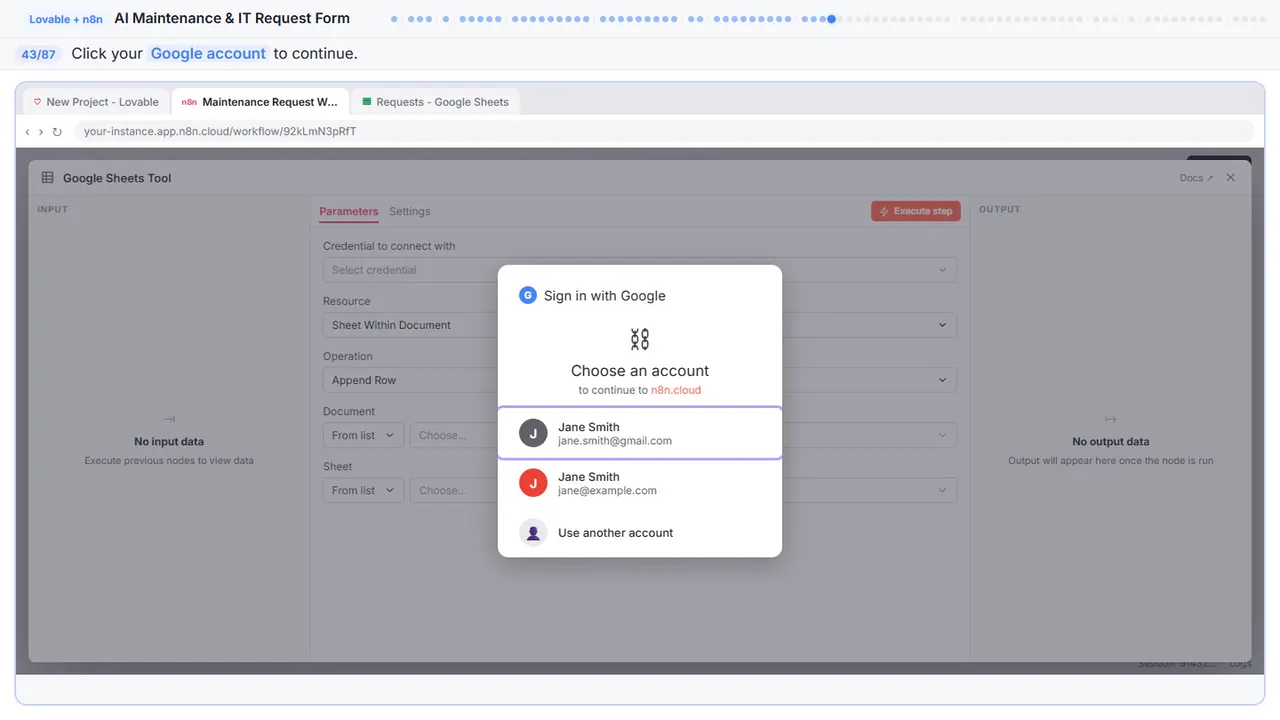
Step 43: Choose your account
Pick the Google account that owns the Requests spreadsheet.
Step 44: Allow Sheets access
Google is asking for permissions. Check the first box — this lets n8n read and write your spreadsheets.
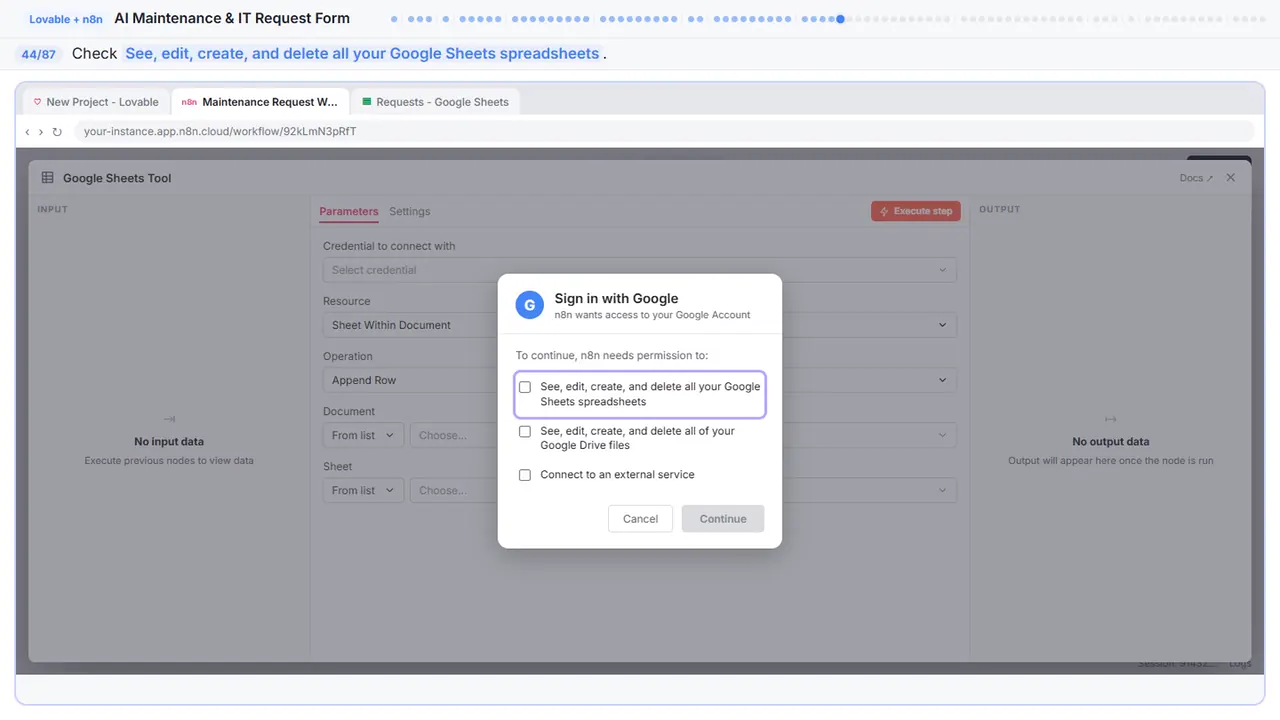
Step 45: Allow Drive access
Second box — Drive access so n8n can find your spreadsheets by name.
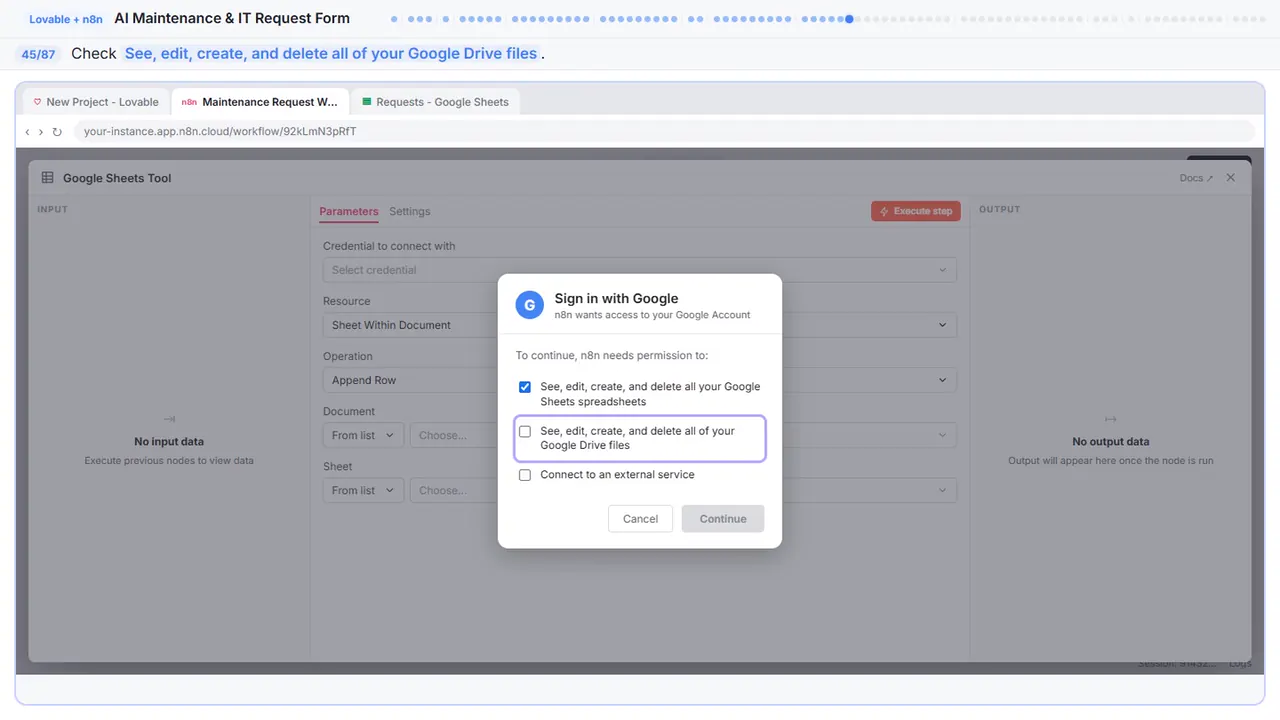
Step 46: Allow external service
Last one — this lets Google connect to n8n as an external service.
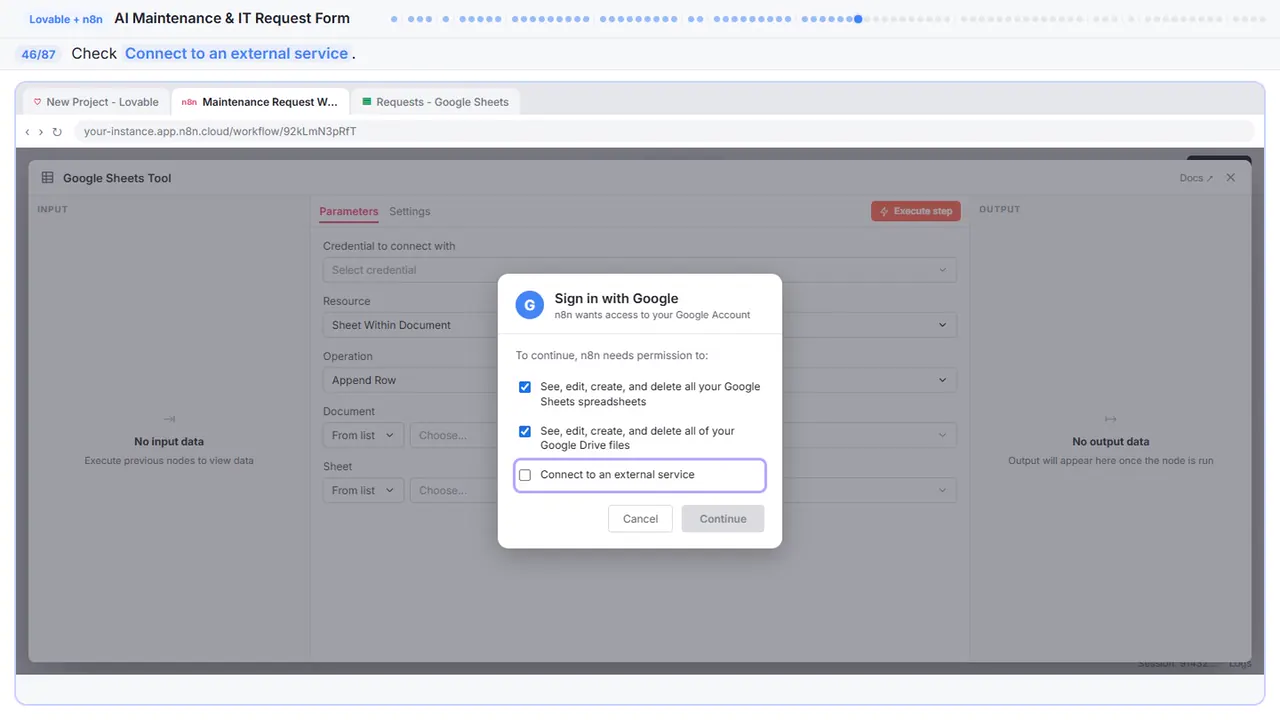
Step 47: Sign in
All three checked.
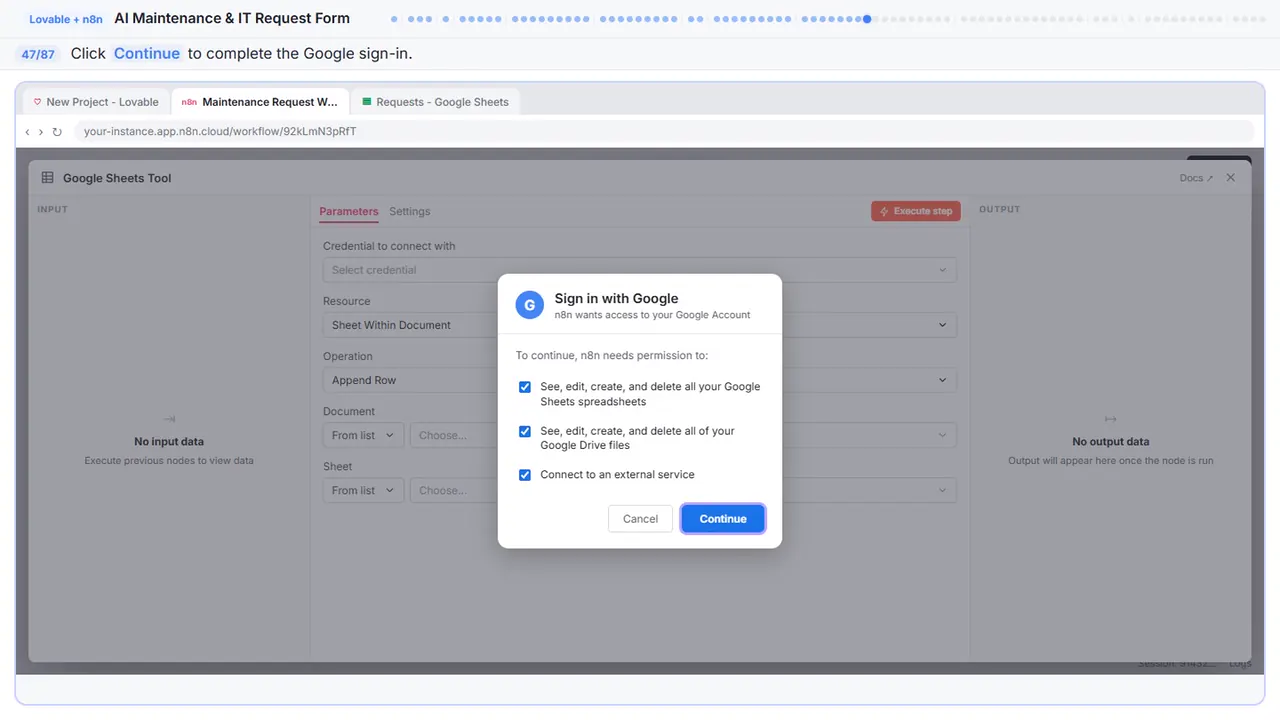
Step 48: Pick the spreadsheet
Now pick the spreadsheet.
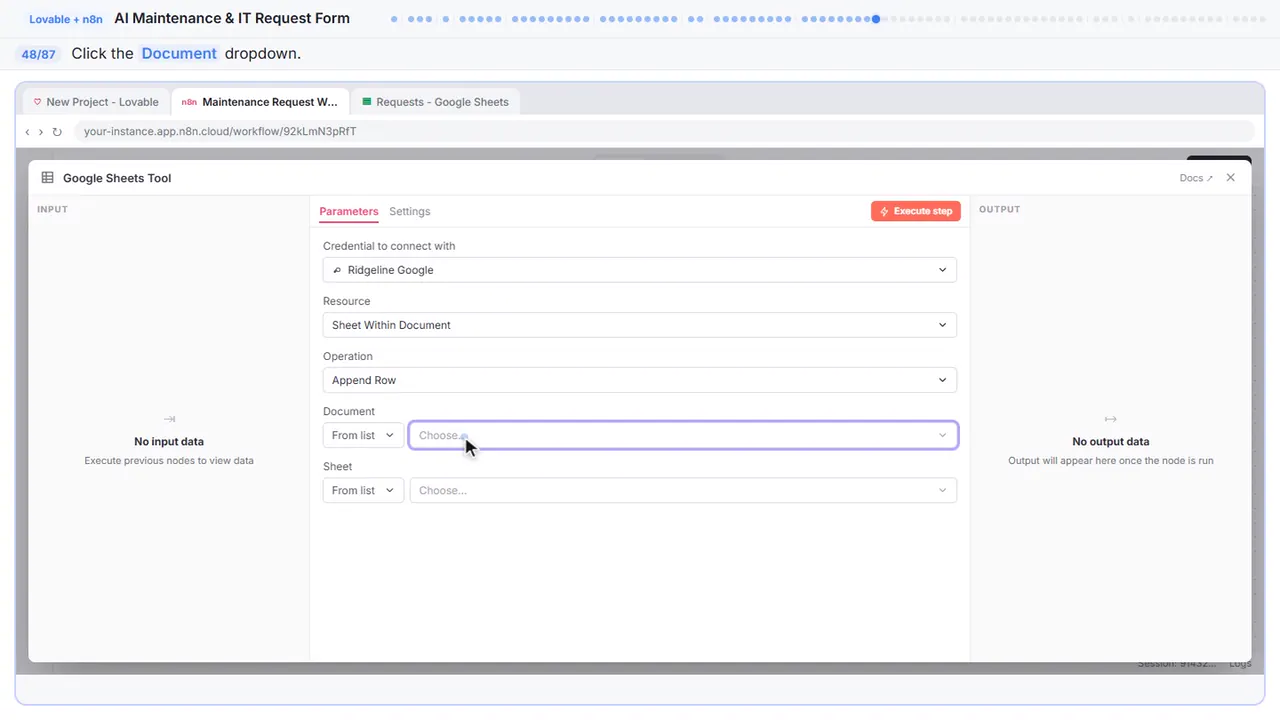
Step 49: Requests
Requests — this is the spreadsheet where every form submission gets saved as a row.
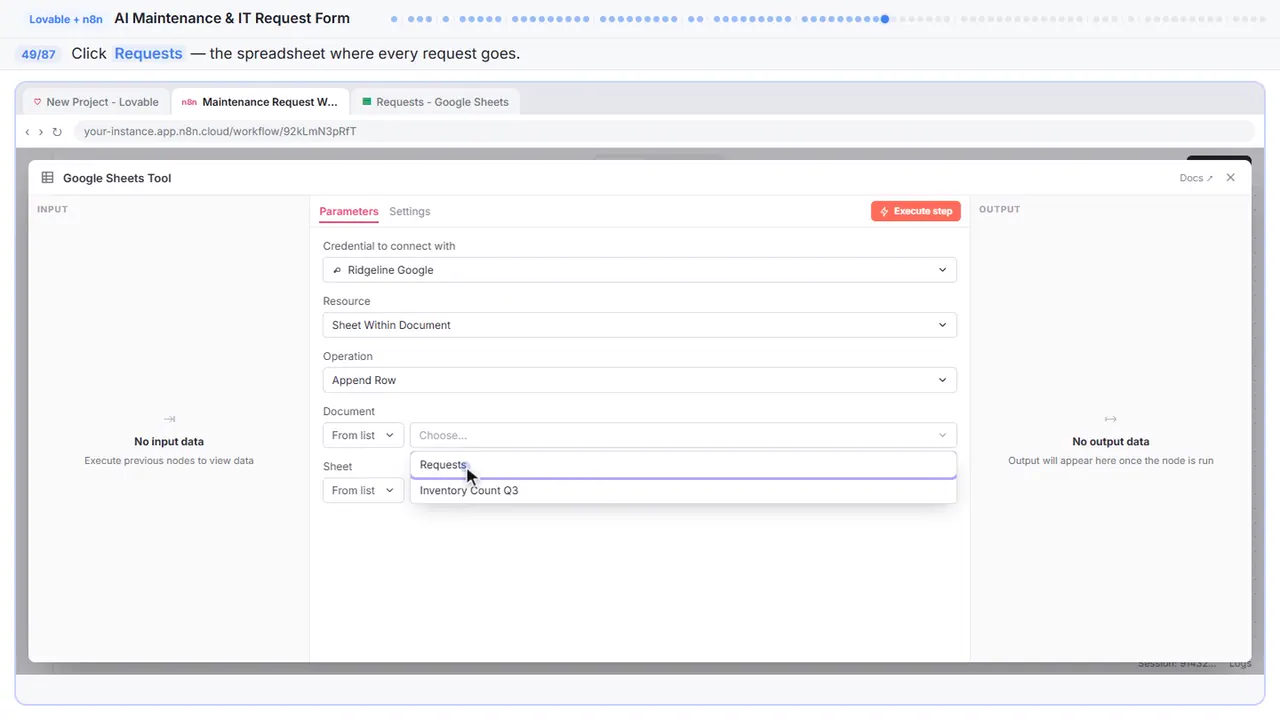
Step 50: Pick the sheet tab
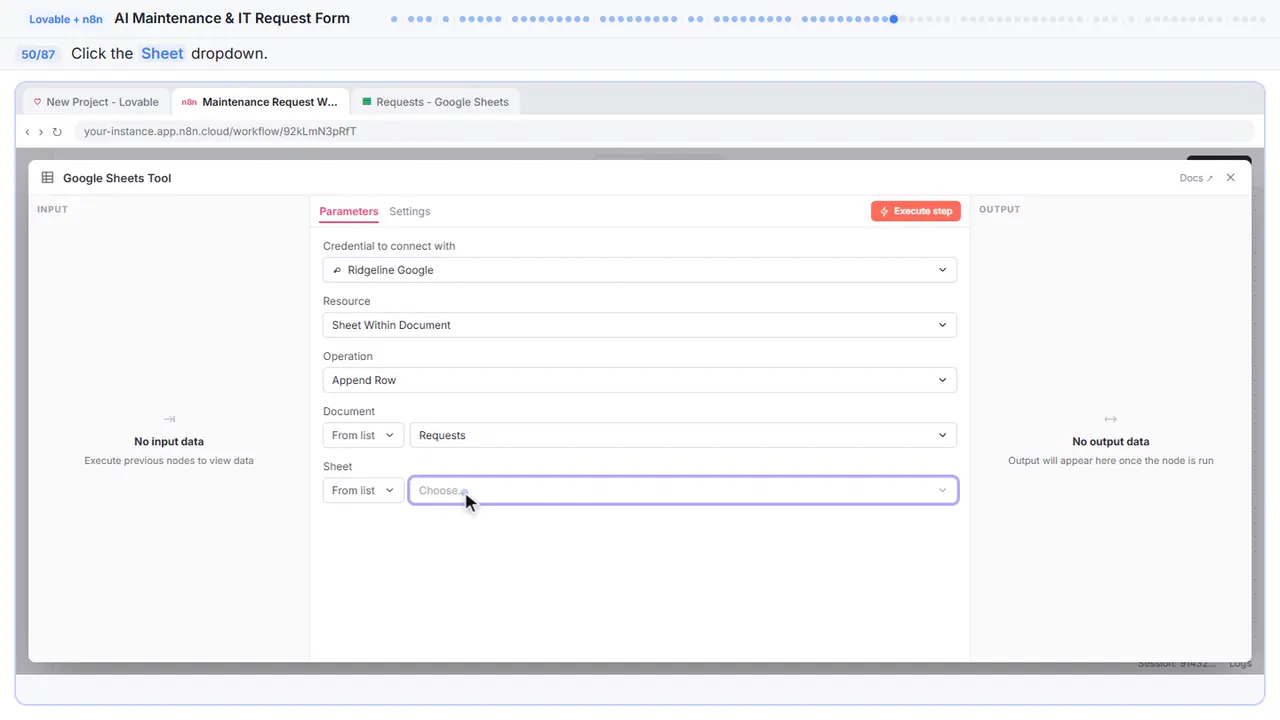
Step 51: Sheet1
Sheet one. That is the only tab.
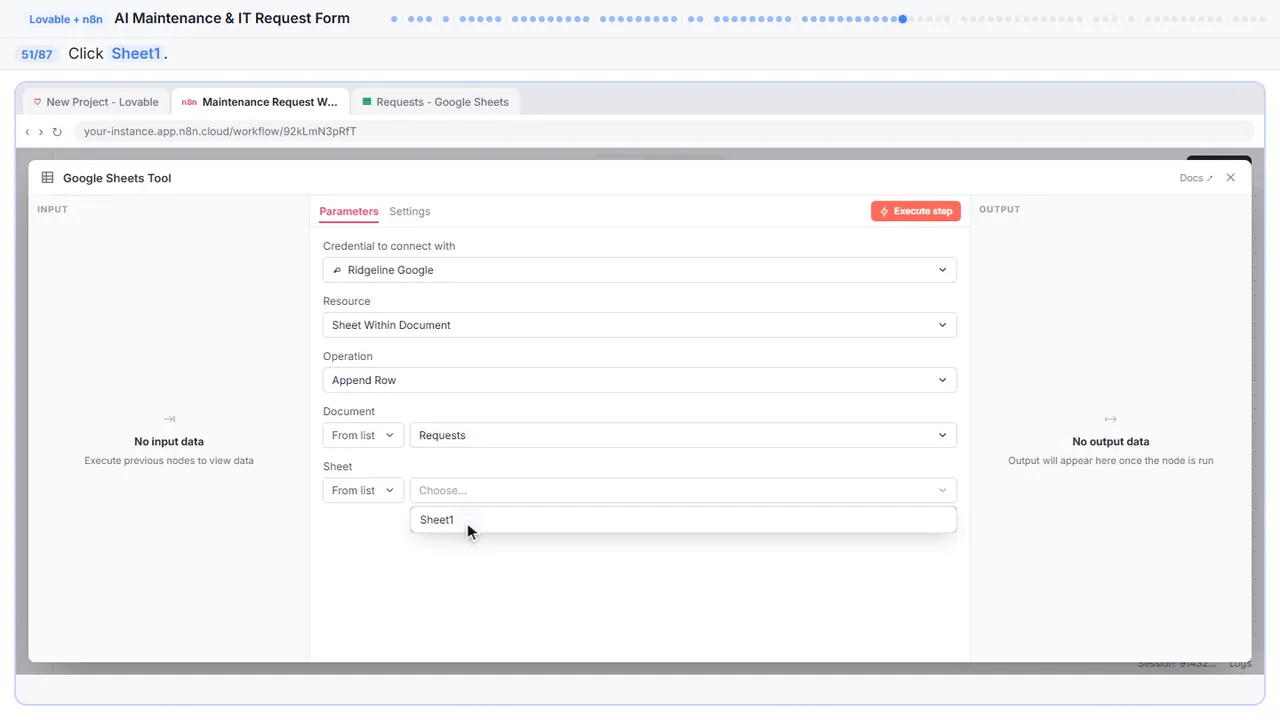
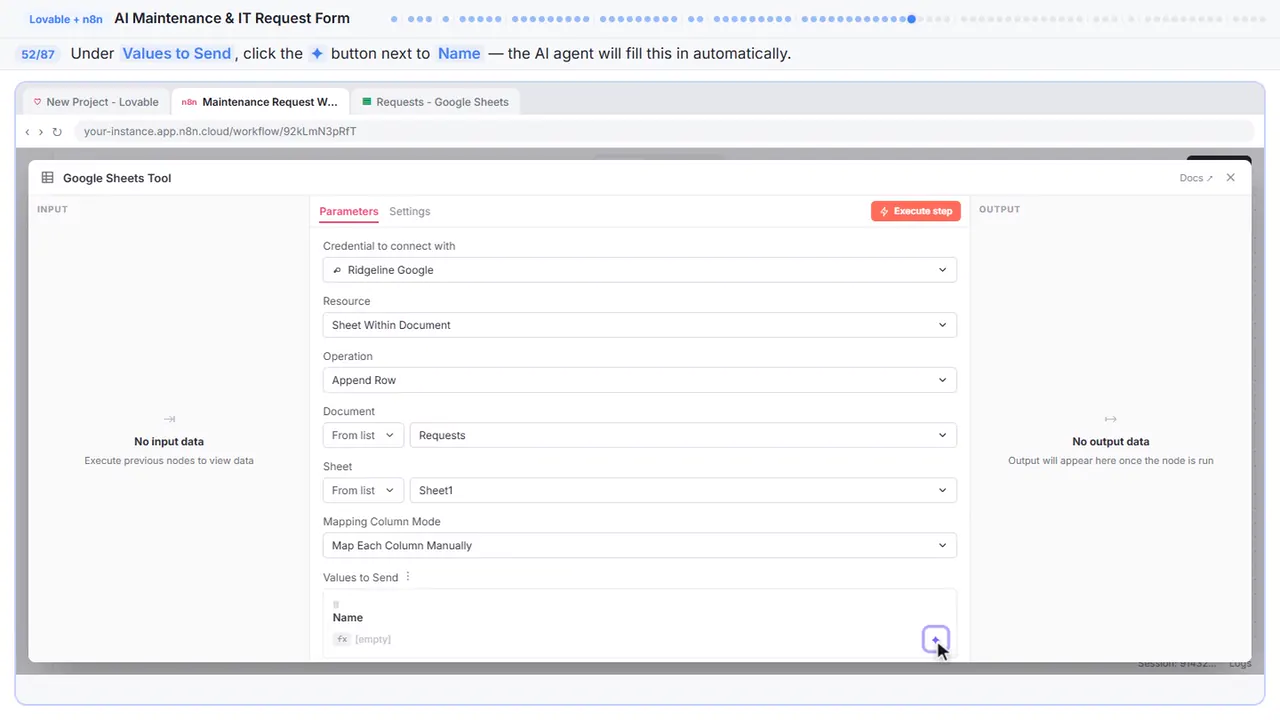
Step 52: Map the Name column
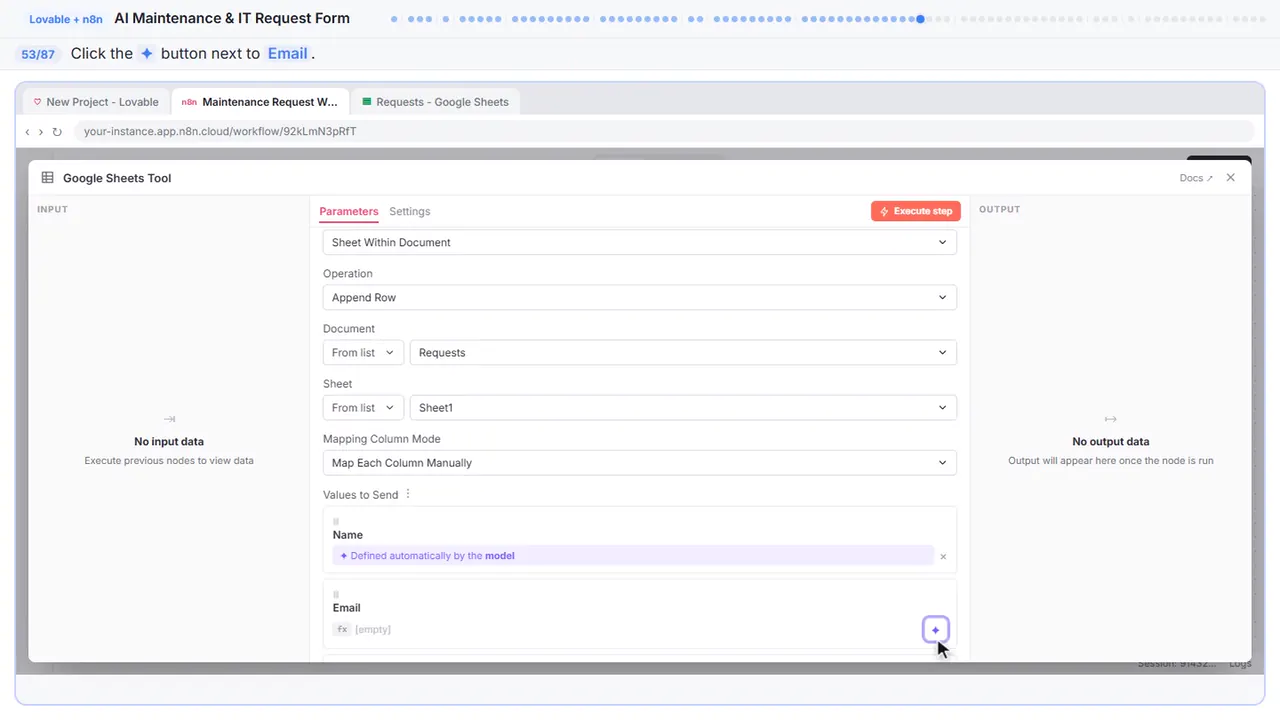
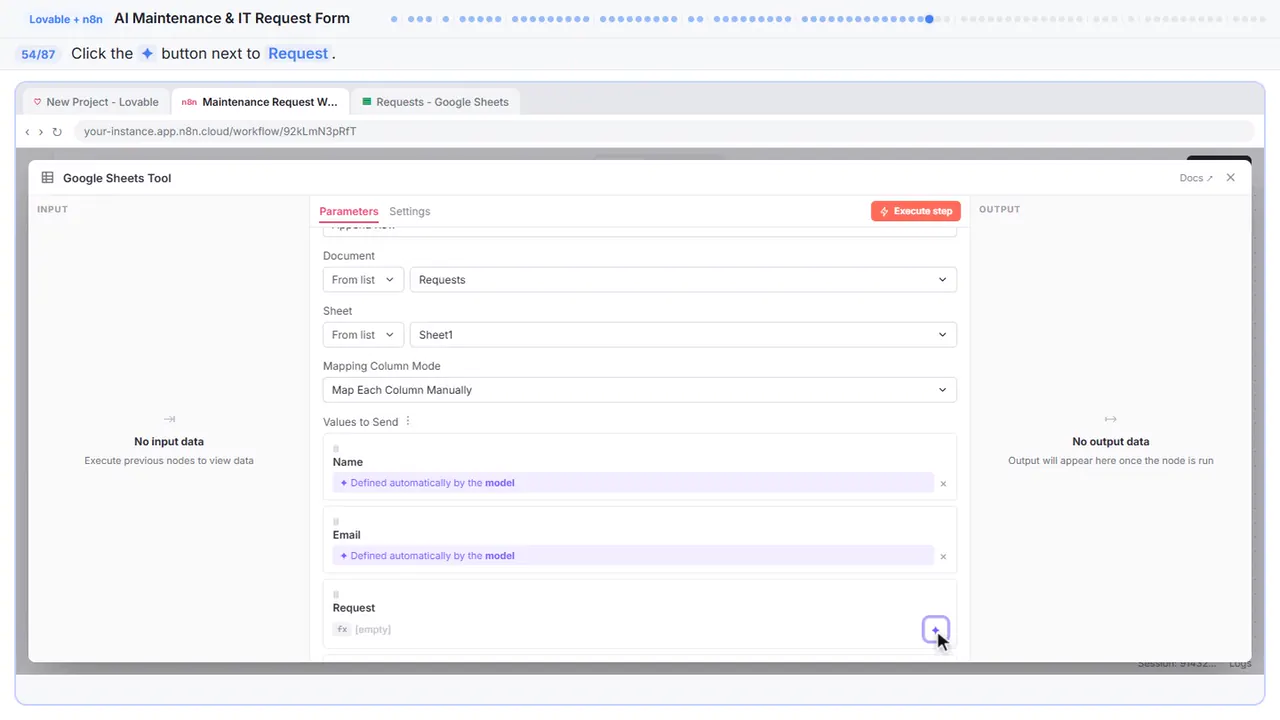
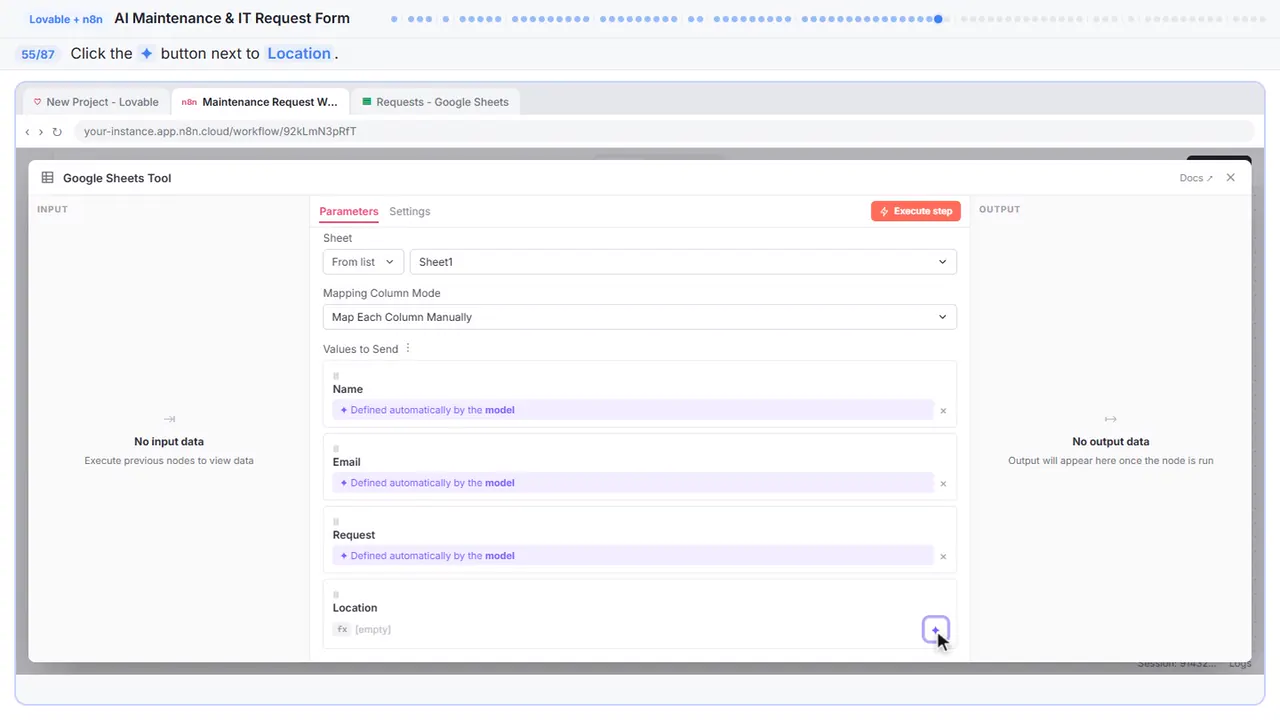
Now the column mapping. Each column in the spreadsheet has a purple button.
Step 53: Map the Email column
Email.
Step 54: Map the Request column
Request.
Step 55: Map the Location column
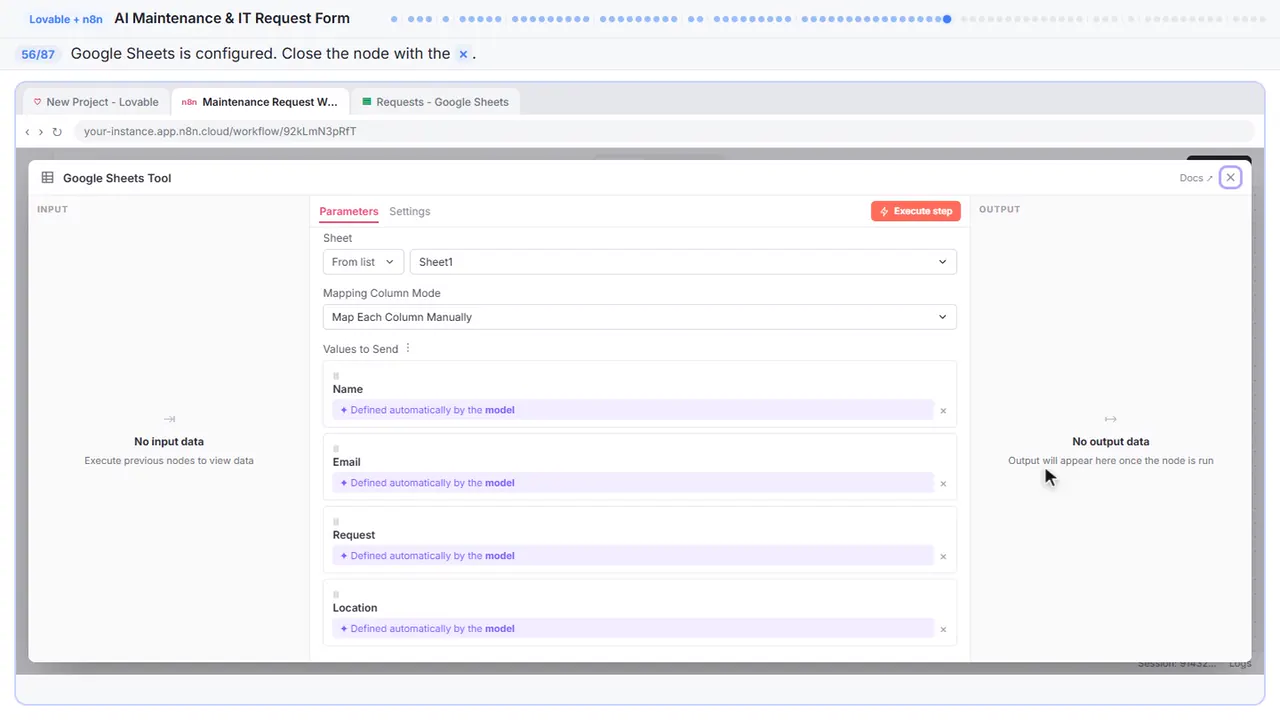
And Location. All four columns are now set to defined automatically by the model.
Step 56: Back to the canvas
Sheets tool is fully configured — credential, spreadsheet, sheet, and column mapping. Close it.
Part 10: Gmail tool
Step 57: Add another tool
The agent can save to Sheets now, but it also needs to send a reply email.
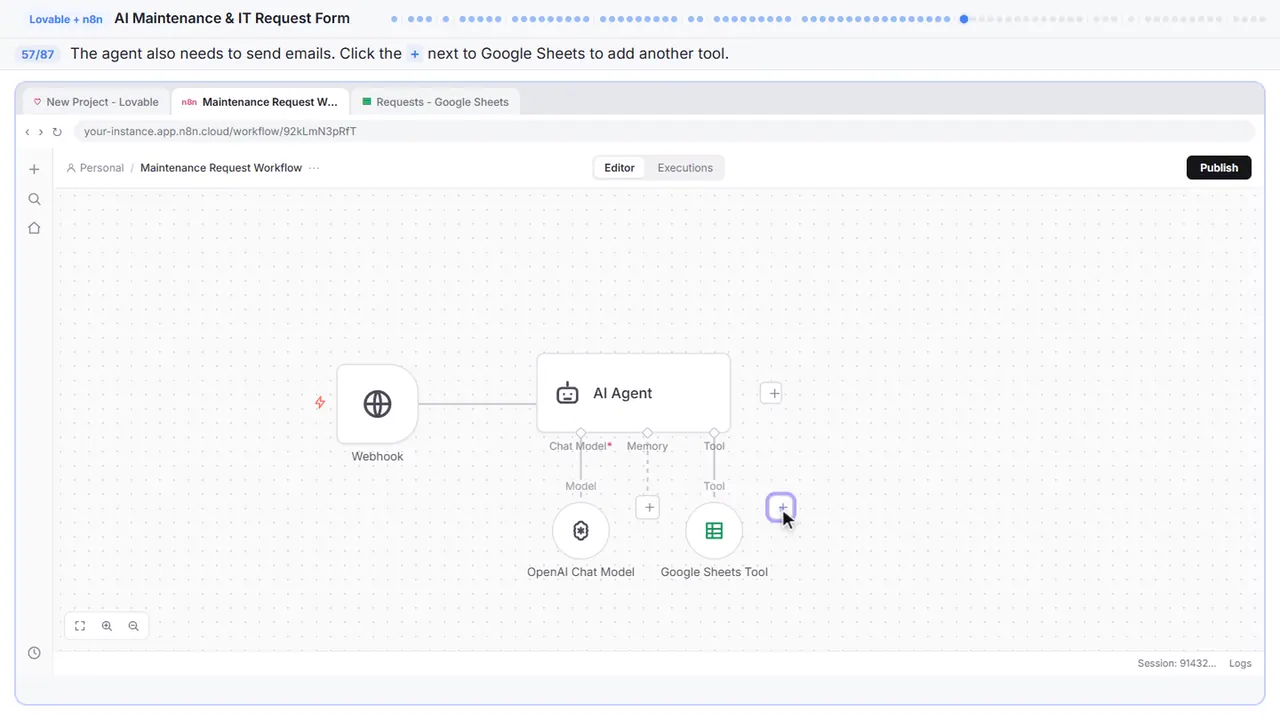
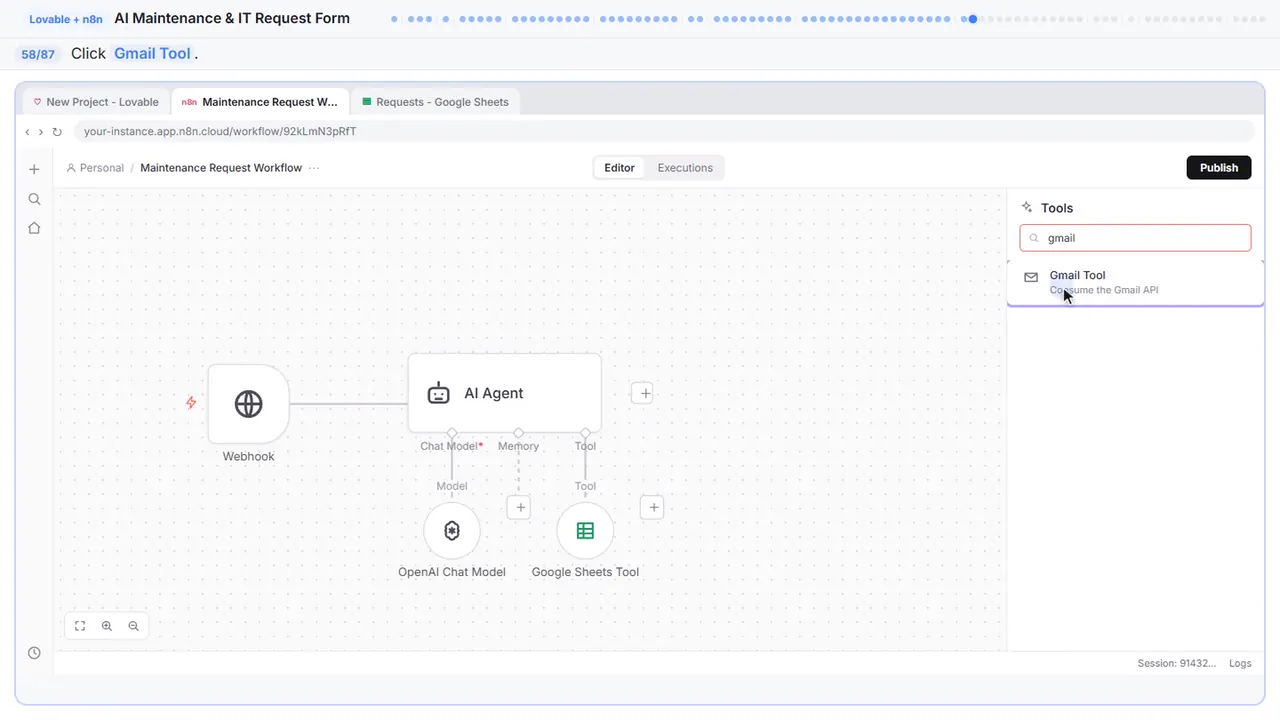
Step 58: Add Gmail
Gmail Tool. This lets the agent send a personalized reply back to whoever submitted the form.
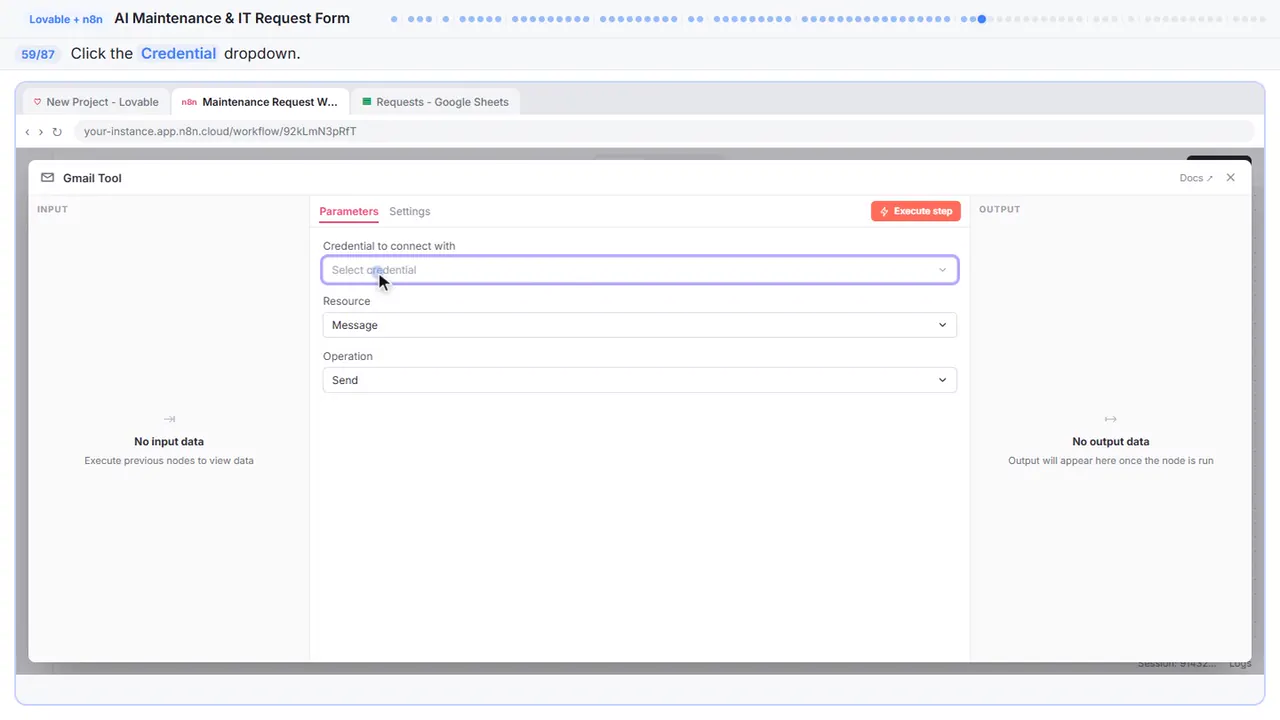
Step 59: Add a credential
Gmail uses the same Google OAuth as Sheets.
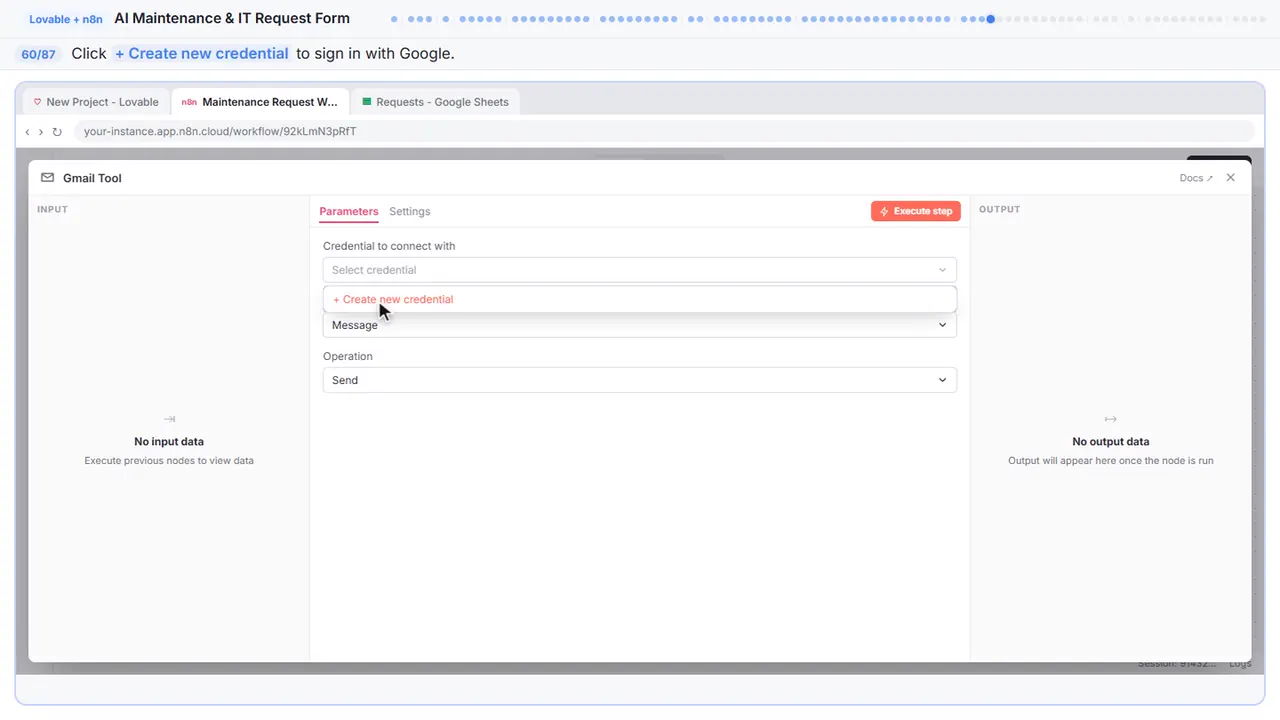
Step 60: Create a new credential
Create new credential. Gmail needs its own Google OAuth credential.
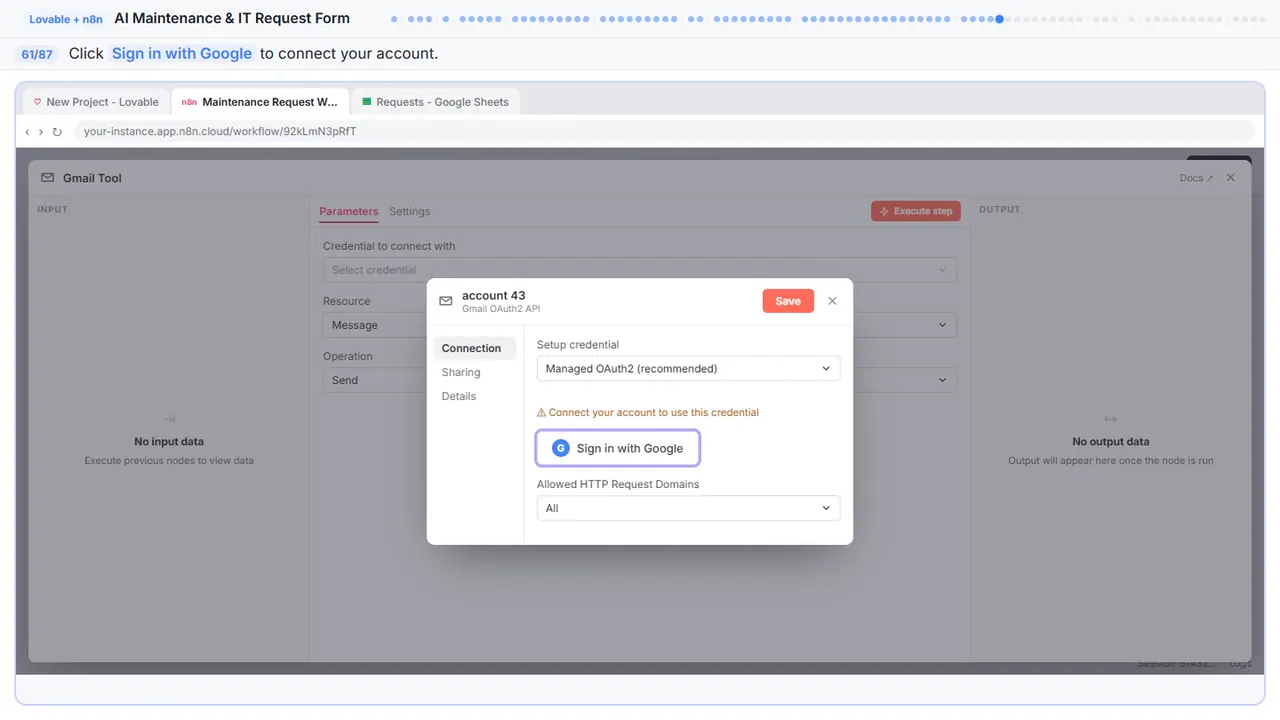
Step 61: Sign in with Google
Same flow as before — Google account chooser then permissions.
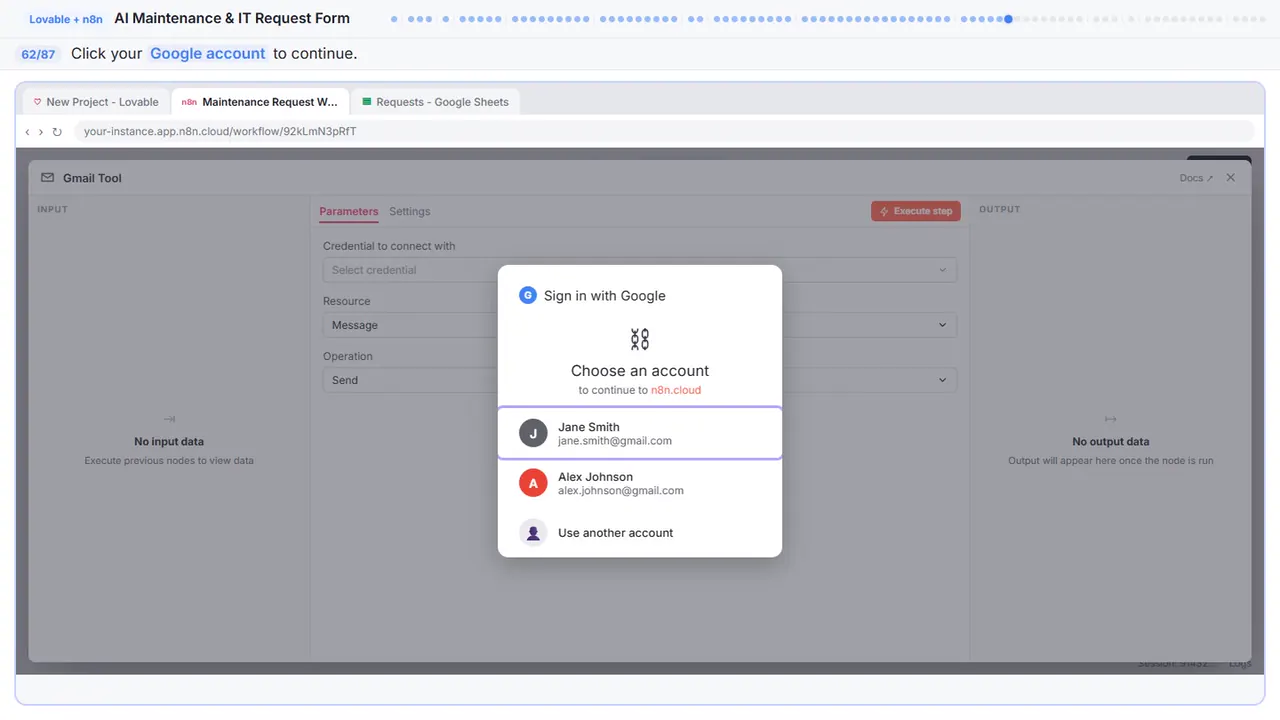
Step 62: Choose your account
Pick the Google account you want to send emails from.
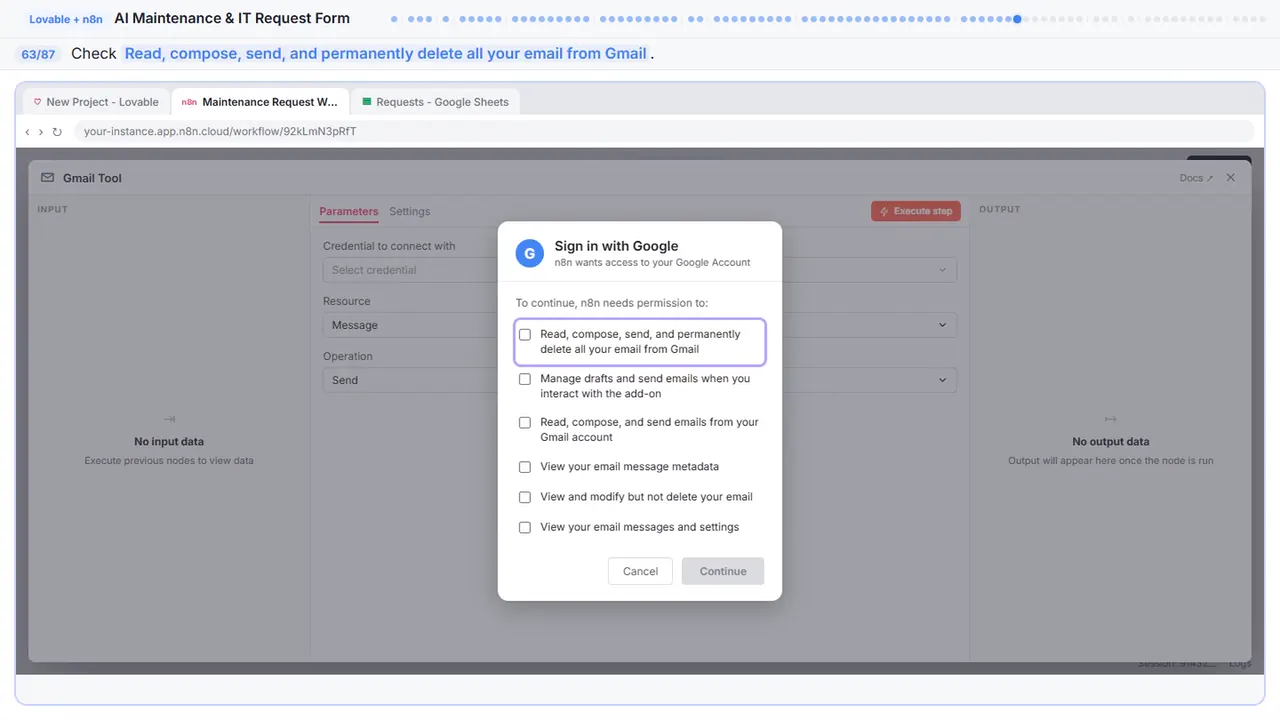
Step 63: Allow email access
Google is asking for permissions. Check the first box — this gives n8n full email access.
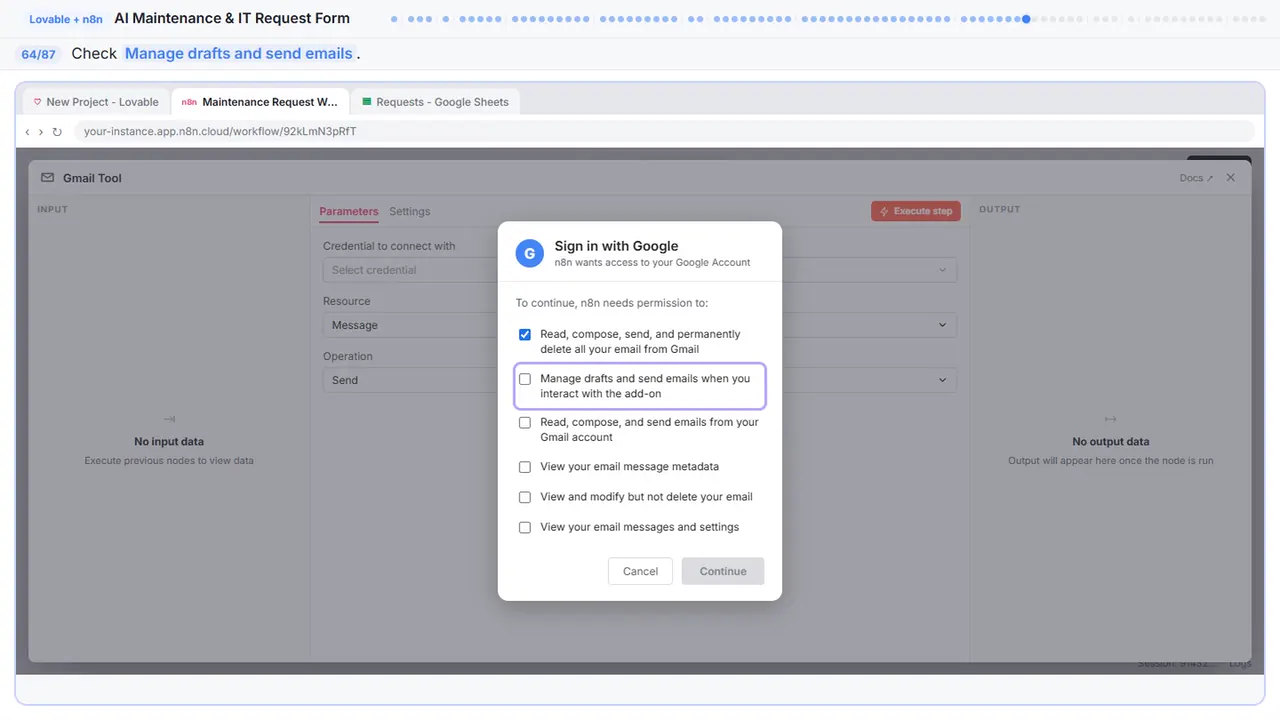
Step 64: Allow drafts
Second box — manage drafts and send emails.
Step 65: Allow compose
Read, compose, and send.
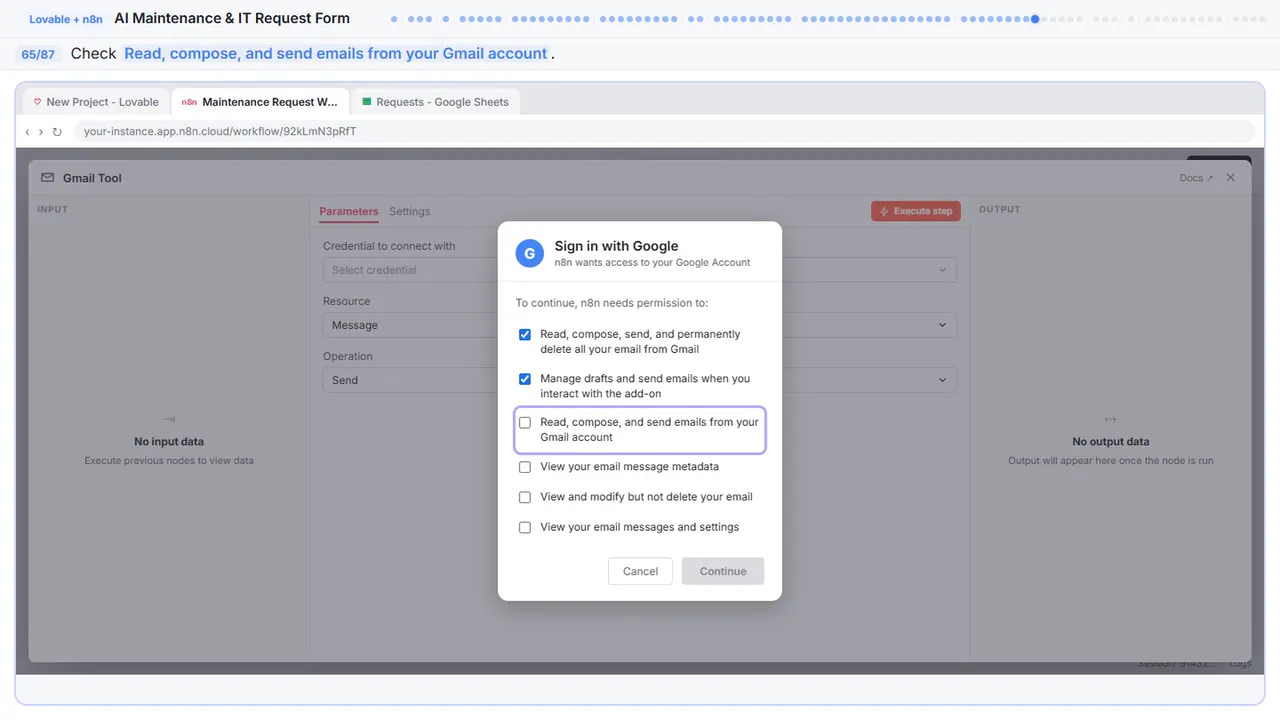
Step 66: Allow metadata
View email message metadata.
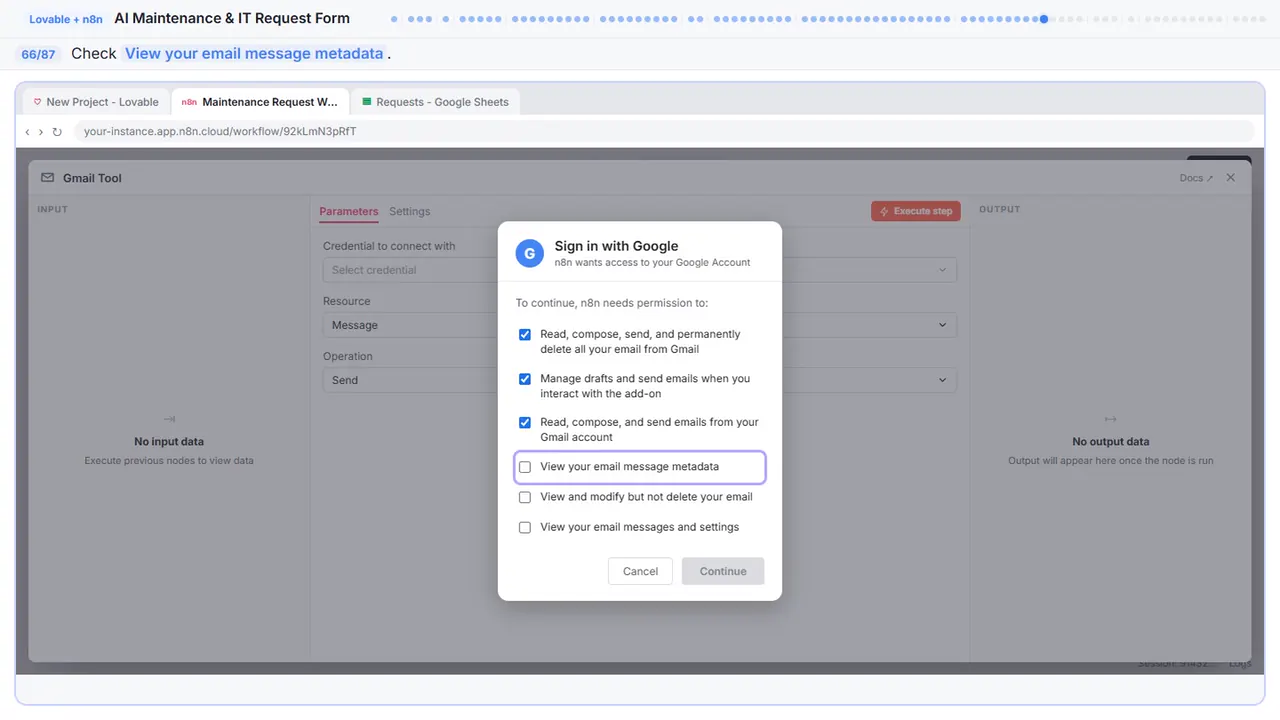
Step 67: Allow modify
View and modify but not delete.
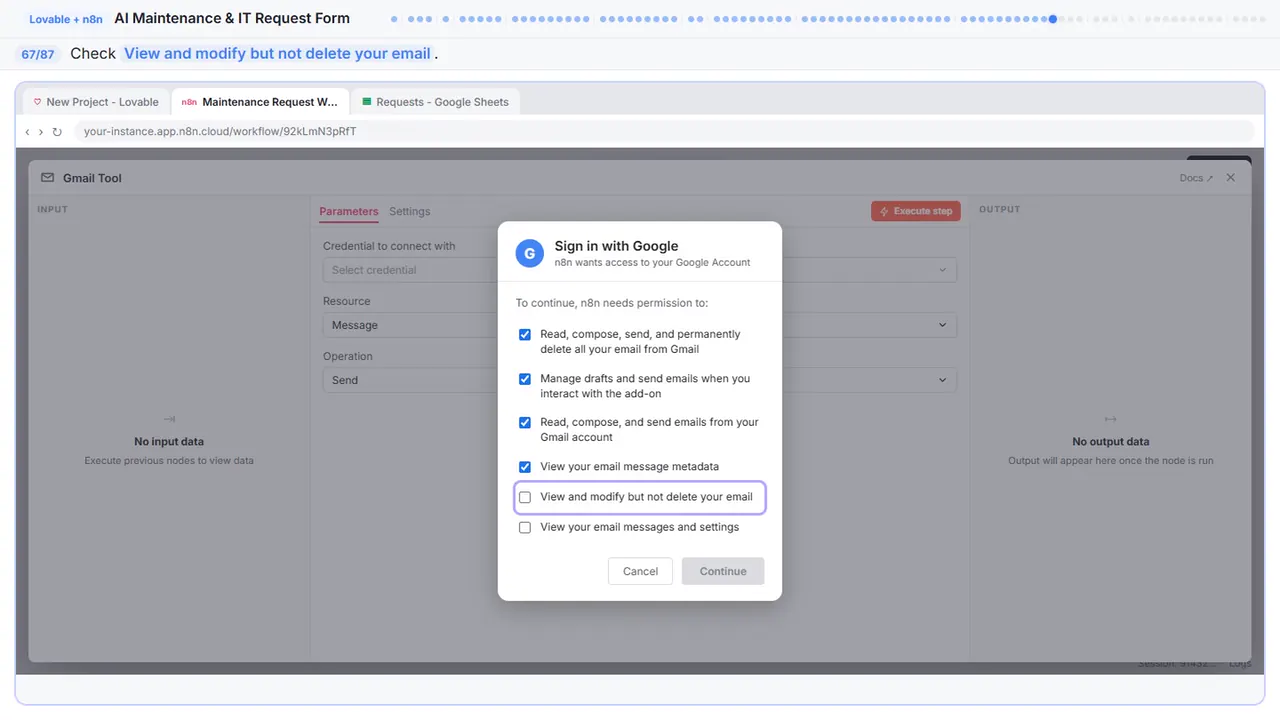
Step 68: Allow view
Last one — view your email messages and settings.
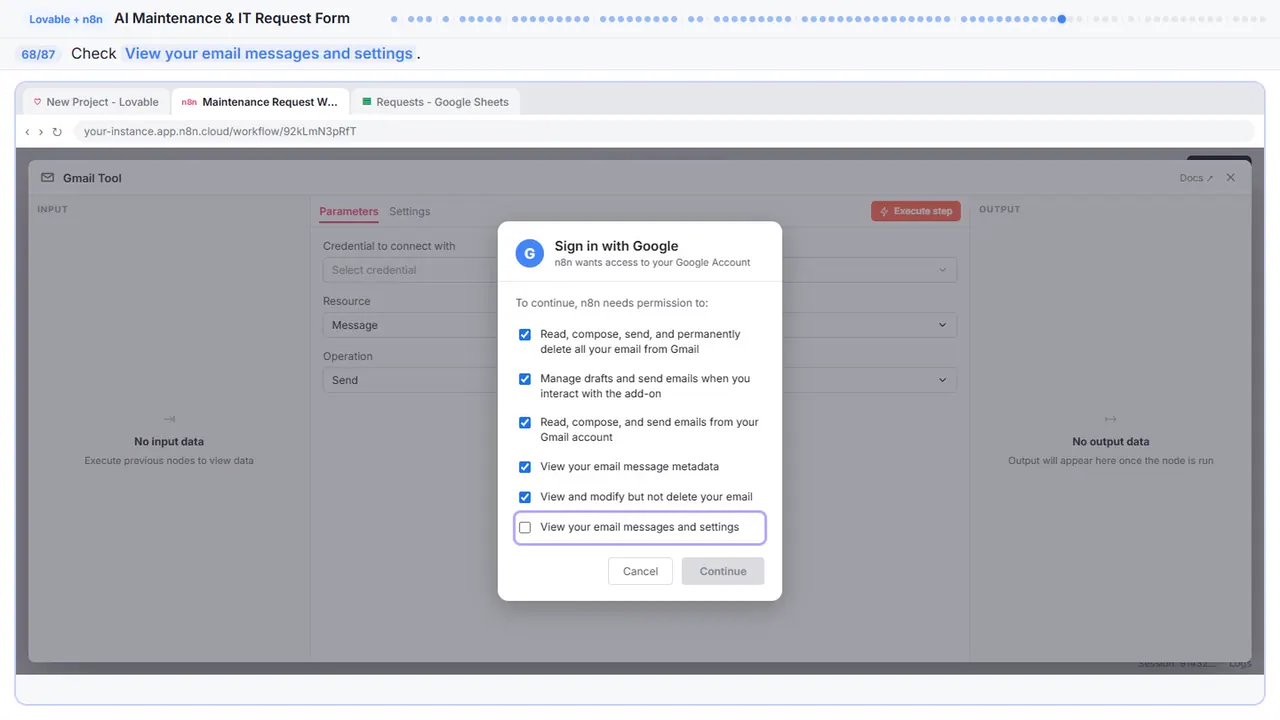
Step 69: Sign in
All six checked.
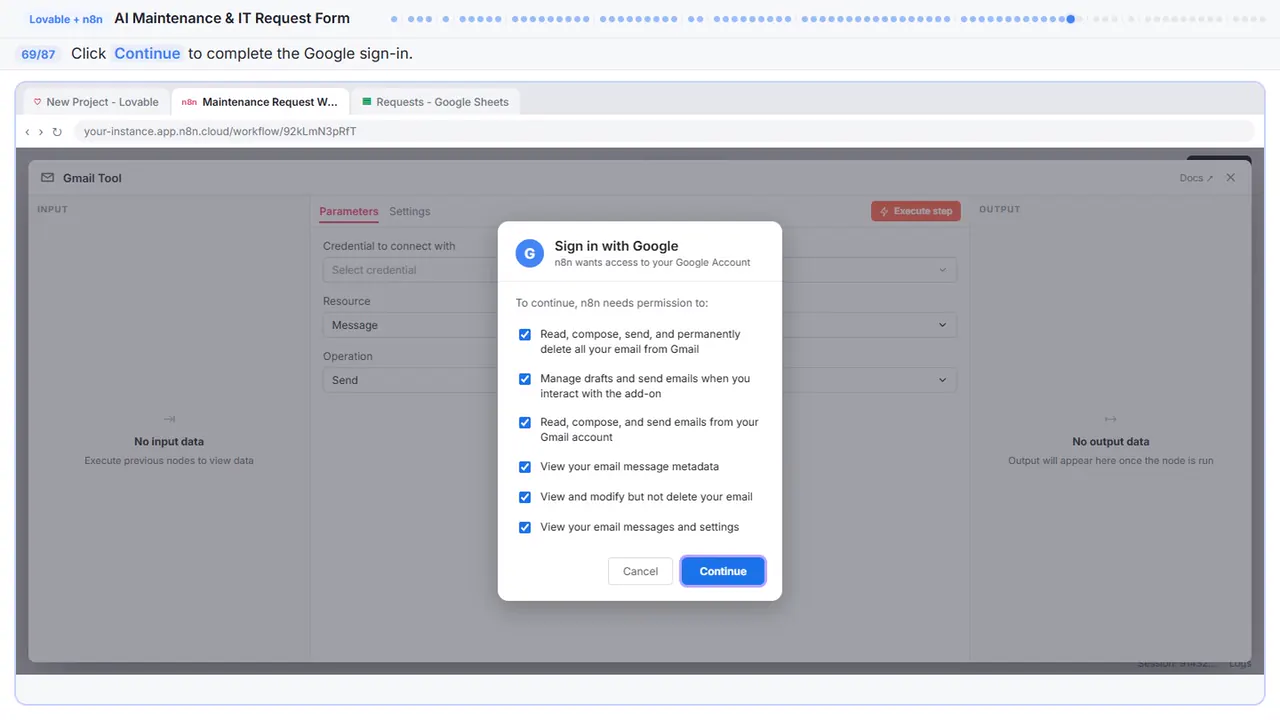
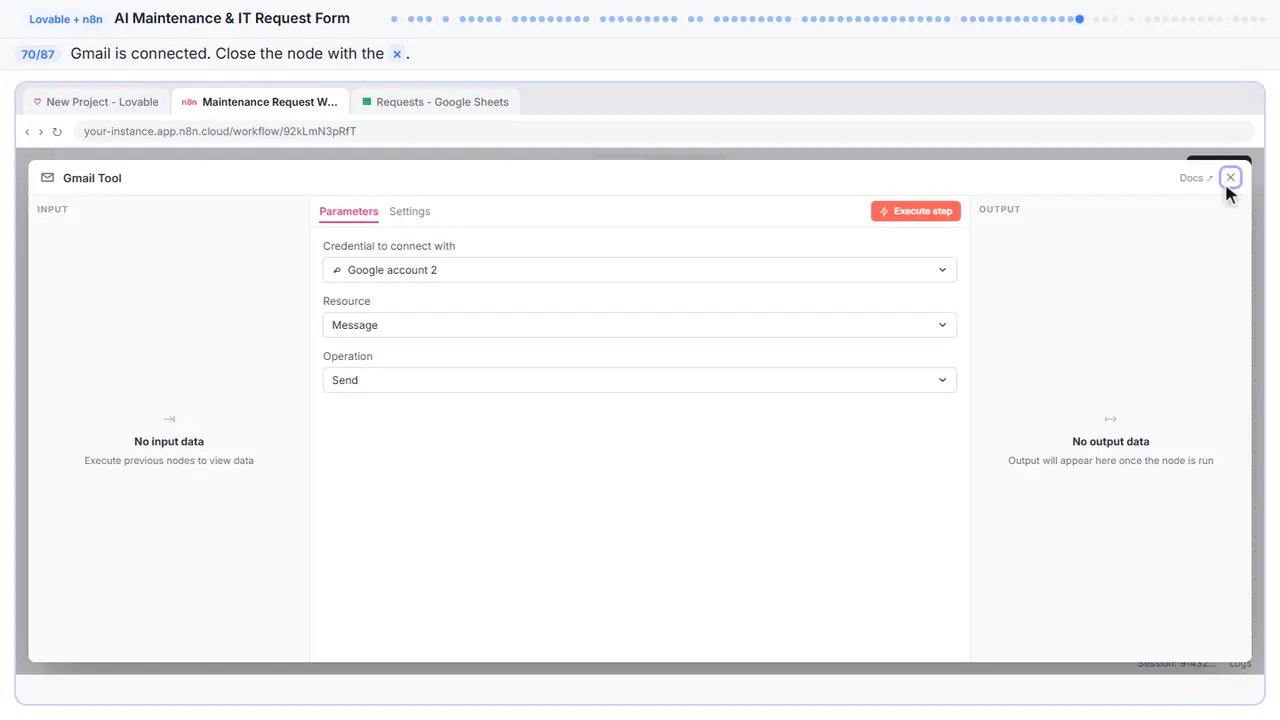
Step 70: Back to the canvas
Gmail is connected. The agent can now send emails. Close the node.
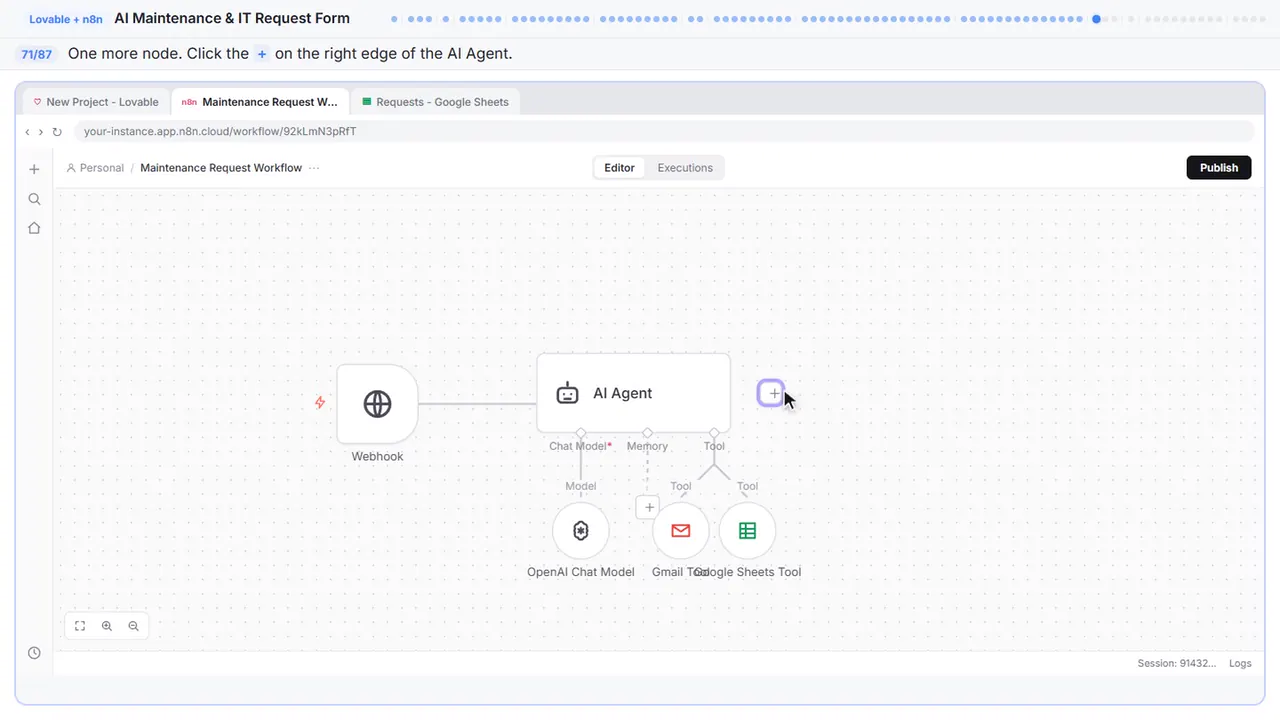
Part 11: Respond node
Step 71: Add the respond node
One last piece. Remember we told the webhook to wait for a respond node before sending back a reply? We need to add that node now.
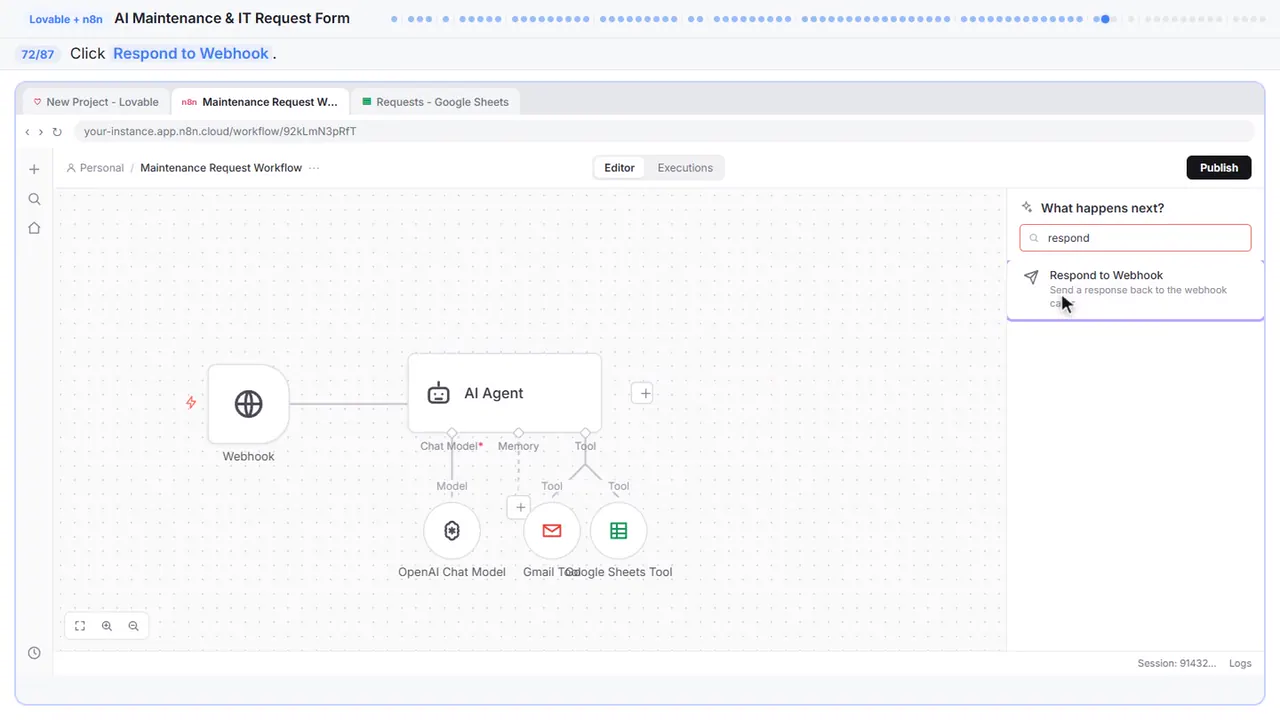
Step 72: Respond to Webhook
Respond to Webhook. When the agent finishes processing — saving to Sheets and sending the email — this node sends a success response back to the form, so the user sees a confirmation message instead of an error.
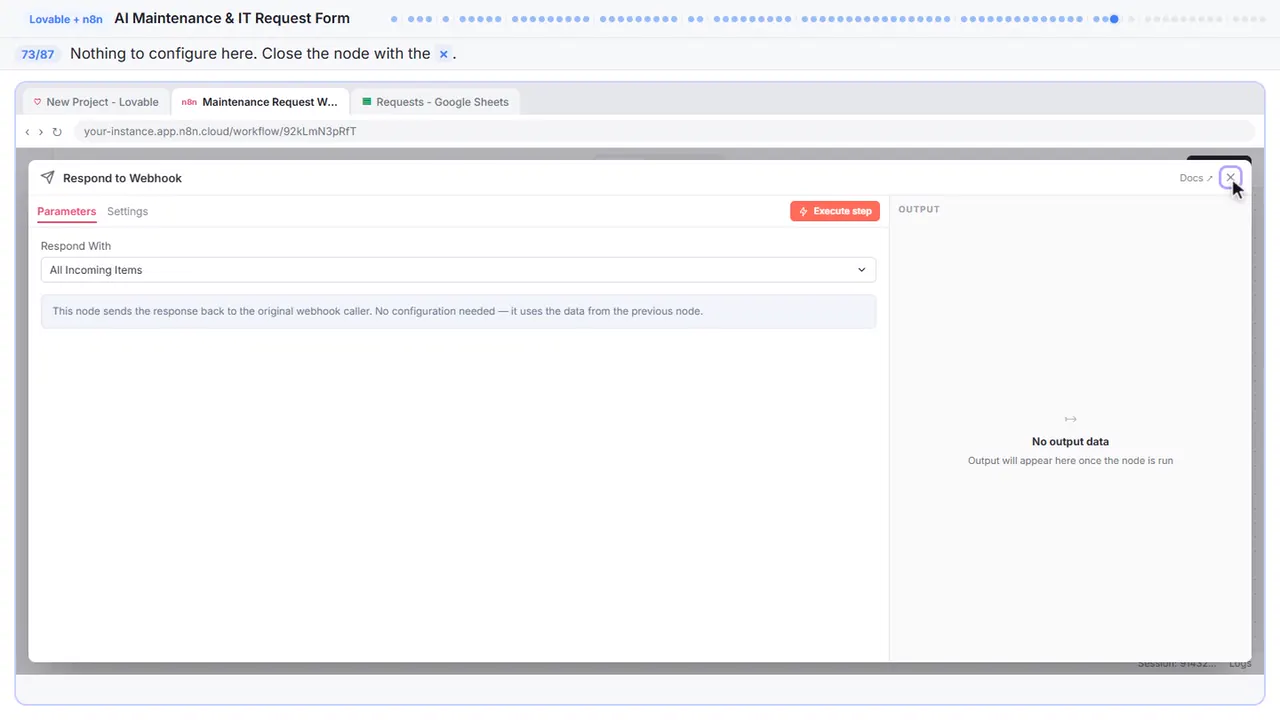
Step 73: Back to the canvas
Nothing to configure. This node just sends back the response. Close it.
Part 12: Publish
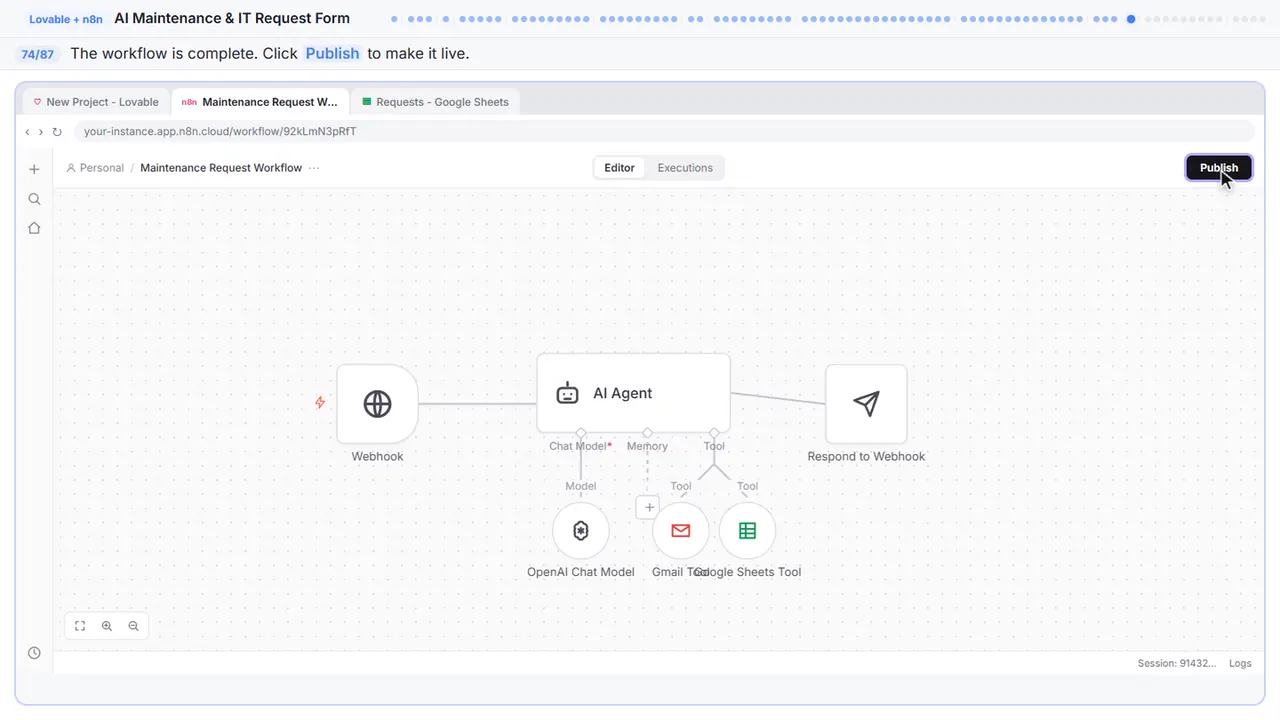
Step 74: Publish the workflow
The workflow is complete. Webhook trigger, AI agent with a model, Google Sheets, Gmail, and a respond node. Once published, the webhook URL is active and ready to receive form submissions.
Part 13: Add the secret
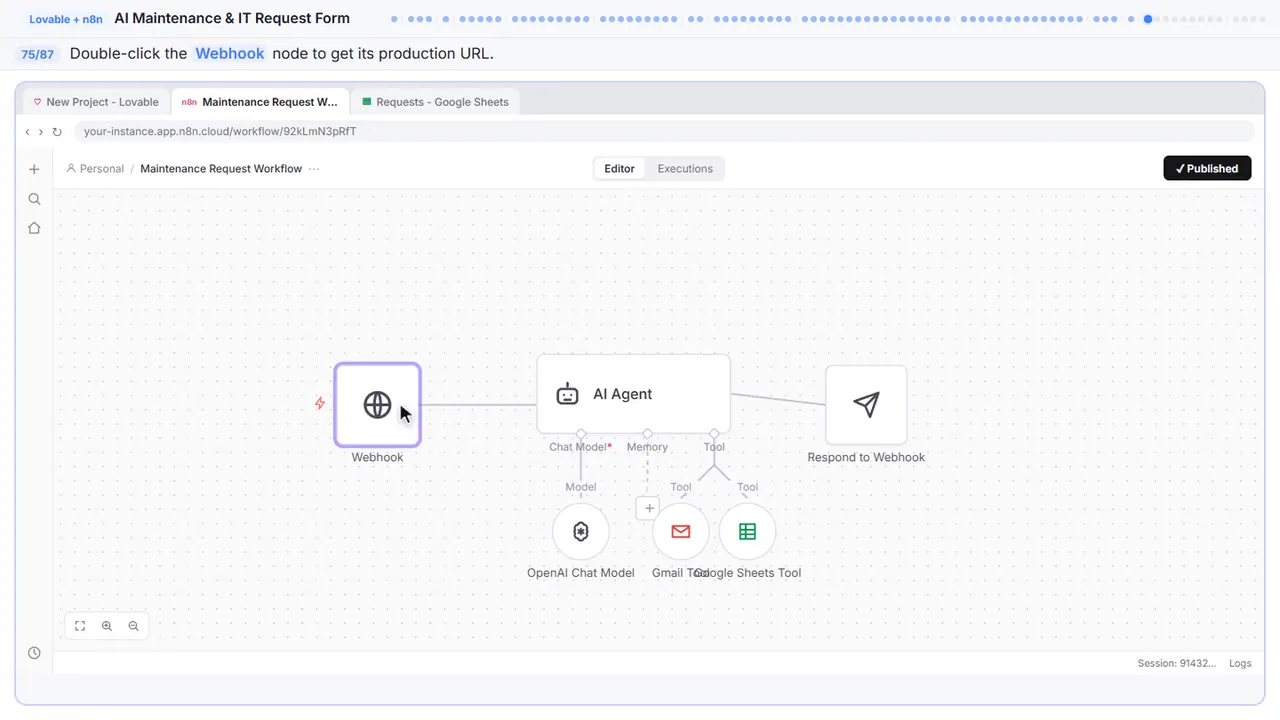
Step 75: Open the webhook
The workflow is published, but Lovable still needs the webhook URL.
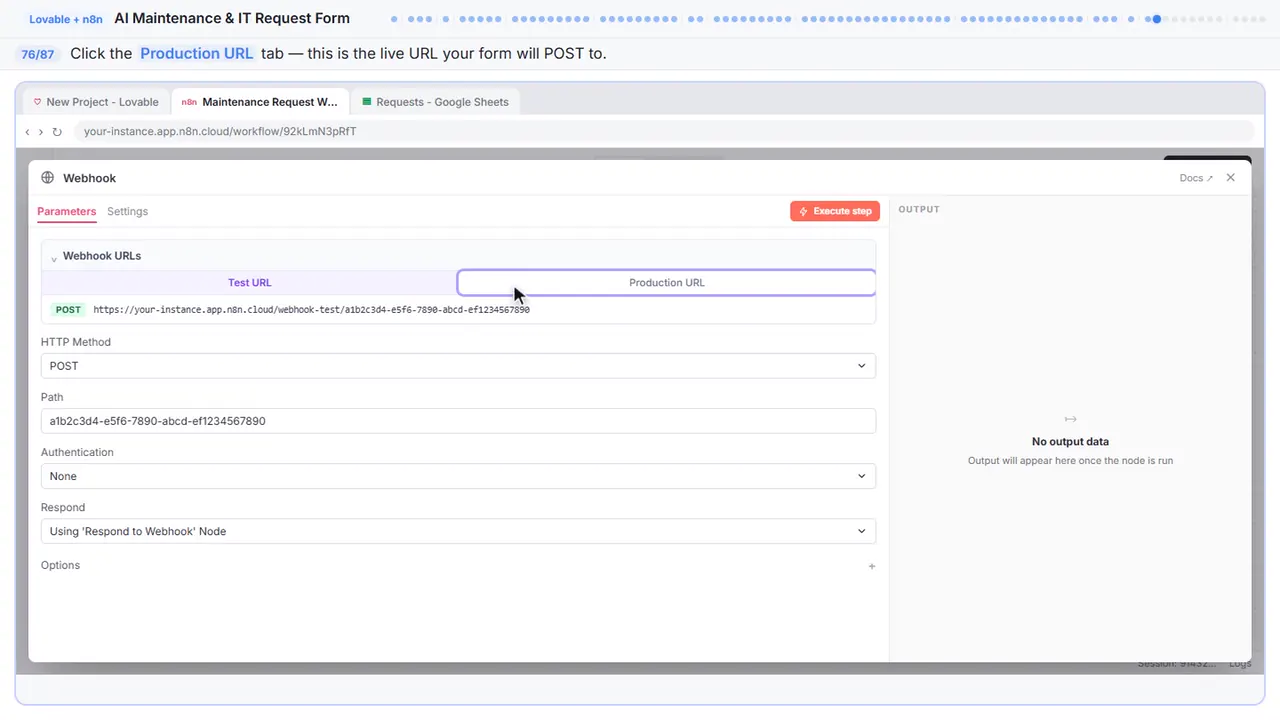
Step 76: Production URL
Switch to the production URL tab. The test URL only works during testing. The production URL is the one your published workflow uses.
Step 77: Copy the URL
You will paste this into Lovable so the form knows where to send data.
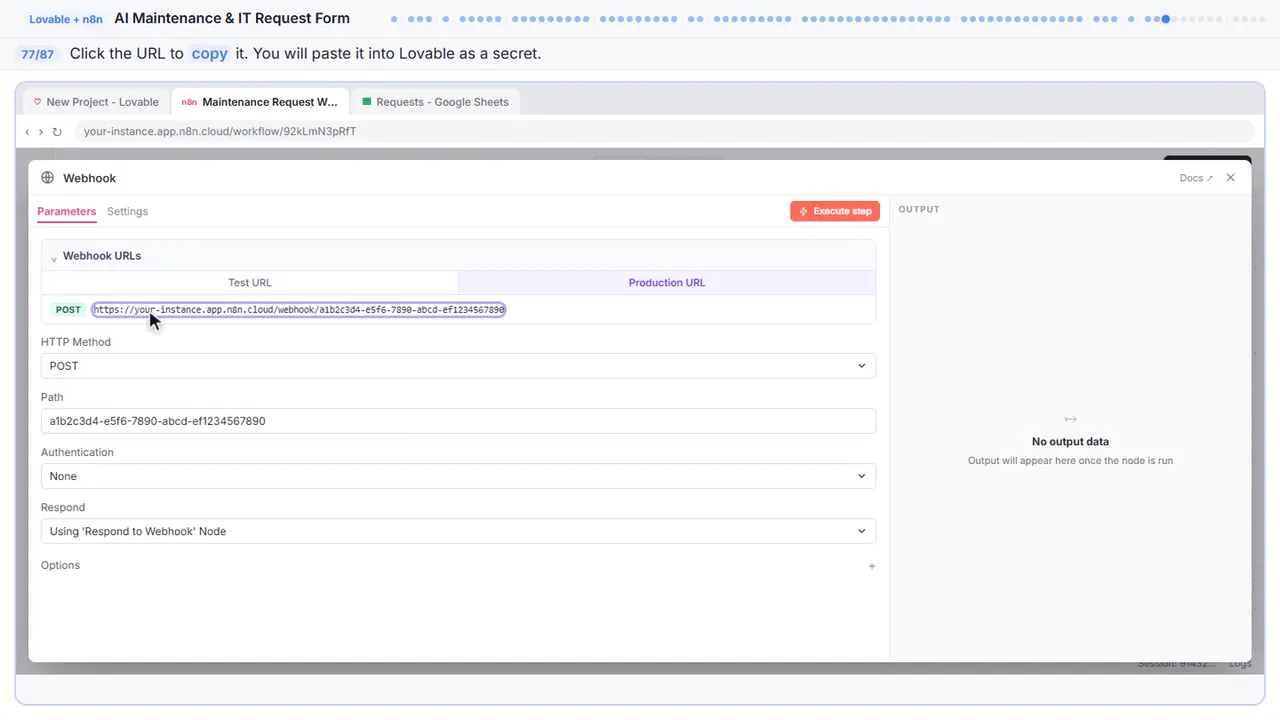
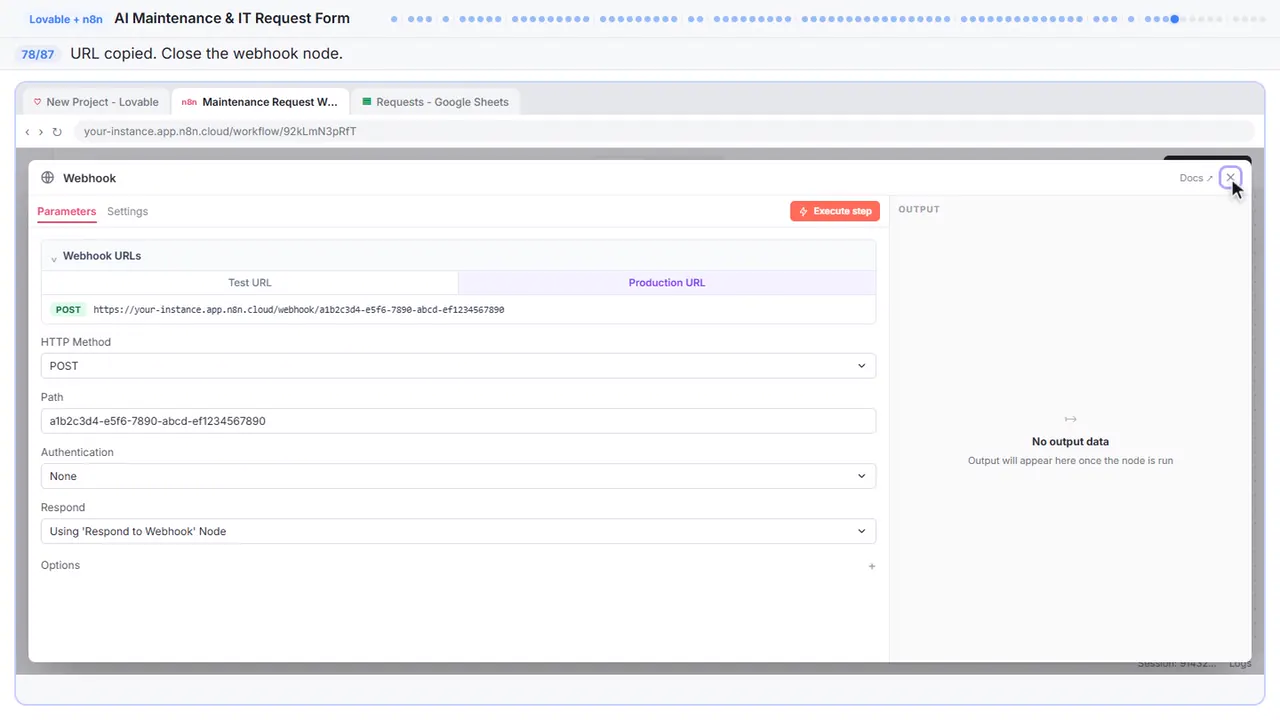
Step 78: Back to the canvas
Got the URL. Close the node.
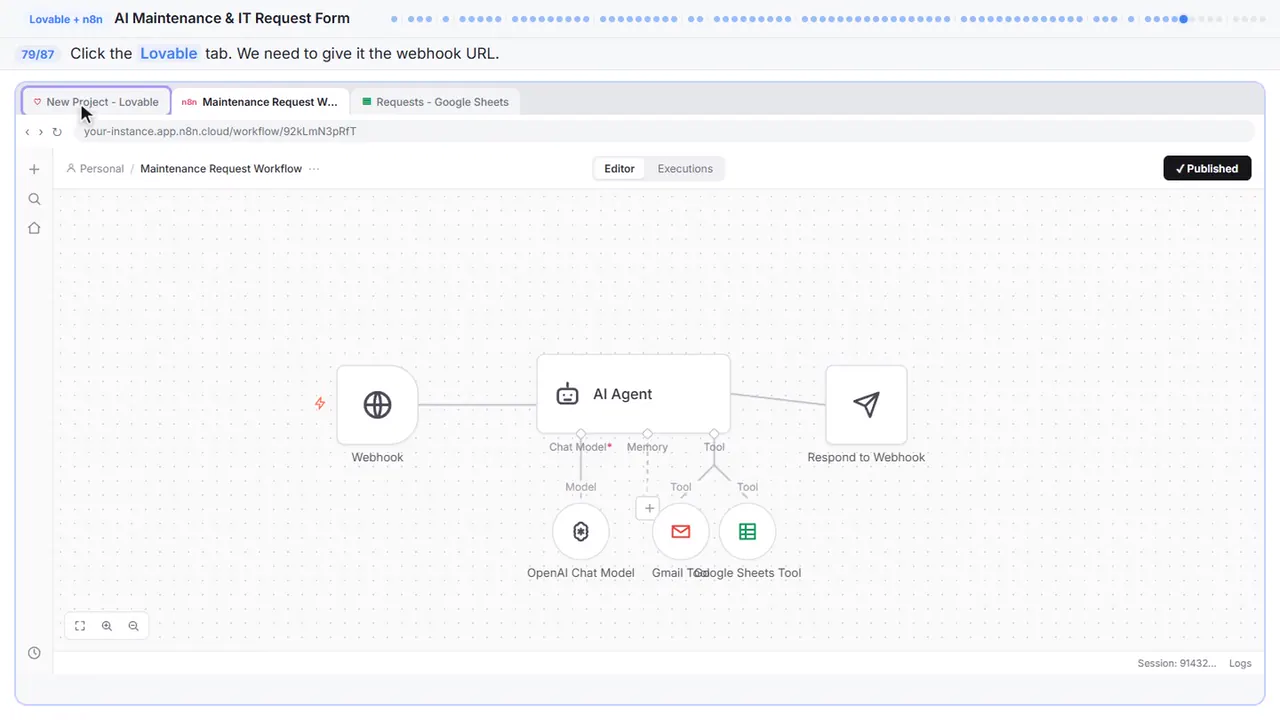
Step 79: Back to Lovable
Switch back to Lovable. We need to paste the webhook URL into a secret so the form can reach the workflow.
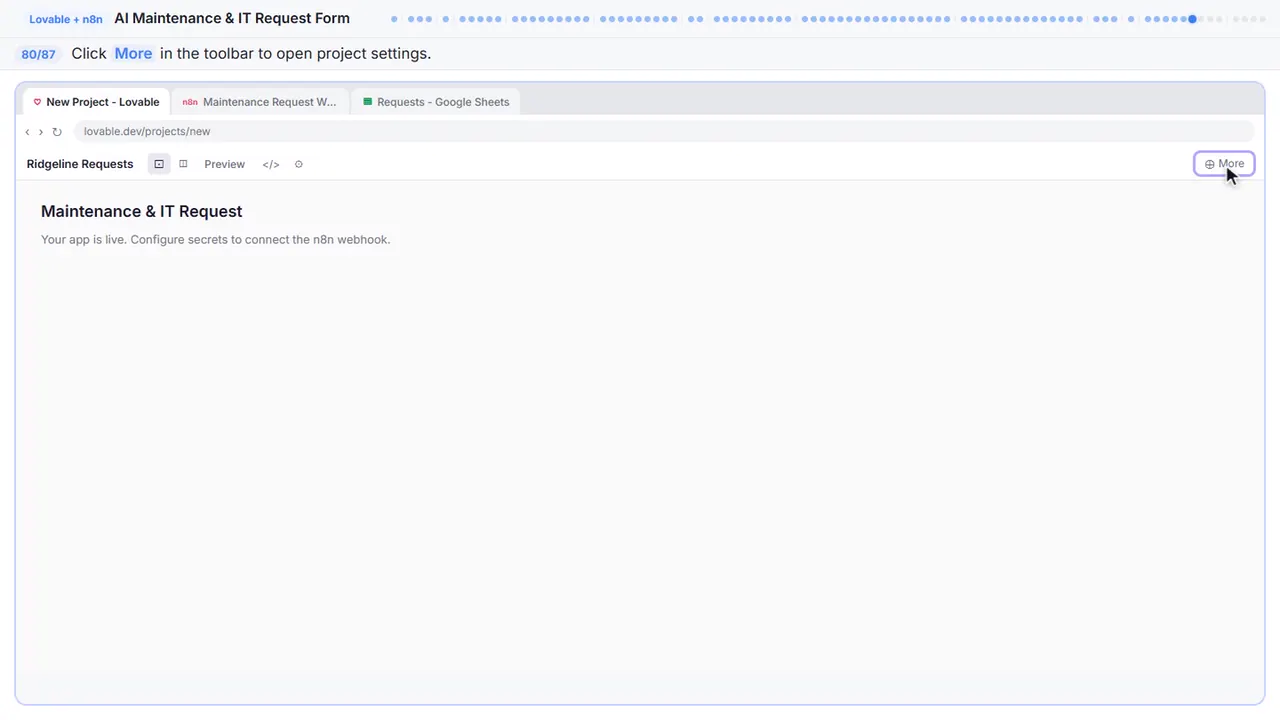
Step 80: Open More
To add a secret in Lovable, click More in the toolbar. This opens the Cloud settings where you can manage secrets.
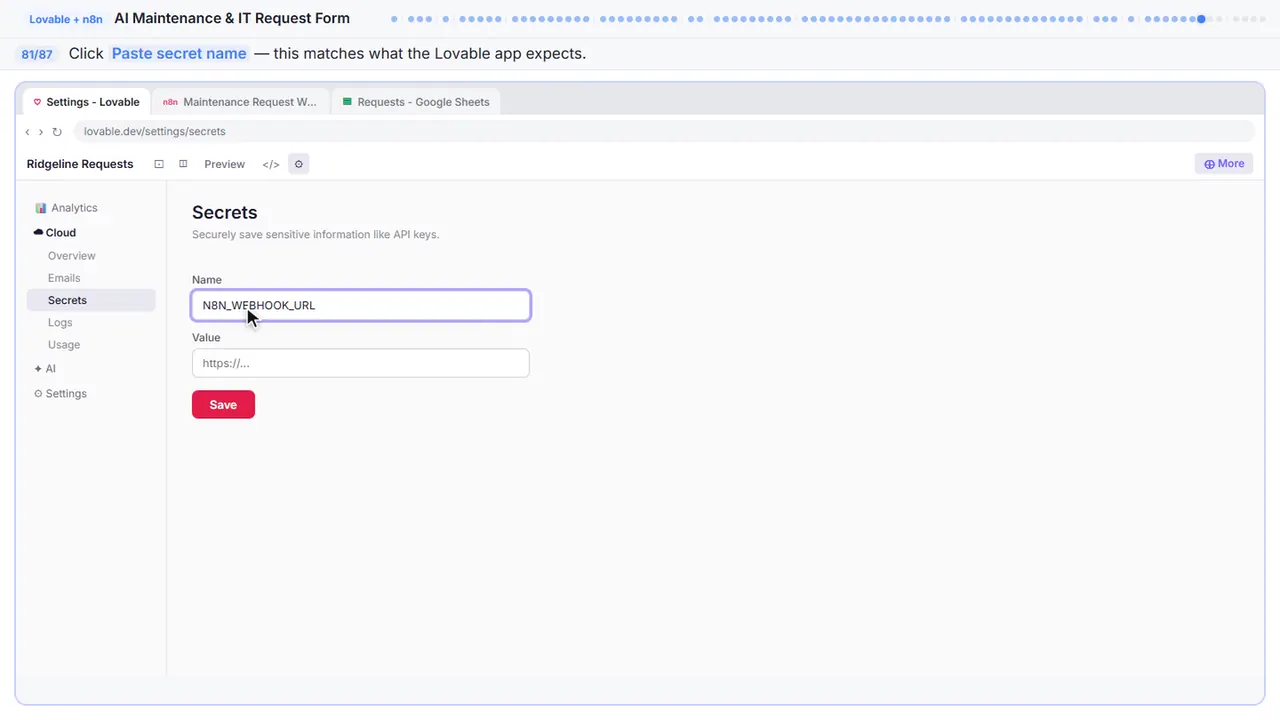
Step 81: Name the secret
This is the secrets page. The prompt told Lovable to reference a secret config value called N8N WEBHOOK URL instead of hardcoding it.
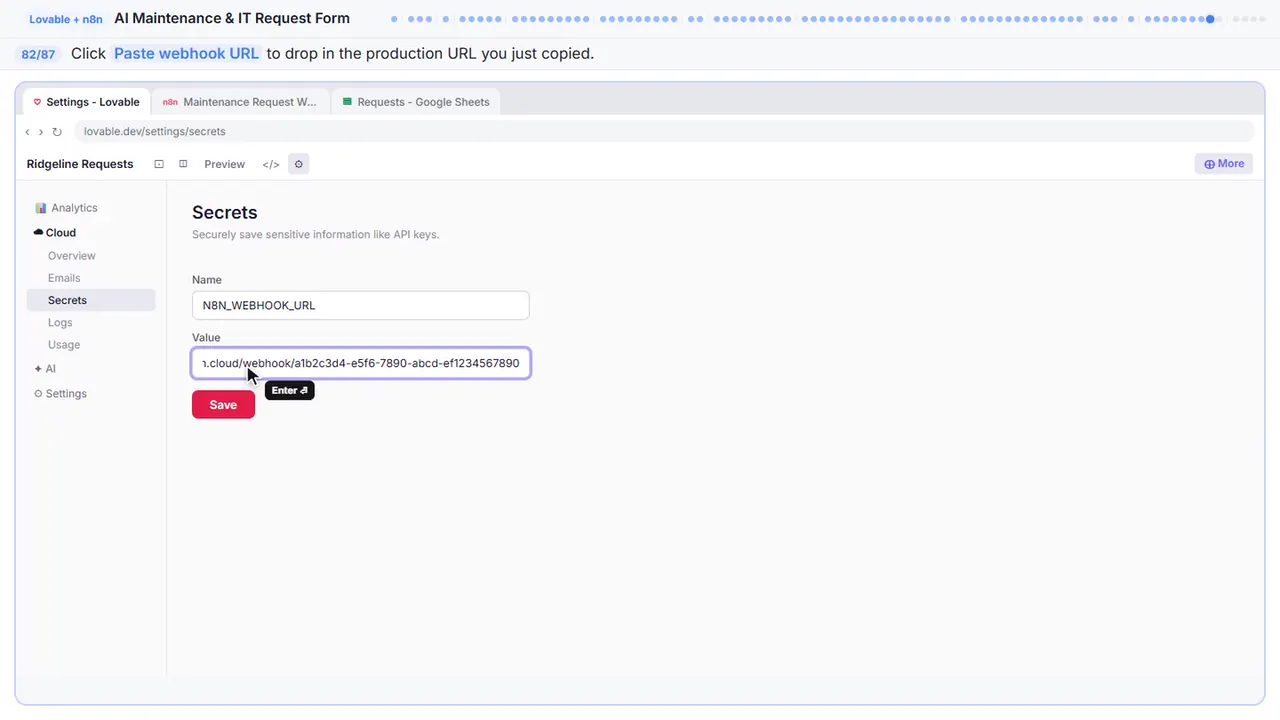
Step 82: Paste the webhook URL
This is the live endpoint your form will POST to.
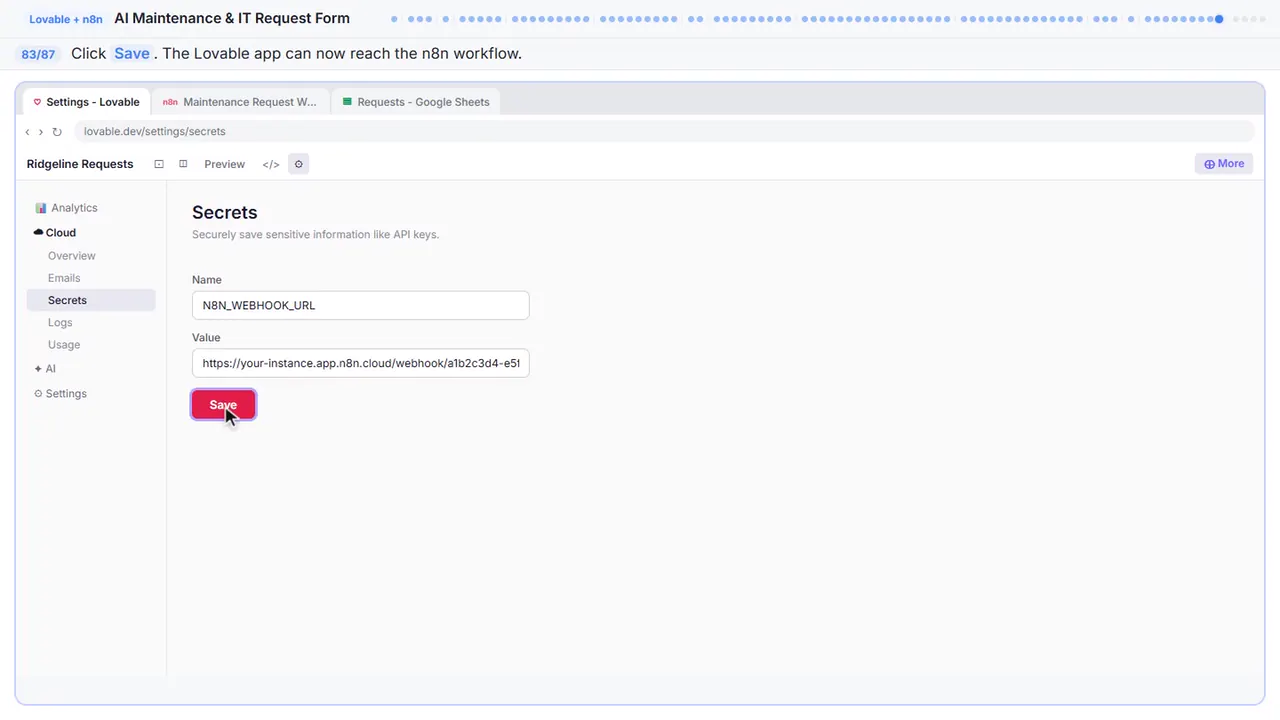
Step 83: Save the secret
The Lovable app now knows where to send form submissions. The webhook URL is stored as a secret, not in the source code — exactly how it should be.
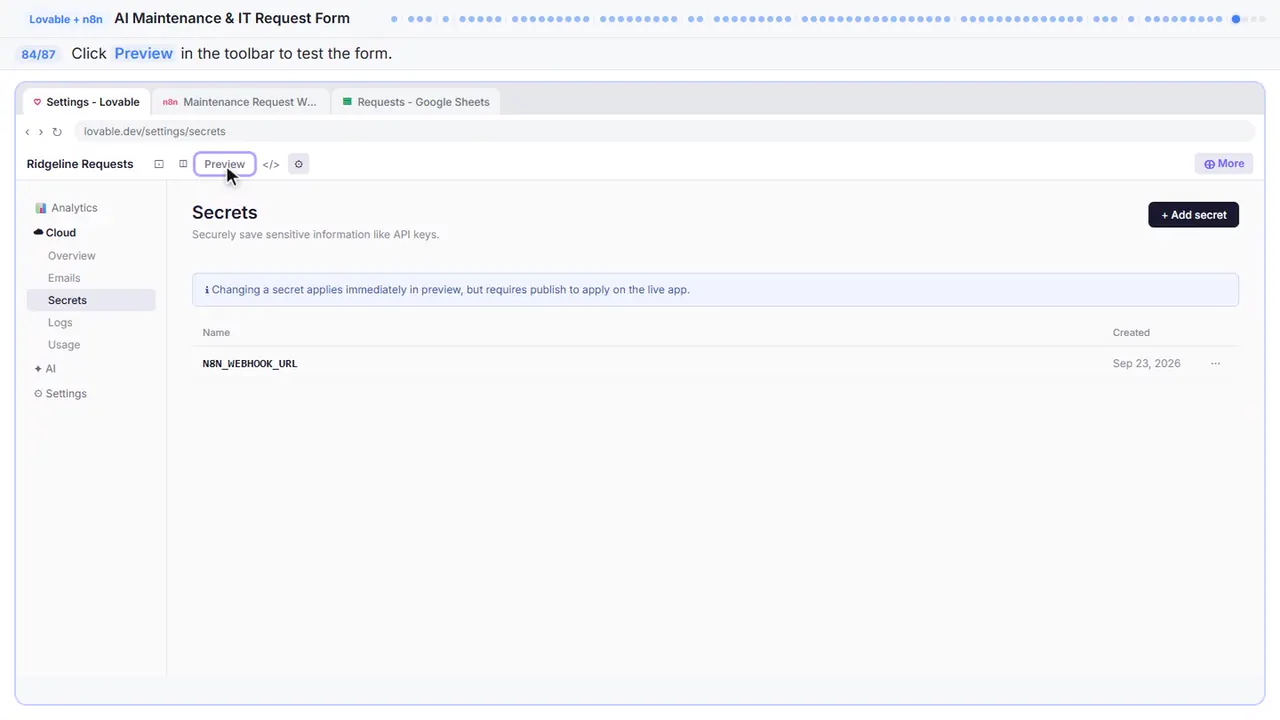
Part 14: Test the form
Step 84: Open the form
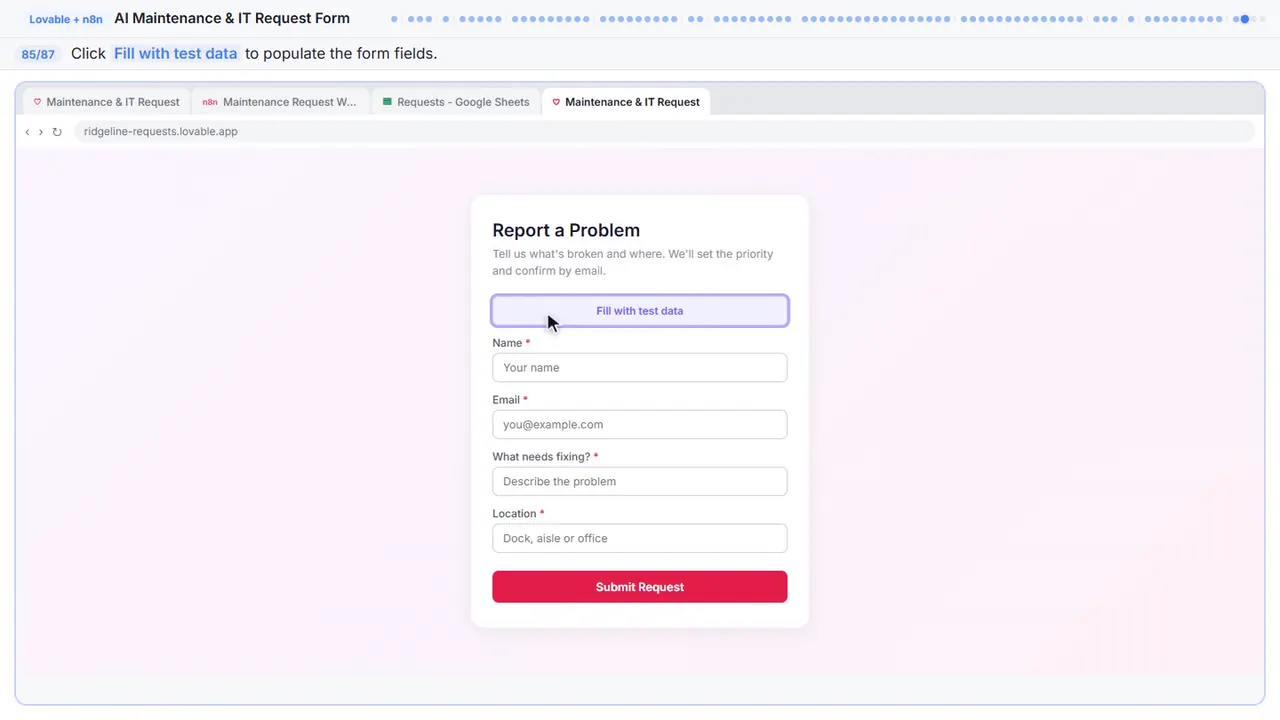
Time to test.
Step 85: Fill the form
Fill out the form with sample data.
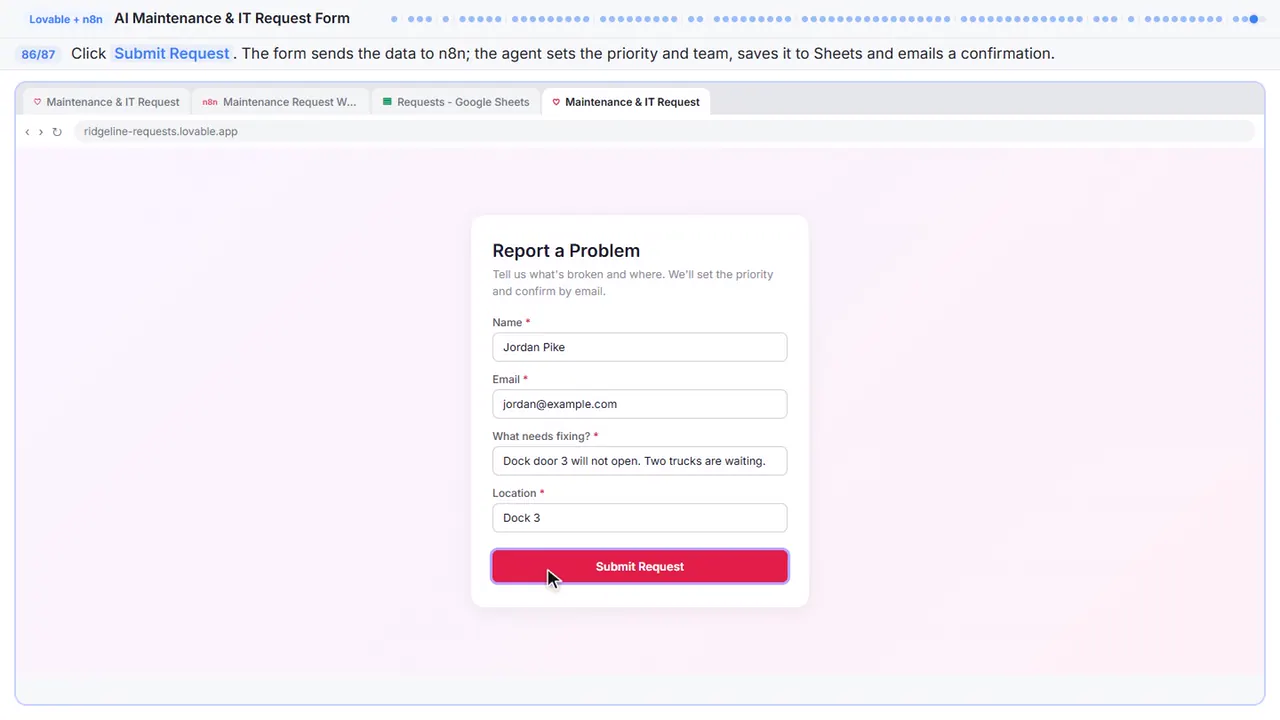
Step 86: Submit the form
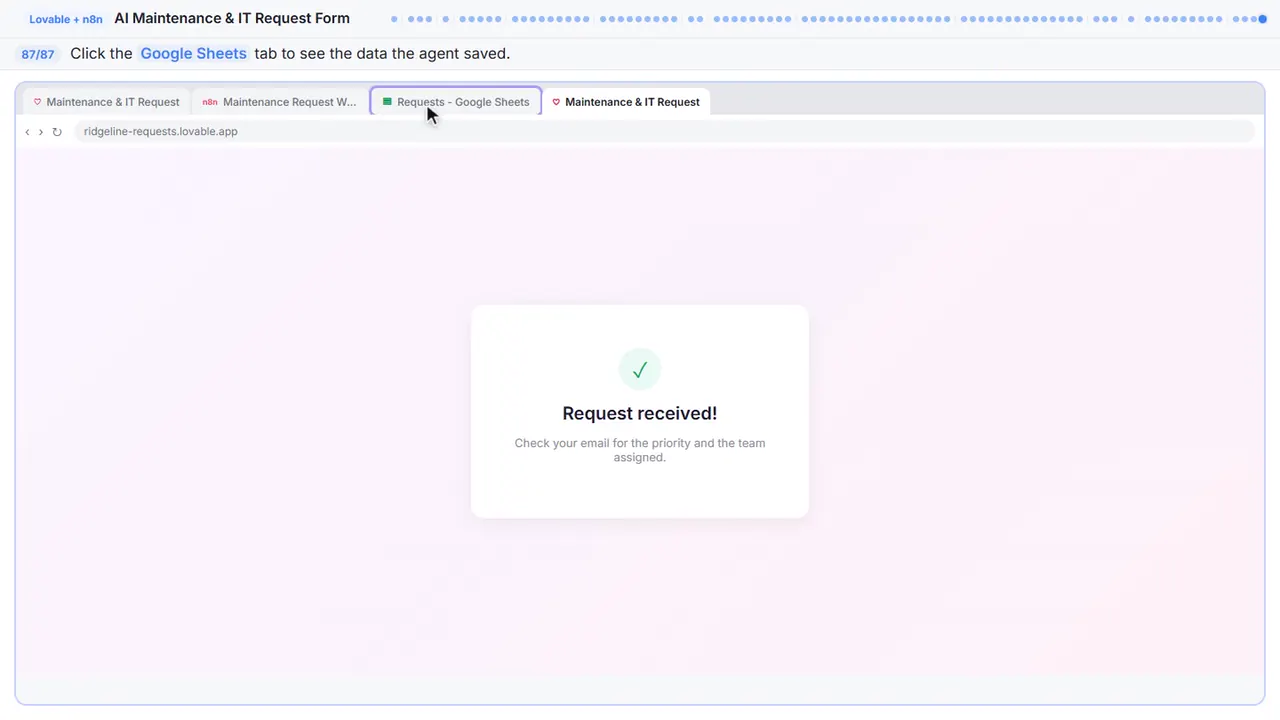
The form posts the request to the n8n webhook. The agent sees a stuck dock door with trucks waiting, marks it urgent for the facilities team, saves a row to Google Sheets, and emails a confirmation through Gmail. The respond node sends back a success message, and the form shows the confirmation.
Step 87: Check the spreadsheet
The form submitted successfully. Now check the spreadsheet — click the Google Sheets tab to see the row the agent just wrote.
Now do it yourself, free
Reading the steps is a start. Doing them is how it sticks. The interactive lesson puts you in a practice copy of Lovable and n8n: you do every step yourself, it checks your work, and “Do it for me” finishes any step you get stuck on. Nothing touches your real accounts.
Practice “Build an AI Maintenance and IT Request Form” step by stepBuild an AI Maintenance and IT Request Form: lesson overview · All free tutorials